Werbung
Quicklinks
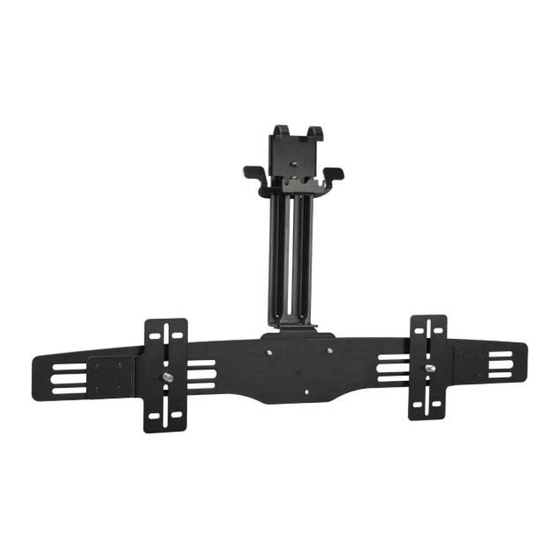
VMA202
(6901-002028 <01>)
Sanus Systems
2221 Hwy 36 West
Saint Paul, MN 55113 USA
Customer Service
Americas: 800-359-5520 • 651-484-7988 • info@sanus.com
Europe, Middle East, and Africa: 31 40 2324700 • europe.sanus@milestone.com
Asia Pacifi c: 86 755 8996 9226 • sanus.ap@milestone.com
sanus.com
©2009 Milestone AV Technologies, a Duchossois Group Company.
All rights reserved. Sanus is a division of Milestone.
All other brand names or marks are used for identifi cation purposes and are trademarks of their respective owners.
Werbung

Verwandte Anleitungen für Sanus VMA202


Inhaltszusammenfassung für Sanus VMA202
- Seite 1 Saint Paul, MN 55113 USA Customer Service Americas: 800-359-5520 • 651-484-7988 • info@sanus.com Europe, Middle East, and Africa: 31 40 2324700 • europe.sanus@milestone.com Asia Pacifi c: 86 755 8996 9226 • sanus.ap@milestone.com sanus.com ©2009 Milestone AV Technologies, a Duchossois Group Company.
- Seite 2 15.9 kg (35 lbs) below a fl at panel TV. The VMA202 e altoparlanti digitali dal peso fi no a 15,9 kg (35 libbre) sotto ad un monitor is compatible with the following Sanus Systems fl at panel mounts: LF228, piatto.
- Seite 3 VLF220, VLF210, VMF220 ve VLMF109. 日本語 重要−上記の安全指示書を保管しておいてください本製品を使用する前 に、説明書の内容をよくお読みください。 Sanus Systems の VMA202 をご 購 入 い た だ きありがとうご ざ い ま す。 VMA202 は、プラッ トパネルモニター下に、最大重量 15.9 kg (35 lbs) のセ ンターチャンネル、サウンドバー、デジタルプロセッサースピーカーを搭 載できます。 VMA202 は以下の Sanus Systems フラッ トパネルモニターマ ウントに対応しています。 LF228 , XF228 , VXF220 , VLF220 , VLF210 , VMF220 と...
- Seite 4 English WARNING: This product contains small items Caution / Warning Choose an Option that could be a choking hazard. Tools required Français Ce produit contient de petites pièces qui ATTENTION/ Outils nécessaires Sélectionnez une option peuvent représenter un risque d’étouff ement. AVERTISSEMENT! Deutsch Dieses Produkt enthält kleine Teile, die zum...
- Seite 5 ATTENTION: Évitez les dommages matériels et les blessures! LET OP: Voorkom persoonlijk letsel of schade aan de apparatuur! Ne pas utiliser ce produit à d’autres fi ns que celles spécifi ées par Sanus Systems. Gebruik dit product niet voor doeleinden die niet expliciet zijn gespecifi ceerd door Sanus Systems.
- Seite 6 неправильной сборки или эксплуатации изделия. FORSIKTIG: Unngå potensiell personskade og materiell skade! polski Bruk ikke dette produktet til noe annet formål enn det som Sanus Systems uttrykkelig har angitt. UWAGA: Należy unikać potencjalnych obrażeń ciała i uszkodzenia mienia! ...
- Seite 7 CAUTION: Türkçe DİKKAT: Olası kişisel yaralanmalardan ve mal zararından sakının! Bu ürünü, Sanus Systems tarafından açıkça belirtilmemiş bir amaçla kullanmayın. Monitör ve hoparlörlerin ağırlığı montaj sırasında kullanılan duvar taşıma düzeneğinin ağırlık kapasitesini geçmemelidir. Duvarın, TV, hoparlörler ve taşıma düzeneğinin toplam ağırlığının beş katı ağırlığı...
- Seite 8 Si faltan piezas o alguna está dañada, no devuelva el artículo Dostarczone części i osprzęt al distribuidor; póngase en contacto con el servicio de Atención al Cliente de Sanus Przed rozpoczęciem montażu prosimy upewnić się, czy zestaw zawiera wszystkie Systems.
- Seite 9 [01] x 1 [05] x 1 [02] x 2 [04] x 1 [03] x 1 1/4-20 10-32 1/4-20 1/4-20 [09] x 2 [10] x 2 [11] x4 [12] x 1 [06] x 1 [07] x 1 [08] x 1 3/8-16 x 1.5 in. M10 x 16 mm 3/8-16 x .625 in.
- Seite 10 English Dansk Install sound bar interface [01] to speaker. Monter højttaler på lydbarsystemet [01]. Determine speaker hole pattern and type of fasteners needed. If your Find ud af, hvilket hulmønster højttaleren skal have ,og hvordan det skal speaker has a four hole bolt pattern or requires additional width, proceed fastgøres.
- Seite 11 [01] [30] [17] [28] [32] [01] [30] [18] [28] [35] [01] [19] [29] [21] [01] [22] [20] [01] [29] [35] 6901-002028 <01>...
- Seite 12 [35] [01] [15] [34] [35] [01] [16] [35] 3/8 - 16 [01] [13] [34] [35] [01] [14] 6901-002028 <01>...
- Seite 13 [35] [01] [29] [23] 1/4 - 20 [35] [01] [29] [24] [35] [33] [01] [29] [25] [35] [33] [01] [29] [26] 6901-002028 <01>...
- Seite 14 English Dansk If your speaker has a four hole bolt pattern: Hvis din højtaler har et boltmønster med fi re huller: Attach brackets [02] to sound bar interface [01] Fastgør beslagene [02] på lydbarsystemet [01] Install speaker monter derefter højttaleren Français Svenska Si votre haut-parleur est muni d’une confi guration de boulons...
- Seite 15 [02] [02] [01] [19] [02] [02] [01] [19] [02] [30] [28] [17] [01] [02] [02] [31] [29] [20] [01] [02] 6901-002028 <01>...
- Seite 16 [02] [01] [30] [28] [17] 6901-002028 <01>...
- Seite 17 English Dansk If your speaker requires additional width: Hvis din højtaler kræver ekstra bredde: This option can be installed with any of the hardware combinations: M4, M6, Disse kan monteres med en kombination af følgende monteringsdele: M4, M10, 3/8-16, or 1/4-20 shown previously. M6, M10, 3/8-16, eller 1/4-20 som tidligere vist.
- Seite 18 English Dansk If mounting to a VMF220 wall mount, follow steps 2-1 to 2-4. Hvis der monteres til en VMF220 vægholder, følges trin 2-1 til 2-4. If mounting to an LF228, XF228, VXF220, VLF220, VLF210 or VLMF109 wall Hvis der monteres til en LF228, XF228, VXF220, VLF220, VLF210 eller mount, continue to step3.
- Seite 19 6901-002028 <01>...
- Seite 20 English Dansk Attach the hanging bracket [07] to the vertical channel bracket [03] Sæt ophængsbeslaget [07] på det vertikale kabelbeslag [03] med using the 10-32 screw [12]. 10-32-skruen [12]. Attach the vertical channel bracket [03] to the speaker and interface Fastgør det vertikale kabelbeslag [03] til højtaleren og systemet med using the 1/4-20 bolt [11] and the provided allen key [37].
- Seite 21 [07] [12] [03] [03] [37] [11] 6901-002028 <01>...
- Seite 22 Ελληνικά Χρησιμοποιώντας το παρεχόμενο κλειδί βραχίονα [05], πιάστε το English παξιμάδι (n) πίσω από τον κάτω βραχίονα της επιτοίχιας βάσης VMF220. Ενώ κρατάτε το κλειδί βραχίονα [05] και το παξιμάδι (n), αφαιρέστε τη Using the supplied bracket wrench [05], clasp the nut (n) behind the βίδα...
- Seite 23 Türkçe Temin edilen destek anahtarı [05]nı kullanarak VMF220 duvara montaj düzeneğinin alt desteğinin arkasındaki somun (n)u sıkıca tutun. Destek anahtarı [05]nı ve somun (n)u tutarken allen anahtarı [37]nı kullanarak vida (s)yı sökün. Destek anahtarı [05]nı ve somun (n)u çıkarın. Vida (s)yı ve somun (n)u yeniden takmayacaksınız.
- Seite 24 Norsk Fest brakettplaten [06] basert på den vertikale avstanden mellom TV-brakettene. A: For 200 mm avstand. English B: For 300 mm avstand. Attach the bracket plate [06] based on the vertical distance between your C: For 400 mm avstand. TV brackets. Dansk A: For 200mm spacing.
- Seite 25 200 x 200 200mm 300 x 300 [11] [06] 300mm 400 x 400 [11] [06] 400mm [11] [06] 6901-002028 <01>...
- Seite 26 English Norsk Hang the speaker interface assembly onto the VMF220 interface, as Heng grensesnittenheten for høyttaler på VMF220-veggfestet, som shown. vist. Using the allen key [37], attach the fi xing plate [08] to the vertical Fest oppspenningsplaten [08] til den vertikale kanalen [03] med channel [03].
- Seite 27 6901-002028 <01>...
- Seite 28 [08] [09] [37] 6901-002028 <01>...
- Seite 29 6901-002028 <01>...
- Seite 30 Dansk English For mounting LF228, XF228, VXF220, VLF220, VLF210 or VLMF109 wall Montering af LF228, XF228, VXF220, VLF220, VLF210 eller VLMF109 mounts. vægholdere. Attach speaker and interface to the vertical channel bracket [03] using Fastgør højtaler og system til den vertikale kanal [03] med ¼-20-bolten [11] 1/4-20 bolt [11] and the provided allen key [37].
- Seite 31 [03] [37] [11] 6901-002028 <01>...
- Seite 32 Dansk English Hang the mounting base [04] onto your wall mount, as shown. Hæng monteringsbasen [04] på din vægholder som vist. Using the allen key [37] and the 1/4-20 bolt [10], affi x the mounting Med unbraco-nøglen [37] og ¼-20-bolten [10] fastgøres base [04] to your wall mount.
- Seite 33 [04] [10] [37] [04] 6901-002028 <01>...
- Seite 34 CAUTION: English Italiano Slide the speaker interface assembly into the mounting base [04] as Far passare il gruppo di interfaccia dell’altoparlante nella base della shown. montatura [04] come illustrato. Using the allen key [37], attach the fi xing plate [08] to the vertical Con la chiave a brugola [37], montare la piastra di fi ssaggio [08] sulla channel [03].
- Seite 35 polski Wsunąć zespół interfejsu głośnika w podstawę montażową [04] zgodnie z ilustracją. Za pomocą klucza [37], przymocować płytę montażową [08] do kanału pionowego [03]. UWAGA: Unikać potencjalnych obrażeń ciała i uszkodzenia mienia! Dołącz do mocowania [08] natychmiast po podłączeniu głośników do montażu interfejsu naszej ścianie.
- Seite 36 [04] [03] [08] [09] [37] 6901-002028 <01>...
- Seite 37 6901-002028 <01>...
- Seite 38 Italiano English Adjustments Regolazioni A: To adjust vertically, loosen, do not remove, vertical adjustment screws A: per la regolazione verticale, allentare senza rimuovere le viti della [09]. Gently push back on the bracket assembly lever while holding the regolazione verticale [09]. Spingere indietro con delicatezza la leva del speaker and adjust the vertical position.
- Seite 39 polski Zmiana ustawienia A: Aby zmienić ustawienie w pionie, poluzować śruby regulacji pionowej [09], nie zdejmując ich. Ostrożnie popchnąć dźwignię zespołu wspornika, jednocześnie trzymając głośnik, i zmienić ustawienie pionowe. Puścić dźwignię i dokręcić śruby. B: Aby zmienić ustawienie w poziomie, poluzować śruby regulacji poziomej [L], nie zdejmując ich.
- Seite 40 [09] 6901-002028 <01>...
- Seite 41 6901-002028 <01>...
- Seite 42 Norsk English Milestone AV Technologies and its affi liated corporations and subsidiaries (collectively, “Milestone”), Milestone AV Technologies og dets tilknyttede selskaper og datterselskaper (samlet kalt “Milestone”), intend to make this manual accurate and complete. However, Milestone makes no claim that the har til hensikt å...