Herunterladen Diese Seite drucken

Werbung

Verfügbare Sprachen
  • DE

Verfügbare Sprachen

  • DEUTSCH, seite 14
VMPL3 Instruction Manual
We are here to help!
Please contact Customer Service with any questions.
Customer Service
Americas: 800-359-5520 • 952-225-6013 • info@sanus.com
UK: 0800-056-2853
Europe, Middle East, and Africa: +31 (0) 495 580 852 • europe.sanus@milestone.com
Asia Pacifi c: 86 755 8996 9226 • sanus.ap@milestone.com
SANUS • 6436 City West Parkway • Eden Prairie, MN • 55344 • USA
©2014 Milestone AV Technologies. All rights reserved. Sanus is a division of Milestone.
All other brand names or marks are used for identifi cation purposes and are trademarks of their respective owners.
sanus.com

Werbung

loading

Inhaltszusammenfassung für Sanus VMPL3

  • Seite 1 Europe, Middle East, and Africa: +31 (0) 495 580 852 • europe.sanus@milestone.com Asia Pacifi c: 86 755 8996 9226 • sanus.ap@milestone.com SANUS • 6436 City West Parkway • Eden Prairie, MN • 55344 • USA ©2014 Milestone AV Technologies. All rights reserved. Sanus is a division of Milestone.
  • Seite 2 Suomi - Oppaan käyttäminen English - How to use this manual For best results, reference both the text and illustrations. Saavutat parhaan tuloksen tutustumalla sekä tekstiin että kuviin. Select one item or the other. Leikkaa katkoviivaa pitkin ja yhdistä kuvat ja suomenkielinen teksti. Valitse toinen vaihtoehdoista.
  • Seite 3: Specifications

    Features and Benefits An extremely versatile wall mount, the VMPL3 can be mounted in either tilting or low profile positions. The wall plate extends to almost twice its width, and TV brackets include extensions to accommodate a wide range of TV sizes.
  • Seite 4: Required Tools

    Required Tools 13 mm 5.5 mm 10 mm (1/2 in.) (7/32 in.) (3/8 in.) Supplied Parts and Hardware WARNING: This product contains small items that could be a choking hazard if swallowed. Before starting assembly, verify all parts are included and undamaged. If any parts are missing or damaged, do not return the damaged item to your dealer;...
  • Seite 5 1 Determine Wall Plate Assembly Width The VMPL3 wall plate extends from 686 mm (27 in.) to 1067 mm (42 in.). Measure the width between mounting holes on the back of your TV. If the width is 635 mm (25 in.) or less, skip this step and proceed to step 2. If the width is greater than 635 mm (25 in.), complete steps 1-1 through 1-3.
  • Seite 6 Minimum horizontal space between fasteners: 406 mm (16 in.). 2-2 Mark the wall For assistance in determining wall plate location, see Height Finder at sanus.com. Level the wall plate [01] and mark the hole locations. [01] 2-3 Drill pilot holes...
  • Seite 7 Solid concrete or concrete block (1/2 in.) (3/8 in.) 2-1 Mark the wall For assistance in determining wall plate location, see Height Finder at sanus.com. Level the wall plate [01] and mark the hole locations. CAUTION: Avoid potential injuries or property damage! ...
  • Seite 8 3 Assemble TV Brackets 3-1 Determine bracket type and length If you want your TV to sit in a low profile position, use bracket [04]. If you want the tilt function, use brackets [02] and [03]. Measure the vertical distance between the mounting holes on your TV. For distances of 400 mm (15¾ in.) or less, use the brackets without extensions.
  • Seite 9 4 Select TV Hardware and Mount TV Brackets 4-1 Select the hardware diameter and length Your TV type will help you determine which hardware configuration to use. Match your type of TV to the suggested hardware configuration on the next page. A.
  • Seite 10 4-2 Attach brackets to a TV with an irregular back Confirm that the brackets are level on the back of the TV. Tilting brackets are shown. Complete the same steps if you chose the low profile brackets. Standard configurations are shown. For special applications, or if you are uncertain about your hardware selection, contact Customer Service.
  • Seite 11 5 Hang TV onto the Wall Plate 5-1 Tilting brackets HEAVY! You will need assistance with this step. CAUTION: Avoid potential injuries or property damage! Ensure the locking screws [26] are secure. Periodic tightening may be required. [02], [03] [02], [03] [26] [01] [01]...
  • Seite 12 Voir à la page 3 Un support mural très polyvalent, le VMPL3 peut être installé en position inclinée ou en retrait. La largeur de la plaque murale peut presque être doublée et les supports de téléviseur incluent des extensions pouvant loger une vaste gamme de grandeurs de téléviseur.
  • Seite 13 2-1 Marquez l'emplacement sur le mur Pour obtenir de l'aide afi n de déterminer l’emplacement de la plaque murale, consultez le site sanus. com sous la rubrique « Height Finder ». Mettez la plaque murale [01] à niveau et marquez les emplacements des trous.
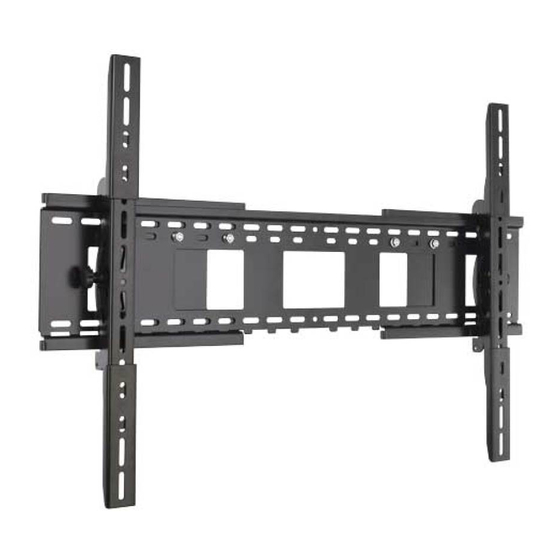
  • Seite 14 1 Bestimmen Sie die Breite der Wandplattenvorrichtung Die VMPL3 Wandplatte lässt sich von 686 mm (27 in.) auf 1067 mm (42 in.) verlängern. Messen Sie den Abstand zwischen den Montagebohrungen auf der Rückseite Ihres Fernsehers. Wenn der Abstand 635 mm (25 in.) oder weniger beträgt, überspringen Sie diesen Schritt und gehen Sie weiter zu Schritt 2.
  • Seite 15 2 Montage der Wandplatte Massivbeton und Betonblöcke 2-1 Markieren Sie Bohrstellen an der Wand Hilfe zum Bestimmen der geeigneten Wandplattenposition fi nden Sie unter Height Finder auf sanus.com. Richten Sie die Wandplatte [01] aus und markieren Sie die Stellen für die Bohrlöcher. VORSICHT: Vermeiden Sie Verletzungen und Sachschäden!
  • Seite 16 1 Determinar el ancho del ensamblaje de la placa mural La placa mural del modelo VMPL3 se extiende de 686 mm (27 pulgadas) a 1067 mm (42 pulgadas). Mida el ancho que existe entre los orifi cios de montaje de la parte trasera de su televisor. Si el ancho es de 635 mm (25 pulgadas) o menos, omita este paso y prosiga con el paso 2. Si el ancho es mayor a 635 mm (25 pulgadas), complete los pasos 1-1 a 1-3.
  • Seite 17 Hormigón o bloques de cemento 2-1 Marque la pared Si necesita ayuda para determinar la ubicación de la placa mural, utilice la herramienta Height Finder disponible en sanus.com. Nivele la placa mural [01] y marque la ubicación de los orifi cios.
  • Seite 18 1 Determine a largura do conjunto da placa de parece A placa de parede do VMPL3 estende-se de 686 mm (27 pol.) a 1067 mm (42 pol.). Meça a largura entre os orifícios de montagem na parte traseira da TV. Se a largura for de 635 mm (25 pol.) ou menos, pule esta etapa e siga para a etapa 2. Se a largura for maior que 635 mm (25 pol.), complete as etapas 1-1 até...
  • Seite 19 Concreto sólido ou bloco de concreto 2-1 Marque a parede Para obter assistência na determinação do local da placa da parede, consulte sanus.com. Nivele a placa de parede [01] e marque os locais dos orifícios. CUIDADO: Evite possíveis ferimentos ou dano à propriedade! ...
  • Seite 20 1 De breedte van de wandplaat bepalen De wandplaat van de VMPL3 kan worden verlengd van 686 mm (27 inch) tot 1067 mm (42 inch). Meet de breedte tussen de montagegaten aan de achterkant van de tv. Als de breedte 635 mm (25 inch) of minder is, slaat u deze stap over en gaat u verder met stap 2. Als de breedte meer dan 635 mm (25 inch) is, voert u stap 1-1 tot en met 1-3 uit.
  • Seite 21 Massief beton of betonblok 2-1 Markeringen op de wand aanbrengen Voor hulp bij het bepalen van de locatie voor de wandplaat, raadpleegt u de Height Finder op sanus.com. Plaats de wandplaat [01] waterpas en markeer de locaties van de gaten.
  • Seite 22 1 Determinazione della larghezza del gruppo piastra a muro Si può estendere la piastra a muro VMPL3 da 686mm (27 poll.) a 1067mm (42 poll.). Misurare la larghezza compresa tra i fori di montaggio sul retro del televisore. Se la larghezza è pari o inferiore a 635 mm (25 poll.), saltare questo punto e procedere al punto 2. Se la larghezza è superiore a 635 mm (25 poll.), eseguire le operazioni da 1-1 a 1-3.
  • Seite 23 Calcestruzzo pieno o in blocchi 2-1 Contrassegnare la parete Per assistenza nel determinare la posizione della piastra a muro, consultare Height Finder sul sito sanus.com. Mettere a livello la piastra a muro [01] e contrassegnare la posizione dei fori. ATTENZIONE - Evitare la possibilità...
  • Seite 24 1 Seinälevykokoonpanon leveyden määrittäminen VMPL3-seinälevy jatkuu 686 mm:stä (27 in.) 1067 mm:iin (42 in.). Mittaa television takapuolella olevien kiinnitysreikien välinen etäisyys. Jos etäisyys on 635 mm (25 in.) tai vähemmän, ohita tämä vaihe ja siirry vaiheeseen 2. Jos etäisyys on suurempi kuin 635 mm (25 in.), suorita vaiheet 1-1 - 1-3.
  • Seite 25 2 Seinälevyn kiinnittäminen Betoni tai betoniharkko 2-1 Merkitse reikien paikat seinälle Jos tarvitset apua seinälevyn sijainnin määrittämisessä, tutustu Height Wizard -laitteeseen osoitteessa sanus.com. Kohdista seinälevy [01] ja merkitse reikien sijainnit. VAROITUS: Vältä mahdolliset henkilövahingot ja laitevauriot!  Kiinnitä seinälevy [01] suoraan betonipinnalle.
  • Seite 26 1 Fastställ väggplattans bredd Väggplattan VMPL3 kan förlängas från 686 mm (27 tum) till 1 067 mm (42 tum). Mät bredden mellan monteringshålen på TV:ns baksida. Om bredden är 635 mm (25 tum) eller mindre kan du hoppa över det här steget och gå vidare till steg 2. Om bredden är mer än 635 mm (25 tum), genomför steg 1-1 till 1-3.
  • Seite 27 Massiv betong eller betongblock 2-1 Markera på väggen Du kan få hjälp med att besluta var väggplattan ska placeras genom att gå till höjdfi nnaren (Height Finder) på sanus.com. Se till att mallen för väggplattan [01] är rak och markera hålplatserna.
  • Seite 28 1 Определение ширины узла стеновой пластины Стеновую пластину VMPL3 можно увеличить с 686 мм (27 дюймов) до 1067 мм (42 дюйма). Измерьте расстояние между монтажными отверстиями на задней панели телевизора. Если расстояние составляет 635 мм (25 дюймов) или меньше, пропустите этот шаг и переходите...
  • Seite 29 2 Установка стеновой пластины Стена из бетона или бетонных блоков 2-1 Разметка стены Для определения расположения стеновой пластины воспользуйтесь приложением Height Finder на sanus.com. Выровняйте стеновую плиту [01] и отметьте расположение отверстий. ПРЕДОСТЕРЕЖЕНИЕ. Соблюдайте осторожность для предотвращения возможных травм или повреждения имущества! ...
  • Seite 30 1 Ustalenie szerokości zespołu płyty ściennej Rozmiar płyty ściennej VMPL3 można zwiększyć z 686 mm (27 cali) do 1067 mm (42 cale). Zmierzyć odstęp pomiędzy otworami montażowymi z tyłu telewizora. Jeśli wynosi on 635 mm (25 cali) lub mniej, pominąć ten krok i przejść do kroku 2. Jeśli odstęp wynosi 635 mm (25 cali), wykonać czynności podane w punktach od 1-1 do 1-3.
  • Seite 31 2 Montaż na ścianie Lany beton i bloczki betonowe 2-1 Oznaczanie ściany Aby uzyskać pomoc w określeniu położenia na płycie ściennej, patrz Height Finder na stronie sanus.com. Wyrównać płytę ścienną [01] i zaznaczyć położenie otworów. OSTRZEŻENIE: Należy uważać na możliwość obrażeń i uszkodzenia sprzętu! ...
  • Seite 32 1 Stanovení šířky sestavy nástěnné desky Nástěnnou desku VMPL3 lze prodloužit z 686 mm (27 in.) na 1 067 mm (42 in.). Změřte šířku mezi montážními otvory na zadní stěně televizoru. Pokud je šířka 635 mm (25 in.) nebo kratší, přeskočte tento krok a pokračujte krokem 2. Je-li šířka delší než 635 mm (25 in.), proveďte kroky 1-1 až 1-3.
  • Seite 33 2 Montáž nástěnné desky Masivní beton nebo betonový panel 2-1 Označení zdi Pomoc s určením umístění montážní desky viz Height Finder (Výškoměr) na webových stránkách sanus.com. Vyrovnejte nástěnnou desku [01] a označte si umístění otvorů. POZOR: Zabraňte možným úrazům a hmotným škodám! ...
  • Seite 34 切勿使用受损零件! 注意: M4、M5、M6 或 M8 描述直径,mm 描述标识为 M# X ##mm 的螺钉的长度。并非包含的所有配件均要使用。 1 确定壁板组件宽度 VMPL3 壁板的扩展范围是 686 mm(27 英寸)至 1067 mm(42 英寸) 。测量电视机背面上的安装孔之间的宽度。如果宽度是 635 mm(25 英寸)或 更小,则跳过此步骤,转到步骤 2。如果宽度大于 635 mm(25 英寸),则完成步骤 1-1 至 1-3。 1-1 拆除前面板 将电视机正面向下放在柔软表面上。从壁板 [01] 的螺栓 (A) 上拆卸螺母 (N) 和垫圈 (W)。...
  • Seite 35 2 安装壁板 实心混凝土或混凝土砌块 2-1 标记墙 如需帮助确定壁板的位置,请参考 sanus. com 网站上的 Height Finder(测高器)。将壁板 [01] 放置水平并标注孔位置。 注意: 避免潜在人身伤害或财产损毁!  直接安装壁板 [01] 到混凝土表面上。  最小实心混凝土厚度:203 mm(8 英寸)。  最小混凝土砌块尺寸:203 x 203 x 406 mm(8 x 8 x 16 英寸)。  如果扩展了壁板 [01],请确保将至少两组方头螺栓 [02]、垫圈 [03] 和锚栓 [04] 固定到三个面板中的各个面板上。...
  • Seite 36 Suomi English Milestone AV Technologies sisar- ja tytäryhtiöineen (yhdessä Milestone) on pyrkinyt tekemään Milestone AV Technologies and its affi liated corporations and subsidiaries (collectively, “Milestone”), tästä oppaasta mahdollisimman kattavan ja tarkan. Milestone ei kuitenkaan takaa, että oppaan intend to make this manual accurate and complete. However, Milestone makes no claim that the tiedot kattavat kaikki yksityiskohdat, käyttöolosuhteet tai vaihtelut.