Sanus VISIONMOUNT VMA201 Montageanleitung
Quicklinks
EN
IMPORTANT SAFETY INSTRUCTIONS - SAVE THESE INSTRUCTIONS
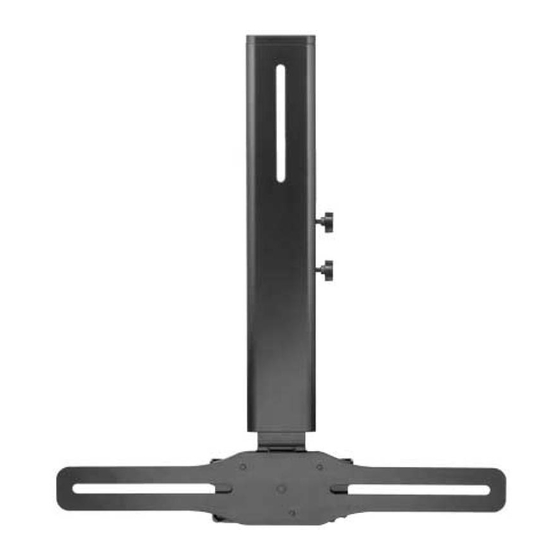
Thank you for choosing the Sanus Systems VMA201. The VMA201 is designed
to mount center channel, sound bar, and digital processor speakers weighing
up to 15.9 kg (35 lbs) below a fl at panel monitor. The VMA201 is compatible
with the following Sanus Systems fl at panel mounts: LL22, LT25, and LMT15.
CAUTION:
not explicitly specifi ed by Sanus Systems. Improper installation may cause
property damage or personal injury. If you do not understand these directions,
or have doubts about the safety of the installation, contact Customer Service
or call a qualifi ed contractor. Sanus Systems is not responsible for damage or
injury caused by incorrect mounting, assembly, or use.
WARNING!
speakers must not exceed the weight capacity of the wall mount used in the
installation. The wall must be capable of supporting fi ve times the weight of
the monitor, speakers, and wall mount combined.
WARNING!
could be a choking hazard if swallowed. Keep these items away from young
children!
Sanus Systems 2221 Hwy 36 West, Saint Paul, MN 55113 USA • sanus.com
Europe, Middle East, and Africa: 31 (0) 40 26 68 619 • sanus.europe@sanus.com
Asia Pacifi c: 86 755 8996 9226 • 800 999 6688 (mainland China only) • sanus.ap@milestone.com
©2009 Milestone AV Technologies. All rights reserved. Sanus is a division of Milestone.
All other brand names or marks are used for identifi cation purposes and are trademarks of their respective owners.
VMA201
Do not use this product for any purpose
The weight of the monitor and
This product contains small items that
Americas: 800-359-5520 • 651-484-7988 • info@sanus.com
(6901-170225 <02>)
FR
INFORMATIONS IMPORTANTES CONCERNANT LA SÉCURITÉ –
CONSERVEZ CES INSTRUCTIONS
Merci d'avoir choisi l'unité VMA201 de Sanus Systems. L'unité VMA201 a été
conçue pour supporter un haut-parleur central, une barre audio et des haut-
parleurs de processeur numérique pesant jusqu'à 15,9 kg sous un moniteur à
écran plan. L'unité VMA201 est compatible avec les assemblages pour écran
plat de Sanus Systems suivants: LL22, LT25, LMT15.
ATTENTION:
non spécifi ée expressément par Sanus Systems. Une installation incorrecte
peut entraîner des préjudices corporels ou des dommages matériels. Si
vous ne comprenez pas ces instructions ou si vous avez des doutes quant
à la sécurité de l'installation, veuillez contacter le service clientèle ou un
installateur qualifi é. Sanus Systems n'est pas responsable des dommages
ou des préjudices causés par un montage, un assemblage ou une utilisation
incorrects.
AVERTISSEMENT!
+ haut-parleurs ne doit pas excéder la capacité de poids du support mural
utilisé dans cette installation. Le mur doit être capable de supporter jusqu'à
cinq fois le poids combiné du moniteur, des haut-parleurs et de l'assemblage.
AVERTISSEMENT!
des composants de petite taille susceptibles de provoquer un étouff ement eu
cas d'ingestion. Éloignez ces composants d'enfants en bas âge !
N'utilisez pas ce produit à une fi n
Le poids du moniteur
Ce produit contient

Verwandte Anleitungen für Sanus VISIONMOUNT VMA201


Inhaltszusammenfassung für Sanus VISIONMOUNT VMA201
- Seite 1 Europe, Middle East, and Africa: 31 (0) 40 26 68 619 • sanus.europe@sanus.com Asia Pacifi c: 86 755 8996 9226 • 800 999 6688 (mainland China only) • sanus.ap@milestone.com ©2009 Milestone AV Technologies. All rights reserved. Sanus is a division of Milestone.
- Seite 2 Wanneer u deze können. aanwijzingen niet begrijpt, of twijfelt over de veiligheid van de installatie, neem dan contact op met de afdeling Customer Service van Sanus Systems of met een WARNUNG! erkend installateur. Sanus Systems is niet aansprakelijk voor enigerlei letsel of Dieses Produkt enthält kleine Teile, die,...
- Seite 3 INSTRUKSJONENE VARNING! Takk for at du har valgt VMA201 fra Sanus Systems. VMA201 er utformet for mon- Den här produkten innehåller smådelar som tering av senterhøyttalere, lydstolpe og digital prosessor på opptil 15,9 kg under kan förorsaka kvävning om de sväljs ned.
- Seite 4 重要- 上記の安全指示書を保管しておいてください Jeśli poniższe wskazówki nie są zrozumiałe lub masz wątpliwości co do Sanus SystemsのVMA201をご購入いただきありがとうございます。VMA201 bezpieczeństwa instalacji, skontaktuj się z działem obsługi klienta fi rmy Sanus は、プラットパネルモニター下に、最大重量15.9 kg (35 lbs)のセンタ Systems lub wezwij wykwalifi kowanego wykonawcę. Firma Sanus Systems ーチャンネル、サウンドバー、デジタルプロセッサースピーカーを搭載...
- Seite 5 Supplied Parts and Hardware Parti ed elementi di montaggio in dotazione Before starting assembly, verify all parts are included and undamaged. If any Prima di procedere al montaggio verifi care che siano presenti tutti i parts are missing or damaged, do not return the item to your dealer; contact componenti e che gli stessi non siano danneggiati.
- Seite 6 Ürünü kurmaya başlamadan önce, bütün parçaların bulunduğunu ve hasar görmediğini kontrol edin. Herhangi bir parça kayıpsa veya hasar görmüşse, malzemeyi bayiinize iade etmeyin; Sanus Sistemleri Müşteri Hizmetleri ile irtibata geçin. Arızalı parçaları kesinlikle kullanmayın! Çoklu montaj yapılandırmaları için gerekli donanım ve prosedürler bulunmaktadır.
- Seite 7 3/8-16 x .625 in. 3/8-16 x 1.5 in. M10 x 16 mm M10 x 40 mm [04] x 2 [05] x 2 [06] x 2 [07] x 2 M4 x 16 mm M4 x 35 mm M6 x 12 mm M6 x 16 mm M6 x 8 mm [08] x 10...
- Seite 8 Falls Sie das mit Ihrer Wandhalterung gelieferte Handbuch lenger har instruksjonshåndboken som fulgte med veggfestet, kan du laste nicht mehr besitzen, laden Sie unter www.sanus.com eine Kopie herunter. ned en kopi fra www.sanus.com. HINWEIS: Wenn Sie gleichzeitig die VMA201 und eine mit der VMA201 kompat- MERK Hvis du monterer både VMA201 og et VMA201-kompatibelt stativ samti-...
- Seite 9 Postępuj zgodnie z instrukcją instalacji załączoną wraz z uchwytem. Jeżeli nie masz już instrukcji instalacji dołączonej do posiadanego uchwytu montażowego, pobierz jej kopię ze strony www.sanus.com . UWAGA Jeśli instalujesz jednocześnie uchwyt VMA201 i uchwyt zgodny z VMA201, zamocuj telewizor do uchwytu ściennego dopiero po wykonaniu kroku 5.1 z tej instrukcji.
- Seite 10 [28] Attach sound bar column [01] to wall mount. Use allen key [28] to Fest lydstolpefestet [01] til veggstativet. Lydstolpefestet og veggsta- tighten sound bar column to the wall mount. The sound bar column and wall tivet skal være kant i kant. Bruk sekskantnøkkelen [28] til å skru lydstolpefestet fast mount should seat fl ush together.
- Seite 11 [01] [01] [28] [01] [01] 6901-170225 <02>...
- Seite 12 Install speaker to sound bar interface [02]. Monter højttaler på lydbarsystemet [02]. Determine speaker hole pattern and type of fasteners needed. If your speaker Find ud af, hvilket hulmønster højttaleren skal have ,og hvordan det skal fast- hole pattern requires the use of the brackets [03] go to 3-1. gøres.
- Seite 13 [23] [20] [18] [08] [20] [18] [09] [19] [10] [19] [11] [22] [22] [12] [13] 6901-170225 <02>...
- Seite 14 [25] [06] [22] [22] [07] 3/8-16 [25] [04] [22] [05] [22] 6901-170225 <02>...
- Seite 15 1/4-20 [19] [19] [14] [22] [15] [22] [24] [24] [19] [19] [16] [17] [22] [22] 6901-170225 <02>...
- Seite 16 Fest brakettene [03] foran på lydstolpen [02], og fest høyttaleren. Attach brackets [03] to sound bar interface [02] and then install speaker. Fastgør beslagene [03] på lydbarsystemet [02], og monter derefter Attachez les brides de montage [03] à l’interface de la barre de son højttaleren.
- Seite 17 [02] [18] [11] [19] [20] [08] [03] [03] 6901-170225 <02>...
- Seite 18 [02] [20] [18] [08] [03] 6901-170225 <02>...
- Seite 19 nasjoner: M4, M6, M10, 3/8-16, eller 1/4-20 som vist over. This option can be installed with any of the hardware combinations: M4, M6, M10, 3/8-16, or 1/4-20 shown previously. Disse kan monteres med en kombination af følgende monterings- dele: M4, M6, M10, 3/8-16, eller 1/4-20 som tidligere vist. Cette option peut être installée sous l’une quelconque des combi- naisons matérielles suivantes : M4, M6, M10, 3/8-16, ou 1/4-20, tel qu’illustré...
- Seite 20 Attach sound bar interface [02] to sound bar column [01]. Fest lydstolpen og høyttaleren [02] til lydstolpefestet [01]. Before you begin, loosen roll control knob [K] so screw is fl ush with front Før du begynner, løsner du på rulleknappen [K] slik at skruen er kant I kant surface of sound bar column and ensure the fl ag [F] is in the open posititon.
- Seite 21 Insert three buttons on back of sound bar interface [02] with three Sett inn tre knapper bak på lydstolpen [02] med tre spor under slots on bottom of sound bar column [01] and push fl ag [F] in and up to lock lydstolpefestet [01], og skyv merket [F] inn og opp for å...
- Seite 22 6901-170225 <02>...
- Seite 23 [27] [28] Adjust speaker height. Προσαρμόστε τη ύψος των ηχείων. 5.1: Use screws [A] on the sound bar column and allen key [28] to coarse adjust 5.1: Χρησιμοποιήστε τους κοχλίες [A] πάνω στη στήλη της ράβδου ήχου για να the height of the speaker. προσαρμόσετε...
- Seite 24 スピーカーの高さを調整します。 调整扬声器高度。 5.1: サウンドバーコラムのネジ[A] で、スピーカーの高さを調整します。 5.1: 使用条形音箱音柱上的螺钉 [A] 调整扬声器的高度。 5.2: 着手する前に、壁に対してテレビが水平になるように、ウォールマ 5.2: 先松开墙壁支架ClickStand,以便电视平贴在墙面上。 ウントのクリックスタンドを外します。 如果您先前在步骤 1 中将电视从墙壁支架上拆下,请在此时重新安装 ステップ1でウォールマウントからテレビを取り外した場合、この時 电视。 点でテレビを再び取り付けてください。 如要对高度进行精调(+/- 2,22 cm),请使用内六角扳手 [27] 和圆柱头螺 高さの微調整を行うには(+/- 2,22 cm)、六角レンチ[27] とソケットキャ 钉 [B]。 ップヘッドネジ [B]を使用します。 [28] 6901-170225 <02>...
- Seite 25 [27] 6901-170225 <02>...
- Seite 26 Level speaker with TV. Juster højttaleren i forhold til tv'et. Mettez le haut-parleur de niveau avec le téléviseur. Ställa in högtalarnivå med TV. Richten Sie den Lautsprecher entsprechend des Fernsehers aus. Выровняйте громкоговоритель по телевизору. Nivele el altavoz con el televisor. Wyrównaj głośnik względem telewizora.
- Seite 27 When level, hold in place by tightening roll control knob [K]. Når den er riktig justert, holder du den på plass ved å stramme rulleknappen [K]. Lorsque tout est de niveau, fi xez en place à l’aide du bouton de commande circulaire [K].
- Seite 28 Milestone AV Technologies and its affi liated corporations and subsidiaries (collectively, Milestone AV Technologies og dets associerede selskaber og datterselskaber (samlet, “Milestone”), intend to make this manual accurate and complete. However, Milestone makes no claim “Milestone”), har til hensigt at gøre denne manual nøjagtig og fuldstændig. Dog hævder Milestone ikke that the information contained herein covers all details, conditions, or variations.