Herunterladen Inhalt Inhalt Diese Seite drucken
Xoro hsd 7570 Bedienungsanleitung

Xoro hsd 7570 Bedienungsanleitung

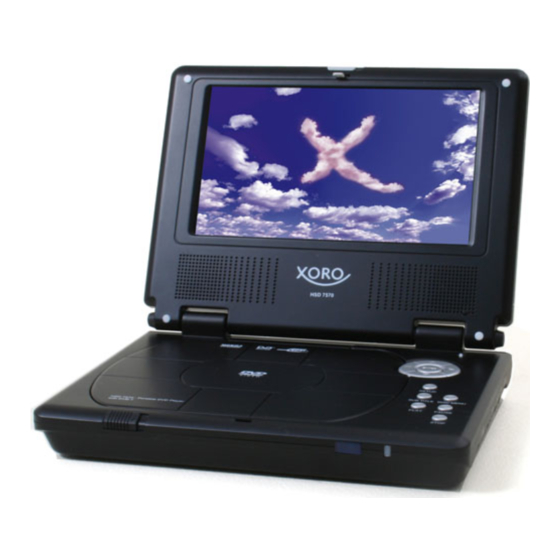
7 inch portable dvd player with dvb-t and usb
Inhaltsverzeichnis

Werbung

Verfügbare Sprachen

Verfügbare Sprachen

7 inch portable DVD player
With DVB-T and USB
HSD 7570
OPERATION MANUAL
BEDIENUNGSANLEITUNG
MANUEL D'EMPLOI
MANUAL DE OPERACIÓN

Werbung

Inhaltsverzeichnis
loading

Inhaltszusammenfassung für Xoro hsd 7570

  • Seite 1 7 inch portable DVD player With DVB-T and USB HSD 7570 OPERATION MANUAL BEDIENUNGSANLEITUNG MANUEL D'EMPLOI MANUAL DE OPERACIÓN...
  • Seite 3: Inhaltsverzeichnis

    Inhalt Vorsichtsmaßnahmen / Sicherheitsinformationen Einleitung Schnellstartanleitung Fernbedienung Anschluss eines Fernsehers Tasten der Fernbedienung Abspielen einer Disc Bilder-CDs und JPEG-Dateien Komprimierte Audioformate Suchen von Titeln, Kapiteln oder Audiospuren Wiederholung Bildvergrößerung Untertitelauswahl Informationen Ändern des Kamerawinkels Einrichten der Kindersicherung Einstellungen DVB-Installation DVB-Menü USB-Funktion Einlegen und Benutzung des Akkus Akkuaufbewahrung...
  • Seite 4: Sicherheitsinformationen

    Sicherheitsinformationen ACHTUNG STROMSCHLAGGEFAHR! NICHT ÖFFNEN! Das Dreieckszeichen mit Blitzsymbol verweist auf gefährliche Spannungen im Gerätegehäuse, die so hoch sein können, dass sie eine Gefahr von Stromschlägen bilden. Das Dreieckszeichen mit Ausrufungszeichen verweist auf wichtige Funkti- ons- und Wartungshinweise (Reparatur) in der dem Gerät beigelegten Be- dienungsanleitung.
  • Seite 5: Warnwinweis Zur Akkubenutzung

    Sicherheitsinformationen WARNWINWEIS ZUR AKKUBENUTZUNG: Dieser DVD-Player verwendet ein Li-Ionen-Akkupack. Wenn das Akkupack unsachgemäß behandelt wird, besteht Feuer- und Verbrennungsgefahr. Akku nicht auseinandernehmen, zerdrücken, durchlöchern, kurzschließen oder Wasser bzw. Feuer aussetzen! Versuchen Sie nicht das Akkupack zu öffnen oder eigenhändig zu reparieren. Benutzen Sie nur ausdrück- lich für dieses Gerät vorgesehene Akkus.
  • Seite 6 Sicherheitsinformationen Wasser und Feuchtigkeit – Benutzen Sie das Gerät nicht in der Nähe von Wasser, z. B. in der Nähe von Badewannen, Waschbecken, Spülen, Wäschekammern, in nassen Kellern oder in der Nähe von Swimmingpools. Zubehör – Benutzen Sie zur Aufstellung Geräts keine instabilen Wagen, Gestelle, Stative, Halte- vorrichtungen oder Tische.
  • Seite 7 Sicherheitsinformationen Fremdgegenstände – Versuchen Sie niemals Gegenstände irgendwelcher Art in das Gerät zu stecken. Hochspannungsteile könnten berührt werden und zu Feuer oder Stromschlag führen. Lassen Sie niemals Flüssigkeiten irgendwelcher Art auf das Gerät kommen. Wartung – Versuchen Sie niemals das Produkt selbst zu warten. Das Öffnen oder Entfernen des Gehäuses kann zur Aussetzung von gefährlicher Spannung oder anderen Gefahren führen.
  • Seite 8: Einleitung

    Einleitung Ihr neuer tragbarer DVD-Player wurde für die Benutzung mit alle Arten von Discs konzipiert. Aufgrund seiner komfortablen Abmessungen, ist es besonders einfach ihn überall mitzuneh- men, um Videos und Musik jederzeit genießen zu können. Ihr Player verwendet die neueste digitale Audio/Videotechnologie (AV), um Ihnen das ultimative Multimedia-Erlebnis zu er- möglichen.
  • Seite 9: Schnellstartanleitung

    Schnellstartanleitung Anschluss an eine externe Stromversorgung: Verbinden Sie das Netz- kabel (im Lieferumfang) mit Adaptereingang und einer Steckdose. Be- nutzen Sie nur Geräte, die von Ihrem Händler angegeben wurden. Öffnen Sie das Gerät. Das Gerät kann maximal auf 135° aufgeklappt werden.
  • Seite 10: Benutzung Des Dvd-Players Mit Der Fernbedienung

    Fernbedienung Bedienung der Fernbedienung Öffnen Sie das Batteriefach. Drücken Sie die mit 1 markierte Stelle herunter (siehe Abbildung) und ziehen Sie den Batteriehalter in Pfeilrichtung (2) heraus (siehe Abbildung). Legen Sie die Batterie in den Batteriehalter. Vergewissern Sie sich dabei, dass die Polarität korrekt ist (+ / -).
  • Seite 11: Anschluss Eines Fernsehers

    Anschluss eines Fernsehers ANSCHLUSS DER KOPFHÖRER Schließen Sie die Kopfhörer an. Kopfhörer mit einem 3,5 mm Klinkenstecker können am Gerät angeschlos- sen werden. Stellen Sie die Lautstärke mithilfe des Lautstärkereg- lers ein. Hinweis: • Vermeiden Sie Lautstärken, die für Ihr Gehör schäd- lich sein können.
  • Seite 12: Anschluss Von Optionalen Geräten

    Anschluss von optionalen Geräten Dolby Digital oder DTS (besser) Mit Dolby Digital und DTS programmierte Discs können Surroundsound mit fünf getrennten Kanälen plus Subwooferkanal ausgeben. Dieser Player unterstützt solche Discs. Sie brau- chen lediglich den DVD-Player mit einem Dolby Digital/DTS-Empfangsgerät oder einem Dolby Digital Ready-Empfangsgerät mit externem Dekoder, anschließen.
  • Seite 13: Tasten Der Fernbedienung

    TASTEN DER FERNBEDIENUNG Taste auf der Fernbedienung: Bereitschaft (StandBy) Ton aus (Mute) 1/ Wiederholung (Repeat) 2 / A-B Abschnittswiederholung (A-B) 3 / Programm (PRGM) 4 / Audio (Audio) 5 / Kamerawinkel (Angle) 6 / Bildvergrößerung (Zoom) 7 / Zeitlupe (Slow) 8 / Titel (Title) Umschalt (Shift) Anzeige (Display)
  • Seite 14: Abspielen Einer Disc

    Abspielen einer Disc GRUNDLEGENDE WIEDERGABEFUNKTIONEN NAVIGATIONSTASTEN WIEDERGABE EINGABE PAUSE EINSTELLUNGEN STOPP TITEL ÖFFNEN DISCMENÜ Dieses Gerät zeigt folgendes Menü an, wenn es das erste Mal ausgeschaltet wird. Wählen Sie die gewünschte Funktion. Wenn Sie DVD-ROM Drive wählen, begibt sich das Gerät in den DVD-Modus. Wenn eine Disc eingelegt wurde, überprüft der Player das Format und startet die Wieder automatisch.
  • Seite 15 Abspielen einer Disc STARTEN DER WIEDERGABE VOM MENÜ AUS Schließen Sie das Netzkabel am Gerät an und die Bereitschafts-LED leuchtet auf. Betätigen Sie die POWER-Taste, um das Gerät anzuschalten. Wenn Sie das Gerät ausschalten wol- len, betätigen Sie die POWER-Taste erneut.
  • Seite 16: Bilder-Cds Und Jpeg-Dateien

    Abspielen einer Disc Wiedergabe von Bilder-CDs und JPEG-Dateien Sie können Ihren DVD-Player zur Wiedergabe von Bildern auf CD-Rs benutzen. Die gespei- cherten Bilder müssen dazu im JPEG-Dateiformat auf der Disc gespeichert werden. Legen Sie eine CD in das Disc-Ladefach. Wählen ein Verzeichnis oder ein Bild auf der CD. Nach dem Einlesen der CD erscheint ein Menü...
  • Seite 17: Wiedergabe Von Picture-Cds

    Wiedergabe von Picture-CDs Musikwiedergabe komprimierter Audioformate Legen Sie eine CD mit komprimierter Musik ein und der DVD-Player liest die Disc automatisch ein, wenn das Disc-Ladefach geschlossen wird. Das Verzeichnis wird dann in einem Menü auf dem Bildschirm angezeigt. Betätigen Sie Navigationstasten OBEN/UNTEN zur Auswahl einer Datei. Betätigen Sie die ENTER-Taste zum Starten der Wiedergabe.
  • Seite 18: Wiederholung

    Wiederholung DIESER DVD-PLAYER ERMÖGLICHT DIE WIEDERHOLUNGSWIEDERGABE VON TI- TELN, KAPITELN, AUDIOSPUREN ODER ABSCHNITTEN. (TITELWIEDERHOLUNG, KA- PITEL/SPURWIEDERHOLUNG, A-B ABSCHNITTSWIEDERHOLUNG) WIEDERHOLUNG VON TITELN/DISCS/KAPITELN Während der normalen Wiedergabe von Video-DVDs, betätigen Sie bitte die REPEAT-Taste (SHIFT-Taste gefolgt von 1 / REPEAT). Der Wiederholungsmodus geht dann mit wiederhol- ter Betätigung der Taste auf Chapter, Title, ALL und OFF.
  • Seite 19: Bildvergrößerung

    Wiederholung Bildvergrößerung Dieser DVD-Player ermöglicht Ihnen das Videobild zu vergrößern und den jeweiligen Aus- schnitt zu bewegen. Benutzen Sie dazu die SHIFT-Taste gefolgt von 6 / ZOOM. Sie können die ZOOM-Taste während der normalen Wiedergabe oder der Zeitlupe betätigen. Die Mitte des Bilds wird dann vergrößert. Durch Betätigung der Navigationstasten können Sie den Bildausschnitt bewegen.
  • Seite 20: Ändern Des Kamerawinkels

    Ändern des Kamerawinkels ÄNDERN DES KAMERAWINKELS Dieser DVD-Player ermöglicht es Ihnen von verschiedenen auf einer DVD zur Verfügung stehenden Kamerawinkeln zu wählen. WINKEL 1 WINKEL 2 Wenn die eingelegte DVD mit verschiedenen Kamerawinkeln aufgenommen wurde, können Sie den Kamerawinkel der jeweiligen Filmszene verändern. Betätigen Sie während der Wiedergabe einer Szene die über mehrere Kamerawinkel verfügt ANGLE-Taste (mit SHIFT-Taste).
  • Seite 21: Einstellungen

    EINSTELLUNGEN DIESES GERÄT ERMÖGLICHT IHNEN DIE PERFORMANCE IHREN VORSTELLUNGEN ENTSPRECHEND EINZUSTELLEN. SETUP MENU AUDIO SETUP LANGUAGE SETUP CUSTOM SETUP Betätigen Sie die SETUP-Taste. Benutzen Sie die Navigationstasten zur Auswahl einer Kategorie und betätigen Sie die ENTER-Taste. Betätigen Sie die SETUP-Taste zum Verlassen des Einstellungsmenüs.
  • Seite 22: Funktionseinstellungen

    Funktionseinstellungen SPDIF/PCM DVD Setup-Audio Setup SPDIF/RAW Digital out Downmix Lo/Ro Lt/Rt SELECT CONFIRM DVD Setup-Custom Setup Parental Ctrl Screen Saver Angel Mark SELECT CONFIRM...
  • Seite 23: Dvb-Installation

    DVB-Installation Betätigen Sie die FUNCTION-Taste zum Verändern der Grundfunktion des Geräts. Es ste- hen Ihnen drei Optionen zur Verfügung: DVD-ROM Drive, DVB und USB. DVD-ROM Drive Grundeinstellungen (Installation) Wenn dies das erste Mal ist, dass Sie das DVB-Menü aufrufen, erscheint folgendes Bild: Gehen Sie auf „YES“...
  • Seite 24: Dvb-Menü

    DVB-Menü Favoriten (Favor) Program Name Favor Move Wenn Sie Kanäle als favorisiert markieren, er- scheint ein Herzsymbol in der Favor-Spalte des jeweiligen Kanals. Wenn Sie einen Kanal von der Favoritenlisten entfernen wollen, bewegen Sie einfach den Cursor in die Favor-Spalte des jeweili- gen Kanals und betätigen Sie die die ENTER- Taste.
  • Seite 25: Channel Lock

    DVB-Menü Channel Lock Sie können einstellen, ob ein Kanal über die Kindersicherung gesperrt wird. Wenn Sie einen Kanal sperren, kann auf ihn nur nach Eingabe des Passworts zugegriffen werden. Passwort: 8888 Grundlegende Bedienung Ein/Ausschalten - Betätigen Sie die POWER-Taste zum ein- bzw. Ausschalten des Geräts.
  • Seite 26: Einlegen Und Benutzung Des Akkus

    Einlegen und Benutzung des Akkus Einlegen und Entfernen des Akkupacks Vergewissern Sie sich, dass das Gerät ausgeschaltet ist und von anderen Geräten abgetrennt wurde. Verbinden Sie das Akkupack am entsprechenden An- schluss des Geräts (siehe Abbildung 1). Richten Sie beide Teile aufeinander aus bis Sie ein Klick hören (siehe Abbildung 2).
  • Seite 27: Akkuaufbewahrung

    Einlegen und Benutzung des Akkus Laden Sie den Akku niemals auf, wenn er schon vollständig aufgeladen ist. Für eine Langzeitbenutzung, vergewissern Sie sich, dass das Netzteil zuerst aus der Steckdo- se herausgezogen wird, wenn Sie das Akkupack nach dem Aufladen vom Gerät tren- nen möchten.
  • Seite 28: Fehlerbehebung

    Bitte richten Sie Ihre Antenne optimal in Richtung des Sendemastes qualität aus. Nutzen Sie eine Antenne mit aktiven Verstärker oder eine Haus-/Dachantenne. Falls Sie mit dem HSD 7570 den Raum ge- wechselt haben, richten Sie entweder die Antenne neu aus oder schließen Sie eine aktive Antenne an.
  • Seite 29: Technische Daten

    Technische Daten Stromversorgung des Netzteils 100-240V AC 50/50 Hz Stromverbrauch Gewicht 2 kg Außenabmessungen 205 x 38 x 163,5 mm (L x H x T) Externes Farbsystem NTSC / PAL Laser Halbleiter-Laser, Wellenlänge 650 nm Videoausgang 1,0V (p-p), 75 Watt Digitaler Audioausgang 0,5V (p-p), 75Watt Analoger Audioausgang...
  • Seite 31 Table of Contents Safety Precautions/Information Introduction Quick Starting Guide Remote Control Connecting to a TV Remote Control Buttons Playing Back a Disc Picture CD and JPEG files Compressed Audio Formats Locating a Specific Title, Chapter or Track Playing Repeatedly Zooming a Picture Selecting Subtitles Information Selecting the Camera Angle...
  • Seite 32: Safety Precautions/Information

    Safety Information The lightning flash with an arrowhead symbol within an equilateral triangle is intended to alert the user of the presence of uninsulated "dangerous voltage" within the product's enclosure that may be of sufficient magnitude to constitute a risk of electric shock to persons. The exclamation point within an equilateral triangle is intended to alert the user of the presence of important operating and maintenance (servicing) instructions in the literature accompanying the...
  • Seite 33: Batterywarning

    Safety Information FCC NOTICE: This equipment has been tested and found to comply with the limits for a Class B digital device. Pursuant with the FCC Rules, Part 15. These limits are designed to provide reasonable protection against harmful interference in a residential installation. This equipment generates, uses and can radiate radio frequency energy and, if not installed and used in accordance with the instructions, may cause harmful interference to radio communication, However, this is no guarantee that interference will not occur in a particular...
  • Seite 34 Safety Information Water and Moisture - Do not use this product near water for example, near a bath tub, wash bowl, kitchen sink, or laundry tub; in a wet basement; or near a swimming pool; and the like. Accessories - Do not place this product on an unstable cart, stand, tripod, bracket, or table. The product may fall, causing serious injury to a child or adult, and serious damage to the product.
  • Seite 35 Safety Information Object and Liquid Entry - Never push objects of any kind into this product through openings as they may touch dangerous voltage points or short-out parts that could result in a fire or electric shock. Never spill liquid of any kind on the product. Servicing - Do not attempt to service this product yourself as opening or removing covers may expose you to dangerous voltage or other hazards.
  • Seite 36: Introduction

    Introduction Your new portable DVD player is designed for you to enjoy all forms of disc media. Its slim shape allows you to easily carry it with you and enjoy movies and music anywhere. Your player incorporates the latest digital audio/video (AV) technologies to give you the ultimate in listening and viewing pleasure.
  • Seite 37: Quick Starting Guide

    Quick Starting Guide Connecting to an External Power Source: Connect the power cord (supplied with the player) to the side input plug and to a wall outlet. Do not use any other device otherwise specified by your dealer. Open the protective cover: The cover opens to a maximum 135° only, so please do not try to open it any further.
  • Seite 38: Remote Control

    Remote Control Introduction of the remote control Open the battery drawer Hold in addition the equipment by point 1 (see picture) and push the cover into the direction 2 (see picture). Please insert the battery into the drawer. Pay attention when inserting the battery to the correct polarity (/-).
  • Seite 39: Connecting To A Tv

    Connecting to a TV CONNECTING EARPHONES Connect the earphones. Earphones with a 3.5 mm stereo plug can be connected. Adjust the volume by turning the dial. Note: • Avoid listening to sound at levels which may be harmful to your ears. CONNECTING Stereo RCA to a Sound System Enjoying Dolby Pro Logic Surround Sound (GOOD) Dolby Pro Logic Surround.
  • Seite 40 Connecting to Optional Equipment Enjoy Dolby Digital or DTS (BETTER) Dolby Digital and DTS programming can deliver surround sound with five discrete full range channels plus a sixth channel for a subwoofer. You can enjoy your DVD with a Dolby Digital or DTS Digital Surround Sound System.
  • Seite 41: Remote Control Buttons

    REMOTE CONTROL BUTTONS Buttons on the remote control: StandBy Mute 1 / Repeat 2 / A-B Segment Repeat 3 / PRGM (Program) 4 / Audio 5 / Angle 6 / Zoom 7 / Slow 8 / Title Shift Display Play Up / DVB-T (CH + (Channel)) Left / DVB-T (V - (Volume)) Right / DVB-T (V + (Volume))
  • Seite 42: Playing Back A Disc

    Playing Back a Disc CONTROLS FOR BASIC PLAYBACK DIRECTION BUTTONS PLAY ENTER PAUSE SETUP STOP SUB TITLE OPEN / PUSH DISC MENU The system will display the following menu if turn off for first time, you can select one of the functions.
  • Seite 43: Fast Forward & Rewind

    Playing Back a Disc HOW TO START PLAYBACK FROM THE MENU SCREEN Connect the power cable and the unit, the standby LED will be illumed, press POWER to turn on the unit, if you want to turn off the unit, press POWER again. HOW TO OPEN/CLOSE THE DISC TRAY Turn on the unit, if there is a disc in the disc door, the unit will sense the format of the disc and play it automatically.
  • Seite 44 Playing Back a Disc Playing Back Your Picture CD or JPEG files You can use your DVD player to view photographs stopped on a CD-R. the photographs on the disc need to be saved in the jpeg file format. Place the CD on the disc tray. Select a folder or a picture contained on the CD.
  • Seite 45: Compressed Audio Formats

    Playing Back Your Picture CD PLAYING Music with compressed Audio-Formats Insert an CD with compressed music files, the DVD player will initialize the disc when the tray is closed and the directory (folder) will be shown in an MENU on screen.
  • Seite 46: Playing Repeatedly

    Playing Repeatedly THIS DVD VIDEO PLAYER ALLOWS YOU TO PLAYBACK A SPECIFIC TITLE, CHAPTER, TRACK, OR SEGMENT REPEATEDLY. (TITLE REPEAT, CHAPTER/TRACK REPEAT, A- B REPEAT) HOW TO REPEAT A TITLE, CHAPTER, OR DISC During normal playback of a Video-DVD, press the REPEAT button (To be set SHIFT on and press 1 / REPEAT).
  • Seite 47: Zooming A Picture

    Playing Repeatedly Zooming a picture This DVD video player allows you to zoom into a picture as well as shift the zoom point. To be set SHIFT on and press 6 (ZOOM). Press ZOOM during normal playback or slow - motion. The player magnifies in the center of the picture.
  • Seite 48: Selecting The Camera Angle

    Selecting the Camera Angle HOW TO CHANGE THE CAMERA ANGLE This DVD player allows you to select from several different angles on a Video-DVD. If the DVD video disc was recorded with multiple angles, you have the option to change the camera angle of the scene you are watching.
  • Seite 49 SETTIGNS THIS UNIT ALLOWS YOU TO CUSTOMIZE THE PERFORMANCE TO YOUR PERSONAL PREFERENCE. SETUP MENU AUDIO SETUP LANGUAGE SETUP CUSTOM SETUP Press SETUP. Press arrow buttons to select category (highlight), then press ENTER. Press SETUP to quit the menu. English DVD Setup-Custom Setup Chinese Japanese...
  • Seite 50: Settings

    Customizing the Function Settings SPDIF/PCM DVD Setup-Audio Setup SPDIF/RAW Digital out Downmix Lo/Ro Lt/Rt SELECT CONFIRM DVD Setup-Custom Setup Parental Ctrl Screen Saver Angel Mark SELECT CONFIRM...
  • Seite 51: Dvb Installation

    DVB installation Press FUNCTION to change the function of the unit ,the options including DVD-ROM Drive, DVB and USB. DVD-ROM Drive Installation After setup, if this is the first time you use DVB, the screen will display the following picture First select YES, then press PLAY, the system will install itself.
  • Seite 52: Dvb Menu

    DVB menu Favorites Program Name Favor Move You can select your favorite channels, and a heart logo will appear in the favorite row of the selected channels. If you want to remove a channel from my favorite channels, move the cursor to the favor row, then press ENTER.
  • Seite 53: Usb Function Supported

    DVB menu Channel Lock You can setup wether to lock a channel that are locked in parental setting If you lock it, the channel that are locked in parental setting can only play after you input the correct password. Password: 8888 Basic operation Turn on/off Press POWER to turn on or turn off .
  • Seite 54: Rechargeable Battery Installation & Use

    Rechargeable Battery Installation & Use INSTALLING & REMOVING THE BATTERY PACK Make sure the unit is powered off and unplugged. Attach the battery pack to the outlet of the unit as illustration 1, and align them with each other till you hear a click sound as illustration 2.
  • Seite 55: Battery Storage

    Rechargeable Battery Installation & Use Never recharge the battery which is already fully charged. For the longterm using of customer, when fully charged in the 2. mode, make sure unplug the AC/DC adapter from the DVD player first, then disconnect the battery from the unit. Under no circumstance should you short out the battery, store it in a metal container, or leave it in a humid or damp environment.
  • Seite 56: Troubleshooting

    Troubleshooting Our custom service will help you. Did you already read the notes for Troubleshooting? • Technical custom service of Xoro/MAS : Phone: +49404 77 11 09 17 • Internet: www.xoro.de/support.htm No DVB-T Signals? Please check if the HTC1900D is in DVB-T mode ? If not please switch to this mode.
  • Seite 57: Specification

    Specification AC Adapter Power Supply 100-240V AC 50/50 Hz Power Consmption Weight 2.0 Kg External dimenson 205 x 38 x 163.5 mm (L / H / A) External System NTSC / PAL Laser Laser emiconductor, wavelength 650nm Video output 1.0V (p-p), 75 W Audio output (digital) 0.5V (p-p), 75 W Audio output (analog)
  • Seite 59 Table des matières Mesures de sécurité/Informations Introduction Guide de démarrage rapide Télécommande Brancher sur le TV Boutons de la télécommande Lire un disque CD de photos et fichiers JPEG Formats audio compressés Localiser un titre, chapitre ou piste spécifique Lecture répétée Zoomer une photo Sélectionner des sous-titres Informations...
  • Seite 60: Mesures De Sécurité/Informations

    Mesures de sécurité ATTENTION RISQUE DE CHOC ELECTRIQUE NE PAS OUVRIR Ce symbole éclair fléché, dans un triangle équilatéral, avertit l’usager de la présence d’une tension non isolée dangereuse dans l’enceinte du produit d’une amplitude suffisante pour constituer un risque d’électrocution sur l’individu.
  • Seite 61 Mesures de sécurité AVERTISSEMENT PILE : Le lecteur DVD contient un élément de piles Li-Ion. Il existe un risque d’incendie ou de brûlures si l’élément est mal manipulé. Ne démontez pas, n’écrasez pas, ne trouez pas les contacts externes ou ne les jetez pas au feu ou dans l’eau. Ne tentez pas d’ouvrir ou de réparer cet élément de piles. Remplacez uniquement avec un élément de piles conçu pour ce produit.
  • Seite 62 Mesures de sécurité Sources d’alimentation - Cet appareil doit uniquement être utilisé avec la même source d’alimentation que celle indiquée sur l’étiquette. Si vous n’êtes pas certain du type d’alimentation dans votre habitation, consultez le revendeur de votre appareil ou la compagnie distributrice d’électricité. Pour les appareils qui sont conçus pour fonctionner avec des piles ou une autre source, référez-vous au manuel d’utilisation.
  • Seite 63 Mesures de sécurité Dommages nécessitant une réparation- Débranchez l’appareil de la prise murale et consultez le personnel de réparation qualifié dans les circonstances suivantes: Quand le cordon d'alimentation ou la prise est endommagé. Si un liquide a été projeté sur l’appareil ou si un objet est tombé dans l’appareil. Si l’appareil a été...
  • Seite 64: Introduction

    Introduction Votre nouveau lecteur DVD portable a été conçu pour que vous puissiez profiter de tous les formats de disques. Sa conception compacte vous permet de le transporter avec vous et de pouvoir ainsi regarder des films et écouter de la musique n’importe où. Votre lecteur comprend les dernières technologies numériques audio/vidéo (AV) pour vous offrir les derniers avantages en matière d’écoute et de visualisation.
  • Seite 65: Guide De Démarrage Rapide

    Guide de démarrage rapide Brancher sur une source d’alimentation externe : Branchez le cordon d’alimentation (fourni avec le lecteur) sur le côté sur la prise d’entrée et sur une prise murale. N’utilisez aucun autre périphérique autrement que spécifié par le revendeur. Ouvrez le couvercle du compartiment à...
  • Seite 66: Télécommande

    Télécommande Introduction de la télécommande Ouvrez le tiroir du compartiment à piles. Reprenez les instructions point par point1 (voir l’image) et poussez le couvercle dans la direction 2 (voir l’image). Veuillez insérer la pile dans le tiroir à piles. Assurez-vous de bien faire attention à la position de la pile, respectez les polarités (+/-).
  • Seite 67: Brancher Sur Le Tv

    Brancher sur le TV CONNECTING EARPHONES Brancher les écouteurs Les écouteurs avec une prise de 3.5mm peuvent être branchés. Réglez le volume en tournant le bouton numéroté. Remarque : • Évitez d’écouter à un niveau sonore élevé cela pourrait être dangereux pour vos oreilles. BRANCHER le RCA Stéréo sur un Sound System Profitez du son Dolby Pro Logic Surround Sound (GOOD) Dolby Pro Logic Surround.
  • Seite 68 Brancher sur un équipement en option Profiter du son Dolby Digital ou DTS (DE MEILLEUR QUALITE) La programmation Dolby Digital and DTS peut offrir un son surround avec cinq canaux séparés en plein gamme avec un sixième canal pour le subwoofer. Vous pouvez profiter de votre lecteur DVD avec un Système Son Dolby Digital ou DTS Digital Surround.
  • Seite 69: Boutons De La Télécommande

    BOUTONS DE LA TELECOMMANDE Boutons de la télécommande STANDBY (VEILLE) Silencieux (Mute) Répétition 1 (1 / Repeat) Répétition de la Section A-B 2 (A-B) 3/ PRG (Programme) (PRGM) 4/ Audio (Audio) 5/ Angle (Angle) 6 / Zoom (Zoom) 7/ Ralenti (Slow) 8/ Titre (Title) Shift (Shift) Affichage (Display)
  • Seite 70: Lire Un Disque

    Lire un disque TOUCHES DE CONTROLE POUR UNE LECTURE SIMPLE BOUTONS DIRECTIONNELS PLAY ENTREE PAUSE CONFIGURATION SARRET SOUS-TITRE OUVRIR/APPUYER MENU DU DISQUE Le système affichera le menu suivant lorsque vous allumerez le lecteur la première fois, vous pouvez sélectionner l’une des fonctions. Si vous sélectionnez DVD-ROM Drive, le système entrera en mode DVD, s’il y a un disque dans l’unité, l’unité...
  • Seite 71: Avance & Retour Rapide

    Lire un disque COMMENT DEMARRER LA LECTURE A PARTIR DU MENU A L’ECRAN Branchez le câble d’alimentation et l’unité, la DEL standby s’allumera. Appuyez sur le bouton POWER pour allumer l‘unité, si vous souhaitez éteindre l’unité, appuyez sur le bouton POWER de nouveau. COMMENT OUVRIR/FERMER LE TIROIR PUR DISQUE Allumez l’unité, s’il y a un disque dans le compartiment, l’unité...
  • Seite 72 Lire un disque Lecture de CD photo ou de fichiers JPEG Vous pouvez utiliser votre lecteur DVD pour visualiser des photos enregistrées sur un CD-R. Les photos sur le disque devront avoir été sauvegardées en format JPEG. Placez le disque sur la platine. Sélectionnez un dossier ou une image du CD.
  • Seite 73: Formats Audio Compressés

    Lire un CD d’images LIRE des fichiers musique avec des formats audio compressés Insérez un CD, le lecteur DVD initialisera le disque une fois le tiroir fermé et le répertoire (dossier) affiché à l’écran dans le MENU. Appuyez sur les boutons HAUT/BAS pour sélectionner et mettre en surbrillance le fichier chanson.
  • Seite 74: Lecture Répétée

    Lecture répétée CE LECTEUR VIDEO DVD VOUS PERMET UNE LECTURE REPETEE D’UN TITRE, CHAPITRE, PISTE OU SEGMENT SPECIFIQUE. (REPETITION TITRE, REPETITION CHAPITRE/PISTE, REPETITION A-B) COMMENT REPETER UN TITRE, CHAPITRE OU UN DISQUE En mode de lecture normale de DVD vidéo, appuyez sur le bouton REPEAT (pour régler la fonction SHIFT sur On et appuyez une fois sur REPEAT).
  • Seite 75: Zoomer Une Photo

    Lecture répétée Zoomer une photo Ce lecteur vidéo DVD vous permet de zoomer sur une image tout en zoomant sur le point de zoom. Régler SHIFT sur ON et appuyez sur le bouton 6 (ZOOM). Appuyez sur le bouton ZOOM en mode de lecture normale ou en lecture au ralenti. Le lecteur augmente le centre de l’image.
  • Seite 76: Sélectionner L'angle De La Caméra

    Sélectionner l’angle de la caméra COIMMENT CHANGER L’ANGLE DE LA CAMERA Ce lecteur DVD vous permet de sélectionner parmi les différents angles de la caméra sur le disque vidéo DVD. ANGLE 1 ANGLE 2 Si le disque vidéo DVD a été enregistré avec des angles multiples, vous avez l’option de changer l’angle de la caméra de la scène que vous regardez.
  • Seite 77: Réglages

    RÉGLAGES CETTE UNITE VOUS PERMET DE PERSONNALISER LA PERFORMANCE EN FONCTION DE VOS BESOINS. SETUP MENU AUDIO SETUP LANGUAGE SETUP CUSTOM SETUP Appuyez sur SETUP. Appuyez sur les boutons fléchés pour sélectionner la catégorie (surlignée) et appuyez sur ENTER. Appuyez sur SETUP pour sortir du menu. English DVD Setup-Custom Setup Chinese...
  • Seite 78 Personnaliser les réglages de la fonction SPDIF/PCM DVD Setup-Audio Setup SPDIF/RAW Digital out Downmix Lo/Ro Lt/Rt SELECT CONFIRM DVD Setup-Custom Setup Parental Ctrl Screen Saver Angel Mark SELECT CONFIRM...
  • Seite 79: Installation Tnt

    Installation TNT Appuyez sur la FONCTION pour changer la fonction de l'unité, les options incluent DVD- ROM Drive, DVB et USB. DVD-ROM Drive Installation Après la configuration, si c’est la première fois que vous utilisez le DVB, l’écran affichera l’image suivante. Sélectionnez dans un premier temps YES, puis appuyez sur le bouton PLAY, le système s’installera de lui-même.
  • Seite 80: Program Search

    Menu TNT Favoris Programme Favor Dépl. Sup. Vous pouvez sélectionner vos chaînes préférées, et un logo avec en forme de cœur apparaîtra dans la rangée des chaînes sélectionnées. Si vous souhaitez retirer une chaîne de mes chaînes préférées, déplacez le curseur sur la rangée préférée puis appuyez sur ENTER.
  • Seite 81: Fonction Usb Supportée

    Menu TNT Verrouillage des chaînes Vous pouvez configurer les chaînes verrouillées dans le contrôle parental. Si vous bloquez une chaîne, vous ne pourrez la visualiser qu’une fois que vous aurez entré le mot de passe correcte. Mot de passe: 8888 Fonctionnement simple Allumer/étreindre - Appuyez sur le bouton POWER pour allumer ou éteindre l'unité.
  • Seite 82: Installation & Utilisation Des Piles Rechargeables

    Installation & utilisation des piles rechargeables INSTALLATION & RETIRER L’ELEMENT DES PILES Assurez-vous l'unité hors tension débranchée. Fixez l'élément des piles sur la prise de l’unité comme dans l’illustration 1 et alignez-les pour entendre un déclic comme dans l’illustration 2. Retirer l’élément des piles Assurez-vous l'unité...
  • Seite 83: Rangement Des Piles

    Installation & utilisation des piles rechargeables Ne jamais recharger une pile qui est déjà chargée. Pour une utilisation prolongée de l’appareil, lorsque l’unité est chargée, assurez-vous de débrancher dans un premier temps l'adaptateur CA/DC du lecteur DVD puis débranchez la pile de l’unité. Dans aucun cas vous ne pouvez court-circuiter la pile, la ranger dans un contenaire en métal ou la laisser dans un environnement humide ou légèrement humide.
  • Seite 84: Guide De Dépannage

    Guide de dépannage Veuillez consulter ce tableau pour détecter la cause probable d’un problème avant de contacter un réparateur. Support technique Xoro/MAS: • Tél.: 0825 889441 • Internet: www.xoro.fr/Service.aspx Pas de signal TNT ? Vérifiez que le HTL 1910w se trouve bien en mode TNT. Dans le cas contraire, mettez-vous sur ce mode.
  • Seite 85: Caractéristiques Techniques

    Caractéristiques techniques Alimentation avec adaptateur CA 100-240V AC 50/50 Hz Consommation d’électricité Poids 2.0 Kg Dimensions externes 205 x 38 x 163.5 mm (L / H / A) Système externe NTSC / PAL Laser Laser semi conducteur, longueur d’ondes 650nm Sortie Vidéo 1.0V (p-p), 75 W Sortie Audio (numérique)
  • Seite 87 Índice Precauciones/Información de seguridad Introducción Guía de inicio rápido Mando a distancia Conexión a una TV Botones del mando a distancia Reproducción de un disco Picture CD y archivos JPEG Formatos de audio comprimido Localizar un título, capítulo o pista específico Reproducir repetidamente Aumentar una imagen Selección de subtítulos...
  • Seite 88: Precauciones/Información De Seguridad

    Información de seguridad PRECAUCIÓN RIESGO DE ELECTROCUCIÓN NO El relámpago con punta de flecha dentro de un triángulo equilátero advierte al usuario de la presencia de “voltaje peligroso” no aislado dentro del chasis del producto, que puede ser de la magnitud suficiente para presentar un riesgo de electrocución a personas.
  • Seite 89 Información de seguridad ADVERTENCIA SOBRE BATERÍAS: Este reproductor DVD contiene un paquete de baterías Li-Ión. Existe riesgo de incendio y quemaduras si se manipula incorrectamente el paquete de baterías. No desmonte, aplaste, perfore, cortocircuite los contactos externos, ni tire al fuego o al agua. No intente abrir ni reparar el paquete de baterías.
  • Seite 90 Información de seguridad Fuentes de alimentación – El producto debe usarse solamente con el tipo de alimentación indicado en la etiqueta identificadora. Si no está seguro del tipo de alimentación de su casa, consulte con su vendedor o compañía eléctrica local. Para productos pensados para funcionar con alimentación por baterías u otras fuentes, consulte las instrucciones de funcionamiento.
  • Seite 91 Información de seguridad Daños que precisan de asistencia – Desconecte este producto de la toma de corriente y dirija su reparación a personal de servicio cualificado en las condiciones siguientes: Cuando el cable de alimentación o el enchufe hayan sufrido daños . Si se ha derramado líquido o introducido objetos en el aparato.
  • Seite 92: Introducción

    Introducción Su nuevo reproductor portátil DVD está diseñado para que disfrute con todo tipo de discos de medios. Su forma delgada le permite llevarlo fácilmente y disfrutar de películas y música en cualquier lugar. Su reproductor incluye la última tecnología audiovisual (AV) digital para ofrecerlo la experiencia definitiva de escucha y visionado.
  • Seite 93: Guía De Inicio Rápido

    Guía de inicio rápido Conexión a fuente de alimentación externa. Conecte el cable de alimentación (incluido con el reproductor) a la toma de entrada lateral y a una toma de corriente. No use ningún otro dispositivo a menos que sea especificado por su vendedor.
  • Seite 94: Mando A Distancia

    Mando a distancia Introducción al mando a distancia Abra el compartimiento de baterías Aguante el equipo por el punto 1 (ver imagen) y presione la tapa en dirección 2 (ver imagen). Introduzca la batería en el compartimiento. Preste atención a la polaridad correcta (+/-) cuando introduzca la batería.
  • Seite 95: Conexión A Una Tv

    Conexión a una TV CONEXIÓN DE AURICULARES Conecte auriculares. Pueden conectarse auriculares con una toma estéreo de 3,5 mm. Ajuste el volumen girando el dial. Nota: • Evite escuchas sonidos a volúmenes que puedan ser dañinos para sus oídos. CONEXIÓN de RCA estéreo a un sistema de sonido Disfrute del sonido envolvente Dolby Pro Logia (BUENO) Dolby Pro Logic Surround.
  • Seite 96 Conexión a equipos opcionales Disfrute de Dolby Digital o DTS (MEJOR) La programación Dolby Digital y DTS puede ofrecer sonido envolvente con cinco canales completos más un sexto canal para subwoofer. Puede disfrutar de su DVD con un sistema de sonido envolvente Dolby Digital o DTS. Todo lo que necesita es conectar su reproductor DVD a un receptor Dolby Digital/DTS o un receptor Dolby Digital Ready con descodificador externo.
  • Seite 97: Botones Del Mando A Distancia

    BOTONES DEL MANDO A DISTANCIA Botones en el mando a distancia Espera (StandBy) Silencio (Mute) 1 / Repetir (Repeat) 2 / Repetir segmento A-B (A-B) 3 / PRGM (Programa) (PRGM) 4 / Audio (Audio) 5 / Ángulo (Angle) 6 / Zoom (Zoom) 7 / Ralentizar (Slow) 8 / Título (Title) Cambiar (Shift)
  • Seite 98: Reproducción De Un Disco

    Reproducción de un disco CONTROLES PARA REPRODUCCIÓN BÁSICA BOTONES DE DIRECCIÓN REPRODUCIR ENTER PAUSA CONFIGURACIÓN DETENER SUBTÍTULOS ABRIR / PRESIONE MENÚ DISCO El sistema mostrará el menú siguiente si se apaga por primera vez, puede seleccionar una de las funciones. Si selecciona la unidad DVD-ROM, el sistema accederá...
  • Seite 99 Reproducción de un disco CÓMO COMENZAR LA REPRODUCCIÓN DESDE LA PANTALLA DE MENÚ Conecte el cable de alimentación y la unidad, el LED de espera se encenderá, pulse POWER para encender la unidad; si desea apagar la unidad, pulse POWER de nuevo. Encienda la unidad, si hay un disco bajo la tapa, la unidad detectará...
  • Seite 100: Picture Cd Y Archivos Jpeg

    Reproducción de un disco Reproducir sus CD de imagen o archivos JPEG Puede usar su reproductor DVD para ver fotografías fijas en un CD-R. Las fotografías del disco necesitan guardarse en formato de archivo JPEG. Ponga el CD en la bandeja del disco. Seleccione una carpeta o imagen contenida en el CD.
  • Seite 101: Formatos De Audio Comprimido

    Reproducir un CD de imágenes REPRODUCIR música con formatos de audio comprimido Introduzca un CD en comprimida musica fichero, el reproductor DVD inicializará el disco cuando la bandeja esté cerrada y el directorio (carpeta) se mostrará en un MENÚ en pantalla. Pulse para ARRIBA/ABAJO...
  • Seite 102: Reproducir Repetidamente

    Reproducir repetidamente ESTE REPRODUCTOR DVD VÍDEO LE PERMITE REPRODUCIR UN TÍTULO, CAPÍTULO, PISTA O SEGMENTO CONCRETO REPETIDAMENTE. (REPETIR TÍTULO, REPETIR CAPÍTULO/PISTA, REPETIR A-B). CÓMO REPETIR UN TÍTULO, CAPÍTULO, O DISCO Durante la reproducción normal de un DVD vídeo, pulse REPEAT (ponga SHIFT activado y pulse 1 / REPEAT).
  • Seite 103: Aumentar Una Imagen

    Reproducir repetidamente Aumentar una imagen Este reproductor DVD permite aumentar una imagen y cambiar el punto de aumento. Para hacerlo, active SHIFT y pulse 6 (ZOOM). Pulse ZOOM durante la reproducción normal o a cámara lenta. El reproductor aumentará el centro de la imagen.
  • Seite 104: Selección De Ángulo De Cámara

    Selección de ángulo de cámara CÓMO CAMBIAR EL ÁNGULO DE CÁMARA Este reproductor DVD le permite seleccionar entre distintos ángulos en un DVD vídeo. ANGLE 1 ANGLE 2 Si el disco DVD vídeo se ha grabado con múltiples ángulos, puede cambiar el ángulo de cámara se la escena que esté...
  • Seite 105: Configuración

    CONFIGURACIÓN ESTA UNIDAD PERMITE PERSONALIZAR RENDIMIENTO PREFERENCIAS PERSONALES. SETUP MENU AUDIO SETUP LANGUAGE SETUP CUSTOM SETUP Pulse STEUP. Pulse los botones de flecha para seleccionar la categoría (marcar), y pulse ENTER. Pulse STEUP para salir del menú. English DVD Setup-Custom Setup Chinese Japanese Menu...
  • Seite 106 Personalizar las configuraciones de función SPDIF/PCM DVD Setup-Audio Setup SPDIF/RAW Digital out Downmix Lo/Ro Lt/Rt SELECT CONFIRM DVD Setup-Custom Setup Parental Ctrl Screen Saver Angel Mark SELECT CONFIRM...
  • Seite 107: Instalación Dvb

    Instalación DVB Pulse FUNCTION para cambiar la función de la unidad, las opciones incluyen unidad DVD- ROM, DVB y USB. DVD-ROM Drive Instalación Tras la configuración, si es la primera vez que usa DVB, la pantalla mostrará la imagen siguiente. Seleccione primero YES,...
  • Seite 108: Menú Dvb

    DVB Menu Favoritos Nº Programa Nombre Favoritos Mover Borrar Puede seleccionar sus canales favoritos, y se mostrará el logo de un corazón en la lista de favoritos de los canales seleccionados. Si desea eliminar un canal de la lista de favoritos, mueva el cursor a la línea de favoritos, y pulse ENTER.
  • Seite 109: Soporte Función Usb

    DVB Menu Bloqueo de canal Puede establecer si bloquear un canal en configuración paterna. Si lo bloquea, los canales bloqueados en configuración paterna sólo puede reproducirse tras introducir la clave correcta. Clave: 8888 Funcionamiento básico Encendido/apagado Pulse POWER para encender o apagar. Cambiar el canal •...
  • Seite 110: Instalación Y Uso De La Batería Recargable

    Instalación y uso de la batería recargable INSTALAR Y SACAR EL PAQUETE DE BATERÍAS Asegúrese de que la unidad esté apagada y desenchufada. Introduzca el paquete de baterías a la salida de la unidad según la ilustración 1, y alinéelos hasta escuchar un chasquido, según la ilustración 2.
  • Seite 111: Capacidad De Batería

    Instalación y uso de la batería recargable No recargue nunca una batería cargada por completo. Para un uso de larga duración, cuando cargue en modo 2, asegúrese de desconectar el adaptador CA/CD primero del reproductor DVD, y luego desconecte la batería de la unidad. En ningún caso debe cortocircuitar la batería, guardarla en un contenedor metálico, o dejarla en un entorno húmedo o mojado.
  • Seite 112: Solución De Problemas

    Nuestro servicio al cliente lo ayudara con mucho gusto en caso de tener problemas. Ha leído ya las instrucciones para la solución de problemas ? • Servicio técnico de Xoro/MAS : Tel. : 040/ 77110917 • Internet: www.xoro.de/support.htm No hay señal en el DVB-T ? Por favor controle si el HTL 1910w se encuentra en modo DVB-T.
  • Seite 113: Especificaciones

    Especificaciones Adaptador de alimentación CA 100-240V CA 50/50 Hz Consumo Peso 2,0 Kg Dimensiones externas 205 x 38 x 163,5 mm (LxAxP) Sistema externo NTSC / PAL Láser Láser semiconductor, longitud de onda 650nm Salida vídeo 1.0V (p-p), 75W, sinc. Negativa, 1 toma pin Salida audio (digital) 0.5V (p-p), 75W, 1 toma pin Salida audio (analógica)
  • Seite 114 XORO by MAS Elektronic AG Blohmstrasse 16/20 21079 Hamburg Germany Tel: + 49(040) 77 11 09 17 Fax: + 49(040) 77 11 09 33 xoro@mas.de www.xoro.de...

Inhaltsverzeichnis