Inhaltsverzeichnis
Werbung
Verfügbare Sprachen
Verfügbare Sprachen
Quicklinks
Werbung
Inhaltsverzeichnis
Fehlerbehebung

Verwandte Anleitungen für Blaupunkt MBS07E


Inhaltszusammenfassung für Blaupunkt MBS07E
- Seite 1 MBS07E BAC-PO-0007-E06M...
-
Seite 3: Inhaltsverzeichnis
CONTENT IMPORTANT SAFEGUARDS .................... 7 INSTALLATION INSTRUCTIONS ..................14 WINDOW SLIDER KIT INSTALLATION ................15 LOCATION ........................16 TURNING THE APPLIANCE ON ..................17 SETTING THE TIMER ....................20 SELF-DIAGNOSIS ......................22 INSERTING OR REPLACING THE BATTERIES ..............24 SETTING THE TIMER .................... - Seite 4 STANDORT ........................48 GERÄT EINSCHALTEN ....................49 TIMER EINSTELLEN ...................... 51 SELBSTDIAGNOSE ......................53 BATTERIEN EINLEGEN ODER WECHSELN ..............56 TIMER EINSTELLEN ...................... 58 TIPPS ZUR RICHTIGEN HANDHABUNG................. 59 WASSERABLAUF ......................61 REINIGUNG ........................64 GEHÄUSE REINIGEN ..................... 64 LUFTFILTER REINIGEN ....................
- Seite 5 USTAWIANIE TIMERA ....................90 PORADY DOTYCZĄCE PRAWIDŁOWEGO UŻYTKOWANIA ..........91 METODA ODPROWADZANIA WODY................93 CZYSZCZENIE ........................ 95 CZYSZCZENIE OBUDOWY ..................... 95 MONTAŻ FILTRÓW POWIETRZA .................. 95 CZYNNOŚCI WYKONYWANE PRZED SEZONEM I PO NIM ..........96 ROZWIĄZYWANIE PROBLEMÓW ................. 97...
-
Seite 6: Portable Air Conditioner
Portable Air Conditioner MBS07E BAC-PO-0007-E06M User Manual Mateko Sp. z o.o. ul. Przyleśna 17a PL-05-126 Michałów-Grabina e-mail: service@mateko.pl www.blaupunkt.com Thank you for selecting our quality appliance. Please be sure to read this user manual carefully before using. Any question, please contact the professional service for help. -
Seite 7: Important Safeguards
IMPORTANT SAFEGUARDS This appliance can be used by children aged from 8 years and above and persons with • reduced physical, sensory or mental capabilities or lack of experience and knowledge if they have been given supervision or instruction concerning use of the appliance in a safe way and understand the hazards involved. - Seite 8 Do not disassemble or modify the appliance or the power cord, it can result in the risk of • electric shock or fire. All other services should be referred to a qualified technician. Do not place the power cord or appliance near a heater, radiator, or other heat source.
- Seite 9 This unit is equipped with a cord that has a earthed wire connected to an earthed pin or • grounding tab. The plug must be plugged into a socket that is properly installed and earthed. Do not under any circumstances cut or remove the earthed pin or grounding tab from this plug.
- Seite 10 GWP: R410A: 2088, R134a: 1430, R290: 3 •...
-
Seite 11: Electrical Connections
IMPORTANT - GROUNDING METHOD This product is factory equipped with a power supply cord that has a three-pronged grounded plug. It must be plugged into a mating grounding type receptacle in accordance with the National Electrical Code and applicable local codes and ordinances. If the circuit... - Seite 12 SPECIFIC INFORMATION REGARDING APPLIANCES WITH R290 REFRIGERANT GAS Thoroughly read all of the warnings. • When defrosting and cleaning the appliance, do not use any tools other than those • recommended by the manufacturing company. The appliance must be placed in an area without any continuous sources of ignition (for •...
-
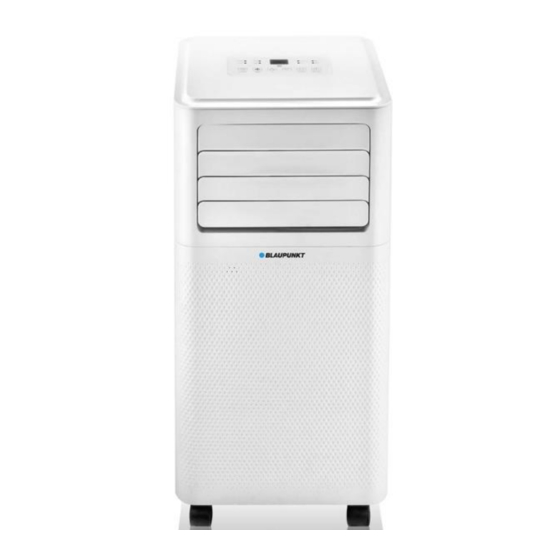
Seite 13: Parts Name
Control panel Intake grille Handle (both side) Power cable Castors Plug fixer Deflector 10. Middle condenser drain Intake grille 11. Condenser drain Air outlet grille 12. USB charging slot Note: USB charging just some mode have this function. ACCESSORIES... -
Seite 14: Installation Instructions
INSTALLATION INSTRUCTIONS EXHAUSTING HOT AIR In the Cool Mode the appliance must be placed close to a Fig. 1 window or opening so that the warm exhaust air can be Extend the side of hose ducked outside. First position unit on a flat floor and make sure there's a minimum of 17.7"... -
Seite 15: Window Slider Kit Installation
WINDOW SLIDER KIT INSTALLATION 1: Parts name: Panel (Second slider may not supplied) Panel with one hole Panel without hole (may not supplied) Screw to lock window kit In place 2: Assembly: Slide Panel B and C Into Panel A and size to widow width. Windows sizes vary. When sizing the window width, be sure that the window kit assembly is free from gaps from gaps and/or air pockets when taking measurements. -
Seite 16: Location
LOCATION INSTALLATION LOCATION The unit should be placed on a firm foundation to minimize noise and vibration. For safe • and secure positioning, place the unit on a smooth, level floor strong enough to support the unit. The unit has casters to aid placement, but it should only be rolled on smooth, flat •... -
Seite 17: Control Panel
CONTROL PANEL The control panel Is on the top of the appliance, enables you to manage part functions • without remote controller. 1. Timer button A. Cool symbol 2. Fan button B. Dehumidify symbol 3. Increase button C. Fan symbol 4. - Seite 18 Never turn the air conditioner off by unplugging from the mains. Always press the • button , then wait for a few minutes before unplugging. This allows the appliance to perform a cycle of checks to verify operation.
-
Seite 19: Cool Mode
COOL MODE Ideal for hot muggy weather when you need to cooling and • dehumidify the room. To set this mode correctly: • Press the “ ” button a number of times until the “Cool” symbol light appears. •... -
Seite 20: Dry Mode
DRY MODE Ideal to reduce room humidity (spring and autumn, damp rooms rainy periods, etc). • Before using the dry mode, the appliance should be prepared in the same way as for cool mode, with the air exhaust hose attached to enable the moisture to be discharged outside. -
Seite 21: Usb Charging Function
Switch the unit of temperature Hold on “A" and ” V” button three seconds by the same time, then you can change the • unit of temperature. For example: • Before change, in cool mode, the screen display like fig1. -
Seite 22: Self-Diagnosis
SELF-DIAGNOSIS The appliance has a self diagnosis system to identify a number of malfunctions. Error • messages are displayed on the appliance display. IF IS DISPLAYED WHAT SHOULD I DO? The appliance Is fitted with a frost protection device to avoid excessive formation of ice. -
Seite 23: Remote Control
REMOTE CONTROL Fan speed button Swing button Sleep button Increase button Decrease button On/Off button Mode button Timer button Unit Switch button NOTE: This serial model have no auto swing function. Point the remote control at the receiver on the appliance. -
Seite 24: Inserting Or Replacing The Batteries
INSERTING OR REPLACING THE BATTERIES Remove the cover on the rear of the remote control; • Insert two "AAA" 1.5V batteries in the correct position (see • instructions inside the battery compartment; NOTE: If the remote control unit is replaced or disposed of, the batteries must be removed and •... - Seite 25 FAN MODE When using the appliance in this mode, the air hose does not need to be attached. • Press the “ ” button a number of times until the “Fan” symbol light appears. • Select the required fan speed by pressing the “...
-
Seite 26: Sleep Function
SLEEP FUNCTION This function is useful for the night as it gradually reduces operation of the appliance. • To set this function correctly: • Select the cool or heat mode as described above. • Press the “ ” button. -
Seite 27: Tips For Correct Use
PROGRAMMING SHUT DOWN Under the running of appliance, please press the button, the screen will display 1-24 • hours. Press several times until the corresponding time is displayed. Wait about 5 seconds, the • timer will be active, then “Timer” symbol is displayed on screen. - Seite 28 Make sure the appliance is standing on a level surface, if necessary, place the castor • locks under the front wheels. do not cover the appliance...
-
Seite 29: Water Drainage Method
WATER DRAINAGE METHOD When there is excess water condensation inside the unit, the appliance stops running • and shows (FULL TANK as mentioned in SELF-DIAGNOSE). This indicates that the water condensation needs to be drained using the following procedures: MANUAL DRAINING (FIG.24) - Seite 30 MIDDLE DRAINAGE When unit running in Dry mode, you can choose the way below to drainage. 1. Unplug the unit from the power source. 2. Remove the drain plug(fig A). While doing this operation some residual water may spill so please have a pan to collect the water.
-
Seite 31: Cleaning
CLEANING Before cleaning or maintenance, turn the appliance off by pressing the button on • the control panel or remote control, wait for a few minutes then unplug from the mains socket. CLEANING THE CABINET You should clean the appliance with a slightly damp cloth then dry with a dry cloth, may not used water to wash appliance. -
Seite 32: Start-End Of Season Operations
START-END OF SEASON OPERATIONS START OF SEASON CHECKS Make sure the power cable and plug are undamaged and the earth system is efficient. Follow the installation instructions precisely. END OF SEASON OPERATIONS To empty the internal circuit completely of water, remove the cap(fig.24). -
Seite 33: Troubleshooting
TROUBLESHOOTING PROBLEM CAUSE SOLUTION The appliance does not There is no current Wait • • come on It Is not plugged Into the mains Plug into the mains • • The internal safety device has Wait 30 minutes, if the •... - Seite 34 The appliance has a self • diagnosis system to Identify a number of malfunctions...
- Seite 35 Mobiles Klimagerät MBS07E BAC-PO-0007-E06M Bedienungsanleitung Mateko Sp. z o.o. ul. Przyleśna 17a PL-05-126 Michałów-Grabina E-Mail: service@mateko.pl www.blaupunkt.com Vielen Dank, dass Sie sich für unser hochwertiges Gerät entschieden haben. Bitte lesen Sie diese Bedienungsanleitung vor der Inbetriebnahme unbedingt sorgfältig durch. Bei Fragen...
-
Seite 36: Wichtige Sicherheitsvorkehrungen
WICHTIGE SICHERHEITSVORKEHRUNGEN Dieses Gerät kann von Kindern ab 8 Jahren sowie von Personen mit eingeschränkten • körperlichen oder geistigen Fähigkeiten oder Mangel an Erfahrung und Wissen verwendet werden, sofern sie beaufsichtigt werden oder in der sicheren Verwendung des Gerätes unterwiesen wurden und die damit verbundenen Gefahren verstehen. - Seite 37 Falls das Netzkabel verschlissen oder beschädigt ist, muss es von einem qualifizierten • Servicetechniker durch ein Originalersatzteil ersetzt werden. Achten Sie darauf, dass der Stecker sicher und richtig in der Steckdose sitzt. Andernfalls • bestehen Stromschlag- und/oder Brandgefahr. Schließen Sie zur Vermeidung von Stromschlaggefahr keine anderen Geräte an dieselbe •...
- Seite 38 Reinigen Sie das Gerät nicht mit Wasser. Wasser könnte in das Gerät gelangen und die • Isolierung überbrücken, was Stromgefahr birgt. Falls Wasser in das Gerät gelangt, ziehen Sie umgehend den Netzstecker und wenden Sie sich an den Kundendienst.
-
Seite 39: Stromanschluss
WICHTIG - ERDUNGSMETHODE Dieses Gerät ist werkseitig mit einem Netzkabel mit Schuko-Stecker ausgestattet. Es muss in Übereinstimmung mit den Niederspannungs- und allen anderen anzuwendenden örtlichen Vorschriften und Verordnungen an eine passende geerdete Steckdose angeschlossen werden. Falls der Stromkreis nicht über eine geerdete Steckdose verfügt, ist der Kunde dafür verantwortlich und dazu verpflichtet, die vorhandene Steckdose entsprechend den... - Seite 40 www.blaupunkt.com...
- Seite 41 SPEZIELLE INFORMATIONEN ZU GERÄTEN MIT DEM KÄLTEMITTEL R290 Bitte lesen Sie alle Warnhinweise aufmerksam durch. • Wenn Sie das Gerät abtauen und reinigen, dürfen Sie nur solche Werkzeuge verwenden, • die vom Hersteller empfohlen werden. Das Gerät muss an einem Ort ohne ständige Zündquellen (offene Flammen, laufende •...
- Seite 42 www.blaupunkt.com...
-
Seite 43: Teilebezeichnung
Bedienfeld Auffangbehälters Griff (an beiden Seiten) Netzkabel Rollen Stopfenhalter Luftauslassgitter 10. Mittlerer Kondensatorablauf Auffangbehälters 11. Kondensatorablauf Abluftgitter 12. USB-Ladeanschluss Hinweis: Nur bei einigen Modellen ist eine USB-Aufladung möglich. ZUBEHÖR TEILE TEILEBEZEICHNUNG ANZAHL Schlaucheinlass Abluftschlauch 1 Satz Schlauchauslass Fensterschieber-Satz 1 Satz... - Seite 44 Hinweis: Alle Abbildungen in dieser Anleitung dienen ausschließlich der Veranschaulichung. Ihr Gerät könnte geringfügig davon abweichen.
-
Seite 45: Installationsanweisungen
INSTALLATIONSANWEISUNGEN ABLEITUNG DER WARMLUFT Im Kühlmodus muss das Gerät in der Nähe eines Fensters Abb. 1 oder einer Öffnung aufgestellt werden, damit die warme Schlauchende ausziehen Abluft nach draußen abgeleitet werden kann. Stellen Sie das Gerät zunächst auf einen ebenen Untergrund und stellen Sie sicher, dass der Abstand rund um das Gerät... - Seite 46 Schneiden Sie nur die dem Loch gegenüberliegende Seite...
-
Seite 47: Fensterschieber-Satz Installieren
FENSTERSCHIEBER-SATZ INSTALLIEREN 1: Teilebezeichnung: Blende (zweiter Schieber möglicherweise nicht im Lieferumfang enthalten) Blende mit einem Loch Blende ohne Loch (möglicherweise nicht im Lieferumfang enthalten) Schraube zur Befestigung des Fenstersatzes 2: Montage: Schieben Sie Blenden B und C über die Blende(n) A und passen Sie sie an die Fensterbreite an. -
Seite 48: Standort
STANDORT AUFSTELLUNGSORT Das Gerät sollte zur Minimierung von Geräuschen und Vibrationen auf einem festen • Untergrund stehen. Platzieren Sie das Gerät für eine sichere Aufstellung auf einem glatten, ebenen Untergrund, der stark genug ist, das Gerät zu tragen. Das Gerät verfügt zur Vereinfachung der Aufstellung über Rollen, sollte jedoch nur auf •... -
Seite 49: Bedienfeld
BEDIENFELD Das Bedienfeld befindet sich an der Oberseite des Gerätes. Damit können Sie das Gerät • Es ermöglicht Ihnen die Steuerung von Funktionen ohne Fernsteuerung bedienen. 1. Timertaste A. Kühlsymbol 2. Gebläsetaste B. Entfeuchtungssymbol 3. Erhöhen-Taste C. Belüftungssymbol 4. Bildschirm D. - Seite 50 Schalten Sie das Klimagerät niemals durch Ziehen des Netzsteckers ab. Drücken Sie • immer die Taste „ “. Warten Sie dann einige Minuten, bevor Sie den Netzstecker ziehen. Dadurch kann das Gerät ein Testprogramm zur Selbstprüfung durchführen. KÜHLMODUS Ideal bei schwül-heißem Wetter, wenn Sie den Raum kühlen und •...
-
Seite 51: Timer Einstellen
ENTFEUCHTUNGSMODUS Ideal zur Verringerung der Raumfeuchtigkeit (Frühling und Herbst, feuchte Räume an • regnerischen Tagen usw.). Vor Verwendung des Entfeuchtungsmodus sollte das Gerät ebenso wie für den Kühlmodus vorbereitet werden. Schließen Sie den Abluftschlauch an, damit die Feuchtigkeit nach draußen abgeführt werden kann. -
Seite 52: Ionisator-Funktion
Temperatureinheit umschalten Halten Sie die Tasten „A“ und „V“ gleichzeitig drei Sekunden lang gedrückt. • Anschließend können Sie die Temperatureinheit ändern. Beispiel: • Vor der Änderung erscheint die Bildschirmanzeige im Kühlmodus wie in Abb. 1. • Nach der Änderung erscheint die Bildschirmanzeige im Kühlmodus wie in Abb. 2. -
Seite 53: Selbstdiagnose
SELBSTDIAGNOSE Das Gerät verfügt über ein Selbstdiagnosesystem zur Identifizierung diverser Störungen. • Die Fehlermeldungen werden am Display des Gerätes angezeigt. FALLS DIES WAS SOLL ICH TUN? ANGEZEIGT WIRD Dank einer Frostschutzvorrichtung wird übermäßige Eisbildung des Gerätes vermieden. Das Gerät startet automatisch... -
Seite 54: Fernbedienung
FERNBEDIENUNG Gebläsegeschwindigkeitstaste Schwenktaste Schlaftaste Erhöhen-Taste Verringern-Taste Ein-/Austaste Modustaste Timertaste Einheitswechsel-Taste HINWEIS: Die Modelle dieses Serie haben keine automatische Schwenkfunktion. Richten Sie die Fernbedienung auf den Empfänger am Gerät. • Die Fernbedienung darf nicht mehr als 7 Meter vom Gerät entfernt sein (ohne •... - Seite 55 Fernbedienung nicht funktioniert, versuchen Sie, die Batterien herauszunehmen und wieder einzulegen.
-
Seite 56: Batterien Einlegen Oder Wechseln
BATTERIEN EINLEGEN ODER WECHSELN Entfernen Sie die Abdeckung an der Rückseite der • Fernbedienung. Legen Sie zwei AAA-Batterien (1,5 V) richtig herum ein (beachten Sie die Markierungen • an der Innenseite des Batteriefachs). HINWEIS: Falls die Fernbedienung ersetzt oder entsorgt wird, müssen die Batterien aufgrund ihrer •... - Seite 57 BELÜFTUNGSMODUS Wenn Sie das Gerät in diesem Modus verwenden, muss der Luftschlauch nicht • angeschlossen sein. Drücken Sie mehrmals die Taste „ “, bis das „Fan“-Symbol aufleuchtet. • Wählen Sie die gewünschte Gebläsegeschwindigkeit mit der Taste „ “. •...
-
Seite 58: Schlaffunktion
SCHLAFFUNKTION Diese Funktion ist nachts praktisch, da Sie den Betrieb des Geräts allmählich reduziert. • So stellen Sie diese Funktion richtig ein: • Wählen Sie, wie oben beschrieben, den Kühl- oder Heizmodus. • Drücken Sie die Taste „ “. -
Seite 59: Temperatureinheit Umschalten
ABSCHALTUNG PROGRAMMIEREN Drücken Sie im Betrieb die Taste „ “, bis der Bildschirm 1 bis 24 Stunden anzeigt. • Drücken Sie die Taste mehrmals, bis die gewünschte Zeit angezeigt wird. Nach ca. 5 • Sekunden Warten wird der Timer aktiv. Anschließend erscheint das „Timer“-Symbol auf dem Bildschirm. - Seite 60 Achten Sie darauf, dass das Gerät auf einem ebenen Untergrund steht. Arretieren Sie • bei Bedarf die Vorderräder.
-
Seite 61: Wasserablauf
WASSERABLAUF Wenn sich übermäßig viel Kondenswasser im Gerät befindet, stellt das Gerät den • Betrieb ein und zeigt (TANK VOLL, wie in SELBSTDIAGNOSE erwähnt) an. Dies zeigt an, dass das Kondenswasser wie folgt abgelassen werden muss: MANUELLES ABLASSEN (ABB. 24) 1. - Seite 62 MITTLERER ABLAUF Wenn das Gerät im Entfeuchtungsmodus arbeitet, können Sie das Wasser wie folgt ablassen. 1. Trennen Sie das Gerät von der Stromversorgung. 2. Entfernen Sie den Ablaufstopfen (Abb. A). Wenn Sie dies im Betrieb tun, könnte etwas Restwasser auslaufen. Stellen Sie daher zum Auffangen des Wassers eine Schale darunter.
- Seite 63 www.blaupunkt.com...
-
Seite 64: Reinigung
REINIGUNG Schalten Sie das Gerät vor Reinigung und Wartung ab, indem Sie die Taste „ “ am • Bedienfeld oder an der Fernbedienung drücken, einige Minuten warten und dann den Netzstecker aus der Steckdose ziehen. GEHÄUSE REINIGEN Sie sollten das Gerät mit einem leicht angefeuchteten Tuch reinigen und anschließend mit einem trockenen Tuch abtrocknen. -
Seite 65: Massnahmen Zu Anfang/Ende Der Saison
MASSNAHMEN ZU ANFANG/ENDE DER SAISON PRÜFUNGEN ZU ANFANG DER SAISON Stellen Sie sicher, dass Netzkabel und Stecker nicht beschädigt sind und das Gerät wirksam geerdet ist. Halten Sie sich präzise an die Installationsanweisungen. MASSNAHMEN ZUM ENDE DER SAISON Entfernen Sie jegliches Wasser im internen Kreislauf, indem Sie die Kappe entfernen (Abb. -
Seite 66: Fehlerbehebung
FEHLERBEHEBUNG PROBLEM URSACHE LÖSUNG Das Gerät schaltet • Es liegt kein Strom an • Warten Sie sich nicht ein • Das Gerät ist nicht an die • Schließen Sie das Gerät an die Stromversorgung angeschlossen Stromversorgung an • Die interne Sicherheitsvorrichtung •... - Seite 67 Folgende Meldung • Das Gerät verfügt über ein • Beachten Sie das Kapitel erscheint am Selbstdiagnosesystem zur SELBSTDIAGNOSE Identifizierung verschiedener Display: Störungen...
-
Seite 68: Instrukcja Obsługi
Klimatyzator przenośny MBS07E BAC-PO-0007-E06M Instrukcja obsługi Mateko Sp. z o.o. ul. Przyleśna 17a PL-05-126 Michałów-Grabina e-mail: service@mateko.pl www.blaupunkt.com Dziękujemy za wybranie naszego urządzenia o wysokiej jakości. Przed użyciem należy dokładnie przeczytać niniejszą instrukcję obsługi. W razie jakichkolwiek pytań prosimy o... -
Seite 69: Bezpieczeństwo
BEZPIECZEŃSTWO To urządzenie może być używane przez dzieci w wieku powyżej 8 lat oraz osoby o • ograniczonych zdolnościach fizycznych, sensorycznych lub umysłowych bądź osoby nieposiadające doświadczenia i wiedzy, o ile zapewniono im nadzór lub instruktaż w zakresie bezpiecznego użytkowania urządzenia i rozumieją związane z tym zagrożenia. - Seite 70 Wtyczka powinna być mocno i dokładnie podłączona do gniazdka. Jest to istotne ze • względu na ryzyko porażenia prądem elektrycznym lub pożaru. Nie podłączać innych urządzeń do tego samego gniazdka, grozi to porażeniem prądem • elektrycznym. Ze względu na ryzyko porażenia prądem elektrycznym lub pożaru nie wolno •...
- Seite 71 Podnoszenie i instalowanie urządzenia powinno być wykonywane przez co najmniej • dwie osoby. Przed użyciem należy się upewnić, że wszystkie akcesoria zostały wyjęte z opakowania.
-
Seite 72: Podłączanie Zasilania
WAŻNE – METODA UZIEMIENIA Produkt ten jest fabrycznie wyposażony w przewód zasilający z wtyczką z trzema bolcami (z uziemieniem). Należy ją podłączyć do odpowiedniego gniazdka z uziemieniem zgodnie z krajowymi przepisami elektrycznymi oraz obowiązującymi miejscowymi przepisami i rozporządzeniami. Jeżeli w obwodzie nie ma gniazdka z uziemieniem, klient jest zobowiązany do wymiany istniejącego gniazdka zgodnie z krajowymi przepisami... - Seite 73 www.blaupunkt.com...
- Seite 74 INFORMACJE DOTYCZĄCE URZĄDZEŃ WYKORZYSTUJĄCYCH GAZOWY CZYNNIK CHŁODNICZY R290 Należy uważnie przeczytać wszystkie ostrzeżenia. • Podczas rozmrażania i czyszczenia urządzenia nie należy stosować narzędzi innych niż • zalecane przez producenta. Urządzenie należy umieścić w przestrzeni wolnej od stałych źródeł zapłonu (na przykład •...
- Seite 75 www.blaupunkt.com...
-
Seite 76: Nazwa Części
Panel kontrolny Kratka wlotowa Uchwyt (z obu stron) Przewód zasilający Kółka samonastawne Mocowanie wtyczki Przegroda kierująca powietrza 10. Środkowy odpływ skraplacza Kratka wlotowa 11. Odpływ skraplacza Kratka wylotu powietrza 12. Gniazdo USB ładowania Uwaga: funkcja ładowania przez USB jest dostępna tylko w niektórych modelach. - Seite 77 Uwaga: wszystkie ilustracje w niniejszym podręczniku mają charakter jedynie poglądowy. Nabyte urządzenie może się nieznacznie różnić.
-
Seite 78: Instrukcje Instalacji
INSTRUKCJE INSTALACJI PROWADZENIE RURY ODPROWADZAJĄCEJ POWIETRZE W trybie chłodzenia urządzenie musi być umieszczone w Rys. 1 Wysunąć stronę rury. pobliżu okna lub otworu, aby umożliwić odprowadzanie ciepłego powietrza wywiewanego na zewnątrz. Najpierw należy ustawić urządzenie na płaskiej podłodze i upewnić... -
Seite 79: Montaż Zestawu Uchwytu Okiennego
MONTAŻ ZESTAWU UCHWYTU OKIENNEGO 1: Nazwa części: Panel (drugi uchwyt może nie być dostarczony) Panel z jednym otworem Panel bez otworu (może nie być dostarczony) Przykręcić zestaw uchwytu okiennego na miejscu 2: Montaż: wsunąć panel B i C w panel A i dopasować do szerokości okna. Rozmiary okien są różne. -
Seite 80: Umiejscowienie
UMIEJSCOWIENIE MIEJSCE INSTALACJI Urządzenie należy umieścić na mocnym podłożu w celu zminimalizowania hałasu i • drgań. W celu zapewnienia bezpiecznego i pewnego ustawienia należy umieścić urządzenie na gładkiej, równej i wystarczająco mocnej podłodze. Urządzenie ma kółka samonastawne ułatwiające ustawianie, ale należy je przetaczać... -
Seite 81: Panel Sterowania
PANEL STEROWANIA Panel sterowania znajduje się na górze urządzenia, umożliwia zarządzanie funkcjami • części bez użycia pilota zdalnego sterowania. 1. Przycisk timera A. Symbol chłodzenia 2. Przycisk wentylatora B. Symbol odwilżania 3. Przycisk zwiększania C. Symbol wentylatora 4. Ekran wyświetlacza D. - Seite 82 Nie wolno wyłączać klimatyzatora, wyjmując wtyczkę z gniazdka. Należy zawsze • nacisnąć przycisk , a następnie zaczekać kilka minut przed wyjęciem wtyczki z gniazdka. Pozwala to urządzeniu na przeprowadzenie cyklu kontroli w celu sprawdzenia działania. TRYB CHŁODZENIA Idealny na gorącą, duszną pogodę, gdy trzeba chłodzić i osuszać...
-
Seite 83: Tryb Osuszania
TRYB OSUSZANIA Idealnie nadaje się do zmniejszania wilgotności w pomieszczeniach (wiosną i jesienią, w • okresach deszczowych, w pomieszczeniach wilgotnych itd.). Przed użyciem trybu osuszania urządzenie należy przygotować w taki sam sposób jak w trybie chłodzenia, z podłączoną rurą odprowadzającą powietrze, aby umożliwić odprowadzanie wilgoci na zewnątrz. -
Seite 84: Funkcja Ładowania Przez Usb
Zmiana jednostki temperatury Przytrzymać jednocześnie przyciski „A” i „V” przez trzy sekundy, następnie można • będzie zmienić jednostkę temperatury. Przykład: • Przed zmianą w trybie chłodzenia ekran wygląda jak na rys. 1. • Po zmianie w trybie chłodzenia ekran wygląda jak na rys. 2. -
Seite 85: Autodiagnostyka
AUTODIAGNOSTYKA Urządzenie jest wyposażone w układ autodiagnostyki umożliwiający identyfikację wielu • usterek. Komunikaty o błędach są wyświetlane na wyświetlaczu urządzenia. WYŚWIETLANY BŁĄD CO NALEŻY ZROBIĆ? Urządzenie jest wyposażone w urządzenie chroniące przed zamarzaniem, zapobiegające nadmiernemu tworzeniu się lodu. Urządzenie samoczynnie NISKA TEMPERATURA uruchamia się... -
Seite 86: Pilot Zdalnego Sterowania
PILOT ZDALNEGO STEROWANIA Przycisk prędkości wentylatora Przycisk funkcji Swing Przycisk funkcji Sleep Przycisk zwiększania Przycisk zmniejszania Przycisk wyłącznika Przycisk trybu Przycisk timera Przycisk zmiany jednostki UWAGA: ten model seryjny nie ma funkcji auto swing. Skierować pilot na odbiornik w urządzeniu. - Seite 87 źródeł ciepła. Jeśli pilot zdalnego sterowania nie działa, należy wyjąć baterię i włożyć ją z powrotem.
-
Seite 88: Wkładanie Lub Wymiana Baterii
WKŁADANIE LUB WYMIANA BATERII Zdjąć pokrywę z tyłu pilota zdalnego sterowania; • Włożyć dwie baterie AAA 1,5 V we właściwej pozycji (patrz • instrukcje w komorze baterii); UWAGA: W przypadku wymiany lub utylizacji pilota zdalnego sterowania baterie należy wyjąć i •... - Seite 89 TRYB WENTYLACJI W tym trybie nie trzeba podłączać rury do urządzenia. • Nacisnąć kilka razy przycisk „ ”, aż zaświeci się dioda symbolu „Fan”. • Wybrać żądaną prędkość wentylatora, naciskając przycisk „ ”. • Dostępne są dwie prędkości: High (duża) / Low (mała) •...
-
Seite 90: Funkcja Sleep
FUNKCJA SLEEP Funkcja ta jest przydatna w nocy, ponieważ stopniowo zmniejsza działanie urządzenia. • Aby prawidłowo ustawić tę funkcję, należy: • Wybrać tryb chłodzenia lub grzania w sposób opisany powyżej. • Nacisnąć przycisk „ ”. • Urządzenie będzie pracować w uprzednio wybranym trybie. -
Seite 91: Porady Dotyczące Prawidłowego Użytkowania
PROGRAMOWANIE WYŁĄCZENIA W trakcie działania urządzenia nacisnąć przycisk , na ekranie zostanie wyświetlony • zakres 1–24 godzin. Naciskać kilkakrotnie, aż zostanie wyświetlony żądany czas. Zaczekać około 5 sekund, • timer zostanie włączony, a następnie na ekranie pojawi się symbol „Timer”. - Seite 92 Nie używać urządzenia na zewnątrz. • Upewnić się, że urządzenie stoi na równej powierzchni. W razie • nie zasłaniać potrzeby umieścić blokady pod przednimi kołami. urządzenia...
-
Seite 93: Metoda Odprowadzania Wody
METODA ODPROWADZANIA WODY W przypadku nadmiernego skraplania się wody wewnątrz urządzenia urządzenie • przestaje pracować i wyświetla komunikat (ZBIORNIK PEŁNY, jak wspomniano w części AUTODIAGNOSTYKA). Wskazuje to, że należy odprowadzić skropliny, wykonując poniższe czynności: RĘCZNE ODPROWADZANIE (RYS. 24) 1. Odłączyć urządzenie od źródła zasilania. - Seite 94 ŚRODKOWY ODPŁYW Gdy urządzenie działa w trybie osuszania, można odprowadzać skropliny w poniższy sposób. 1. Odłączyć urządzenie od źródła zasilania. 2. Wyjąć korek spustowy (rys. A). Podczas tej czynności może rozlać się nieco wody, warto więc podstawić miskę, aby zebrać wodę.
-
Seite 95: Czyszczenie
CZYSZCZENIE Przed czyszczeniem lub konserwacją należy wyłączyć urządzenie, naciskając przycisk • na panelu sterowania lub pilocie zdalnego sterowania, odczekać kilka minut, a następnie wyjąć wtyczkę z gniazdka sieciowego. CZYSZCZENIE OBUDOWY Urządzenie należy czyścić lekko zwilżoną ścierką, a następnie suszyć suchą ścierką. Nie wolno używać... -
Seite 96: Czynności Wykonywane Przed Sezonem I Po Nim
CZYNNOŚCI WYKONYWANE PRZED SEZONEM I PO KONTROLE NA POCZĄTKU SEZONU Upewnić się, że kabel zasilający i wtyczka są nieuszkodzone, a system uziemienia jest sprawny. Ściśle wykonać instrukcje instalacji. CZYNNOŚCI OBSŁUGOWE PO SEZONIE Aby całkowicie opróżnić z wody obwód wewnętrzny, należy wyjąć korek (rys. 24). -
Seite 97: Rozwiązywanie Problemów
ROZWIĄZYWANIE PROBLEMÓW PROBLEM PRZYCZYNA ROZWIĄZANIE Nie można włączyć • Brak prądu • Zaczekać urządzenia • Nie jest podłączone do sieci • Podłączyć do sieci • Zadziałało wewnętrzne urządzenie • Zaczekać 30 minut, jeśli zabezpieczające problem nie ustąpi, skontaktować się z centrum serwisowym Urządzenie działa... - Seite 98 Na wyświetlaczu • Urządzenie jest wyposażone w układ • Patrz rozdział widnieje następujący autodiagnostyki umożliwiający AUTODIAGNOSTYKA. komunikat: identyfikację wielu usterek.