
Verwandte Anleitungen für Blaupunkt Arrifana 12


Inhaltszusammenfassung für Blaupunkt Arrifana 12
- Seite 1 Arrifana 12 Instruction manual Bedienungsanleitung Instrukcja obsługi BAC-PO-0012-E06D...
-
Seite 2: Inhaltsverzeichnis
CONTENTS IMPORTANT SAFEGUARD ............................ 4 DESCRIPTION ................................7 IMPORTANT SAFEGUARD ............................ 9 DESCRIPTION OF THE DISPLAY SCREEN ....................10 OPERATING FROM THE CONTROL PANEL ....................10 SELF-DIAGNOSIS ..............................15 TIPS FOR CORRECT USE ............................ 16 WATER DRAINAGE METHOD .......................... 16 CLEANING.................................. - Seite 3 PRZYGOTOWANIE ..............................69 EKRAN WYŚWIETLACZA ............................ 70 OBSŁUGA PANELU KONTROLNEGO ......................70 AUTO DIAGNOZA ..............................75 PORADY DOTYCZĄCE WŁAŚCIWEGO UŻYTKOWANIA ..............76 USUWANIE WODY ..............................76 CZYSZCZENIE ................................78 CZYNNOŚCI NA POCZĄTEK I KONIEC SEZONU .................. 80 SPECYFIKACJA TECHNICZNA ......................... 80 USUWANIE PROBLEMÓW ..........................
-
Seite 4: Important Safeguard
AUTO-DIAGNOSTIC ............................125 CONSEILS POUR L'UTILISATION CORRECTE..................127 MÉTHODE DE DRAINAGE DE L'EAU ......................127 NETTOYAGE ................... Błąd! Nie zdefiniowano zakładki. OPÉRATIONS DE DEBUT/FIN DE SAISON ..................... 131 DÉPANNAGE ................................133 WEE SIGN ................................140 NOMENCLATURE ..............................140 IMPORTANT SAFEGUARD •... - Seite 5 • Never unplug the appliance by pulling on the power cable. • Do not install the appliance in rooms containing gas, oil or sulphur. Do not install near sources of heat. • Keep the appliance at least 50 cm away from flammable substances (alcohol etc.) or pressurized containers (eg.
-
Seite 6: Electrical Connections
Important information for correct disposal of the product in accordance with EC Directive 2012/19/EU. At the end of its working life, the product must not be disposed of as urban waste. It must be taken to a special local authority differentiated waste collection centre or to a dealer providing the service. - Seite 7 SPECIFIC INFORMATION REGARDING APPLIANCES WITH R290 REFRIGERANT GAS • Thoroughly read all of the warnings. • When defrosting and cleaning the appliance, do not use any tools other than those recommended by the manufacturing company. • The appliance must be placed in an area without any continuous sources of ignition (for example: open flames, gas or electrical appliances in operation).
-
Seite 8: Description
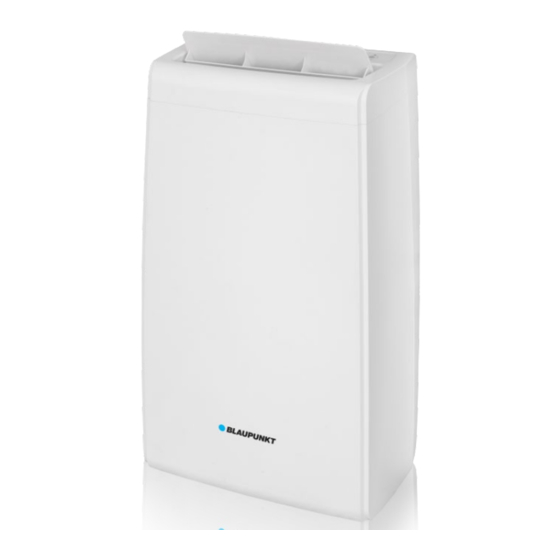
DESCRIPTION Deflector Air outlet grille Display screen Handle Intake grille Castors Control panel Intake grille Air exhaust hose housing 10. Condenser drain 11. Power cable 12. Air Exhaust hose 13. Hose Outlet 14. Stopper or Castor Locks 15. Suckers 16. -
Seite 9: Important Safeguard
IMPORTANT SAFEGUARD The instructions below will enable you to prepare your air conditioner for operation as efficiently as possible. Before use, make sure the air intake and outlet grilles are unobstructed. AIR-CONDITIONING WITHOUT INSTALLATION Just a few simple steps and your comfort is ensured with your appliance: •... -
Seite 10: Description Of The Display Screen
DESCRIPTION OF THE DISPLAY SCREEN 1. COOL symbol 4. TIMER symbol 2. HEAT symbol 5. Temperature symbol 3. FAN speed indicator 6. Temperature indicator OPERATING FROM THE CONTROL PANEL The control panel is on the top of the appliance, enables you to manage part functions without remote controller, but to fully exploit its potential, you must use the remote controller. -
Seite 11: Turning The Appliance On
2. MODE button 5. DECREASE button 3. FAN button TURNING THE APPLIANCE ON Plug into the mains socket, then the appliance is standby. Press the button to make the appliance turn on. The last function active when it was turned off will appear. - Seite 12 The most suitable temperature for the room during the summer varies from 24ºC to 27ºC. You are recommended, however, not to set a temperature much below the outdoor temperature. HEAT MODE (option) • Press the M button a number of times until the symbol appears.
- Seite 13 - In this mode, you may have to wait for a few minutes before the appliance starts giving out hot air. - In this mode, the fan may operate for short periods, even though the set temperature has already been reached.
- Seite 14 • Press the M button a number of times until the symbol appears. • Select the required fan speed by pressing the button. Three speeds are available: Maximum speed: to achieve the target temperature as rapidly as possible. Medium speed: reduces noise levels but still maintains a good level of comfort.
-
Seite 15: Self-Diagnosis
SELF-DIAGNOSIS The appliance has a self diagnosis system to identify a number of malfunctions. Error messages are displayed on the appliance display. IF IS DISPLAYED WHAT SHOULD I DO? The appliance is fitted with a Frost protection device to avoid excessive formation of ice. -
Seite 16: Tips For Correct Use
TIPS FOR CORRECT USE To get the best from your air conditioner, follow these recommendations: • Close the windows and doors in the room to be air conditioned (fig. 1). When installing the air conditioner semi-permanently, you should leave a door slightly open (as little as 1cm) to guarantee correct ventilation. - Seite 17 NOTE As a safety measure, to positively prevent water spillage, the air conditioner is equipped with a fail safe device, if, the water tank fills. The unit will completely stop, the control panel displays “ ” (FULL TANK as mentioned in SELF-DIAGNOSIS), the compressor and fan will nor restart until the tank has been drained.
-
Seite 18: Cleaning
CONTINUOUS DRAINAGE (fig. 6 and fig. 7) When operating in HEAT mode, continuous drain method can also be used to avoid the trouble of manual drainage. • Empty the water tank completely. • Connect one end of the drain hose on the drain outlet, and lead the other end to outdoor or and place where can be drained freely. -
Seite 19: Cleaning The Air Filters
You should clean the appliance with a slightly damp cloth then dry with a dry cloth. Never wash the air conditioner with water. It could be dangerous. Never use petrol, alcohol or solvents to clean the appliance Never spray insecticide liquids or similar. -
Seite 20: Start-End Of Season Operations
START-END OF SEASON OPERATIONS START OF SEASON CHECKS Make sure the power cable and plug are undamaged and the earth system is efficient. Follow the installation instructions precisely. END OF SEASON OPERATIONS To empty the internal circuit completely of water, remove the cap (fig. -
Seite 21: Technical Details
TECHNICAL DETAILS For all technical details see rating label. LIMIT CONDITIONS Cooling: 18ºC-35 ºC (64ºF-95ºF) Temperature of room in air conditioning Heating: 10ºC-25 ºC (50ºF-77ºF) SIZE OF APPLIANCE Width: 435 mm Height: 715 mm Depth: 350 mm... -
Seite 22: Troubleshooting
TROUBLESHOOTING PROBLEM CAUSE SOLUTION • There is no current • Wait The air • It is not plugged into the mains. • Plug into the mains. conditioner does • The internal safety device has • Wait 30 minutes, if not come on. - Seite 23 • The air exhaust hose is detached • Fit the air exhaust from the appliance. hose in the housing • The technical specification of the at the back of the appliance is not adequate for the appliance (fig. 1).
-
Seite 24: Instruction Manual For Remote Control
Instruction Manual for Remote Control Arrifana 12 BAC-PO-0012-E06D... - Seite 25 Buttons function: Swing Sleep Increase Decrease ON/OFF Mode Timer Unit Switch Button • Point the remote control at the receiver on the appliance. The remote control must be not more than 7 meters away from the appliance (without obstacles between the remote control and the receiver).
- Seite 26 Inserting or Replacing the Batteries • Remove the cover on the rear of remote control. • Insert CR2025 3V batteries in the correct position (see instructions inside the battery compartment). • Replace the cover. If the remote control unit is replaced or disposed of, the batteries must be removed and discarded in accordance with current legislation as they are harmful to the environment.
-
Seite 27: Cool Mode
COOL MODE Ideal for hot muggy weather when you need to cooling and dehumidify the room . To set this mode correctly: • Press the button a number of times until the symbol appears. • Select the target temperatue 18~32° C (64-90° F) by pressing the button until the corresponding value is displayed. -
Seite 28: Fan Mode
MODE When using the appliance in this mode, the air hose does not need to be attached. To set this mode correctly please follow instructions: • Press the button a number of times until the symbol appears. • Select the required fan speed by pressing the button. - Seite 29 • Select the required fan speed by pressing the button. Three speeds are available. HIGH MEDIUM • Water is removed from the air and collected in the tank. • When the tank full, the appliance shuts down and (full tank) appears on the display.
-
Seite 30: Dry Mode
MODE Ideal to reduce room humidity (Spring and Autumn, Damp rooms, Rainy seasons etc). In dry mode, the appliance should be prepared in the same way as for cool mode, with the air exhaust hose attached to enable the moisture to be discharged outside. -
Seite 31: Sleep Mode
• Press the button several times, the deflector will stop different positions or swing continuously. The deflecter position SLEEP MODE This function is useful for the night as it gradually reduces operation of the appliance. To set this function correctly please follow below instructions: •... - Seite 32 When sleep function is active, in order to supply more comfort to your sleeping, the set temperature increases conditions by 1°C after 2 hours, and then keeps the same in following period. °C/°F MODE In cooling or heating mode, press the °C/°F button, can change the unit of temperature.
- Seite 33 • Press several times until the corresponding time is displayed. Wait about 5 seconds, the timer will be active, then only the symbol will display on the screen (Fig. 4) • Press again button or the button, the timer will be cancelled, and the symbol will disappear from screen.
- Seite 34 Programming start down • Press the button, the screen will display 1~24 hours, and several symbols are flash together. (Fig. 5) • Press several times until the corresponding time is displayed. Wait about 5 seconds, the timer will be active. Then only the symbol will displayed on screen.
- Seite 35 Mobiles Klimagerät Arrifana 12 BAC-PO-0012-E06D Bedienungsanleitung Mateko Sp. z o.o. ul. Przyleśna 17a Michałów-Grabina 05-126 Nieporęt e-mail:service@mateko.pl...
-
Seite 36: Sicherheitshinweise
SICHERHEITSHINWEISE HOTLINE/SERVICETELEFON 00 800 888 00 444 Bedienungsanleitung und Warnhinweise 1. Bevor Gerät in Betrieb nehmen, lesen Sie bitte diese Bedienungsanleitung für Ihre Sicherheit sorgfältig und vollständig durch. Lesen und beachten Sie alle Warnhinweise auf dem Gerät und in der Bedienungsanleitung. - Seite 37 7. Auf keinen Fall installieren Sie das Gerät in einem Raum, wo sich Gas, Öl oder Schwefel befinden können. Installieren Sie das Gerät nicht in der nähe von Wärmequellen. 8. Halten Sie das Gerät mindestens 50 cm fern von brennbaren Stoffen (z. B.
- Seite 38 15. Überprüfen regelmäßig Netzstecker (das Netzkabel) Beschädigungen. Ist der Netzstecker (das Netzkabel) beschädigt, sollen Sie das Gerät auf keinen Fall einschalten und bedienen. In solchen Fällen wenden Sie sich an einen qualifizierten Service-Techniker oder an den Lieferanten dieses Gerätes. Wenn der Netzstecker (das Netzkabel) beschädigt ist, versuchen Sie niemals das Gerät an eine andere Stromquelle anzuschließen, weil Sie dadurch...
- Seite 39 Sie niemals irgendwelche Flüssigkeiten direkt aufs Gerätegehäuse. Dabei besteht Brand- und Stromschlaggefahr 23. Wenn das Gerät nicht ordnungsgemäß funktioniert, stellen Sie nur diese Bedienelemente ein, die in der Bedienungsanleitung benannt werden. Wenn Sie andere Bedienelemente unsachgemäß einstellen, können Sie das Gerät beschädigen.
-
Seite 40: Seriennummer
29. Vor der Reinigung schalten Sie das Gerät aus und trennen Sie es vom Stromnetz. Auf diese Weise beugen Sie dem Brand oder der Gefahr des elektrischen Stromschlags vor. 30. Reinigen Sie den Luftfilter mindestens einmal pro Woche. 31. Das Gerät soll immer senkrecht und liegend auf einer Seite transportiert werden. - Seite 41 Stellen entsorgt werden. 3. Mit der ordnungsgemäßen Entsorgung von Elektro- und Elektronik-Altgeräten, vermeiden Sie Umweltschäden und schützen Sie Ihre Gesundheit. 4. Weitere Informationen zur Entsorgung von Elektro- und Elektronik-Altgeräten erhalten Sie bei Ihrer Gemeindeverwaltung oder im Fachgeschäft, wo Sie das Gerät erworben haben.
-
Seite 42: Entsorgung Von Batterien
Batterien sollen nicht gemeinsam mit Metallgegenständen aufbewahrt oder getragen werden. Dies kann Kurzschluss, Auslaufen oder Explosion verursachen. 9. Unsachgemäße Installation Batterien kann Auslaufen Korrosionsschäden verursachen. 10. Wenn Batterien auslaufen, wischen Sie die Flüssigkeit aus dem Batteriefach ab. Anschließend tauschen Sie die Batterien aus. VORSICHT! Batterieflüssigkeit kann Hautausschlag verursachen. -
Seite 43: Produktbeschreibung
PRODUKTBESCHREIBUNG Luftauslassgitter Luftaustrittsgitter Display Griffe Lufteintrittsgitter Rollen Bedienfeld Filter Abluftschlaucheingang Kondenswasserabfluss Netzkabel Abluftschauch Fensterausgang Schlaucheinlass Rollenblockade Saugkopf Verlängerbare Querträger Ablaufwanne Ablaufschlauch Fernbedienung Strona 42 instrukcji MBS1111E, MBS1111T, MBS1111TB... -
Seite 44: Inbetriebnahme
INBETRIEBNAHME Klimagerät vorläufig installieren Die folgenden Anweisungen erklären, wie das Klimagerät so effizient wie möglich für den Betrieb vorbereitet werden soll. Bevor Sie das Gerät zu benutzen anfangen, stellen Sie sicher, dass die Luftauslassgitter und Lufteintrittsgitter nicht versperrt werden. Mit ein paar einfachen Schritten, können Sie das Gerät nutzen um sich gemütlich zu machen:... -
Seite 45: Bedienfeld - Funktionstasten
BEDIENFELD - Funktionstasten 1. COOL: Kühlsymbol 4. TIMER: Timer-Symbol 2. HEAT: Heizsymbol 5. Temperatur-Symbol 3. FAN: Lüftungssymbol 6. Temperaturanzeige BETRIEB MIT DEM BEDIENFELD Mit dem Bedienfeld können Sie alle Hauptfunktion des Klimagerätes bedienen. Um das ganze Potential des Gerätes auszuschöpfen, sollen Sie jedoch die mitgelieferte... -
Seite 46: Um Das Klimagerät Einzuschalten
1. Taste ON/OFF 4. Taste Senkung 2. Taste MODE 5. Taste Steigerung 3. Taste FAN UM DAS KLIMAGERÄT EINZUSCHALTEN 1. Schließen Sie den Netzstecker an eine Netzsteckdose an. Auf dem Display des Gerätes erscheinen zwei Linien, die zeigen, dass sich das Klimagerät im Standby-Betriebsmodus befindet. - Seite 47 • Stellen Sie die gewünschte Lüftergeschwindigkeit ein, indem Sie die Taste FAN drücken. Es stehen Ihnen 4 Geschwindigkeitsstufen zur Verfügung: MAXIMUM SPEED (Höchstgeschwindigkeit): Wählen Sie diese Option, um die Solltemperatur so schnell wie möglich zu erreichen. MEDIUM SPEED (mittlere Geschwindigkeit): Wählen Sie diese Option, um den Geräuschpegel zu verringern.
- Seite 48 • In diesem Betriebsmodus wird die Lüftergeschwindigkeit automatisch vom Klimagerät eingestellt. Sie können die Lüftergeschwindigkeit nicht manuell einstellen. • Wasser wird von der Luft entfernt und im Behälter gesammelt. • Wenn der Behälter voll ist, schaltet das Klimagerät automatisch aus. Auf dem Display erscheint die Meldung (voller Behälter).
- Seite 49 Um den Lüftungsbetriebsmodus einzustellen: • Drücken Sie die Betriebsmodus-Taste MODE wiederholt, bis Sie die Betriebsmodusoption FAN gewählt haben. Das Entfeuchtungssymbol erscheint auf dem Display. • Wählen Sie die gewünschte Lüftergeschwindigkeit, indem Sie die Taste FAN drücken. Es stehen Ihnen drei Geschwindigkeitsoptionen zur Verfügung.
- Seite 50 Feuchtigkeit nach außen abzuführen. Um den Entfeuchtungsbetriebsmodus einzustellen: • Drücken Sie die Betriebsmodus-Taste MODE wiederholt, bis Sie die Betriebsmodusoption DRY gewählt haben. Das Entfeuchtungssymbol erscheint auf dem Display. • In diesem Betriebsmodus wird die Lüftergeschwindigkeit automatisch vom Klimagerät eingestellt.
-
Seite 51: Selbstdiagnose
SELBSTDIAGNOSE Das Klimagerät ist mit einem Selbstdiagnosesystem ausgestattet, um die Fehlfunktionen und Störungen zu erkennen. Die Fehleranzeigen werden auf dem Display des Klimagerätes eingeblendet. Wenn angezeigt Was soll ich tun? Das Gerät ist mit einer Frostschutzfunktion ausgestattet. Dadurch wird vermieden, dass Niedrige Temperatur sich übermäßiges Eis auf dem Gerät bildet. -
Seite 52: Anweisungen Zur Richtigen Benutzung Des Klimagerätes
ANWEISUNGEN ZUR RICHTIGEN BENUTZUNG DES KLIMAGERÄTES Um das Beste aus dem Klimagerät herauszuholen, befolgen Sie die folgenden Empfehlungen: • Schließen Sie alle Fenster und Türen im Raum zu, wo Sie das Klimagerät benutzen (Abb. 1). Wenn Sie das Gerät auf Dauer installieren, sollen Sie die Tür leicht geöffnet... -
Seite 53: Entwässerungsmethoden
ENTWÄSSERUNGSMETHODEN Dieses Klimagerät ist mit der letzten MIST-Technologie ausgestattet. Diese bedeutet, dass der Wasserbehälter fast niemals vollständig gefüllt wird. Daher wird die Entleerung des Behälters im Allgemeinen nur am Ende der jeweiligen Jahreszeit notwendig sein (dazu sehen Sie das Kapitel „Ende des Jahreszeitbetriebs“. -
Seite 54: Ständige Entwässerung
• Schalten Sie das Klimagerät wieder ein, indem Sie den Netzschalter ON/OFF drücken. Stellen Sie sicher, dass sich das Gerät im Betriebsmodus COOL (Kühlung), DRY (Entfeuchtung) oder HEAT befindet. Der Kompressor wird ungefähr nach 3 Minuten starten nachdem Sie das Klimagerät eingeschaltet haben. -
Seite 55: Reinigung
REINIGUNG Bevor Sie das Klimagerät zu reinigen oder zu warten anfangen, schalten Sie es aus, indem Sie die Taste auf dem Bedienfeld oder die Taste ON/OFF auf der Fernbedienung drücken. Danach warten Sie ein paar Minuten ab und trennen Sie das Gerät von der Netzsteckdose. - Seite 56 40 C sein. 4. Nach dem Waschen trocknen Sie den Luftfilter und danach schließen Sie ihn an das Lufteintrittsgitter des Klimagerätes wieder an.
-
Seite 57: Anfang Und Ende Des Jahreszeitbetriebs
ANFANG UND ENDE DES JAHRESZEITBETRIEBS Am Anfang des Jahreszeitbetriebs: 1. Stellen Sie sicher, dass das Netzkabel und der Netzstecker nicht beschädigt sind sowie das Erdungssystem effizient funktioniert. 2. Befolgen Sie präzis die Installationsanweisungen. Am Ende des Jahreszeitbetriebs: 1. Lassen Sie das Wasser aus dem internen Kreislauf vollständig ab und entfernen Sie die... -
Seite 58: Technische Spezifikations
TECHNISCHE SPEZIFIKATIONS Für alle technischen Details siehe Typenschild. Rahmenbedingungen Raumtemperatur (Kühlung): 18ºC-35 ºC (64ºF-95ºF) Raumtemperatur (Heizung): 10ºC-25 ºC (50ºF-77ºF) SIZE OF APPLIANCE Breite: 435 mm Höhe: 715 mm Tiefe: 350 mm... -
Seite 59: Fehlerbehebung
FEHLERBEHEBUNG Bevor Sie sich mit unserem Service in Verbindung setzen, prüfen Sie bitte, ob sich der Fehler anhand von untenstehenden Hinweisen beheben lässt. Erst wenn das nicht der Fall ist, wenden Sie sich an unseren Service. Störungen werden meistens nicht durch technische Mängel oder Defekte des Gerätes verursacht, sondern durch Bedienungsfehler, deswegen sind sie leicht zu... - Seite 60 • Warten Sie 30 Min. ab. • Die interne Wenn das Problem Sicherheitseinrichtung weiter besteht, setzen schaltet sich nicht ein. Sie sich in Verbindung mit dem Service-Center. • Es gibt Biegungen im • Legen Sie den Das Klimagerät arbeitet nur für...
- Seite 61 • Abluftschlauch ist abgetrennt • Schließen Sie den vom Gerät. Abluftschlauch an die • Die technische Spezifikation Rückseite des Gerätes des Klimagerätes ist nicht an (Abb. 1) geeignet für das Zimmer, wo sich das Gerät befindet. • Luftfilter ist verstopft.
-
Seite 62: Instrukcja Obsługi
Klimatyzator Przenośny Arrifana 12 BAC-PO-0012-E06D Instrukcja Obsługi Mateko Sp. z o.o. ul. Przyleśna 17a Michałów-Grabina 05-126 Nieporęt e-mail:service@mateko.pl... -
Seite 63: Przepisy I Zasady Bezpieczeństwa
3. Wszystkie produkty marki Blaupunkt są starannie testowane przed sprzedażą. Po rozpakowaniu urządzenia należy sprawdzić, czy w dostarczonym zestawie znajdują się wszystkie jego części i akcesoria. W przypadku stwierdzenia uszkodzeń... - Seite 64 6. Konieczne jest, aby urządzenie podłączyć do wydajnego systemu uziemienia. To oznacza, że gniazdko sieciowe, do którego podłączone jest urządzenie, powinno być połączone z systemem uziemiania. Elektryczny obieg prądu, do którego podłączone...
- Seite 65 Urządzenia nie powinny obsługiwać osoby, które nie posiadają odpowiedniej wiedzy na jego temat i nie zapoznały się z instrukcją obsługi. Dotyczy to w szczególności dzieci. 12. Aby podczas chłodzenia jak najszybciej osiągnąć docelową temperaturę, należy w klimatyzowanym pomieszczeniu zamknąć drzwi i okna oraz do minimum ograniczyć...
- Seite 66 16. Urządzenie należy czyścić suchą i miękką ścierką. Jeżeli obudowa urządzenia jest mocno zabrudzona, można użyć ścierki nasączonej domowym środkiem czystości.
-
Seite 67: Opis Urządzenia
Informacje dotyczące urządzeń wykorzystujących gazowy czynnik chłodniczy: R290 • Uważnie przeczytaj wszystkie ostrzeżenia. • Podczas rozmrażania i czyszczenia urządzenia nie stosuj narzędzi innych niż zalecane przez producenta. • Urządzenie należy umieścić w przestrzeni wolnej od stałych źródeł zapłonu (na przykład: otwartego ognia, działających urządzeń... - Seite 68 Pokrywa Grill wylotu powietrza Wyświetlacz Uchwyt Grill wlotu powietrza Kółka Panel sterujący Grill wlotu powietrza Wejście rury odprowadzającej powietrze 10. Odpływ wody 11. Przewód zasilający 12. Rura odprowadzająca powietrze 13. Okienna dysza wylotowa 14. Dysza wlotowa 15. Blokada kółek 16.
-
Seite 69: Przygotowanie
PRZYGOTOWANIE Poniższa instrukcja pomoże ci przygotować klimatyzator do pracy z maksymalną możliwą wydajnością. Przed uruchomieniem upewnij się, że zwrot powietrza oraz grill kratki wylotowej nie są zatkane. KLIMATYZATOR BEZ INSTALACJI Wystarczy kilka prostych kroków, aby poprawić komfort użytkowania: • Zamontuj rurę odprowadzającą powietrze z tyłu urządzenia (rys. -
Seite 70: Ekran Wyświetlacza
EKRAN WYŚWIETLACZA 1. Chłodzenie 4. Timer 2. Grzanie 5. Jednostka temperatury 3. Wentylacja 6. Temperatura OBSŁUGA PANELU KONTROLNEGO Panel kontrolny znajdujący się na górze urządzenia, pozwala korzystać z niektórych funkcji bez użycia pilota. Tylko dzięki pilotowi można korzystać ze wszystkich funkcji. -
Seite 71: Włączanie Urządzenia
1. Przycisk Włącz/Wyłącz 4. Przycisk zwiększania 2. Przycisk Trybu pracy 5. Przycisk zmniejszania 3. Przycisk wentylacji WŁĄCZANIE URZĄDZENIA Podłącz wtyczkę urządzenia do kontaktu, urządzenie będzie w trybie stand-by. Naciśnij przycisk aby włączyć urządzenie. Aktywny będzie tryb pracy, w jakim urządzenie zostało wyłączone. - Seite 72 Najbardziej optymalna temperatura pokojowa podczas lata to od 24ºC do 27ºC. Zaleca się, aby nie ustawiać temperatury dużo niższej niż temperatura na zewnątrz. TRYB GRZANIA (opcja model BAC-PO-1011-E06D) • Wcisnąć przycisk M tyle razy, aż na wyświetlaczu pojawi się symbol •...
- Seite 73 - W tym trybie pracy, wentylator może działać z krótkimi przerwami, nawet, jeżeli zadana temperatura została osiągnięta. TRYB WENTYLACJI Gdy używasz urządzenia w tym trybie pracy, rura odprowadzająca powietrze nie musi być zamontowana. Aby ustawić tryb wentylacji należy: • Wcisnąć przycisk M tyle razy, aż na wyświetlaczu pojawi się...
- Seite 74 Maksymalna prędkość: dla osiągnięcia żądanej temperatury najszybciej jak to możliwe. Średnia prędkość: zmniejsza poziom hałasu generowany przez wentylator, ale nadal pozwala zachować wysoki poziom komfortu. Niska prędkość: dla cichej pracy. Zmiana jednostek temperatury Jeżeli urządzenie jest w trybie stand-by, wciśnij przycisk M przez 20 sekund, aby zmienić...
-
Seite 75: Auto Diagnoza
AUTO DIAGNOZA Urządzenie posiada system auto diagnostyki do identyfikowania błędów. Błedy są wyświetlane w postaci kodu błędu na wyświetlaczu urządzenia. Jeżeli na CO NALEŻY ZROBIĆ? wyświetlaczu jest: Urządzenie jest wyposażone w zabezpieczenie przed zamarzaniem, które chroni klimatyzator przed nadmiernym gromadzeniem się lodu. -
Seite 76: Porady Dotyczące Właściwego Użytkowania
PORADY DOTYCZĄCE WŁAŚCIWEGO UŻYTKOWANIA klimatyzator działał najsprawniej, należy zastosować się do poniższych wskazówek: • Wszystkie drzwi i okna w pomieszczeniu, w którym znajduje się klimatyzator powinny być zamknięte (rys. 1). Jeżeli klimatyzator jest zawsze samym pomieszczeniu, należy zostawić uchylone drzwi (na ok. 1 cm) w celu zapewnienia poprawnej wentylacji. - Seite 77 UWAGA! Ze względów bezpieczeństwa, aby zapobiec rozlaniu wody, klimatyzator został wyposażony w zabezpieczenie, które zatrzyma pracę urządzenia, jeżeli zbiornik na skropliny jest pełny. W tym przypadku na wyświetlaczu pojawi się symbol “ ” (PEŁNY ZBIORNIK jak wspomniano w dziale AUTO DIAGNOZA), a kompresor i wentylator nie uruchomi się...
-
Seite 78: Czyszczenie
• Całkowicie opróżnić zbiornik na wodę. • Jeden koniec węża odpływowego podłącz do rury odpływowej, a drugi odprowadź na zewnątrz bądź do miejsca gdzie można odprowadzić wodę. • Włącz urządzenie w trybie grzania. UWAGA! Należy upewnić się, aby wąż odpływowy był zamontowany ze spadkiem. W przeciwnym wypadku zbiornik na wodę... - Seite 79 Filtr skraplacza składa się z dwóch części. Krok 1: Zdejmij filtr jak na rys. 9. Krok 2: Zdejmij pozostały filtr jak na rys. 10-11. Użyj odkurzacza, aby usunąć zanieczyszczenia nagromadzone na filtrze. Jeżeli jest bardzo brudny, kilkukrotnie zanurz go w ciepłej wodzie. Woda nie może być...
-
Seite 80: Czynności Na Początek I Koniec Sezonu
CZYNNOŚCI NA POCZĄTEK I KONIEC SEZONU SPRAWDZANIE NA POCZĄTKU SEZONU Upewnij się, że przewód zasilający I wtyczka nie są uszkodzone, a uziemienie działa poprawnie. Postępuj zgodnie z instrukcją. CZYNNOŚCI NA KONIEC SEZONU Całkowicie opróżnij zbiornik na wodę przez wyjęcia zatyczki odpływu I wylanie wody. -
Seite 81: Usuwanie Problemów
USUWANIE PROBLEMÓW PROBLEM PRZYCZYNA ROZWIĄZANIE • Nie ma prądu. • Poczekaj. Klimatyzator nie • Wtyczka nie jest podłączona. • Podłącz wtyczkę. włącza się. • Bezpiecznik jest wyłączony. • Poczekaj 30 minut, włącz bezpiecznik, jeżeli problem nie ustąpił skontaktuj się z serwisem. - Seite 82 • Zanieczyszczony filtr powietrza. • Wyczyść filtr Podczas pracy wyczuwalny jest powietrza. dziwny zapach w pomieszczeniu. • Wewnętrzne zabezpieczenie • Zaczekaj, jest to Klimatyzator nie rozpoczął pracy zadziałało nie pozwalając normalne. po ok. 3 minutach kompresorowi rozpoczęcie pracy...
-
Seite 83: Instrukcja Obsługi Dla Pilota
Instrukcja obsługi dla pilota Arrifana 12 BAC-PO-0012-E06D... - Seite 84 Przyciski funkcyjne: Wentylator (nawiew) Funkcja SWING Tryb Sleep Zwiększ Zmniejsz WŁĄCZ/WYŁĄCZ Przelączanie trybów Timer Zamiana jednostek temp. • Skieruj pilot na odbiornik na obudowie. Pilot nie może znajdować się dalej niż 7 metrów od jednostki (Bez jakichkolwiek przeszkód pomiędzy pilotem, a jednostką).
- Seite 85 Wkładanie lub wymiana baterii • Zdejmij osłonę z tyłu pilota. • Włóż baterię CR2025 3V w poprawnej pozycji (zobacz instrukcję w komorze baterii). • Włóż oslonę. Jeśli pilot jednostki został wymieniony lub zniszczony, baterie muszą zostać wyjęte i zutylizowane zgodnie z obowiązującymi przepisami, ponieważ są one szkodliwe dla środowiska.
- Seite 86 TRYB CHŁODZENIA Idealny na gorącą, duszną pogodę, kiedy potrzebujesz schłodzić i osuszyć pomieszczenie. Aby ustawić ten tryb należy: • Wciskaj przycisk tak długo aż na wyświetlaczu pojawi się symbol • Ustaw wyznaczoną temperaturę z zakresu 18~32° C (64-90° F) poprzez wciskanie aż...
- Seite 87 TRYB NADMUCHU Kiedy używasz urządzenia w tym trybie, rura odprowadzająca powietrze nie musi być zamontowana. By ustawić poprawnie ten tryb podążaj według poniższej instrukcji: • Wciskaj przycisk tak długo aż na wyświetlaczu pojawi się symbol • Ustaw wymaganą prędkość poprzec wciskanie przycisku .
- Seite 88 • Ustaw prędkość poprzec wciskanie przycisku . Istnieją trzy możliwe prędkości. WYSOKA ŚREDNIA NISKA • Wilgoć jest usuwana z powietrza i gromadzona w zbiorniku. • Kiedy zbiornik jest pełny, urządzenie wyłącza się a na wyświetlaczu pojawia się znak (full tank) appears on the display. Należy usunąć...
-
Seite 89: Tryb Osuszania
TRYB OSUSZANIA Idealny do redukcji poziomu wilgoci w pomieszczeniu (wiosna i jesień, wilgotne pomieszczenia, sezon deszczowy itp.) W trybie osuszania, urządzenie powinno zostać przygotowane w ten sam sposób, co w trybie chłodzenia, z rurą odprowadzającą gorące powietrze i możliwością odprowadzania wilgoci na zewnątrz. - Seite 90 • Wybrać jeden z trybów pracy (chłodzenie, osuszanie, nadmuch, grzanie) jak opisano wyżej. • Wciśnij przycisk kilkakrotnie, deflektor będzie zatrzymywał się w różnych pozycjach lub zmieniał kierunek nadmuchu. Pozycje deflektora TRYB Funkcja jest przydatna w nocy która stopniowo zmniejsza działanie urządzenia. Aby poprawnie ustawić...
- Seite 91 Kiedy funkcja SLEEP jest aktywna, w celu utrzymania komfortu dla twojego snu, nastawiona temperatura zwiększa parametr o 1°C co 2 godziny, i utrzymuje się przez ten okres czasu.
- Seite 92 • Ustaw odpowiedni czas a następnie poczekaj około 5 sekund, aż regulator czasu zostanie aktywowany, wtedy tylko symbol będzie wyświetlany na ekranie (Fig 4). • Wciśnij ponownie przycisk , regulator czasu zostanie wyłączony, a symbol zniknie z wyświetlacza. Rys. 3 Rys.
- Seite 93 Wciśnij ponownie przycisk regulator zostanie wyłączony, a symbol zniknie z wyświetlacza. (Rys. 7). Rys. 5 Rys. 6 Rys. 7 Dziękujemy za wybór naszego klimatyzatora. Pamiętaj, aby przeczytać instrukcję przed użyciem. Jakiekolwiek pytania proszę kierować bezpośrednio do profesjonalnego serwisu. Condizionatore Portatile Arrifana 12...
- Seite 94 BAC-PO-0012-E06D Vaco Arrifana VAC12W VAC-PO-0012-E06W Manuale di instruzione Mateko Sp. z o.o. ul. Przyleśna 17a Michałów-Grabina 05-126 Nieporęt e-mail:service@mateko.pl...
-
Seite 95: Misure Di Sicurezza
MISURE DI SICUREZZA PRECAUZIONI DI SICUREZZA • Utilizzare quell’apparecchio solo come indicato in questo manuale di istruzioni. Queste istruzioni non intendono coprire ogni possibile condizione e situazione che può presentarsi. Bisogna sempre far ricorso al buon senso e alla prudenza nell’installazione,... - Seite 96 • Evitate di utilizzare apparecchi di riscaldamento in prossimità del climatizzatore. • In caso di trasporto, l’apparecchio deve restare in posizione verticale o adagiato su un fianco. Prima di un trasporto rimuovere completamente l’acqua contenuta all’interno dell’apparecchio. Dopo un trasporto, attendete almeno 1 ora prima di avviare l’apparecchio.
-
Seite 97: Collegamenti Elettrici
Important information for correct disposal of the product in accordance with EC Directive 2002/96/EC. Alla fine della sua vita utile questo apparecchio non può essere smaltito insieme ai rifiuti domestici. Deve essere consegnato presso appositi centri di raccolta differenziata oppure presso i... -
Seite 98: Description
DESCRIPTION Deflettore Griglia di uscita aria Scermo Maniglia Griglia aspirazione aria Rotelle Pannello comandi Griglia aspirazione aria Tubo flessibile di espulsione aria 10. Scarico continuo condensa 11. Cavo di alimentazione 12. Tubo di scarico aria 13. Uscita tubo 14. Entrata tubo 15. -
Seite 99: Predisposizione All'uso
PREDISPOSIZIONE ALL’USO Di seguito troverete tutte le indicazioni necessarie per predisporre al meglio il funzionamento del vostro climatizzatore. L’apparecchio deve essere sempre posto in uso facendo attenzione che non ci siano ostacoli per l’entrata e l’uscita dell’aria. CLIMATIZZAZIONE SENZA INSTALLAZIONE... -
Seite 100: Descrizzione Del Scermo
DESCRIZZIONE DEL SCERMO 1. Simbolo raffreddamento 4. Simbolo timer 2. Simbolo riscaldamento 5. Simbolo temperatura 3.Indicatore velocità di ventilazione 6. Indicatore temperatura FUNZIONAMENTO DA PANELLO DI CONTROLLO Il pannello di controllo si trova sul lato superiore dell’ apparecchio, permette di gestire le principali funzioni dell’apparecchio ma per sfruttare completamente tutte... -
Seite 101: Accensione Dell'apparecchio
1. Pulsante ON/OFF 4. Tasto incremento 2.Pulsante MODE 5. Tasto decremento 3. Pulsante FAN ACCENSIONE DELL’APPARECCHIO Inserire la spina nella presa di corrente, l’apparecchio è in stand-by. Premere quindi il tasto fino all’accensione dell’apparecchio, apparirà l’ultima funzione attiva al momento dello spegnimento. -
Seite 102: Modalità Riscaldamento
Le temperature più adatte all’ambiente nel periodo estivo variano da 24ºC a 27ºC. Comunque non è consiliabile impostare temperature molto inferiori rispetto a quelle esterne. MODALITÀ RISCALDAMENTO • Premere ripetutamente il tasto M finchè appare il simbolo riscaldamento • Selezionare la temperatura da raggiungere 13~27ºC (55~81ºF) premendo il tasto... - Seite 103 - In questa modalità potrebbe essere necessario aspettare alcuni minuti prima che l’apparecchio cominci ad emettere l’aria calda -In questa modalità il ventilatore può operare solo per i brevi periodi anche se la temperatura preregolata è stata già raggiunta.
- Seite 104 Per impostare correttamente questa modalità: Press the symbol appears. • Premere ripetutamente il tasto M finchè appare il simbolo • Selezionare la velocità di ventilazione desiderata premendo il tasto Le velocità disponibili sono: Velocità massima: per raggiungere il più velocemente possibile la temperatura desiderata.
-
Seite 105: Autodiagnosi
AUTODIAGNOSI Questo apparecchio e dotato di un sistema di autodiagnosi per identificare alcune anomalie di funzionamento. I codici errori vengono riportati sul scermo dell’apparecchio. SE SULLO SCERMO APPARE COSA FARE? L’apparecchio possiede un dispositivo di sbrinamento che evita l’eccessiva formazione di ghiaccio. L'unità ritorna automaticamente alla TEMPERATURA BASSA modalità... -
Seite 106: Consigli Per Un Utilizzo Corretto
CONSIGLI PER UN UTILIZZO CORRETTO Ci sono alcune avvertenze da seguire per ottenere il Massimo rendimento dal climatizzatore: • Chiudete i serramenti dell’ambiente da climatizzare (fig.1). Nel caso di installazione semi-permanente, vi consigliamo, però, di lasciare leggermente aperta una porta (anche solo di 1 cm) per garantire il giusto ricambio dell'aria;... - Seite 107 NOTARE Come la precauzione di sicurezza, per prevenire lo spillamento dell’acqua, il condizionatore dell’aria è dodato di un dispositivo di sicurezza se la vasca si riempisce. L’unità si fermerà completamente e il pannello comandi visualizzerà...
- Seite 108 DRENAGGIO CONTINUO (fig. 6 e fig. 7) Quando l’apparecchio funziona in modalità riscaldamento si può usare anche un metodo di drenaggio continuo per evitare le difficoltà per quanto riguarda il drenaggio manuale. • Svuotate la vasca di scarico. • Collegate l’ e stremità del tubo di scarico alla valvola di drenaggio e prendete l’altra parte del tubo all’...
-
Seite 109: Pulizia
PULIZIA Prima di ogni operazione di pulizia o di manutenzione, spegnete l’apparecchio premendo il tasto sul pannello di controllo o sul telecomando, attendete alcuni minuti e quindi staccate la spina dalla presa di corrente.. PULIZIA DEL MOBILE ESTERNO Pulite l’apparecchio con un panno che sia soltanto inumidito ed asciugate con un panno asciutto. -
Seite 110: Operazioni Di Inizio E Fine Stagione
Il filtro della condensa e di due pezzi. Primo passo – estrarre un filtro come in fig.9. Secondo passo – estrarre il secondo filtro come in fig.10-11. Togliere la polvere depositata sul filtro utilizzare un aspirapolvere. Se il filtro è molto sporco immergerlo in acqua tiepida risciacquando più... -
Seite 111: Caratteristiche Tecniche
Osservate scrupolosamente le norme di installazione. OPERAZIONI DI FINE STAGIONE Per svuotare completamente dall'acqua il circuito interno, rimuovere il tappo (figura 12). Lasciare defluire completamente l’acqua residua in una bacinella. -
Seite 112: Se Qualcosa Non Funziona
SE QUALCOSA NON FUNZIONA PROBLEMI CAUSE RIMEDI • Manca la corrente . • Attendere Il condizionatore • La spina non è inserita. • Inserire la spina non funziona. • Un dispositivo interno di • Aspettare 30 minuti, sicurezza ha sbagliato. - Seite 113 • Qualcosa ostacola l’emissione • Controllare e dell’aria. rimouvere gli ostacoli che impedino l’ e missione dell’aria • Le finestre, la porta o le tende • Chiudere la porta, le Il condizionatore funziona ma non sono aperte. finestre, le tende...
- Seite 114 • L’aparecchio è dotato di un • Vedete il capitolo Il seguente messagio si sistema di auto diagnosi per AUTO DIAGNOSI visualizza sul...
- Seite 115 Climatiseur mobile Arrifana 12 BAC-PO-0012-E06D Mode d'emploi Mateko Sp. z o.o. ul. Przyleśna 17a Michałów-Grabina 05-126 Nieporęt e-mail:service@mateko.pl...
-
Seite 116: Précautions Importantes
PRÉCAUTIONS IMPORTANTES • Utiliser cet appareil uniquement comme dé c rit dans cette notice d’utilisation. Comme avec tout l'équipement électrique, bien que les instructions visent à couvrir autant d'éventualités que possible, la prudence et le bon sens devraient être appliqués pendant l’installation et l’utilisation de cet appareil. - Seite 117 (par exemple les aé r osols). • Ne pas poser d'objets lourds ou chauds sur l'appareil. • Nettoyer le filtre à air au moins une fois par semaine. • Eviter d'utiliser des appareils de chauffage à proximité du climatiseur.
-
Seite 118: Branchement Électrique
Important information for correct disposal of the product in accordance with EC Directive 2012/19/EU. A la fin de sa vie utile, le produit ne doit pas être éliminé en tant que déchet urbain. Il doit être éliminé à un centre de collecte des déchets spéciaux municipale ou auprès... -
Seite 119: Description
DESCRIPTION Couverture Grille de sortie de l’air Ecran d’affichage Poignée Grille d'aspiration de l’air Roulettes Panneau de commande Grille d'aspiration de l’air Logement du tuyau d'é v acuation de l'air 10. Sortie de l’ e au 11. Cordon d'alimentation 12. -
Seite 120: Préparation Pour L'utilisation
PRÉPARATION POUR L'UTILISATION Les instructions ci-dessous vous permettront de pré p arer le fonctionnement de votre climatiseur ainsi efficacement que possible. Avant d'utiliser ce produit, assurez-vous que les grilles d'entrée et de sortie d'air ne sont pas obstruées.. CLIMATISATION SANS INSTALLATION Juste quelques é... -
Seite 121: Description Du Panneau De Commande
DESCRIPTION DU PANNEAU DE COMMANDE 1. Refroidissement 4. Minuteur 2. Chauffage 5. Symbole de température 3. Ventilateur 6. Indicateur de température FONCTIONNEMENT DEPUIS LE PANNEAU DE COMMANDE Le tableau de commande vous permet de gérer toutes les fonctions principales de l'appareil, mais pour exploiter pleinement son potentiel, vous devez utiliser la télécommande. -
Seite 122: Mise En Marche De L'appareil
MISE EN MARCHE DE L'APPAREIL Branchez dans la prise secteur. Deux tirets indiquant que l'appareil est en veille apparaissent sur l'écran. Appuyer sur le bouton pour mettre l'appareil en marche. Au démarrage d'appareil s'active la dernière fonction confi¬gurée avant l'arrêt. - Seite 123 La température la plus appropriée à l'intérieur pendant l'été varie 24ºC à 27ºC. Il est recommandé de ne pas régler la température très au-dessous de la température extérieure. MODE de la CHAUFFAGE • Appuyez sur le boutons M ce que le symbole soit montré...
- Seite 124 à extraire l'air chaud. - Dans ce mode, le ventilateur peut fonctionner pendant de courtes pé r iodes, mê m e si la tempé r ature réglée a déjà été atteinte. MODE DE VENTILATEUR Dans ce mode, le tuyau de viange ne doit pas être attaché.
-
Seite 125: Changement De L'unité De Température
Vitesse maximale: le ventilateur fonctionne au maximum pour atteindre la température exigée aussi rapidement que possible. Vitesse moyenne: réduit le niveau de bruit, mais maintient toujours un bon niveau du confort. Baisse vitesse: pour un fonctionnement silencieux. CHANGEMENT DE L’UNITÉ DE TEMPÉRATURE Si l’appareil est en veille, appuyez sur le bouton M pendant 20 secondes pour... - Seite 126 SI S'AFFICHE, WHAT SHOULD I DO? L'appareil est é q uipé d'un dispositif de protection contre geler pour é v iter la formation excessive de Basse TEMPERATURE glace. L'appareil démarre encore automatiquement (prévention de la quand le processus de dégivrage est complété.
-
Seite 127: Conseils Pour L'utilisation Correcte
CONSEILS POUR L'UTILISATION CORRECTE Pour profiter au mieux de votre climatiseur, suivez ces recommandations : • Fermez les fenêtres et les portes dans la chambre qui sera climatisée (fig. 1). Lors de l'installation du climatiseur d’une faç o n semi- permanente, vous devriez laisser une porte lé... - Seite 128 Le ré s ervoir peut toujours exiger la vidange en mode CHAUFFAGE. NOTICE Par mesure de sé c urité , pour empê c her le dé v ersement de l'eau, le climatiseur est é q uipé d'un dispositif de sé c urité si le ré s ervoir d'eau se remplit. L'unité sera arrê t é...
- Seite 129 DRAINAGE CONTINU (fig. 6 et fig. 7 ) Pendant le fonctionnement en mode CHAUFFAGE, la mé t hode du drainage continu peut ê t re utilisé e pour é v iter la difficulté du drainage manuel. • Videz le réservoir d'eau complètement.
-
Seite 130: Nettoyage
NETTOYAGE Avant le nettoyage ou l’entretien, é t eignez l'appareil en appuyant sur le bouton (1) sur le panneau de commande ou sur la té l é c ommande, attendez quelques minutes, puis le dé b rancher de la prise de courant. -
Seite 131: Opérations De Debut/Fin De Saison
OPÉRATIONS DE DEBUT/FIN DE SAISON CONTRÔ L ES DE DÉ B UT DE SAISON Assurez-vous que le câ b le d'alimentation et la prise sont en bon é t at et que le systè m e de terre est efficace. -
Seite 132: Caractéristiques Techniques
Nettoyez le filtre et sé c hez le complè t ement avant de le remettre. CARACTÉRISTIQUES TECHNIQUES Voir plaque signalétique CONDITIONS LIMITES Refroidissement: 18ºC-35 ºC (64ºF-95ºF) La température de la pièce climatisée Chauffage: 10ºC-25 ºC (50ºF-77ºF) TAILLE D'APPAREIL Largeur: 435 mm... -
Seite 133: Dépannage
DÉPANNAGE PROBLEME CAUSE SOLUTION • il n'y a pas de courant, il n'est pas • attendre Le climatiseur ne • brancher au secteur s'allume pas branché au secteur • le dispositif de sécurité interne • attendre 30 s'est déclenché... - Seite 134 • il y a des sources de chaleur dans ci-dessus • éliminer les sources la pièce (four, sèche-cheveux, etc.) de chaleur • le tuyau d'évacuation d'air est • Positionner le tuyau détaché de l'appareil d'évacuation d'air • les spécifications techniques de dans le logement à...
- Seite 135 WEE SIGN Deutsch (DE): Entsorgung von Elektrogeräten durch Benutzer in privaten Haushalten in der EU. Dieses Symbol auf dem Produkt oder dessen Verpackung gibt an, dass Produkt nicht zusammen mit dem Restmüll entsorgt werden darf. Es obliegt daher Ihrer Verantwortung, Gerät an einer entsprechenden Stelle...
- Seite 136 Italiano (IT): Smaltimento di apparecchiature da rottamare da parte di privati nell’Unione Europea. Questo simbolo che appare sul prodotto o sulla confezione indica che il prodotto non deve essere smaltito assieme agli altri rifiuti domestici. Gli utenti devono provvedere allo smaltimento delle apparecchiature da rottamare portandole al luogo di raccolta indicato per il riciclaggio delle apparecchiature elettriche ed elettroniche.
- Seite 137 2002/96/EF, skal fjernes fra det indsamlede affald af elektrisk og elektronisk udstyr. English (GB) : Disposal of Waste Equipment by Users in Private Households in European Union.
- Seite 138 Bruk tilgjengelige retur- og innsamlingssystemer når du skal returnere dine gamle apparater. Når batterier eller akkumulatorer samles inn sammen med WEEE I henhold til direktiv 2002/96/EF, skal batterier og akkumulatorer skilles fra innsamlet WEEE produkter.
- Seite 139 Het is uw verantwoordelijkheid uw afgedankte apparatuur af te leveren op een aangewezen inzamelpunt voor de verwerking van afgedankte elektrische en elektronische apparatuur. De gescheiden inzameling en verwerking van uw afgedankte apparatuur draagt bij tot het sparen van natuurlijke bronnen en tot het hergebruik van materiaal op een wijze die de volksgezondheid en het milieu beschermt.
-
Seite 140: Wee Sign
NOMENCLATURE E06D AC: Air PO: Portable Heating Cooling Internal Blaupunkt Conditioner capacity: capacity: number in kBTU/h in kBTU/h... - Seite 141 www.blaupunkt.com...