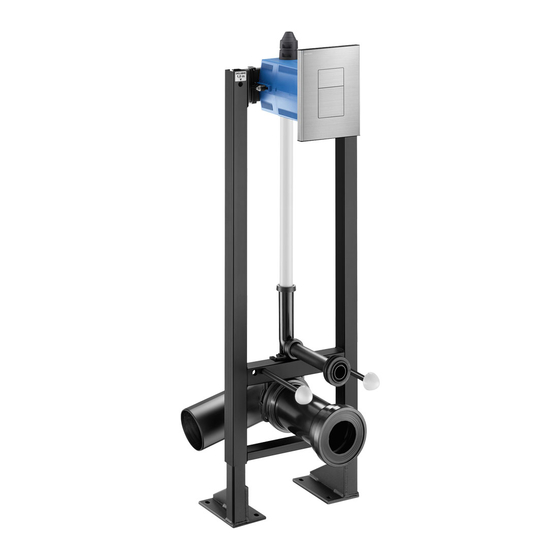
Delabie TEMPOFIX 3 Montageanleitung
Installationssystem für wandhängendes wc-becken mit druckspüler 3l/6l ab
Vorschau ausblenden
Andere Handbücher für TEMPOFIX 3:
- Montageanleitung (51 Seiten) ,
- Bedienungsanleitung (24 Seiten) ,
- Montageanleitung (26 Seiten)
Werbung
FR
Bâti-support pour cuvette WC suspendue avec robinet de chasse 3l/6l AB
EN
Frame system for wall-hung WC pan with AB 3L/6L flush valve
DE
Installationssystem für wandhängendes WC-Becken mit Druckspüler 3l/6l AB
PL
Stelaż do podwieszanej miski ustępowej z zaworem do spłukiwania bezpośredniego 3 l/6 l AB
NL
Voorwandsysteem voor hangtoilet met spoeling 3l/6l AB
Purger soigneusement les canalisations
FR
avant la pose et la mise en service du produit.
Thoroughly flush the pipes to remove any impurities
EN
before installing and commissioning the product.
Vor Montage und Inbetriebnahme des Produkts
DE
die Anschlussleitungen regelkonform spülen.
Dokładnie wypłukać instalację
PL
przed montażem i uruchomieniem produktu.
Spoel zorgvuldig de leidingen alvorens
NL
tot installatie of ingebruikname van de kraan over te gaan.
TEMPOFIX 3
+ TEMPOFLUX 3
NT 564KIT
Indice 0
Werbung
Inhaltsverzeichnis

Inhaltszusammenfassung für Delabie TEMPOFIX 3
- Seite 1 TEMPOFIX 3 NT 564KIT + TEMPOFLUX 3 Indice 0 Bâti-support pour cuvette WC suspendue avec robinet de chasse 3l/6l AB Frame system for wall-hung WC pan with AB 3L/6L flush valve Installationssystem für wandhängendes WC-Becken mit Druckspüler 3l/6l AB Stelaż do podwieszanej miski ustępowej z zaworem do spłukiwania bezpośredniego 3 l/6 l AB...
- Seite 2 564060 - P.2 564065 - P.3 763000 - P.15 763040 - P.18 763000 - P.21 763040 - P.23...
- Seite 3 KIT 1 : 564060 10-120mm 160-220 1000 1000 90 Mini 180/230 157/177...
- Seite 4 KIT 1 : 564065 10-120mm 1000 1000 180/230 157/177 350kg/m3 350kg/m3...
- Seite 5 KIT 1 : 564060, 564065...
- Seite 6 564060 Ø10 564065 Ø10...
- Seite 7 564060 564065...
- Seite 8 10 - 105 mm 20 - 120 mm...
- Seite 9 ≤ Ø20 ≤ Ø20...
- Seite 10 Ø 50 Ø 110...
- Seite 11 3 mm maxi...
- Seite 14 "CLIC" "CLIC" "CLIC" "CLIC"...
- Seite 15 45°...
- Seite 16 KIT 2 : 763000...
- Seite 17 2-4 L 4-9 L "CLIC" "CLIC" "CLIC" "CLIC" "CLIC" "CLIC"...
- Seite 19 KIT 2 : 763040...
- Seite 20 4-9L 2-4L "CLIC" "CLIC" "CLIC" "CLIC" "CLIC" "CLIC"...
- Seite 22 763000 763MOD...
- Seite 24 763040 763MOD...
-
Seite 26: Installation
L’ÉTANCHÉITÉ DES JOINTS ENTRE LA PLAQUE INOX ET LE MUR DOIT ÊTRE VÉRIFIÉE AU MOINS UNE FOIS PAR AN ET AUSSI SOUVENT QUE NÉCESSAIRE. EN CAS DE BESOIN, LES REMPLACER. Le non-respect de ces conseils risque d’engendrer des infiltrations dans le mur, pour lesquelles DELABIE ne pourrait être tenu responsable. -
Seite 27: Operation
CHECK THE INTEGRITY OF THE SEALS BETWEEN THE STAINLESS STEEL WALL PLATE AND THE WALL AT LEAST ONCE A YEAR AND AS OFTEN AS NECESSARY, AND MAKE GOOD IF NECESSARY. If this advice is not followed, water may leak into the wall. DELABIE cannot be held responsible for any ingress. -
Seite 28: Funktionsweise
Bei Nichtbeachtung dieser Hinweise besteht die Gefahr von Einsickern in die Wand. Hierfür kann DELABIE nicht haftbar gemacht werden. IM ZWEIFELSFALL: TECHNISCHE BERATUNG DELABIE UNTER +49 (0) 231 - 49 66 34 - 12 ANRUFEN. DURCHFLUSSREGULIERUNG (Abb. D1, D2 und D3 Seite 16 oder 19) Die Durchflussmenge ist von 2 bis 9 l regulierbar: Hebel der Vorabsperrung (Abb. - Seite 29 USZCZELNIENIA MIĘDZY PŁYTĄ Z INOXU A ŚCIANĄ MUSZĄ BYĆ SPRAWDZANE PRZYNAJMNIEJ RAZ NA ROK LUB TYLE RAZY ILE JEST TO KONIECZNE. W RAZIE POTRZEBY NALEŻY JE WYMIENIĆ. Nieprzestrzeganie zaleceń może spowodować przeniknięcie wody do ściany, za co DELABIE nie ponosi odpowiedzialności.
-
Seite 30: Onderhoud En Reiniging
De niet-naleving van deze aanbevelingen kan het risico op insijpeling met zich meebrengen, waarvoor DELABIE niet aansprakelijk kan worden gesteld. IN GEVAL VAN TWIJFEL, CONTACT OPNEMEN MET DE TECHNISCHE DIENST VAN DELABIE: + 32 (0)2 520 16 76. DEBIETREGELING (Fig. D1, D2 en D3 pagina 16 of 19) Het debiet is regelbaar tussen 2 en 9 L : draai zowel aan de hendel van de stopkraan (Fig.


