Herunterladen Inhalt Inhalt Diese Seite drucken

Werbung

Verfügbare Sprachen

Verfügbare Sprachen

DE | EN | FR
FL 220HV
BEDIENUNGSANLEITUNG
USER MANUAL
MODE D'EMPLOI
www.geo-fennel.de
www.geo-fennel.com
www.geo-fennel.fr

Werbung

Inhaltsverzeichnis
loading

Inhaltszusammenfassung für geo-FENNEL FL 220HV

  • Seite 1 DE | EN | FR FL 220HV BEDIENUNGSANLEITUNG USER MANUAL MODE D‘EMPLOI www.geo-fennel.de www.geo-fennel.com www.geo-fennel.fr...
  • Seite 2 Sehr geehrter Kunde, vielen Dank für das Vertrauen, welches Sie uns beim Erwerb Ihres neuen geo-FENNEL-Gerätes ent- gegengebracht haben. Dieses hochwertige Qualitätsprodukt wurde mit größter Sorgfalt produziert und qualitätsgeprüft. Die beigefügte Anleitung wird Ihnen helfen, das Gerät sachgemäß zu bedienen. Bitte lesen Sie ins- besondere auch die Sicherheitshinweise vor der Inbetriebnahme aufmerksam durch.
  • Seite 3: Eigenschaften

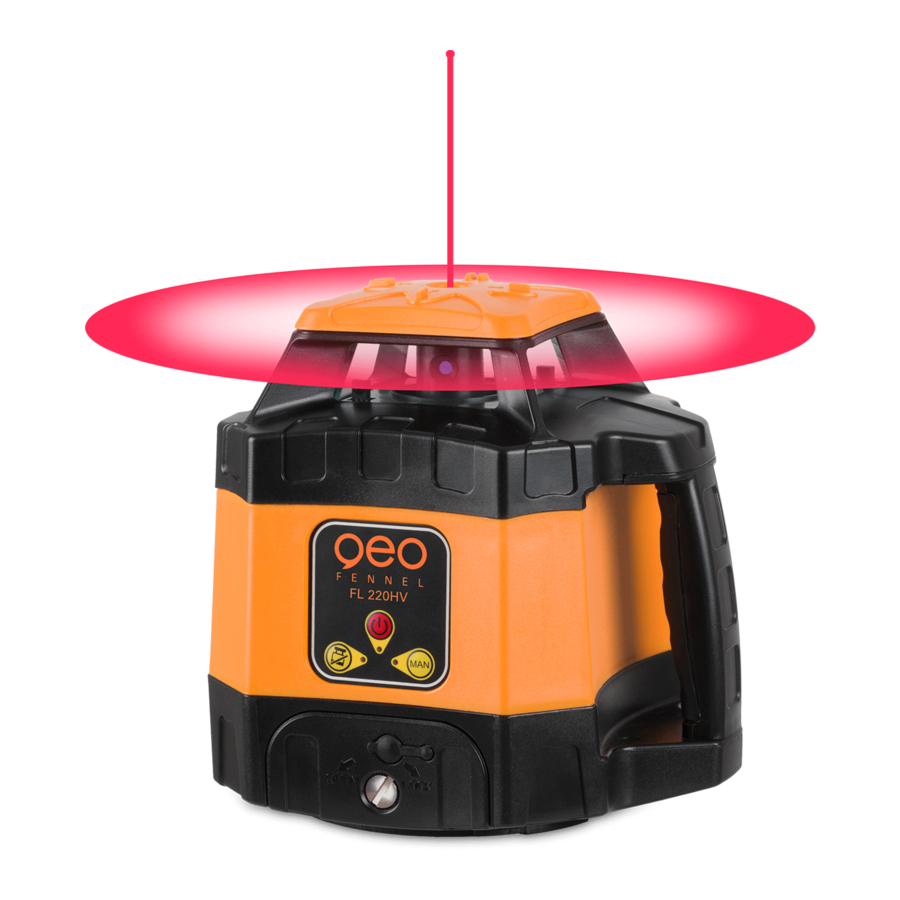
    EIGENSCHAFTEN · Arbeitsbereich bis 400 m Ø · Staub-/Wasserschutz IP 54 · 90° Lotstrahl · Automatische TILT-Funktion · Abschaltung außerhalb des Selbstnivellierbereiches · Manuellfunktion Technische Daten Selbstnivellierung horizontal / vertikal Selbstnivellierbereich ± 5° Laserklasse Genauigkeit · horizontal ± 1,0 mm / 10 m ·...
  • Seite 4: Stromversorgung

    STROMVERSORGUNG Der Laser ist mit einem NiMH-Akkupack ausgestattet. Alternativ kann er mit handelsüblichen Alkalinebatterien betrieben werden. 1) Alkalinebatterien in das dafür vorgesehene Batteriefach einlegen (auf Polarität achten) und das Fach ins Gerät einfügen. ODER 2) Wiederaufladbares NiMH-Akkufach ins Gerät einfügen. AKKU LADEN Ladegerät mit Ladebuchse am Gerät und Stromnetz verbinden.
  • Seite 5: Bedienelemente

    BEDIENELEMENTE 1. Laseraustrittsfenster 2. Rotorkopf 3. Handgriff 4. Batteriefach 5. Bedienfeld 6. Auflagepunkt für Vertikalbetrieb 7 . 5/8“-Gewinde vertikal 8. 5/8“-Gewinde horizontal 9. Buchse für Ladegerät 5/8″thread hole in side 5/8″thread hole in the centre BEDIENUNG HORIZONTALEINSATZ Das Gerät auf einer einigermaßen ebenen Fläche oder auf einem Stativ aufstellen. VERTIKALEINSATZ Gerät vertikal (auf der Seite mit dem Gewinde) aufstellen oder mit dem Vertikalgewinde auf einem Stativ befestigen.
  • Seite 6: Gerät An/Aus-Schalten

    Direkt nach dem Einschalten beginnt das Gerät, sich selbst zu nivellieren (Laserpunkt blinkt). Wenn der Selbstnivellierungsvorgang abgeschlossen ist, beginnt sich der Rotorkopf zu drehen. Wenn keine Selbstnivellierung erfolgt, wurde das Gerät außerhalb des Selbstnivellierbereiches von ± 5° aufgestellt (Warnsignal ertönt). Gerät dann auf eine waagerechtere Ebene stellen. 1.
  • Seite 7: Manuell-Funktion

    MANUELL-FUNKTION (3) Gerät einschalten, Selbstnivellierung abwarten und nach abgeschlossener Sellbstnivellierung MANUELL -Taste (3) drücken. Die TILT-LED (5) geht aus, die MANUELL -LED (4) leuchtet dauerhaft. Nun kann das Gerät auch in Schrägposition, z. B mit Neigungswinkeladapter eingesetzt werden, ohne dass TILT-Alarm ausgelöst wird. Bei vertikaler Verwendung kann mit Hilfe der MAN-Funktion eine gewünschte Ausrichtung schnell und sicher hergestellt werden.
  • Seite 8: Lieferumfang

    EMPFÄNGER FR 45 BEDIENELEMENTE 1. Libelle (2) 2. Display 3. Referenzmarke 4. Empfangsfenster 5. AN- / AUS-Schalter 6. Lautsprecher 7 . Batteriefach (Rückseite) 8. Ton an / aus 9. Genauigkeit grob / normal / fein 10. Beleuchtung an / aus 11.
  • Seite 9: Genauigkeitseinstellung Grob/ Normal / Fein

    GENAUIGKEITSEINSTELLUNG GROB/ NORMAL / FEIN Der FR 45 ist mit drei Genauigkeitsstufen ausgestattet. Zur Auswahl Taste (9) drücken: Genauigkeit grob ± 10 mm Displaysymbol: leeres Feld Genauigkeit normal ± 4 mm Displaysymbol: Genauigkeit fein ± 2 mm Displaysymbol: EINLEGEN DER BATTERIE •...
  • Seite 10: Sicherheitshinweise

    SICHERHEITSHINWEISE UMSTÄNDE, DIE DAS MESSERGEBNIS VERFÄLSCHEN KÖNNEN Messungen durch Glas- oder Plastikscheiben; verschmutzte Laseraustrittsfenster; Sturz oder starker Stoß. Bitte Genauigkeit überprüfen. Große Temperaturveränderungen: Wenn das Gerät aus warmer Umgebung in eine kalte oder umgekehrt gebracht wird, vor Benutzung einige Minuten warten. UMGANG UND PFLEGE Messinstrumente generell sorgsam behandeln.
  • Seite 11: Bestimmungsgemässe Verwendung

    Das Gerät entspricht der Lasersicherheitsklasse 2 gemäß der Norm DIN IEC 60825-1:2014. Das Gerät darf ohne weitere Sicherheitsmaßnahmen eingesetzt werden. Das Auge ist bei zufälligem, kurzzeitigem Hineinsehen in den Laserstrahl durch den Lidschlussreflex geschützt. Laserwarnschilder der Klasse 2 sind gut sichtbar am Gerät angebracht. www.geo-fennel.de G ERMAN Y Laser IEC 60825-1:2014 P ≤...
  • Seite 12: Inhaltsverzeichnis

    Dear customer, Thank you for your confidence in us having purchased a geo-FENNEL instrument. This manual will help you to operate the instrument appropriately. Please read the manual carefully - particularly the safety instructions. A proper use only guarantees a longtime and reliable operation.
  • Seite 13: Technical Data

    CHARACTERISTICS · Working range up to 400 m Ø · Dust / water protection IP 54 · Permanent 90° plumb beam · Automatic TILT alarm function · Auto-shut-off when out of level · Manual mode Technical data Self-levelling horizontal / vertical Self-levelling range ±...
  • Seite 14: Power Supply

    POWER SUPPLY Both the standard NiMH battery pack and Alkaline batteries can be used. 1) Insert Alkaline batteries into the Alkaline battery box (ensure correct polarity) and mount the battery box into the instrument. 2) Mount the rechargeable battery box into the instrument. CHARGING THE BATTERY Connect the charger with the charging plug of the instrument and the power source.
  • Seite 15 FEATURES 1. Laser emitting window 2. Rotating head 3. Handle 4. Battery compartment 5. Keypad 6. Support for vertical use 7 . 5/8“ thread hole vertical 8. 5/8“ thread hole horizontal 9. Charging plug 5/8″thread hole in side 5/8″thread hole in the centre OPERATION HORIZONTAL USE Set up the instrument on an even surface or mount it onto a tripod.
  • Seite 16: Power On/Off

    HORIZONTAL USE After powering on the unit a flashing laser diode indicates that the automatic self-levelling procedure is working. The laser starts rotating when it is self-levelled. If not the laser was set up outside of its self- levelling range. In this case set up the instrument on a more even surface. 1.
  • Seite 17: Manual Mode

    MANUAL MODE (3) Power on the laser with button (1). After completion of the self-levelling procedure press button (3). The TILT LED (5) will power off and the MANUAL LED (4) will be illuminated permanently. Now the laser can be used in slope position, i. e. it can be used with a grade mount without giving TILT alarm. In vertical position a required alignment can be made quick and safe by means of the MAN function.
  • Seite 18: Supplied With

    RECEIVER FR 45 FEATURES 1. Vial (2) 2. Display 3. Reference indicator 4. Receiving window 5. ON / OFF switch 6. Loudspeaker 7 . Battery compartment (back side) 8. Sound on / off 9. Accuracy coarse / normal / fine 10.
  • Seite 19: Receiver

    ACCURACY COARSE / NORMAL / FINE The FR 45 is equipped with three precision modes. They can be chosen by pressing button (9): Accuracy coarse ± 10 mm Symbol on display: without symbol Accuracy normal ± 4 mm Symbol on display: Accuracy fine ±...
  • Seite 20: Safety Notes

    SAFETY NOTES SPECIFIC REASONS FOR ERRONEOUS MEASURING RESULTS Measurements through glass or plastic windows; dirty laser emitting windows; after the instrument has been dropped or hit. Please check the accuracy. Large fluctuation of temperature: If the instrument will be used in cold areas after it has been stored in warm areas (or the other way round) please wait some minutes before carrying out measurements.
  • Seite 21: Intended Use Of Instrument

    It is allowed to use the unit without further safety precautions. The eye protection is normally secured by aversion responses and the blink reflex. The laser instrument is marked with class 2 warning labels. www.geo-fennel.de G ERMAN Y Laser IEC 60825-1:2014 P ≤...
  • Seite 22: Livré Comme Suit

    2. Alimentation en courant 3. Descriptif 4. Opération 5. Cellule de réception 6. Consignes de sécurité LIVRÉ COMME SUIT · Laser rotatif FL 220HV · Cellule de réception FR 45 avec son support · Accu et chargeur · Bloc piles de secours ·...
  • Seite 23: Données Techniques

    FONCTIONS · Portée de 400 m Ø · Étanchéité IP 54 · Point d‘equerrage permanent à 90° · Fonction TILT · Arrêt du laser si il n‘est pas de niveau · Fonction manuelle Données techniques Auto-nivellement horizontal / vertical Plage d‘autonivellement ±...
  • Seite 24: Alimentation En Courant

    ALIMENTATION EN COURANT L ’instrument laser est équipé d’une batterie d’accumulateurs. Comme solution de rechange, il peut fonctionner avec des piles alcalines. 1) Mettez en place les piles alcalines dans le logement prévu à cet effet (faites attention à la pola- rité) et insérez ledit logement dans l’instrument.
  • Seite 25 DESCRIPTIF 1. Fenêtre de sortie du faisceau laser 2. Tête du laser 3. Poignée 4. Logement de piles 5. Clavier 6. Point d‘appui pour une opération verticale 7 . 5/8“-pas de vis verticale 8. 5/8“-pas de vis horizontale 9. Douille pour chargeur d‘accus 5/8″thread hole in side 5/8″thread hole in the centre OPÉRATION...
  • Seite 26 Après la mise en marche, l’instrument se met à niveau automatiquement (la trace ponctuelle du laser clignote). La tête rotative commence à tourner dès que la phase d’autonivellement est ache- vée. Si l’autonivellement n’a pas lieu, cela signifie que l’instrument se trouve hors de la plage d’autonivellement.
  • Seite 27: Mode Manuel

    MODE MANUEL (3) Mettez l‘instrument en marche avec la touche (1), attendez la mise de niveau automatique et quand celle-ci est achevée pressez la touche MANUEL (3). La diode TILT (5) s‘éteint, la diode MANUEL (4) s‘allume. Maintenant le laser peut travailler dans toutes les positions sans déclencher l‘alarme TILT. Utilisant la fonction MANUEL en position verticale vous pouvez procéder à...
  • Seite 28 CELLULE FR 45 DESCRIPTION 1. Nivelle (2) 2. Écran 3. Hauteur de référence 4. Fenêtre de réception 5. Bouton marche/arrêt 6. Haut-parleur 7 . Logement de piles 8. Son marche/arrêt 9. Précision fine / normale / grossière 10. Éclairage marche/arrêt 11.
  • Seite 29: Mise En Place Des Piles

    RÉGLAGE DE LA PRÉCISION FINE / NORMALE / GROSSIÈRE Le FR 45 est équipé de trois niveaux de précision. Pour choisir, pressez bouton (9): Précision grossière ± 10 mm Symbole sur l‘écran: champ vide Précision normale ± 4 mm Symbole sur l‘écran: Précision fine ±...
  • Seite 30: Consignes De Sécurité

    CONSIGNES DE SÉCURITÉ CIRCONSTANCES POUVANT FAUSSER LES RÉSULTATS DE MESURES Mesures effectuées à travers des plaques de verre ou de matière plastique; mesures effectuées à travers la fenêtre de sortie du faisceau laser lorsqu‘elle est sale. Mesures après que le niveau soit tombé ou ait subi un choc très fort. Mesures effectuées pendant de grandes différences de température - p.
  • Seite 31: Exclusion De La Responsabilité

    être utilisé sans avoir recours à d’autres mesures de sécurité. Au cas où l’utilisateur a regardé un court instant le faisceau laser, les yeux sont tout de même protégés par le réflexe de fermeture des paupières. Les pictogrammes de danger de la classe 2 sont bien visibles sur le niveau. www.geo-fennel.de GER MANY Laser IEC 60825-1:2014 P ≤...
  • Seite 32 GmbH Technische Änderungen vorbehalten. Kupferstraße 6 All instruments subject to technical changes. D-34225 Baunatal Sous réserve de modifications techniques. Tel. +49 561 / 49 21 45 +49 561 / 49 72 34 info@geo-fennel.de 10/2019 www.geo-fennel.de Precision by tradition.

Inhaltsverzeichnis