Herunterladen Inhalt Inhalt Diese Seite drucken
Inhaltsverzeichnis

Werbung

Verfügbare Sprachen
  • DE

Verfügbare Sprachen

  • DEUTSCH, seite 104
AV Receiver
Owner's Manual
Read the supplied booklet "Safety Brochure" before using the unit.
English

Werbung

Inhaltsverzeichnis
loading

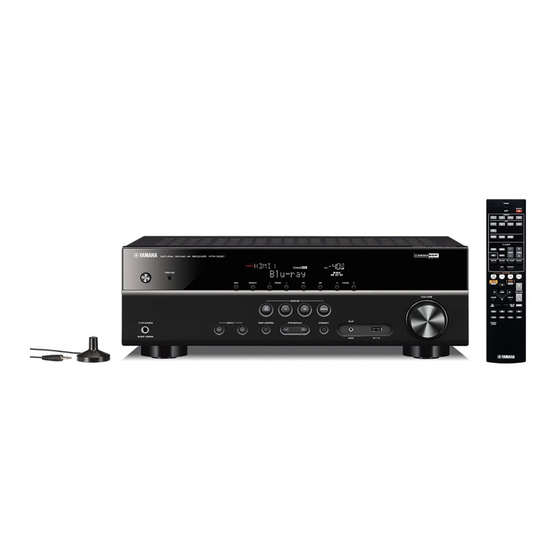
Inhaltszusammenfassung für Yamaha HTR-3067

  • Seite 1 AV Receiver Owner’s Manual Read the supplied booklet “Safety Brochure” before using the unit. English...
  • Seite 2: Inhaltsverzeichnis

    CONTENTS Accessories ............4 9 Optimizing the speaker settings automatically (YPAO) .
  • Seite 3 Yamaha technologies ........
  • Seite 4: Accessories

    Accessories Operating range of the remote control Check that the following accessories are supplied with the product. • Point the remote control at the remote control sensor on the unit and remain within the operating range shown below.  Remote control ...
  • Seite 5: Features

    FEATURES What you can do with the unit . p.41 • High-quality sound from iPod via Supports 2- to 5.1-channel speaker system. digital connection Allows you to enjoy your favorite acoustic spaces in various styles. . p.45 • Playback of music stored on USB .
  • Seite 6: Useful Tips

    Full of useful functions! Useful tips The combination of video/audio input jacks does not ❑ Connecting various devices (p.20) ❑ Creating high-realistic sound fields (p.33) match an external device... A number of HDMI jacks and various input/output jacks CINEMA DSP allows you to create a natural and realistic Use “Audio In”...
  • Seite 7: Part Names And Functions

    Part names and functions Front panel YPAO MIC INFO MEMORY PRESET TUNING VOLUME SCENE RADIO PHONES INPUT TONE CONTROL PROGRAM STRAIGHT SILENT CINEMA AUDIO z (power) key TUNING keys PROGRAM keys Turns on/off (standby) the unit. Select the radio frequency (p.37). Select a sound program or a surround decoder (p.32).
  • Seite 8: Front Display (Indicators)

    Front display (indicators) CHARGE ENHANCER STEREO TUNED SLEEP MUTE VOL. SP IMP.••8 MIN ADAPTIVE DRC > HDMI SLEEP Speaker indicators Lights up when HDMI signals are being input or output. Lights up when the sleep timer is on. Indicate speaker terminals from which signals are output. Front speaker (L) MUTE Front speaker (R)
  • Seite 9: Rear Panel

    DC OUT jack For outputting video/audio to a recording device (such as a VOLTAGE SELECTOR For supplying power to a Yamaha AV accessory. For details VCR) (p.24). (Taiwan and General models only) on connections, refer to the instruction manual of the AV AUDIO jacks accessory.
  • Seite 10: Remote Control

    (sleep timer). Press • The playback devices must support HDMI Control. However, repeatedly to set the time (120 min, 90 min, 60 min, 30 min, Yamaha does not assure the operation of all HDMI Control- compatible devices. off).
  • Seite 11: Preparations

    PREPARATIONS General setup procedure Placing speakers (p.12) Select the speaker layout for the number of speakers that you are using and place them in your room. Connecting speakers (p.15) Connect the speakers to the unit. Connecting a TV (p.18) Connect a TV to the unit. Connecting playback devices (p.20) Connect video devices (such as BD/DVD players) and audio devices (such as CD players) to the unit.
  • Seite 12: Placing Speakers

    1 2 3 4 5 6 7 8 9 Placing speakers Select the speaker layout for the number of speakers that you are using and place the speakers and subwoofer in your room. This section describes the representative speaker layout examples.
  • Seite 13 1 2 3 4 5 6 7 8 9 5.1-channel system 4.1-channel system 10° to 30° 10° to 30° 10° to 30° 10° to 30° 5.1-channel system (Virtual CINEMA FRONT) 3.1-channel system • To utilize this configuration, set "Virtual CINEMA FRONT" (p.55) in the "Setup" menu to "On". •...
  • Seite 14: Setting The Speaker Impedance

    1 2 3 4 5 6 7 8 9 ■ 2.1-channel system Setting the speaker impedance (U.S.A. and Canada models only) Under its default settings, the unit is configured for 8-ohm speakers. When connecting 6-ohm speakers, set the speaker impedance to “6 Ω MIN”. Before connecting speakers, connect the power cable to an AC wall outlet.
  • Seite 15: Connecting Speaker Cables

    1 2 3 4 5 6 7 8 9 Connecting speakers ■ Connect the speakers placed in your room to the unit. 5.1-channel system Connecting speaker cables The following diagrams provide connections for a Speaker cables have two wires. One is for connecting 5.1-channel system as an example.
  • Seite 16: Connecting The Subwoofer (With Built-In Amplifier)

    1 2 3 4 5 6 7 8 9 (Connecting center/surround speakers) a Remove approximately 10 mm (3/8”) of insulation from the ends of the speaker cable, and twist the bare wires of the cable firmly together. b Press down the tab. c Insert the bare wires of the cable into the hole in the terminal.
  • Seite 17: Input/Output Jacks And Cables

    Input/output jacks and cables ■ ❑ VIDEO jacks ❑ AUDIO jacks Video/audio jacks Transmit analog video signals. Use a video pin cable. (Stereo L/R jacks) ❑ HDMI jacks Transmit analog stereo audio signals. Use a stereo pin Video pin cable Transmit digital video and digital sound through a single cable (RCA cable).
  • Seite 18: Connecting A Tv

    1 2 3 4 5 6 7 8 9 Connecting a TV ■ Connect a TV to the unit so that video input to the unit can be output to the TV. You can Component / composite video connection also enjoy playback of TV audio on the unit. When connecting any video device with a component video cable, connect the TV to To maximize the performance of the unit, we recommend connecting a TV with an HDMI the MONITOR OUT (COMPONENT VIDEO) jacks.
  • Seite 19 1 2 3 4 5 6 7 8 9 ❑ VIDEO (composite video) connection (with a video pin cable) Video input The unit (rear) MONITOR OUT (VIDEO) jack (composite video) VIDEO (BD/DVD) HDMI OUT HDMI 1 HDMI 2 HDMI 3 HDMI 4 DC OUT COMPONENT...
  • Seite 20: Connecting Playback Devices

    1 2 3 4 5 6 7 8 9 Connecting playback devices ■ The unit is equipped with a variety of input jacks including HDMI input jacks to allow Component video connection you to connect different types of playback devices. For information on how to connect Connect a video device to the unit with a component video cable and an audio cable an iPod or a USB storage device, see the following pages.
  • Seite 21: Composite Video Connection

    1 2 3 4 5 6 7 8 9 ■ ■ Composite video connection Changing the combination of video/audio input jacks Connect a video device to the unit with a video pin cable and an audio cable (digital If the combination of video/audio input jacks available on the unit does not match your coaxial or stereo pin cable).
  • Seite 22: Connecting Audio Devices (Such As Cd Players)

    1 2 3 4 5 6 7 8 9 Connecting audio devices (such as CD players) After connecting external devices (such as a TV and playback devices) and power cable of the unit, turn on the unit. Connect audio devices such as CD players and MD players to the unit. Depending on the audio output jacks available on your audio device, choose one of the following Press AV 2 to select “AV 2”...
  • Seite 23: Connecting To The Jack On The Front Panel

    1 2 3 4 5 6 7 8 9 Connecting to the jack on the front panel Connecting the FM/AM antennas Use the AUX jack on the front panel to temporarily connect devices such as portable Connect the supplied FM/AM antennas to the unit. audio players to the unit.
  • Seite 24: Connecting Recording Devices

    1 2 3 4 5 6 7 8 9 Connecting recording devices Connecting the power cable You can connect video/audio recording devices to the AV OUT jacks. The jacks output Before connecting the power cable (Taiwan and General models only) analog video/audio signals selected as the input.
  • Seite 25: Selecting An On-Screen Menu Language

    1 2 3 4 5 6 7 8 9 Selecting an on-screen menu language TRANSMIT TRANSMIT RECEIVER RECEIVER z RECEIVER z SLEEP SLEEP Select the desired on-screen menu language from English, HDMI HDMI To exit from the menu, press SETUP. Japanese, French, German, Spanish, Russian, Italian and Chinese.
  • Seite 26: Optimizing The Speaker Settings Automatically (Ypao)

    RECEIVER RECEIVER z RECEIVER z SLEEP SLEEP The Yamaha Parametric room Acoustic Optimizer (YPAO) function HDMI HDMI Place the YPAO microphone at your listening detects speaker connections, measures the distances from them to your listening position(s), and then automatically optimizes the...
  • Seite 27 1 2 3 4 5 6 7 8 9 TRANSMIT TRANSMIT To start the measurement, use the cursor keys to To save the measurement results, use the cursor RECEIVER RECEIVER select “Start” and press SETUP. keys (e/r) to select “SAVE” and press ENTER. SLEEP SLEEP HDMI...
  • Seite 28: Error Messages

    Exit YPAO, and turn off and on the unit. If this error occurs Procedure to handle errors E-10:Internal Err. An internal error has occurred. repeatedly, contact the nearest authorized Yamaha dealer or (E-10:INTERNAL) service center. Check the content of error message and press ENTER.
  • Seite 29: Warning Messages

    1 2 3 4 5 6 7 8 9 Warning messages If a warning message is displayed after the measurement, you can still save the measurement results by following on-screen instructions. However, we recommend you perform YPAO again in order to use the unit with the optimal speaker settings. Warning message Cause Remedy...
  • Seite 30: Playback

    PLAYBACK TRANSMIT TRANSMIT RECEIVER RECEIVER SLEEP SLEEP HDMI Basic playback procedure Input Input selection keys selection Switching information on the front display keys Turn on the external devices (such as a TV or BD/ AUDIO DVD player) connected to the unit. TUNER TUNER Press INFO.
  • Seite 31: Selecting The Input Source And Favorite Settings With One Touch

    Selecting the input source and favorite settings with one touch (SCENE) TRANSMIT TRANSMIT RECEIVER RECEIVER SLEEP SLEEP The SCENE function allows you to select the assigned input source, Configuring scene assignments HDMI HDMI sound program, and Compressed Music Enhancer on/off with just one touch.
  • Seite 32: Selecting The Sound Mode

    Selecting the sound mode TRANSMIT TRANSMIT RECEIVER RECEIVER SLEEP SLEEP The unit is equipped with a variety of sound programs and HDMI HDMI surround decoders that allow you to enjoy playback sources with • You can also switch the sound programs and surround decoder by pressing your favorite sound mode (such as sound field effect or stereo PROGRAM on the front panel.
  • Seite 33: Enjoying Sound Field Effects (Cinema Dsp)

    You’ll never get tired listening for long periods. The unit is equipped with a variety of sound programs that utilize Yamaha’s original DSP technology (CINEMA DSP). It allows you to easily create sound fields like actual movie This program reproduces monaural video sources, such as classic movies, in an atmosphere of a good old movie theater.
  • Seite 34: Enjoying Surround Sound With 5 Speakers Placed In Front (Virtual Cinema Front)

    ■ ■ Sound programs suitable for music/stereo playback Enjoying sound field effects without surround speakers (MUSIC) (Virtual CINEMA DSP) The following sound programs are optimized for listening to music sources. If you select one of the sound programs (except 2ch Stereo and 5ch Stereo) when no surround speakers are connected, the unit automatically creates the surround sound You can also select stereo playback.
  • Seite 35: Enjoying Unprocessed Playback

    ■ Enjoying unprocessed playback Enjoying unprocessed multichannel TRANSMIT TRANSMIT sounds (surround decoder) RECEIVER RECEIVER SLEEP SLEEP You can play back input sources without any sound field effect HDMI HDMI The surround decoder enables unprocessed multichannel processing. playback from 2-channel sources. When a multichannel source is input, it works the same way as the straight decode mode.
  • Seite 36: Enhancing The Bass (Extra Bass)

    Enhancing the bass (Extra Bass) Enjoying compressed music with enhanced TRANSMIT TRANSMIT sound (Compressed Music Enhancer) RECEIVER RECEIVER SLEEP SLEEP Extra Bass allows you to enjoy enhanced bass sounds, regardless HDMI HDMI of the size of the front speakers and the presence or absence of the subwoofer.
  • Seite 37: Listening To Fm/Am Radio

    Listening to FM/AM radio TRANSMIT TRANSMIT RECEIVER RECEIVER SLEEP SLEEP You can tune into a radio station by specifying its frequency or Selecting a frequency for reception HDMI HDMI selecting from registered radio stations. Press FM or AM to select a band. •...
  • Seite 38: Registering Favorite Radio Stations (Presets)

    Registering favorite radio stations (presets) When the Auto Preset process finishes, “FINISH” appears and the TRANSMIT TRANSMIT “Option” menu closes automatically. RECEIVER RECEIVER SLEEP SLEEP You can register up to 40 radio stations as presets. Once you have CHARGE ENHANCER STEREO TUNED SLEEP MUTE HDMI...
  • Seite 39 ■ ■ Selecting a preset station Clearing preset stations TRANSMIT TRANSMIT Tune into a registered radio station by selecting its preset number. Clear radio stations registered to the preset numbers. RECEIVER RECEIVER SLEEP SLEEP HDMI HDMI Press FM or AM to select “TUNER” as the input Press FM or AM to select “TUNER”...
  • Seite 40: Displaying The Radio Data System Information

    Radio Data System tuning TRANSMIT TRANSMIT • “Program Service”, “Program Type”, “Radio Text”, and “Clock Time” are not RECEIVER RECEIVER SLEEP SLEEP (U.K. and Europe models only) displayed if the radio station does not provide the Radio Data System HDMI HDMI service.
  • Seite 41: Playing Back Ipod Music

    Playing back iPod music TRANSMIT TRANSMIT RECEIVER RECEIVER SLEEP SLEEP You can play back iPod music on the unit using a USB cable Playback of iPod content HDMI HDMI supplied with the iPod. Follow the procedure below to operate the iPod contents and start playback.
  • Seite 42 ■ Browse screen TRANSMIT TRANSMIT Use the cursor keys to select an item and press RECEIVER RECEIVER ENTER. SLEEP SLEEP HDMI HDMI If a song is selected, playback starts and the playback i P o d M u s i c screen is displayed.
  • Seite 43: Playback Screen

    ■ ■ Playback screen Operating the iPod itself or remote control TRANSMIT TRANSMIT (simple play) RECEIVER RECEIVER SLEEP SLEEP HDMI HDMI i P o d Press MODE to switch to the simple play mode. N o w P l a y i n g The TV menu screen turns off and iPod operations are A r t i s t N a m e A l b u m T i t l e...
  • Seite 44 ■ Repeat/shuffle settings TRANSMIT TRANSMIT You can configure the repeat/shuffle settings of your iPod. RECEIVER RECEIVER SLEEP SLEEP HDMI HDMI • During simple play, configure the repeat/shuffle settings directly on your iPod or press MODE to display the TV menu screen and then follow the procedure below. AUDIO AUDIO When “USB”...
  • Seite 45: Playing Back Music Stored On A Usb Storage Device

    Playing back music stored on a USB storage device TRANSMIT TRANSMIT RECEIVER RECEIVER SLEEP SLEEP You can play back music files stored on a USB storage device on Playback of USB storage device contents HDMI HDMI the unit. Follow the procedure below to operate the USB storage device contents and start playback.
  • Seite 46 ■ Browse screen TRANSMIT TRANSMIT Use the cursor keys to select an item and press RECEIVER RECEIVER ENTER. SLEEP SLEEP HDMI HDMI U S B If a song is selected, playback starts and the playback T o p screen is displayed. B l u e s C l a s s i c a l E l e c t r o n i c a...
  • Seite 47 ■ ■ Playback screen Repeat/random settings TRANSMIT TRANSMIT You can configure the repeat/random settings for playback of USB RECEIVER RECEIVER SLEEP SLEEP storage device contents. HDMI HDMI U S B N o w P l a y i n g When “USB”...
  • Seite 48: Configuring Playback Settings For Different Playback Sources

    Configuring playback settings for different playback sources (Option menu) You can configure separate playback settings for different playback sources. This Option menu items menu is available on the front panel (or on the TV screen), allowing you to easily configure settings during playback. Press OPTION.
  • Seite 49 ■ ❑ Enhancer (Enhancer) Tone Control (Tone Control) Enables/disables Compressed Music Enhancer (p.36). Adjusts the high-frequency range (Treble) and low-frequency range (Bass) of sounds. Choices Treble (Treble), Bass (Bass) • This setting is applied separately to each input source. Setting range •...
  • Seite 50: Audio In (Audio In)

    ■ ■ Lipsync (Lipsync) Audio In (Audio In) Enables/disables the adjustment configured in “Lipsync” (p.59) in the “Setup” menu. Combines the video jack of the selected input source (HDMI 1–4 or AV 1–5) with an audio jack of others. For example, use this function in the following cases. •...
  • Seite 51: Configurations

    CONFIGURATIONS Configuring various functions (Setup menu) You can configure the unit’s various function with the menu displayed on the TV screen. Use the cursor keys (e/r) to select a setting and press ENTER. To exit from the menu, press SETUP. •...
  • Seite 52: Setup Menu Items

    Setup menu items Menu Item Function Page Subwoofer Selects whether or not a subwoofer is connected. Front Selects the size of the front speakers. Center Selects whether or not a center speaker is connected and its size. Surround Selects whether or not surround speakers are connected and their size. Configuration Crossover Sets the lower limit of the low-frequency component that can be output from speakers whose size is set to “Small”.
  • Seite 53 Menu Item Function Page Auto Power Standby Set the amount of time for the auto-standby function. ECO Mode Enables/disables the eco mode (power saving mode). Input Rename Changes the input source name displayed on the front display. Function Dimmer Adjusts the brightness of the front display. Memory Guard Prevents accidental changes to the settings.
  • Seite 54: Configuration

    Speaker Configures the speaker settings manually. Center Selects whether or not a center speaker is connected and its size. • Default settings are underlined. Settings ■ Configuration Select this option for small speakers. Small The subwoofer or front speakers will produce center channel Configures the output characteristics of the speakers.
  • Seite 55 ■ Distance Subwoofer Phase Sets the distance between each speaker and listening position so that sounds from the Sets the phase of the subwoofer. When the bass sound is lacking or unclear, speakers reach the listening position at the same time. First, select the unit of distance switch the subwoofer phase.
  • Seite 56 ■ Manual equalizer adjustment Set “EQ Select” to “GEQ”. Use the cursor keys (q/w) to select “Channel” and the cursor keys (e/r) to select the desired speaker channel. Use the cursor keys (q/w) to select the desired band (frequency) and the cursor keys (e/r) to adjust the gain.
  • Seite 57: Hdmi

    HDMI Configures the HDMI settings. TV Audio Input Selects an audio input jack of the unit to be used for TV audio input when “HDMI • Default settings are underlined. Control” is set to “On”. The unit’s input source automatically switches to TV audio when the TV input is switched to its built-in tuner.
  • Seite 58 SCENE Enables/disable SCENE link playback when “HDMI Control” is set to “On”. When SCENE link playback is enabled, HDMI Control-compatible devices connected to the unit via HDMI automatically works as follows, with a scene selection. • TV: turning on and displaying video from the playback device •...
  • Seite 59: Sound

    Sound Configures the audio output settings. Center Image Adjusts the center orientation level (broadening effect) of the front sound field. • Default settings are underlined. Higher to strengthen the center orientation level (less broadening effect) and lower to weaken (more broadening effect). This setting is effective when “Neo:6 Music” is ■...
  • Seite 60 ■ Volume Configures the volume settings. Scale Switches the scale of the volume display. Settings Displays the volume in the “dB” unit. 0-97 Displays the volume in the numeric value (0.5 to 97.0). Dynamic Range Selects the dynamic range adjustment method for bitstream audio (Dolby Digital and DTS signals) playback.
  • Seite 61: Eco

    Configures the power supply settings. • Default settings are underlined. ■ Auto Power Standby Set the amount of time for the auto-standby function. Settings Does not set the unit to standby mode automatically. Sets the unit to standby mode when you have not operated the unit 20 minutes and the unit has not detected any input signal for the specified time.
  • Seite 62: Function

    Function ■ Configures the functions that make the unit easier to use. Dimmer Adjusts the brightness of the front display. • Default settings are underlined. Setting range -4 to 0 (higher to brighten) ■ Input Rename Changes the input source name displayed on the front display. •...
  • Seite 63: Language

    Language Select an on-screen menu language. • Default settings are underlined. Settings English English 日本語 Japanese French Français German Deutsch Spanish Español Russian Italian Italiano Chinese • Japanese and Chinese characters used in content information (such as song titles) cannot be displayed.
  • Seite 64: Configuring The System Settings (Advanced Setup Menu)

    Configuring the system settings (ADVANCED SETUP menu) Configure the system settings of the unit while viewing the front display. ADVANCED SETUP menu items Set the unit to standby mode. While holding down STRAIGHT on the front panel, press z (power). •...
  • Seite 65: Selecting The Remote Control Id (Remote Id)

    Switch the video signal type of HDMI output so that it matches to the format of your TV. ID1). When using multiple Yamaha AV receivers, you can set each remote control with a Since the unit automatically selects the video signal type so that it matches to the TV, it unique remote control ID for its corresponding receiver.
  • Seite 66: Updating The Firmware (Update)

    Updating the firmware (UPDATE) CHARGE ENHANCER STEREO TUNED SLEEP MUTE VOL. UPDATE•••••USB ADAPTIVE DRC VIRTUAL New firmware that provides additional features or product improvements will be released as needed. Updates can be downloaded from our website. For details, refer to the information supplied with updates. ■...
  • Seite 67: Appendix

    When using multiple Yamaha products, the remote control may work on another the “Option” menu (p.49). Yamaha product or another remote control may work on the unit. If this happens, register different remote control IDs for the devices that you want to control with each remote control (p.65).
  • Seite 68: Troubleshooting

    The power does not turn on. consecutively. nearest Yamaha dealer or service center to request repair. Hold down z (power) on the front panel for more than 10 seconds to reboot the The internal microcomputer has frozen, due to an external electric The power does not turn off.
  • Seite 69: Audio

    Audio Problem Cause Remedy Another input source is selected. Select an appropriate input source with the input selection keys. Some digital audio formats cannot be played back on the unit. To check the audio No sound. Signals that the unit cannot reproduce are being input. format of the input signal, use “Signal Info”...
  • Seite 70: Video

    Problem Cause Remedy Only the front speakers work on multichannel The playback device is set to output 2-channel audio (such as To check it, use “Signal Info” in the “Option” menu (p.50). If necessary, change audio. PCM) only. the digital audio output setting on the playback device. The unit is too close to another digital or radio frequency device.
  • Seite 71: Fm/Am Radio

    FM/AM radio Problem Cause Remedy There is multi-path interference. Adjust the FM antenna height or orientation, or place it in a different location. Press MODE to select monaural FM radio reception (p.37). FM radio reception is weak or noisy. Your area is too far from the FM station transmitter. Use an outdoor FM antenna.
  • Seite 72: Error Indications On The Front Display

    Turn off the iPod and then turn it on again. Internal Error An internal error has occurred. Contact the nearest authorized Yamaha dealer or service center. No content There are no playable files in the selected folder. Select a folder that contains files supported by the unit.
  • Seite 73: Glossary

    Glossary Audio information DTS-HD Master Audio DTS-HD Master Audio is an advanced lossless audio format developed to offer a high-definition home theater experience with the quality of the studio master by DTS, Inc. DTS-HD Master Audio can carry up to ■...
  • Seite 74: Hdmi And Video Information

    Based on a wealth of actually measured data, CINEMA DSP, LFE (Low Frequency Effects) 0.1 channel Yamaha’s original DSP technology provides the audiovisual experience of a movie theater in your own home. This channel reproduces low-frequency bass signals and has a frequency range from 20 Hz to 120 Hz. This...
  • Seite 75: Supported Devices

    Supported devices and file formats Video signal flow Video signals input from a video device to the unit are output to a TV as shown below. ■ Supported devices Video device The unit ❑ USB devices • This unit supports USB mass storage class devices (e.g., flash memories or portable audio players) using FAT16 or FAT32 format.
  • Seite 76: Information On Hdmi

    To use HDMI Control, you need to perform the following HDMI Control link setup after Information on HDMI connecting the TV and playback devices. For details on settings and operating your TV, refer to the instruction manual for the TV. HDMI Control HDMI Control allows you to operate external devices via HDMI.
  • Seite 77: Audio Return Channel (Arc)

    f If you made a digital optical cable connection between the TV and the unit, use the Audio Return Channel (ARC) cursor keys (q/w) to select "TV Audio Input" and the cursor keys (e/r) to select "AV 1". ARC allows you to input TV audio to the unit with the HDMI cable which transmits video g Press SETUP.
  • Seite 78 HDMI signal compatibility Audio signals Audio signal type Audio signal format Compatible media (example) 2ch Linear PCM 2ch, 32 to 192 kHz, 16/20/24 bit CD, DVD-Video, DVD-Audio DVD-Audio, BD (Blu-ray disc), Multichannel Linear PCM 8ch, 32 to 192 kHz, 16/20/24 bit HD DVD 2 to 5.1ch, 2.8224 MHz, 1 bit SACD...
  • Seite 79 Reference diagram (rear panel) 0.5A ANTENNA (BD/DVD) HDMI OUT HDMI 1 HDMI 2 HDMI 3 HDMI 4 DC OUT COMPONENT VIDEO SPEAKERS FRONT SURROUND CENTER COMPONENT MONITOR OUT VIDEO MONITOR OUT VIDEO OPTICAL COAXIAL COAXIAL SUBWOOFER ( TV ) (CD) PRE OUT •...
  • Seite 80: Trademarks

    Trademarks Manufactured under license from Dolby Laboratories. Dolby, “SILENT CINEMA” is a trademark of Yamaha Corporation. Pro Logic and the double-D symbol are trademarks of Dolby Laboratories. Manufactured under license under U.S. Patent Nos: 5,956,674; 5,974,380; 6,226,616; 6,487,535; 7,212,872; 7,333,929; 7,392,195;...
  • Seite 81 Specifications Input jacks • Video Format (Repeater Mode) Compatible Decoding Formats - VGA • Analog Audio • Decoding Format - 480i/60 Hz Audio x 4 (AV 4–5, AUDIO, AUX [Mini Jack]) - Dolby TrueHD, Dolby Digital Plus - 576i/50 Hz - Dolby Digital •...
  • Seite 82 • Dynamic Power (1-channel driven) (IHF) • Filter Characteristics AM section [U.S.A. and Canada models] (fc=40/60/80/90/100/110/120/160/200 Hz) • Tuning Range Front L/R (8/6/4/2 Ω) ........110/130/160/180 W H.P.F. (Front, Center, Surround)........ 12 dB/oct. [U.S.A. and Canada models]....530 kHz to 1710 kHz [Other models] L.P.F.
  • Seite 83 Index Symbols Banana plug DSP Parameter (Sound, Setup menu) Basic playback operation DSP Program (front display information) Lock icon (o) BASS (sound mode) DSP/Surround (Option menu) Numerics Bass (Tone Control, Option menu) DTS Neo:6 (surround decoder) 2.1-channel system Bitrate (Signal Info, Option menu) Dynamic Range (Volume, Setup menu) 2ch Stereo (sound program) Bitstream...
  • Seite 84 HDMI Control (HDMI, Setup menu) Muting Sampling (Signal Info, Option menu) HDMI OUT (TV) (Audio Output, Setup menu) Scale (Volume, Setup menu) HDMI signal compatibility SCENE (HDMI, Setup menu) No content (error indication) Headphones Scene configuration No Front SP (YPAO error message) High definition audio SCENE function No MIC (YPAO error message)
  • Seite 85 YPAO (Yamaha Parametric room Acoustic Optimizer) Test Tone (Speaker, Setup menu) YPAO error message The Bottom Line (sound program) YPAO microphone The Roxy Theatre (sound program) YPAO warning message Tone Control (Option menu) TP (Traffic Program) Traffic information (Radio Data System)
  • Seite 86 © 2014 Yamaha Corporation YG025A0/EN...
  • Seite 87 (NS-B20 + NS-C20 + NS-SW20) SPEAKER PACKAGE PACKAGE ENCEINTES OWNER'S MANUAL MODE D'EMPLOI BEDIENUNGSANLEITUNG BRUKSANVISNING MANUALE DI ISTRUZIONI MANUAL DE INSTRUCCIONES GEBRUIKSAANWIJZING ИНСТРУКЦИЯ ПО ЭКСПЛУАТАЦИИ...
  • Seite 88 Precautions Please read the following operating precautions before use. Yamaha will not be held responsible for any damage and/or injury caused by not following the cautions below. 1. To assure the finest performance, please read this 1. Do not operate this unit upside down. It may overheat, manual carefully.
  • Seite 89: Voltage Selector

    Precautions • VOLTAGE SELECTOR Information for Users on Collection and Disposal (For China, Korea, Asia and General models) of Old Equipment The voltage selector switch on the rear panel of this This symbol on the products, packaging, unit must be set to your local main voltage BE- and/or accompanying documents means FORE plugging this unit into the AC main supply.
  • Seite 90: Package Contents

    Contents Package contents..........1 Connecting the speakers ........3 Connection diagram..........3 Installing the speakers........1 Connecting the power cables ......4 Installing the front, center, and surround Using the Subwoofer ......... 4 speakers ............2 Installing the subwoofer........2 Setting the subwoofer volume ......4 Wall-mounting the speakers........2 Troubleshooting ..........
  • Seite 91: Installing The Front, Center, And Surround Speakers

    Installing the speakers Installing the front, center, Wall-mounting the speakers and surround speakers You can mount the speakers on the wall as follows. Front speakers: Place the two front speakers on the Install screws into a solid wall or wall support left and right sides of the TV facing directly forward.
  • Seite 92: Connecting The Speakers

    Connecting the speakers Caution: Make sure the power cables for the subwoofer and your other AV components are disconnected from the AC wall outlets before making any connections. Connection diagram Surround speakers Right Left Center speaker SPEAKERS FRONT SURROUND CENTER Amplifier ANTENNA (BD/DVD)
  • Seite 93: Power Indicator

    (or “S”) for all of the NS-P20 speakers. Release the tab so that it closes securely on the If you’re connecting the subwoofer to a Yamaha DSP bare wire, not the insulation. amplifier or AV receiver, connect to its SUBWOOFER or LOW PASS output.
  • Seite 94: Troubleshooting

    If this product doesn’t work as expected, look for a possible cause below. If the issue you are experiencing is not listed, or you cannot resolve it after reading through these instructions, disconnect the power cable and contact an authorized Yamaha dealer or service center. ■ Front, surround speakers (NS-B20) and center speaker (NS-C20)
  • Seite 95: Specifications

    Yamaha’s discretion, without any charge for parts or labour. Yamaha reserves the right to replace a product with that of a similar kind and/or value and condition, where a model has been discontinued or is considered uneconomic to repair.
  • Seite 96 Précautions Lisez attentivement les précautions d’utilisation suivantes. Yamaha décline toute responsabilité en cas de dommages et/ ou de blessures découlant du non respect de ces consignes. En ce qui concerne le NS-SW20 1. Pour profiter au mieux de votre acquisition, lisez attentivement ce mode d’emploi.
  • Seite 97 Précautions 11. Si vous notez que cet appareil produit de la distorsion Information concernant la Collecte et le (par exemple, des “bruits secs et répétés”, un Traitement des déchets d’équipements électriques “martèlement”), réduisez le niveau de sortie. Les et électroniques. fréquences très graves que contiennent certaines pistes sonores de film ou certains passages de musique Le symbole sur les produits, l’emballage...
  • Seite 98: Contenu De L'emballage

    Sommaire Contenu de l’emballage........1 Connexion des enceintes........3 Schéma des connexions........3 Installation des enceintes .........1 Connexion des câbles d’alimentation ....4 Installation des enceintes avant, centrale et Utilisation du subwoofer ........4 surround ............2 Installation du subwoofer ........2 Réglage du volume du subwoofer .......4 Suspension murale des enceintes......2 En cas de problème..........
  • Seite 99: Installation Des Enceintes

    Installation des enceintes Installation des enceintes avant, Suspension murale des enceintes centrale et surround Vous pouvez suspendre les enceintes au mur de la façon suivante. Enceintes avant: Placez les deux enceintes avant à gauche et à droite du téléviseur, et en les orientant Fixez les vis dans un mur solide ou dans un directement vers l’avant.
  • Seite 100: Connexion Des Enceintes

    Connexion des enceintes Attention: Vérifiez que les câbles d’alimentation du subwoofer et de vos autres éléments AV sont débranchés des prises secteur avant d’ e ffectuer la moindre connexion. Schéma des connexions Enceintes surround Droite Gauche Enceinte centrale SPEAKERS FRONT SURROUND CENTER Amplificateur...
  • Seite 101: Connexion Des Câbles D'alimentation

    Relâchez le levier pour qu’il se referme Si vous raccordez le subwoofer à un amplificateur DSP convenablement en serrant le fil dénudé et ou un ampli-tuner AV Yamaha, utilisez sa sortie non l’isolant. SUBWOOFER ou LOW PASS. Vérifiez que les fils sont bien maintenus en tirant doucement dessus.
  • Seite 102: En Cas De Problème

    Yamaha. ■ Enceintes avant, surround (NS-B20) et enceinte centrale (NS-C20) Problème...
  • Seite 103: Fiche Technique

    Vous pouvez trouver toutes informations complémentaires sur notre site Web (http://europe.yamaha.com/warranty/). Yamaha garantit votre produit contre tout défaut de fabrication, pièces et main d’oeuvre, pour une durée de 2 ans à compter de la première date de vente au détail. Yamaha s’engage, dans les conditions décrites ci-après, à procéder à la réparation du produit défectueux (ou d’un quelconque de ses composants) ou à...
  • Seite 104: Vorsichtsmaßnahmen

    Vorsichtsmaßnahmen Bitte lesen Sie sich die folgenden Sicherheitshinweise vor der Inbetriebnahme durch. Yamaha kann für etwaige Schäden und/oder Verletzungen, die durch eine Nichtbeachtung der folgenden Sicherheitshinweise entstehen, nicht haftbar gemacht werden. 1. Um optimales Leistungsvermögen sicherzustellen, 12. Bitte lesen Sie den Abschnitt „Beheben vermeintlicher lesen Sie bitte diese Anleitung aufmerksam durch.
  • Seite 105: Voltage Selector

    Vorsichtsmaßnahmen und kann zu Feuer, Beschädigung des Gerätes und/oder Verbraucherinformation zur Sammlung und persönlichen Verletzungen führen. Yamaha übernimmt Entsorgung alter Elektrogeräte keine Haftung für Beschädigungen, die auf die Verwendung dieses Gerätes mit einer anderen als der Befindet sich dieses Symbol auf den vorgeschriebenen Netzspannung zurückzuführen sind.
  • Seite 106: Lieferumfang

    Inhalt Lieferumfang ............1 Anschließen der Boxen ........3 Anschluss-Schema ..........3 Aufstellen der Boxen ..........1 Anschließen der Netzkabel........4 Aufstellen der Front-, Mitten- und Surround- Verwendung des Subwoofers......4 Boxen ...............2 Aufstellen des Subwoofers ........2 Einstellen der Subwoofer-Lautstärke....4 Wandmontage der Boxen ........2 Fehlersuche ............
  • Seite 107: Aufstellen Der Front-, Mittenund Surround-Boxen

    Aufstellen der Boxen Aufstellen der Front-, Mitten- Wandmontage der Boxen und Surround-Boxen Die Boxen kann man mit folgendem Verfahren an der Wand anbringen. Frontboxen: Stellen Sie die beiden Frontboxen links und rechts neben den Fernseher. Sie sollten gerade auf Verankern Sie die Schrauben wie nachstehend die Hörposition gerichtet sein.
  • Seite 108: Anschließen Der Boxen

    Anschließen der Boxen Achtung: Vor dem Anschließen oder Abtrennen der Boxen müssen Sie den Netzanschluss des Subwoofers und der übrigen AV-Geräte lösen. Anschluss-Schema Surround-Boxen Rechts Links Mittenbox SPEAKERS FRONT SURROUND CENTER Verstärker ANTENNA HDMI OUT (BD/DVD) DOCK HDMI 1 HDMI 2 HDMI 3 HDMI 4 GND AM...
  • Seite 109: Anschließen Der Netzkabel

    Geben Sie die Lasche wieder frei, um die Ader Wenn Sie den Subwoofer an einen DSP-Verstärker (nicht aber den Mantel) festzuklemmen. oder AV-Receiver von Yamaha anschließen möchten, Ziehen Sie vorsichtig am Kabel, um zu müssen Sie seine SUBWOOFER- oder LOW PASS- überprüfen, ob es fest sitzt.
  • Seite 110: Fehlersuche

    Wenn sich das Produkt nicht erwartungsgemäß verhält, finden Sie hier eventuell einschlägige Lösungsansätze. Wenn die bei Ihnen auftretende Störung nicht erwähnt wird bzw. wenn Sie sie anhand der erwähnten Hinweise nicht lösen können, müssen Sie sofort den Netzanschluss lösen und sich an Ihren Yamaha-Händler oder eine anerkannte Kundendienststelle wenden.
  • Seite 111: Empfindlichkeit

    Begrenzte Garantie für den Europäischen Wirtschaftsraum (EWR) und die Schweiz Herzlichen Dank, dass Sie sich für ein Yamaha Produkt entschieden haben. In dem unwahrscheinlichen Fall, dass die Garantie für das Yamaha-Produkt in Anspruch genommen werden muss, wenden Sie sich bitte an den Händler, bei dem es gekauft wurde. Sollten Sie auf Schwierigkeiten stoßen, wenden Sie sich bitte and die Yamaha Repräsentanz in Ihrem Land.
  • Seite 112: Säkerhetsföreskrifter

    Säkerhetsföreskrifter Läs igenom följande försiktighetsåtgärder innan användningen. Yamaha kan inte hållas ansvarig för eventuella materiella skador och/eller personskador som uppstår till följd av underlåtenhet att läsa följande försiktighetsåtgärder. 1. Läs noga denna bruksanvisning för att kunna ha största 2. Hantera inte tangenter, reglage eller anslutningskablar möjliga nöje av enheten.
  • Seite 113 Säkerhetsföreskrifter • Spänningsväljare (VOLTAGE SELECTOR) Användarinformation, beträffande insamling och (Gäller modeller till kina, Korea, övriga Asien och dumpning av gammal utrustning allmän exportmodell) Denna symbol, som finns på produkterna, Spänningsväljaren på enhetens bakpanel måste emballaget och/eller bifogade dokument ställas in på den spänning som används i området talar om att de använda elektriska och INNAN enheten ansluts till elnätet.
  • Seite 114: Förpackningens Innehåll

    Innehåll Förpackningens innehåll........1 Anslutning av högtalarna ......... 3 Anslutningsdiagram ..........3 Installation av högtalarna .........1 Anslutning av nätkablarna........4 Installation av front-, center-, och Använda subwoofern ........4 surroundhögtalare..........2 Installera subwoofern ...........2 Ställa in subwoofervolymen.........4 Väggmontering av högtalarna ......2 Felsökning ............5 Tekniska data ............
  • Seite 115: Installation Av Front-, Center-, Och Surroundhögtalare

    Installation av högtalarna Installation av front-, center-, Väggmontering av högtalarna och surroundhögtalare Du kan montera högtalarna på väggen enligt följande. Fronthögtalare: Placera de två fronthögtalarna på Dra i skruvar i en solid vägg eller ett väggstöd vänster och höger sida av TV-apparaten, riktade rakt såsom visas nedan.
  • Seite 116: Anslutning Av Högtalarna

    Anslutning av högtalarna Försiktighet: Kontrollera att nätkablarna till subwoofern och andra AV-komponenter har dragits ut ur vägguttagen innan några anslutningar görs. Anslutningsdiagram Surroundhögtalare Höger Vänster Centerhögtalare SPEAKERS FRONT SURROUND CENTER Förstärkare ANTENNA HDMI OUT (BD/DVD) DOCK HDMI 1 HDMI 2 HDMI 3 HDMI 4 GND AM...
  • Seite 117: Anslutning Av Nätkablarna

    Tryck in och håll kontakttabben intryckt. högtalare anges som små (eller “S”). För in den blottlagda ledningen. Om du ansluter subwoofern till en Yamaha DSP- förstärkare eller AV-receiver, anslut till SUBWOOFER Släpp upp tabben så att den sluter till om den eller LOW PASS-utgången.
  • Seite 118: Felsökning

    Om denna produkt inte fungerar såsom det är tänkt, sök efter möjlig orsak nedan. Om problemet som uppstått inte är medtaget, eller om du inte kan lösa det efter att ha läst igenom anvisningarna, koppla ur nätkabeln och rådfråga en auktoriserad Yamaha-handlare eller servicecenter. ■ Front-, surroundhögtalare (NS-B20) och centerhögtalare (NS-C20) Problem Möjlig orsak...
  • Seite 119: Tekniska Data

    Yamaha förbehåller sig rätten att byta ut en produkt mot en av liknande typ och/eller värde och skick, då en viss modell har upphört eller anses oekonomisk att reparera.
  • Seite 120 Precauzioni Leggere le seguenti precauzioni operative prima dell’uso. Yamaha non sarà ritenuta responsabile per alcun danno e/o lesione causati dal mancato rispetto delle precauzioni riportate di seguito. 1. Per assicurarvi le migliori prestazioni di quest’unità, 1. Non usare quest’unità ribaltata. Essa si può altrimenti leggere con attenzione l’intero manuale.
  • Seite 121: Voltage Selector

    Precauzioni 14. Se si pensa di non dover usare quest’unità per qualche Informazioni per gli utenti sulla raccolta e lo tempo (ad esempio per andare in vacanza), scollegare il smaltimento di vecchia attrezzatura cavo di alimentazione dalla presa di corrente. 15.
  • Seite 122: Contenuto Dell'imballo

    Sommario Contenuto dell’imballo ........1 Collegare gli altoparlanti ........3 Diagramma dei collegamenti ......3 Installare gli altoparlanti ........1 Collegare i cavi dell’alimentazione......4 Installazione degli altoparlanti anteriori, Usare il subwoofer..........4 centro, e surround ..........2 Installare il subwoofer ..........2 Impostare il volume del subwoofer.....4 Montaggio degli altoparlanti a muro....2 Risoluzione dei problemi........
  • Seite 123: Installazione Degli Altoparlanti Anteriori, Centro, E Surround

    Installare gli altoparlanti Installazione degli altoparlanti Montaggio degli altoparlanti a muro anteriori, centro, e surround Potete montare gli altoparlanti a muro come segue. Altoparlanti anteriori: Posizionate i due altoparlanti Inserite le viti in una parete o su un supporto anteriori a sinistra e a destra del televisore, in modo da parete come mostrato di seguito.
  • Seite 124: Collegare Gli Altoparlanti

    Collegare gli altoparlanti Attenzione: Accertatevi che i cavi dell’alimentazione del subwoofer e degli altri dispositivi AV siano scollegati dalle prese a muro CA prima di eseguire qualsiasi collegamento. Diagramma dei collegamenti Altoparlanti surround Destro Sinistro Altoparlante centro SPEAKERS FRONT SURROUND CENTER Amplificatore ANTENNA...
  • Seite 125: Collegare I Cavi Dell'alimentazione

    “S”) per tutti gli altoparlanti NS-P20. fili, non sull’isolante. Se collegate il subwoofer a un amplificatore DSP o a un Per controllare che il collegamento sia stato ricevitore AV di Yamaha, collegatelo alla sua uscita effettuato correttamente, tirate leggermente il SUBWOOFER o LOW PASS. cavo.
  • Seite 126: Risoluzione Dei Problemi

    Se il prodotto non funziona come dovrebbe, cercate una possibile causa nella seguente sezione. Se il problema non è elencato o, nonostante le istruzioni, non riuscite a risolverlo, staccate il cavo dell’alimentazione e contattate un rivenditore autorizzato Yamaha o il centro di assistenza. ■ Altoparlanti anteriori, surround (NS-B20) e altoparlante centro (NS-C20)
  • Seite 127: Specifiche Tecniche

    (o sostituire, a discrezione esclusiva di Yamaha) il prodotto difettoso o qualsiasi sua parte senza alcun addebito per le parti o per il lavoro. Yamaha si riserva il diritto di sostituire un prodotto con uno di tipo, valore e/o condizione simile nel caso un modello particolare non sia più...
  • Seite 128 Precauciones Lea las siguientes precauciones de funcionamiento antes de iniciar el uso del aparato. Yamaha no se responsabilizará de cualquier daño o lesión causada por no seguir las precauciones que aparecen a continuación. Para el NS-SW20 1. Para asegurar el mejor rendimiento posible, lea con atención este manual.
  • Seite 129 Precauciones 12. La vibración generada por el sonido superbajo puede Información para Usuarios sobre Recolección y distorsionar la imagen de un televisor. En este caso, Disposición de Equipamiento Viejo separe la unidad del televisor. 13. Cuando desconecte el cable de alimentación de la toma Este símbolo en los productos, embalaje, de corriente, sujete la clavija;...
  • Seite 130: Contenido Del Paquete

    Contenido Contenido del paquete........1 Conectar los altavoces........3 Diagrama de conexión .........3 Instalar los altavoces ..........1 Conectar los cables de alimentación ....4 Instalar los altavoces frontales, central, y Utilizar el subwoofer.......... 4 surround ............2 Instalar el subwoofer..........2 Ajustar el volumen del subwoofer.......4 Instalar los altavoces en la pared......2 Solucionar problemas ........
  • Seite 131: Instalar Los Altavoces Frontales, Central, Y Surround

    Instalar los altavoces Instalar los altavoces frontales, Instalar los altavoces en la pared central, y surround Puede instalar los altavoces en una pared de la manera siguiente. Altavoces frontales: Sitúe los dos altavoces frontales en los lados derecho e izquierdo del televisor Fije los tornillos a una pared firme o en un totalmente hacia delante.
  • Seite 132: Conectar Los Altavoces

    Conectar los altavoces Precaución: Antes de realizar las conexiones, compruebe que los cables de alimentación para el subwoofer y los otros componentes AV no estén conectados a las tomas de CA. Diagrama de conexión Altavoces Surround Derecho Izquierdo Altavoz central SPEAKERS FRONT SURROUND...
  • Seite 133: Conectar Los Cables De Alimentación

    Si conecta el subwoofer a un amplificador DSP de no la parte del aislamiento. Yamaha o a un receptor AV, conéctelo a su Compruebe que la conexión sea segura SUBWOOFER o a la salida LOW PASS.
  • Seite 134: Solucionar Problemas

    Yamaha autorizado. ■ Altavoces frontales, surround (NS-B20), y central (NS-C20)
  • Seite 135: Especificaciones

    Yamaha se compromete, sujeto a las condiciones listadas más abajo, a reparar el producto o cualquier pieza (o piezas) que tenga defectos, o a sustituirlo, a discreción de Yamaha, sin cobrar ningún honorario por las piezas o la mano de obra.
  • Seite 136: Voorzorgsmaatregelen

    Voorzorgsmaatregelen Gelieve de volgende voorzorgsmaatregelen te lezen alvorens het toestel te gebruiken. Yamaha is niet aansprakelijk voor schade en/of letsels die zijn veroorzaakt doordat onderstaande voorzorgsmaatregelen niet in acht zijn genomen. 1. Om verzekerd te kunnen zijn van optimale prestaties, 13.
  • Seite 137 Voorzorgsmaatregelen 9. De zeer lage tonen die door dit toestel geproduceerd Informatie voor gebruikers van inzameling en worden kunnen leiden tot ‘rondzingen’ bij gebruik van verwijdering van oude apparaten. een draaitafel. Zet dit toestel in voorkomende gevallen verder weg van de draaitafel. Dit teken op de producten, verpakkingen 10.
  • Seite 138: Geleverde Onderdelen

    Inhoud Geleverde onderdelen ........1 Aansluiten van de speakers......3 Aansluitschema .............3 Opstellen van de speakers ........1 Aansluiten van de netsnoeren ......4 Plaatsing van de front-, midden- en Gebruik van de subwoofer ....... 4 surroundspeakers ...........2 Installeren van de subwoofer.......2 Instellen van het subwoofervolume....4 Wandmontage van de speakers ......2 Verhelpen van problemen........
  • Seite 139: Plaatsing Van De Front-, Midden- En Surroundspeakers

    Opstellen van de speakers Plaatsing van de front-, midden- Wandmontage van de speakers en surroundspeakers U kunt de speakers als volgt aan de wand monteren. Frontspeakers: Zet de twee frontspeakers links en Draai de schroeven zoals hierna getoond in een rechts van de TV.
  • Seite 140: Aansluiten Van De Speakers

    Aansluiten van de speakers Voorzichtig: Vóór het aansluiten of afkoppelen van de speakers moet u de aansluiting van de subwoofers en de overige AV-apparaten op het lichtnet verbreken. Aansluitschema Surroundspeakers Rechts Links Middenspeaker SPEAKERS FRONT SURROUND CENTER Versterker ANTENNA HDMI OUT (BD/DVD) DOCK HDMI 1...
  • Seite 141: Aansluiten Van De Netsnoeren

    (maar niet de kabelmantel) worden Als u de subwoofer op een DSP-versterker of AV- vastgeklemd. receiver van Yamaha wilt aansluiten, moet u de SUBWOOFER- of LOW PASS-uitgang gebruiken. Test de stevigheid van de verbinding door voorzichtig aan de kabel te trekken.
  • Seite 142: Verhelpen Van Problemen

    Wanneer dit product niet naar behoren lijkt te werken, vindt u hier eventueel de oplossing. Als u niets vindt over de bij u optredende storing of als u het probleem niet kunt verhelpen, moet u meteen de aansluiting op het lichtnet verbreken en contact opnemen met uw Yamaha-dealer of een erkende herstellingsdienst. ■ Front-, surroundspeakers (NS-B20) en middenspeaker (NS-C20)
  • Seite 143: Specificaties

    (5) Gebreken aan het systeem waarin het product wordt ingebouwd en/of onverenigbaarheid met derde producten. (6) Gebruik van een product dat in de Europese Economische Ruimte en/of Zwitserland werd ingevoerd, maar niet door Yamaha, en dat niet voldoet aan de technische of veiligheidsnormen van het land van gebruik en/of de standaardspecificaties van producten die door Yamaha in de Europese Economische Ruimte en/of Zwitserland worden verkocht.
  • Seite 144: Меры Предосторожности

    Меры предосторожности Прочитайте описание следующих мер предосторожности перед использованием аппарата. Yamaha не несет ответственность за любые повреждения и (или) травмы, вызванные несоблюдением приведенных ниже мер предосторожности. 1. Для обеспечения наилучшего результата, 12. Перед тем как прийти к заключению о поломке...
  • Seite 145 указанное, опасно и может стать причиной и в сопроводительных документах пожара, поломки аппарата и (или) привести к указывают на то, что подержанные травме. Компания Yamaha не несет электрические и электронные ответственности за поломку или ущерб, вызванные использованием аппарата при приборы не должны...
  • Seite 146: Содержимое Упаковки

    Содержание Содержимое упаковки ........1 Подключение колонок........3 Схема подключения ...........3 Установка колонок ...........1 Подключение силовых кабелей.......4 Установка центральной, фронтальных Использование сабвуфера ......4 колонок и колонок окружающего звучания ............2 Установка уровня громкости сабвуфера..4 Установка сабвуфера .........2 Поиск и устранение неисправностей ..5 Колонки...
  • Seite 147: Колонки Для Настенного Монтажа

    Установка колонок Установка центральной, Колонки для настенного монтажа фронтальных колонок и Вы можете выполнить монтаж колонок на стене, колонок окружающего звучания как показано ниже. Установите винты в твердую стену или Фронтальные колонки: Разместите две опору стены, как показано на рисунке ниже. фронтальные...
  • Seite 148: Подключение Колонок

    Подключение колонок Предупреждение: Перед выполнением каких-либо подключений убедитесь в том, что силовые кабели сабвуфера и прочих аудиовидеокомпонентов отсоединены от розеток переменного тока. Схема подключения Колонки окружающего звучания Правая Левая Центральная колонка SPEAKERS FRONT SURROUND CENTER Усилитель ANTENNA (BD/DVD) HDMI OUT DOCK HDMI 1 HDMI 2...
  • Seite 149: Подключение Силовых Кабелей

    Отпустите защелку таким образом, чтобы акустических систем NS-P20. она надежно прижала оголенную часть При подсоединении сабвуфера к DSP-усилителю провода, а не изоляцию. Yamaha или AV-ресиверу, подключите его к Проверьте надежность подключения, выходу SUBWOOFER или LOW PASS. слегка потянув кабели. Подключение силовых кабелей...
  • Seite 150: Поиск И Устранение Неисправностей

    возможных причин. Если в списке нет проблемы, с которой Вы столкнулись, или же Вы не можете ее решить даже после прочтения данных указаний, отсоедините силовой кабель и обратитесь к ближайшему авторизированному дилеру Yamaha или в сервисный центр. ■ Фронтальные колонки, колонки окружающего звучания (NS-B20) и...
  • Seite 151: Технические Характеристики

    Технические характеристики ■ Фронтальные колонки, колонки ■ Сабвуфер (NS-SW20) окружающего звучания (NS-B20) и Тип .......Advanced Yamaha Active Servo Technology центральная колонка (NS-C20) Головка..16-см конический низкочастотный динамик с магнитным экранированием Тип ....Широкополосная акустическая система колонок Выходная мощность усилителя........50 Вт с магнитным экранированием...
  • Seite 152 Технические характеристики Printed in China WY60250-1 © 2011 Yamaha Corporation...

Inhaltsverzeichnis