Werbung
Quicklinks
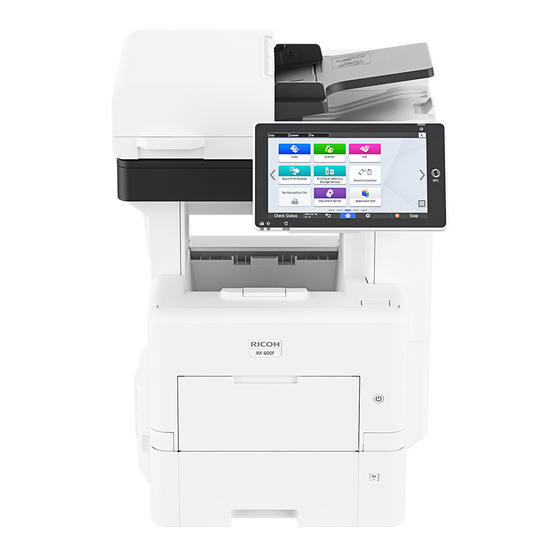
Setup Guide
Setup Guide
For safe and correct use, be sure to read the
Safety Information before using the machine.
Installationsanleitung
Für eine sichere und korrekte Verwendung
lesen Sie unbedingt die "Sicherheitshinweise"
vor der Verwendung dieses Geräts.
Manuel d'installation
Pour une utilisation correcte et en toute sécuri-
té, veillez à bien lire les "Consignes de sécurité"
avant d'utiliser l'appareil.
Guida all'installazione
Per un uso sicuro e corretto, leggere le "In-
formazioni sulla sicurezza" prima di utilizzare la
macchina.
Guía de instalación
Para un uso seguro y correcto, lea "Información
de seguridad" antes de utilizar la máquina.
Guia d'instal·lació
Per un ús correcte i segur, llegiu la Informació
sobre seguretat abans d'utilitzar la màquina.
EN
DE
FR
IT
ES
CA
Werbung

Verwandte Anleitungen für Ricoh IM 600SRF


Inhaltszusammenfassung für Ricoh IM 600SRF
- Seite 1 Setup Guide Setup Guide For safe and correct use, be sure to read the Safety Information before using the machine. Installationsanleitung Für eine sichere und korrekte Verwendung lesen Sie unbedingt die “Sicherheitshinweise” vor der Verwendung dieses Geräts. Manuel d’installation Pour une utilisation correcte et en toute sécuri- té, veillez à...
- Seite 2 The components are stored in the inner box. 1. Setup Guide (This manual) / Safety Informa- 5. CD-ROM tion 6. Extender (only for IM 600SRF) 2. Waste toner bottle 7. Modular cable with ferrite core (only for North 3. Ferrite core (only for Europe/Asia) America) 4.
- Seite 3 Setup DVL205 Confirm the environmental conditions. • Install the machine in a place where the temperature and humidity around the machine is within the permissible range (white area) shown above. (Blue area: Recommended range) • Install the machine on a level spot where the difference in height is within 3 mm.
- Seite 4 Installing the Machine/Aufstellung des Geräts/Installation de l'appareil/Installazione della macchina/Instalación de la máquina/Instal·lació de la màquina EAT031 EAT033 EAT030 EAT032 EAT034 Hold the inset grips on both sides of the machine with two people as shown above, and slowly lift and move the machine. Heben Sie das Gerät mit einer zweiten Person an den dafür vorgesehenen Griffen an beiden Seiten des Geräts langsam an und transportieren Sie es.
- Seite 5 EAT035 EAT036 For IM 600SRF only: If you need to lift the machine from the left and right sides, two people should hold the machine as shown above, and then slowly lift and move the machine. Nur für IM 600SRF: Wenn Sie das Gerät von der linken und rechte Seite anheben müssen, sollten zwei Personen das Gerät wie oben abgebildet festhalten, es dann langsam anheben und bewegen.
- Seite 6 30 cm (11.8 inches) 40 cm 40 cm (15.7 inches) (15.7 inches) IM 550F/IM 600F: 20 cm (7.8 inches) 20 cm IM 600SRF: (7.8 inches) 30 cm (11.9 inches) 50 cm 50 cm 30 cm 30 cm (19.6 inches) (19.6 inches) (11.8 inches)
- Seite 7 Setup (IM 600SRF) EAT040 EAT041 EAT042 Remove the adhesive tape from the Tilt the operation panel and remove all the Open the right cover, and then remove the operation panel. adhesive tape and the protective sheet. protective material. Entfernen Sie das Klebeband vom Kippen Sie das Bedienfeld an und entfernen Öffnen Sie die rechte Abdeckung und...
- Seite 8 Setup (IM 600SRF) EAT043 Attach the extender. Bringen Sie die Verlängerung an. Fixez l'extension. Collegare l'estensore. Acople el extensor. Col·loqueu l'extensor.
- Seite 9 Installing the Print Cartridge/Installieren der Druckkartusche/Installation de la cartouche d'impression/Installazione della cartuccia di stampa/Instalación del cartucho de impresión/Instal·lació del cartutx d'impressió EAT044 EAT046 EAT045 Open the front cover. Hold the print cartridge with one hand as Lift the print cartridge. you release the print cartridge lever with another hand.
- Seite 10 EAT047 EAT048 EAT049 Turn over the print cartridge as shown Shake the print cartridge at least 10 times to Turn over the print cartridge as shown above. the left and right so that the toner inside it above. spreads uniformly. Drehen Sie die Druckkartusche wie oben Schütteln Sie die Kartusche mindestens Drehen Sie die Druckkartusche wie oben...
- Seite 11 Setup EAT050 EAT071 EAT051 Insert the print cartridge into the machine. Lock the lever of the print cartridge. Press the print cartridge until it clicks into place. Legen Sie die Druckkartusche in das Gerät ein. Verriegeln Sie die Kartusche mit dem Hebel. Schieben Sie die Kartusche in den Drucker, bis sie mit einem Klick einrastet.
- Seite 12 Setup EAT052 Close the front cover. Schließen Sie die vordere Abdeckung. Refermez le capot avant. Chiudere lo sportello anteriore. Cierre la tapa frontal. Tanqueu la tapa davantera.
- Seite 13 Replacing the Waste Toner Bottle/Austauschen des Resttonerbehälters/Remplacement de la cartouche de toner usagé/ Sostituzione della vaschetta recupero toner/Sustitución de la botella de tóner residual/Substitució de l'ampolla de tòner residual EAT053 EAT054 EAT055 Open the left cover. Open the cap of the waste toner bottle Press the waste toner bottle until it clicks and insert the waste toner bottle into the into place.
- Seite 14 Setup EAT056 Close the left cover. Schließen Sie die linke Abdeckung. Fermez-le. Chiudere lo sportello di sinistra. Cierre la tapa izquierda. Tanqueu la tapa esquerra.
- Seite 15 Loading Paper/Einlegen von Papier/Chargement du papier/Caricamento della carta/Carga del papel/Càrrega de paper EAT057 EAT325 EAT326 Pull the tray carefully until it stops, lift the Squeeze the clip on the side paper fence and Squeeze the end fence and slide it inward to front side of the tray, and then pull it out of slide it to match the paper size.
- Seite 16 EAT059 EAT073 EAT074 Fan the paper. Load the paper print side down. • Do not stack paper over the limit mark. Fächern Sie das Papier auf. Legen Sie das Papier mit der Druckseite nach unten zeigend ein. • Stapeln Sie Papier nicht über die Begrenzungs- markierung.
- Seite 17 Setup EAT061 EAT062 EAT060 Adjust the paper fences to close any gaps. Rotate the paper size dial, which is located Lifting the front side of the tray, insert it into at the front right of the tray, so that the size the machine, and then push it in carefully and the feed direction of the paper in the until it stops.
- Seite 18 Turning the Power On/Einschalten des Geräts/Mise sous tension/Accensione della macchina/Cómo encender el dispositivo/ Encesa del dispositiu EAT063 EAT064 EAT065 Remove the power connector cover from the Plug the power cord into the machine and Insert the power plug into an electric outlet. lower left hand corner of the machine.
- Seite 19 Setup EAT066 Press the main power switch. The machine starts up. Following the start screen, the language select screen appears. When installing option, see “Installing Options”, Setup in the web manual. Drücken Sie den Hauptschalter. Das Gerät fährt hoch. Nach dem Startbildschirm wird der Sprachauswahl-Bildschirm angezeigt.
- Seite 20 Basic Settings/Allgemeine Einstellungen/Paramètres de base/Impostazioni di base/Ajustes básicos/Paràmetres bàsics Select the language that you want to use, Select [Set Up Now], and then press [Next]. Press the [Administrator 1] and the and then press [Next]. [Password] dialogue boxes, enter and the name of the administrator and the password English screens are used in this manual for respectively.w...
- Seite 21 Initial Settings Enter the name of the administrator and the Press [Basic Settings]. Select your country, and then press [Next]. password again for confirming, and then Follow the instructions on the screen to specify press [OK] to register them. time zone, date, time, daylight saving time, and sound as necessary.
- Seite 22 When the basic setting is completed, the initial screen for the setup appears. Proceed the setup according to the function you want to use. Nach Abschluss der allgemeinen Einstellungen wird der anfängliche Einrichtungsbildschirm angezeigt. Fahren Sie mit der Einrichtung des Geräts entsprechend der zu verwendenden Funktion fort.
-
Seite 23: Wired Lan
Initial Settings 8. Network Settings (Wired LAN) → See page 24. Wired LAN 8. Netzwerkeinstellungen (kabelgebundenes LAN) → Siehe Seite 24. 8. Paramètres réseau (LAN filaire) → Voir page 24. 8. Impostazioni di rete (LAN cablata) → Vedere pagina 24. 8. - Seite 24 Network Settings (Wired LAN)/Netzwerkeinstellungen (kabelgebundenes LAN)/Paramètres réseau (LAN filaire)/Impostazioni di rete (LAN cablata)/Ajustes de red (LAN con cable)/Paràmetres de xarxa (LAN amb fil) DVL234 EAT067 EAT067 Prepare a LAN cable (commercially Press [Network Settings] on the control Connect the LAN cable to the Ethernet port available).
- Seite 25 Initial Settings Press [Next] on the screen. Select the method to set the IP address, and After Wired LAN settings: then press [Next]. When using the fax, go to page 28 “Fax Proceed the settings by following the screen. Settings”. If the Wireless LAN board is installed, the When not using the fax, press [Set Up screen for setting a direct connection appears...
- Seite 26 Network Settings (Wireless LAN)/Netzwerkeinstellungen (Wireless LAN)/Paramètres réseau (LAN sans fil)/Impostazioni di rete (LAN wireless)/Ajustes de red (LAN inalámbrica)/Paràmetres de xarxa (LAN sense fil) Press [Network Settings] on the control Press [Wireless LAN], then press [Next]. Specify how to connect the machine to the panel.
- Seite 27 Initial Settings Specify whether or not to enable Direct After Wireless LAN settings: Connection, then press [OK]. When using the fax, go to page 28 “Fax Settings”. When not using the fax, press [Set Up Complete] and then go to page 30 “10 Installing the Printer Driver”.
- Seite 28 Fax Settings/Fax-Einstellungen/Paramètres fax/Impostazioni fax/Ajustes de fax/Paràmetres de fax EAT068 Press [Fax Settings] on the control panel. Connect the modular cable to the “LINE” Press [Next] on the control panel. connector. • Connect the public switched telephone network (PSTN) to Line. Connecting lines other than PSTN to this machine may cause it to malfunction.
- Seite 29 Initial Settings Select the type of line you are using, then Select a reception mode, then press [Next]. Follow the instructions on the screen to press [Next]. specify Fax Header, Own Name, Own Fax Number, and Sound Volume. When you have completed the settings, press [Set Up Complete] on the control panel.
- Seite 30 • Per utilizzare Device Software Manager, il computer deve essere connesso a Internet. • È possibile installare Device Software Manager anche dal sito web di Ricoh. • Se viene rilasciato un driver della stampante aggiornato, viene individuato automaticamente il driver della stampante appropriato in modo da poterlo installare.
- Seite 31 Installing the Printer Driver (CD-ROM)/Installieren des Druckertreibers (CD-ROM)/Installation du pilote d'impression (CD-ROM)/Installazione del driver della stampante (CD-ROM)/Instalación del driver de impresora (CD-ROM)/Instal·lació del driver d'impressora (CD-ROM) DVK238 Insert the CD-ROM into your computer. When the [Printer and Scanner Drivers] Specify whether to connect the computer via screen appears, select the language to use, a network or by a USB cable.
- Seite 32 When the [Install Printer Driver] screen When the [Printer Initial Settings] screen appears, select [Add a new printer] and appears, specify the optional devices • If you connect the computer by a USB proceed the installation. attached to the machine or the paper cable, do not connect the cable until you are settings for trays as necessary.
- Seite 33 Installing the Printer Driver (Online)/Installieren des Druckertreibers (Online)/Installation du pilote d'impression (en ligne)/Installazione del driver della stampante (online)/Instalación del driver de impresora (Online)/Instal·lació del driver d'impressora (en línia) DVK238 Insert the CD-ROM into your computer. When the [Printer and Scanner Drivers] Select [I accept the agreement], and then screen appears, select the language to use, click [Install] to continue the installation.
- Seite 34 Preparations for Printing Specify whether to connect the computer via Select the machine from [Device Name], and a network or by a USB cable. then click [Next]. Installation starts. A message appears when the installation is complete. • If you connect the computer by a USB cable, do not connect the cable until you are instructed to do so on the screen.
- Seite 36 © 2019 EN GB DE DE FR FR IT IT CA ES D0BW-7069A...