Herunterladen Inhalt Inhalt Diese Seite drucken

Werbung

Verfügbare Sprachen
  • DE

Verfügbare Sprachen

  • DEUTSCH, seite 14
NL - Instructieboekje
EN - Instruction leaflet
DE - Bedienungsanleitung
FR - Livret d'instructions
IT - Manuale d'istruzioni
ES - Instrucciones
PT - Manual de Instruções
VENTO 9 – 12 – 16 – 16SR
Ventilatoren / Fans / Ventilateurs / Ventilatori /
Ventiladores
(T=tafelmodel, S=op standaard, R=met afstandsbediening)
(T= tabletop model, S = on stand, R=with remote control)
(T=Tischmodell, S=Standmodell, R = mit Fernbedienung)
(T=modèle de table, S=sur pied, R=avec télécommande)
(T=da tavolo, C=a colonna, R=con telecomando)
(T = modelo de mesa, S = de pie, R=con mando a distancia)
(T = modelo de mesa, S = com suporte, R=com controlo remoto)
Art.nr. 38.466.6 (Vento9) – 38.468.0 (Vento12) – 38.470.3 (Vento16) – 38.474.1 (Vento16SR)

Werbung

Inhaltsverzeichnis
loading

Inhaltszusammenfassung für EUROM VENTO series

  • Seite 1 NL - Instructieboekje EN - Instruction leaflet DE - Bedienungsanleitung FR - Livret d’instructions IT - Manuale d’istruzioni ES - Instrucciones PT - Manual de Instruções VENTO 9 – 12 – 16 – 16SR Ventilatoren / Fans / Ventilateurs / Ventilatori / Ventiladores (T=tafelmodel, S=op standaard, R=met afstandsbediening) (T= tabletop model, S = on stand, R=with remote control)
  • Seite 2: Technische Gegevens

    DANK Hartelijk dank dat u voor de EUROM ventilator gekozen hebt. U hebt daarmee een goede keus gemaakt! Lees voor gebruik het instructieboekje aandachtig en in zijn geheel door: dat is belangrijk voor een correcte en optimale werking én voor uw veiligheid!
  • Seite 3 13. Spuit geen middelen (anti-insect, schoonmaak of wat dan ook) op of in de ventilator; dat kan lichamelijke klachten veroorzaken (i.h.b. bij kinderen!) of onderdelen beschadigen. 14. Sluit de ventilator niet aan op een timer of een dimmer. 15. Gebruik de ventilator niet bij té hoge temperaturen (boven de 40°), niet in de buurt van verwarmingsapparatuur, niet in ruimtes met een hoge luchtvochtigheid (badkamers enz.) en niet in stoffige ruimtes.
  • Seite 4 SAMENSTELLING A. voorrooster B. roostersluitring C. waaier D. roosterbevestiging E. achterrooster F. motoras G. uitstulping standaard H. uitsparing voet I. sokkel J. voet K. waaierbevestigingsknop L. as-pen Stekker uit het stopcontact!  Verwijder waaierbevestigingsknop (alleen Vento 12&16/16SR) roosterbevestiging van de motoras. ...
  • Seite 5 BELANGRIJK Gebruik het apparaat niet in een badkamer of op een vochtige locatie. Zoek een stabiele, horizontale plaats voor het apparaat in de buurt van een stopcontact; Vento 16SR op de grond plaatsen! Zorg ervoor dat het apparaat zich buiten het bereik van kinderen bevindt. Steek nooit voorwerpen door het rooster.
  • Seite 6 Door voor een tweede keer te drukken schakelt u over op de slaapstand, waarbij de ventilator na een half uur terugschakelt van zeer sterke naar sterke ventilatie, en na nogmaals een half uur naar normale ventilatie. Deze stand zal hij gedurende de nacht vasthouden. 4.
  • Seite 7: Schoonmaak En Onderhoud

    SCHOONMAAK EN ONDERHOUD Schakel de ventilator uit en neem de stekker uit het stopcontact wanneer u hem wilt reinigen of onderhoud wilt uitvoeren. De ventilator vraag alleen wat algemeen, uitwendig onderhoud. Stof hem regelmatig af met een zachte doek of plumeau of zuig hem schoon met een zacht stofzuigerborsteltje. Is hij erg vuil, open dan het voorste rooster en neem roosters en bladen af met een licht-bevochtigde doek met een zacht huishoudelijk reinigingsmiddel.
  • Seite 8: Technical Specifications

    THANKS Many thanks for choosing this EUROM fan. You have made a very good choice! Please read the instruction leaflet carefully before use. It is very important if you are to get the very best from this device and use it correctly and safely.
  • Seite 9 15. Do excessive temperatures (above 40°), in the vicinity of heating units, in areas with high air humidity (bathrooms etc) or in dusty rooms. 16. Do not use the device in the vicinity of baths, showers, basins or other receptacles that may contain water/liquids.
  • Seite 10 ASSEMBLY A. front grid B. grid locking ring C. fan D. grid mount E. rear grid F. motor shaft G. stand protrusion H. foot cutaway I. pedestal J. foot K. fan mounting knob L. shaft pin Unplug from the wall socket! ...
  • Seite 11: Operation

    IMPORTANT Do not use the fan in a bathroom or wet area. Find a stable, horizontal place for the fan in the vicinity of a wall socket. Place the vento 16SR on the ground. Ensure that the fan is not within the reach of children.
  • Seite 12 By pressing a second time you switch the fan into sleep mode, so that after half an hour the fan will switch from extra fast to fast, and once again after half an hour to normal speed. It will maintain this setting for the rest of the night. 4.
  • Seite 13: Cleaning And Maintenance

    CLEANING AND MAINTENANCE Switch the fan off and remove the plug from the socket if you wish to clean the device or perform maintenance. The fan only needs general, exterior maintenance. Dust it regularly with a soft cloth or duster or use a vacuum cleaner with a soft brush to clean.
  • Seite 14: Technische Daten

    DANKE! Wir freuen uns, dass Sie sich für den EUROM Ventilator entschieden haben. Sie haben eine gute Wahl getroffen! Bitte lesen Sie diese Bedienungsanleitung vor dem Gebrauch sorgfältig und vollständig durch. Dies ist für eine korrekte und optimale Funktion sowie für Ihre Sicherheit von großer Bedeutung.
  • Seite 15: Bezeichnung Der Geräteteile

    13. Spritzen Sie keine Mittel (Insektenspray, Reinigungsmittel oder dergleichen) auf oder in den Ventilator, das kann zu Gesundheitsbeschwerden führen (insbesondere bei Kindern!) oder Bauteile beschädigen. 14. Schließen Sie den Ventilator nicht an einen Timer oder Dimmer an. 15. Verwenden Sie den Ventilator nicht bei zu hohen Temperaturen (über 40°), nicht in der Nähe von Heizgeräten, nicht in Räumen mit hoher Luftfeuchtigkeit (Badezimmer, usw.) und nicht in staubigen Räumen.
  • Seite 16: Montage

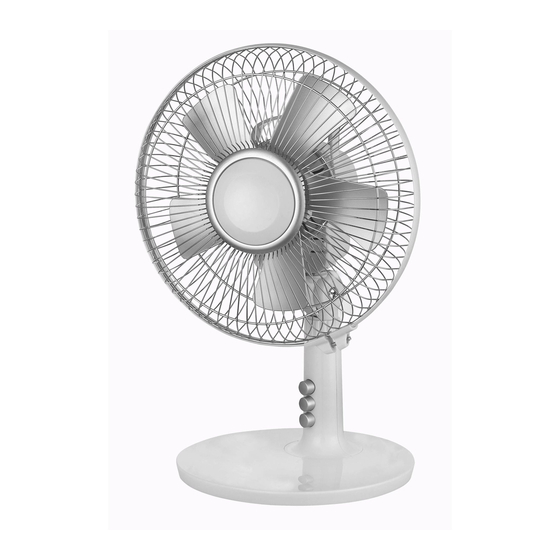
    MONTAGE Vorderes Gitter B. Gitterverschlussring C. Ventilatorrad D. Gitterbefestigung E. Hinteres Gitter F. Motorwelle G. Ausstülpung Ständer H. Aussparung Fuß I. Sockel J. Fuß K. Ventilatorradbefestigungsknopf L. Wellenschaft Stecker aus der Steckdose!  Entfernen Sie den Ventilatorradbefesti- gungsknopf (nur Vento 12&16/16SR) und die Gitterbefestigung von der Motorwelle.
  • Seite 17: Funktionsweise

    WICHTIG! Verwenden Sie das Gerät nicht im Badezimmer oder an feuchten Orten. Suchen Sie für das Gerät einen stabilen, ebenen Platz in der Nähe einer Steckdose. Setzen Sie den Vento 16SR am Boden. Halten Sie das Gerät außerhalb der Reichweite von Kindern. Stecken Sie nichts durch das Gitter.
  • Seite 18 Lüftungsweise Mit diesem Knopf wechseln Sie von einem konstanten Luftstrom zu einem natürlichen, ständig wechselnden Luftstrom. Mit dem Geschwindigkeitsknopf (I, II oder III) wählen Sie dabei eine bestimmte Abwechslung: Drücken Sie ein zweites Mal, dann wechselt das Gerät in den Schlafstand, wobei der Ventilator nach einer halben Stunde von der höchsten zur hohen Stufe und nach einer weiteren halben Stunde zur normalen Stufe wechselt.
  • Seite 19: Reinigung Und Wartung

    Fernbedienung Der Vento16S hat eine Fernbedienung. Nachdem Sie das Gerät mit dem An/Aus-Knopf eingeschaltet haben, können Sie die weitere Bedienung mit der Fernbedienung vornehmen, welche ebenfalls über die Knöpfe 2 bis 5 verfügt. Schalten Sie das Gerät mit dem An/Aus-Knopf am Gerät aus.
  • Seite 20: Informations Techniques

    REMERCIEMENTS Nous vous remercions d’avoir choisi le ventilateur EUROM. Vous avez fait le bon choix ! Avant de l’utiliser, lisez le livret d’instructions entièrement et avec attention : cette lecture est importante pour fonctionnement correct optimal et pour votre sécurité ! INFORMATIONS TECHNIQUES Modèle...
  • Seite 21: Schéma Des Composants

    13. Ne vaporisez pas de produit (insecticide, produit de nettoyage ou quelque produit que ce soit) sur ou dans le ventilateur ; cela peut causer des problèmes physiques (en particulier chez l’enfant !) ou endommager les éléments. 14. Ne branchez pas le ventilateur sur un minuteur ou variateur. 15.
  • Seite 22 MONTAGE A. grille avant B. anneau de fermeture de grille C. rotor D. fixation de grille E. grille arrière F. arbre moteur G. protubérance sur support H. évidement sur pied I. socle J. pied K. bouton de fixation du rotor L.
  • Seite 23 IMPORTANT N'utilisez pas l'appareil dans une salle de bain ou un espace humide. Trouvez un endroit stable et horizontal à proximité d'une prise de courant. Placez le Vento 16SR sur la terre. Veillez à ce que l'appareil se trouve hors de portée d'enfants. N'introduisez jamais d'objets à travers la grille. Avant de déplacer l'appareil ou de procéder à...
  • Seite 24 En appuyant une deuxième fois, vous passez au mode veilleuse, ce qui signifie que le ventilateur passe de la ventilation maximale à la ventilation supérieure après une demi-heure et, après encore une demi-heure, de la ventilation supérieure à la ventilation normale. La position ventilation normale est maintenue pendant toute la nuit.
  • Seite 25: Nettoyage Et Entretien

    NETTOYAGE ET ENTRETIEN Arrêtez le ventilateur, puis retirez la fiche de la prise murale lorsque vous procédez au nettoyage ou à l’entretien. Le ventilateur ne nécessite qu’un peu d’entretien général, et extérieur. Dépoussiérez-le régulièrement avec un chiffon doux ou un plumeau, ou passez la petite brosse de l’aspirateur. En cas de forte salissure, ouvrez la grille de devant, puis nettoyez la grille et les ailettes à...
  • Seite 26: Dati Tecnici

    GRAZIE Grazie per avere scelto un ventilatore EUROM. Congratulazioni per l'ottimo acquisto! Prima dell'uso legga attentamente il manuale di istruzioni nella sua interezza. Ciò è importante per il funzionamento corretto e ottimale dell'apparecchio e per la Sua sicurezza. DATI TECNICI...
  • Seite 27: Schema Delle Parti

    12. Evitare l'apparecchio costantemente orientato verso bambini piccoli, pazienti o persone con mobilità ridotta. 13. Non utilizzare mai prodotti a spruzzo (insetticidi, detergenti o altro) sul ventilatore al fine di evitare problemi fisici (in particolare nei bambini) o danni all'apparecchio. 14.
  • Seite 28 ASSEMBLAGGIO A. griglia anteriore B. anello di protezione griglie C. ventilatore D. elemento di fissaggio griglia E. griglia posteriore F. asse motore G. sporgenza piedistallo H. rientranza piede I. zoccolo J. piede K. pulsante fissaggio ventilatore L. perno dell'asse Estrarre la spina dalla presa elettrica! ...
  • Seite 29: Funzionamento

    IMPORTANTE! Non utilizzare l'apparecchio in bagno o in ambiente umido. Cercare una posizione stabile e in piano per l'apparecchio, in prossimità di una presa elettrica. Poggiare il Vento 16SR sul pavimento. Accertarsi che l'apparecchio sia lontano dalla portata dei bambini. Non infilare mai oggetti attraverso la griglia.
  • Seite 30 Premendo una seconda volta il pulsante, si passa alla modalità di stand-by, per cui il ventilatore trascorsa mezz'ora passa da ventilazione molto forte a forte e dopo un'ulteriore mezz'ora alla ventilazione normale. La modalità resterà attiva per tutta la notte. 4.
  • Seite 31: Pulizia E Manutenzione

    PULIZIA E MANUTENZIONE Prima di eseguire interventi di pulizia o di manutenzione al ventilatore spegnere l'apparecchio e scollegare la spina dalla presa elettrica. Il ventilatore necessita soltanto di una manutenzione generale esterna. Spolverarlo regolarmente con un panno morbido un piumino o utilizzando un aspirapolvere con spazzola morbida.
  • Seite 32: Datos Técnicos

    AGRADECIMIENTO Muchas gracias por la elección de un ventilador EUROM. ¡Ha realizado una buena compra! Antes de usarlo léase detenidamente el libro de instrucciones: es esencial para su funcionamiento correcto y óptimo y para garantizar su propia seguridad. DATOS TÉCNICOS...
  • Seite 33 12. Evite que la salida de aire del aparato recaiga continuamente sobre niños pequeños, pacientes o personas con dificultades de movimiento. 13. No aplique ninguna sustancia (repelente de insectos, de limpieza o cualquier otro) en el ventilador, esto puede provocar daños físicos (especialmente a niños) o dañar partes del ventilador.
  • Seite 34 CÓMO MONTAR A. rejilla delantera B. abrazadera de la rejilla C. ventilador D. fijación de la rejilla E. rejilla trasera F. eje del motor G. protuberancia del soporte H. hueco del pie I. pedestal J. pie K. botón de fijación del ventilador L.
  • Seite 35 IMPORTANTE No use el aparato en un cuarto de baño o en otros lugares húmedos. Busque una superficie horizontal y estable cerca de un enchufe para colocar el aparato. Posicione el Vento 16SR en el suelo. Manténgalo fuera del alcance de los niños. Nunca inserte objetos en la rejilla. Desenchufe siempre el cable de la toma de corriente antes de desplazar el aparato o realizar tareas de mantenimiento.
  • Seite 36 Si presiona el botón por segunda vez, seleccionará el modo dormir: el ventilador cambia de ventilación muy fuerte a ventilación fuerte pasada media hora, y pasada otra media hora cambiará a ventilación normal. Seguirá en este modo durante la noche. 1.
  • Seite 37: Limpieza Y Mantenimiento

    LIMPIEZA Y MANTENIMIENTO Apague el ventilador y desenchúfelo cuando quiera limpiarlo o realizar una tarea de mantenimiento. El ventilador solo necesita un mantenimiento general externo. Quítele el polvo con regularidad con un paño suave o plumero o pásele la aspiradora con un cepillo pequeño. Si está muy sucio, abra la rejilla frontal y limpie las rejillas y palas con un paño ligeramente húmedo con un limpiador suave.
  • Seite 38: Dados Técnicos

    AGRADECIMENTO Obrigado por ter escolhido um ventilador EUROM. Fez uma boa escolha! Leia cuidadosamente o manual de instruções na sua totalidade antes da utilização: fazê-lo é importante para o funcionamento correto e ideal e para a sua segurança! DADOS TÉCNICOS...
  • Seite 39 13. Nunca pulverize quaisquer produtos (inseticidas, produtos limpeza outros), sobre o ventilador ou no interior do mesmo; fazê-lo poderá vir a causar problemas físicos (principalmente em crianças!) ou danificar os componentes. 14. Não ligue o ventilador a um temporizador ou um dimmer. 15.
  • Seite 40 COMPOSIÇÃO grade frontal B. anel de fecho da grade C. ventilador D. fixação da grade E. grade traseira F. eixo do motor G. flanco padrão H. orifício do pé I. pedestal J. pé K. botão de confirmação da ventilador L. cavilha do eixo Retire a ficha da tomada! ...
  • Seite 41 IMPORTANTE Não use o aparelho na banheira ou num local húmido. Procure um local estável e horizontal, situado perto de uma tomada de corrente para a colocação do aparelho. Coloque o Vento 16SR no chão. Certifique-se que o dispositivo está fora do alcance das crianças. Nunca insira objetos através da grade.
  • Seite 42 Premindo uma segunda vez desativa o modo de stand-by, em que o ventilador volta a ligar-se passado meia hora, alternando de uma ventilação muito forte para uma ventilação forte, e após passada a meia hora muda para a ventilação normal. Nesta posição, mantém-se este funcionamento durante a noite.
  • Seite 43: Limpeza E Manutenção

    LIMPEZA E MANUTENÇÃO Desligue o ventilador e retire a ficha da tomada se desejar proceder à limpeza ou manutenção do mesmo. O ventilador necessita apenas de manutenção geral, externa. Limpe o pó regularmente com um pano suave ou um espanador ou aspire-o com uma escova de aspirador suave. Se o ventilador estiver demasiado sujo, abra a grelha frontal e limpe as grelhas e a hélice com um pano ligeiramente humidificado com um produto de limpeza suave.
  • Seite 44 / known under the brand / Bekannt unter der Marke / commercialisé sous la marque / di marchio / identificados con la marca/ / conhecidos sob a marca EUROM, type/typ/tipul/tipo VENTO 9 – 12 – 16 – 16ST voldoen aan de eisen van de onderstaande normen:...

Diese Anleitung auch für:

Vento 12Vento 16Vento 9Vento 16sr

Inhaltsverzeichnis