Herunterladen Inhalt Inhalt Diese Seite drucken
Inhaltsverzeichnis

Werbung

Verfügbare Sprachen
  • DE

Verfügbare Sprachen

  • DEUTSCH, seite 1
INFINITY PRO 4.0
Laufband
Treadmill
Pavimento móvil
Trottoir roulant
Marciapiede mobile
10032955
www.capitalsports.de

Werbung

Inhaltsverzeichnis
loading

Inhaltszusammenfassung für capital sports INFINIT Y PRO 4.0

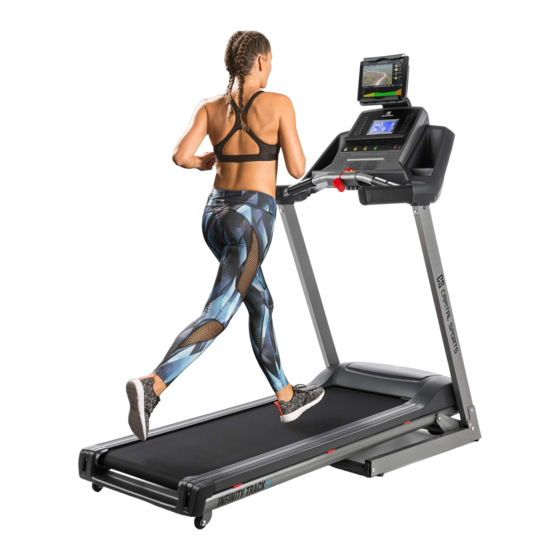
  • Seite 1 INFINITY PRO 4.0 Laufband Treadmill Pavimento móvil Trottoir roulant Marciapiede mobile 10032955 www.capitalsports.de...
  • Seite 3: Inhaltsverzeichnis

    Sehr geehrter Kunde, wir gratulieren Ihnen zum Erwerb Ihres Gerätes. Lesen Sie die folgenden Hinweise sorgfältig durch und befolgen Sie diese, um möglichen Schäden vorzubeugen. Für Schäden, die durch Missachtung der Hinweise und unsachgemäßen Gebrauch entstehen, übernehmen wir keine Haftung. Scannen Sie den folgenden QR-Code, um Zugriff auf die aktuellste Bedienungsanleitung und weitere Informationen rund um das Produkt zu erhalten: INHALTSVERZEICHNIS...
  • Seite 4: Sicherheitshinweise

    SICHERHEITSHINWEISE Lesen Sie sich die Bedienungsanleitung vor der Verwendung des Geräts aufmerksam durch und bewahren Sie diese für den zukünftigen Gebrauch auf. Die Produktmerkmale können leicht von den auf den Abbildungen dargestellten Merkmalen abweichen. Veränderungen können vom Hersteller ohne Benachrichtigung vorgenommen werden. •...
  • Seite 5 • Überprüfen Sie vor jeder Verwendung des Geräts, ob die Handgriffe, der Sattel, Muttern und Bolzen richtig festgezogen wurden. • Beachten Sie die maximale Position für anpassbare Geräteteile und gehen Sie nicht über die Markierung „Stopp“ hinaus, da dadurch ein Risiko entstehen würde.
  • Seite 6: Geräteübersicht

    GERÄTEÜBERSICHT Konsole Handpuls-Griff Haltegriff Aufrechter Pfosten Motorabdeckung Laufgurt Seitenleiste Abdeckung Basisrahmen Hauptrahmen Hintere Abdeckung...
  • Seite 7: Lieferumfang

    LIEFERUMFANG Hauptgerät Kleinteile Konsole Pfosten Abdeckungen Griff-Abdeckungen Anleitung Klammer des Konsolenrahmens Sicherheitsschlüssel Silikonöl...
  • Seite 8: Kleinteile

    KLEINTEILE Sechskantschraube M8*60*20 Zylinderschraube M8*15 Schraube ST4*16 Sechskantschraube M8*15 Flache Unterlegscheibe Ø8 Federscheibe Ø8 T-Schlüssel Kreuzschlitz-Schlüssel Inbusschlüssel...
  • Seite 9: Installation

    INSTALLATION Nehmen Sie das Gerät aus dem Karton und legen Sie es auf den Boden. Verbinden das Kommunikationskabel des Standpfostens mit den Kabel des Grundrahmens. Führen Sie dann die Pfosten in den Klemmring auf beiden Seiten des Hauptrahmens ein und befestigen Sie sie mit Innensechskantschrauben M8*60*20 und Innensechskantschrauben M8*15.
  • Seite 10 Nehmen Sie die Lenkerabdeckungen heraus und befestigen Sie sie mit 4 Schrauben ST4*16 an der Konsole. Nehmen Sie ie Klammern des Konsolenrahmens heraus und befestigen Sie sie mit 4 Zylinderschrauben, 4 Unterlegscheibe und 4 Federscheibe an der Konsole. Hinweis: Achten Sie bei der Montage darauf, dass die Lenkerabdeckung und die Konsole nicht zerkratzt werden;...
  • Seite 11 Verbinden Sie das Kommunikationskabel im Standpfosten mit dem Kommunikationskabel der Konsole wie in der folgenden Abbildung dargestellt. Befestigen Sie dann die Konsole mit 8 Inbusschrauben am aufrechten Pfosten. Ziehen Sie die Schrauben fest an.
  • Seite 12 Setzen Sie zum Schluss die Abdeckungen auf und ziehen Sie alle Schrauben fest. Das Gerät ist jetzt fertig zusammengebaut.
  • Seite 13: Cardiotraining Im Überblick

    CARDIOTRAINING IM ÜBERBLICK Regelmäßiges Cardiotraining regt das Herz-Kreislauf-System ( Herz und Atmung) an. Man verbessert seine Kondition, verliert an Gewicht und verbrennt Fett. Dies ist also das empfohlene Training, wenn man abnehmen möchte. Während des Trainings wird zuerst Glukose verbrannt, anschließend werden durch die Übungen die im Körper eingelagerten Fette verbrannt.
  • Seite 14 Die Cardio-Trainingsphase ist je nach Energieaufwand dem aeroben bzw. anaeroben Trainingsbereich zugeordnet. Diese Bereiche definieren sich wie folgt: Aerober Trainingsbereich In dieser Zone verbessern Sie Ihr Herz- und Kreislaufsystem und verbrennen Fett. Trotz der leichten Anstrengung mit erhöhter Herzfrequenz, tieferer Atmung, Warmwerden und leichtem Schwitzen fühlen Sie sich aber nicht sehr angestrengt, die Atmung ist nicht wesentlich beschleunigt, so dass Sie sich noch gut mit jemandem unterhalten könnten ohne außer Atem zu kommen,...
  • Seite 15 3. Erholungsphase Zum Abschluss verbleiben Sie mindestens 5 Minuten in der Erholungsphase und nutzen auch hier wieder geringe Widerstandsstufen ohne hohen Kraftaufwand. Die Erholungs- oder Rekuperationsphase ist außerdem hilfreich, um einen möglichen Muskelkater nach dem Training vorzubeugen. Sehr ratsam ist nach einer intensiven Trainingseinheit ebenfalls eine aktive Regeneration, wie zum Beispiel ein heißes Bad, ein Gang in die Sauna oder eine Massage.
  • Seite 16: Aufwärmung Vor Dem Training

    AUFWÄRMUNG VOR DEM TRAINING Führen Sie die Aufwärmbewegungen vor jeder Trainingseinheit durch. So mobilisieren Sie Ihre Gelenke und aktivieren die Muskulatur. Sollten Sie sich bei einzelnen Bewegungen unwohl fühlen oder Schmerz empfinden, so überspringen Sie diese Übung und stimmen sich über ein spezifisches Aufwärmtraining mit Ihrem Arzt bzw.
  • Seite 17 Hüfte drehen während die Arme Hüfte beugen, ein Arm gestreckt gestreckt sind. Die Füße sind nach oben. Verbleiben Sie in dieser dabei nicht fest am Boden fixiert Position jeweils einige Sekunden pro (die Fußgelenke begleiten die Seite. Körperdrehung). Stellen sie sich auf ein Bein und halten den Spann mit der Hand. Hier mobilisieren Sie ihr Fußgelenk und strecken den Oberschenkel leicht.
  • Seite 18 Stellen Sie beim Kniebeugen Setzen Sie sich mit gebeugten die Füße etwa schulterbreit Beinen so hin, dass die Fußsohlen nebeneinander und senken sie mit sich berühren. Federn Sie leicht mit gestreckten Armen die Hüft ab. den Knien. Hierbei mobilisieren Sie Versuchen Sie dabei den Rücken neben den Fußgelenken die gesamte gestreckt zu halten.
  • Seite 19: Bedienfeld Und Tastenfunktionen

    BEDIENFELD UND TASTENFUNKTIONEN Programm (P) Drücken Sie bei stehendem Laufband auf die Taste (P), um eines der folgenden Programme auszuwählen: P1-P36 > U1-U3 > FAT. P0 ist der manuelle Modus, P1-36 sind voreingestellte Programme, U1-U3 sind benutzerdefinierte Programme und FAT ist die Körperfettmessung.
  • Seite 20 Modus (M) Drücken Sie bei stehendem Laufband auf die Taste (M), um den gewünschten Modus auszuwählen. Sie können eine der folgenden Optionen auswählen: • Time count down (Die eingegebene Zeit wird heruntergezählt) • Calories count down (Die eingegeben Kalorien werden heruntergezählt) •...
  • Seite 21 Schnellwahl-Taste Neigungswinkel Ändern Sie den Neigungswinkel direkt, durch Drücken der Schnellwahl-Tasten auf 3 %, 6 %, 9 % oder 12 %. Lüfter Drücken Sie auf die Lüfter-Taste, um den Lüfter ein- oder auszuschalten. Geschwindigkeit von Meilen in Kilometer ändern 1. Ziehen Sie den Sicherheitsschlüssel heraus und drücken Sie gleichzeitig die Tasten PROGRAMM und MODUS.
  • Seite 22: Modi Und Programme

    MODI UND PROGRAMME Hinweis: Sie können zu jeder Zeit den Sicherheitsschlüssel abziehen, um das Laufband zu stoppen. Das Display zeigt dann die Fehlermeldung [E7] an und es ertönt ein Warnsignal. Befestigen Sie den Sicherheitsschlüssel wieder an der Sicherung. Das Display leuchtet kurz voll auf und wechselt dann zur Start-Anzeige.
  • Seite 23 Voreingestellte Programme • P1-P36 sind voreingestellte Programm. Hier lässt sich nur die Zeit einstellen. Drücken Sie die [+] oder [-] Taste, um den Wert zu ändern. Die Zeit kann zwischen 5-99 Minuten eingestellt werden. Voreingestellt sind 30:00 Minuten. Drücken Sie die Taste MODE, um zu den Standardeinstellungen zurückzukehren.
  • Seite 24 Körperfettanteil messen Wenn das Laufband gestoppt ist, drücken Sie die PROGRAMM-Taste, bis FAT erscheint. Drücken Sie dann auf MODUS, um die Parameter einzustellen. • F1 (Geschlecht): wählen Sie 1 (männlich) oder 2 (weiblich). Wenn das Fenster 1 anzeigt, ist männlich ausgewählt. Voreingestellt istv männlich. •...
  • Seite 25 HRC Zielpulsprogramm (Optional) 1. Drücken Sie auf die PROG bis HRC angezeigt wird. 2. Drücken Sie dann zur Bestätigung auf MODE, um zur nächsten Einstellung zu gelangen. 3. Benutzen Sie die Geschwindigkeit +/- Taste, um die folgenden Paramter einzustellen: Alter: 15-80 Jahre, voreingestellt sind 25 Jahre. Standard Herzfrequenz: (220 Jahre - aktuelles Alter) x 0,6 Zielherzfrequenz: 80-180 bpm Standard-Zeit: voreingestellt sind 30 Minuten...
  • Seite 26: Programm- Und Geschwindigkeitstabellen

    PROGRAMM- UND GESCHWINDIGKEITSTABELLEN Segment Programm Geschwindigkeit Steigung Geschwindigkeit Steigung Geschwindigkeit Steigung Geschwindigkeit Steigung Geschwindigkeit Steigung Geschwindigkeit Steigung Geschwindigkeit Steigung Geschwindigkeit Steigung Geschwindigkeit Steigung Geschwindigkeit Steigung Geschwindigkeit Steigung Geschwindigkeit Steigung Geschwindigkeit Steigung Geschwindigkeit Steigung Geschwindigkeit Steigung...
  • Seite 27 Segment Programm Geschwindigkeit Steigung Geschwindigkeit Steigung Geschwindigkeit Steigung Geschwindigkeit Steigung Geschwindigkeit Steigung Geschwindigkeit Steigung Geschwindigkeit Steigung Geschwindigkeit Steigung Geschwindigkeit Steigung Geschwindigkeit Steigung Geschwindigkeit Steigung Geschwindigkeit Steigung Geschwindigkeit Steigung Geschwindigkeit Steigung Geschwindigkeit Steigung Geschwindigkeit Steigung...
  • Seite 28: Fehlersuche Und Fehlerbehebung

    Segment Programm Geschwindigkeit Steigung Geschwindigkeit Steigung Geschwindigkeit Steigung Geschwindigkeit Steigung Geschwindigkeit Steigung FEHLERSUCHE UND FEHLERBEHEBUNG Problem Mögliche Ursache Lösungsansatz Das Gerät läuft nicht. Der Strom ist nicht Schließen Sie den Strom angeschlossen. an und schalten Sie das Gerät ein. Der Sicherheitsschlüssel Setzen Sie den ist nicht installiert.
  • Seite 29: Pflege Und Wartung

    Problem Mögliche Ursache Lösungsansatz Fehlermeldung E7 Die Konsole erkennt den Befestigen Sie den Sicherheitsschlüssel nicht. Sicherheitsschlüssel an der Konsole. Keine Pulsmessung. Das Handpulskabel Schließen Sie das Kabel ist nicht richtig richtig an. angeschlossen. Die Konsole ist kaputt. Wenden Sie sich an einen Fachbetrieb.
  • Seite 30 Einstellen der Riemenspannung Wenn sich der Laufgurt nach einer gewissen Zeit etwas schlüpfrig anfühlt, muss die Spannung auf dem Laufgurt eventuell erhöht werden. So erhöhen Sie die Spannung: 1. Stecken Sie einen 1. 8 mm Imbusschlüssel in die linke Riemenspannschraube. Drehen Sie den Schlüssel im Uhrzeigersinn um 1/4 Umdrehung, um die Riemenspannung zu erhöhen.
  • Seite 31 • Wenn der Gurt immer noch nicht in der Mitte ist, wiederholen Sie den obigen Schritt, bis der laufende Gurt in der Mitte steht. • Nachdem das Band in der Mitte ist, erhöhen Sie die Geschwindigkeit auf 16 km/h und überprüfen Sie, ob es ruhig läuft. Wiederholen Sie die obigen Schritte, wenn es notwendig ist.
  • Seite 32: Training Per Kinomap App

    TRAINING PER KINOMAP APP Mit der KINOMAP-App können Sie mehr als 100.000 km Bewegungsvideos auf der ganzen Welt laufen, fahren oder rudern und täglich von den Benutzern selbst aktualisiert werden. Versuchen Sie, ihrem Tempo unter den gleichen Bedingungen zu folgen, wie sie aufgenommen wurden.
  • Seite 33 Aktivierungscode • Die Standardversion ist kostenlos und bietet Ihnen Zugriff auf eine Reihe von kostenlosen Videos sowie Intervalltrainings (zur Zeit nicht auf allen Geräten verfügbar). • Ein Abonnement ist später erforderlich, um Zugriff auf alle berechtigten Inhalte zu erhalten, darunter Tausende von Real-Life-Videos, einen Mehrspieler-Modus und vieles mehr.
  • Seite 34 Vorschau der Daten Mit der Funktion „Vorschau der Daten“ können Sie die vom Gerät gesendeten Daten sofort sehen. Diese Funktion ist besonders nützlich, wenn Sie Probleme beim Starten einer Aktivität haben. Je nach Ausstattung muss die App davon einige Werte erhalten.
  • Seite 35 Training Videoauswahl • Es stehen mehrere Listen mit Videos zur Verfügung, auf denen Sie das gewünschte Video auswählen können. • Um während des Trainings darauf zu trainieren. Es gibt eine Filterfunktion, um sicherzustellen, dass Sie Zugriff auf die gesuchten Videos erhalten (Featured, popular, most viewed, most recent, duration, distance, incline..).
  • Seite 36 Playlists • Hier gibt es auch viele Playlisten, die von Kinomap oder den Benutzern selbst erstellt wurden. • Jede Playlist hat ein bestimmtes Thema, um z. B. 30 Minuten zu trainieren oder ein Land zu besuchen. • Sie können Ihren Fortschritt auf jeder Wiedergabeliste und jedem Video, das sie erstellt, verfolgen.
  • Seite 37 Trainingsbeginn Wählen Sie das Video Wählen Sie den Modus, Beginnen Sie einfach aus, auf dem Sie in dem Sie trainieren mit dem Treten, um das trainieren möchten. möchten. Training zu beginnen.
  • Seite 38 Entdeckungs- und Herausforderungsmodus Herausforderungsmodus: Das Video wird mit Ihrer Geschwindigkeit abgespielt, sodass Sie die gleiche Gesamtleistung wie der Videoproduzent erbringen können. Wenn Sie nicht schnell genug sind, verringert das Video langsam die Framerate. Bei guter Leistung kann die Framerate bis auf das Doppelte der ursprünglichen Geschwindigkeit erhöht werden.
  • Seite 39 Trainingsanzeige Am oberen Rand des Bildschirms werden relevante Informationen angezeigt: • Die Dauer • Der sofort erzeugte Strom • Die sofortige Geschwindigkeit • Ihr Herzfrequenzschlag (nur wenn Sie einen zusätzlichen Herzsensorgurt hinzufügen oder wenn Ihre Ausrüstung einen integrierten hat) • Die sofortige Trittfrequenz •...
  • Seite 40 Training beenden Wenn Sie das Training pausieren oder stoppen wollen, hören Sie einfach auf zu treten oder benutzen Sie die Pause-Taste in der Ecke des Trainings. Klicken Sie auf die Schaltfläche „Sitzung fortsetzen“, um ein unerreichtes Training fortzusetzen. Wenn Sie diese Aktivität beenden möchten, bestätigen Sie einfach durch Tippen auf ‚Speichern und beenden‘...
  • Seite 41 Das Profiltraining ist eine Trainingsform, die eine Reihe von Trainings mit niedriger bis hoher Intensität und Ruhe- oder Entlastungsphasen beinhaltet. Variieren der Intensität Ihrer Anstrengung trainiert den Herzmuskel, bietet ein Herz-Kreislauf-Training, verbessert die aerobe Kapazität und ermöglicht es der Person, länger und/oder intensiver zu trainieren. Das Profiltraining ist noch nicht für alle Geräte verfügbar.
  • Seite 42 Auswertungen Trainingsprotokoll • Öffnen Sie das Hauptmenü auf der linken Seite, um auf „Trainingsprotokoll“ zu klicken. • Sie können hier die Historie Ihrer vergangenen Trainingseinheiten sehen, einschließlich des Namens des Videos, das Sie trainiert haben, des Datums des Trainings, der Dauer und der Distanz. •...
  • Seite 43 Suche Dieser Button ist immer in der oberen rechten Ecke verfügbar, um Videos zu durchsuchen, egal in welchem Menü Sie sich befinden. Es gibt mehrere Möglichkeiten, das passende Video zu finden: • Sie können suchen, indem Sie auf die Schaltfläche Suchen klicken. Sobald Sie mindestens 3 Zeichen eingegeben haben, wird eine automatische Vervollständigungssuche durchgeführt.
  • Seite 44: Hinweise Zur Entsorgung

    HINWEISE ZUR ENTSORGUNG Befindet sich die linke Abbildung (durchgestrichene Mülltonne auf Rädern) auf dem Produkt, gilt die Europäische Richtlinie 2012/19/EU. Diese Produkte dürfen nicht mit dem normalen Hausmüll entsorgt werden. Informieren Sie sich über die örtlichen Regelungen zur getrennten Sammlung elektrischer und elektronischer Gerätschaften.
  • Seite 45 Dear Customer, Congratulations on purchasing this equipment. Please read this manual carefully and take care of the following hints to avoid damages. Any failure caused by ignoring the items and cautions mentioned in the instruction manual is not covered by our warranty and any liability. Scan the QR code to get access to the latest user mannual and other information about the product: CONTENT...
  • Seite 46: Safety Instructions

    SAFETY INSTRUCTIONS Before operating this unit, please read this manual carefully to ensure optimum performance and safety. This is manual should be kept available for future reference. For product improvement, the company reserves the right to change the design and specification at any time without prior notice. Pictures are for reference use only and may differ from the actual product.
  • Seite 47 • Before using the equipment, check the handle bar, seat, and the nuts & bolts are securely tightened. • For adjustable parts, bear the maximum position in your mind, do not exceed the mark „stop“, otherwise will cause risk. • Always use the equipment as indicated.
  • Seite 48: Product Overview

    PRODUCT OVERVIEW Console Handle pulse Handle bar Stand post Motor cover Running belt Side rail Stand post cover Base frame Main frame Rear cover...
  • Seite 49: Packing Content

    PACKING CONTENT Main body Hardware Console Upright post Stand post cover Handle bar cover Manual Clamp ring of console frame Safety key Silicon oil...
  • Seite 50: Hardware

    HARDWARE Allen screw M8*60*20 cylinder head screw M8*15 Screw ST4*16 Allen screw M8*15 Flat washer Ø8 Spring washer Ø8 T wrench Wrench Allen wrench...
  • Seite 51: Installation

    INSTALLATION Take out the machine from box and put it on the flat floor. Connecting the communication wire inside of stand post with the communication wire inside base frame. Then Insert the upright post into clamping ring on the both side of the main frame and fix tight with Allen C.K.S.
  • Seite 52 Take out the handle bar cover and then fix them to console with 4 pcs of Self- tapping screw ST4*16; Take out the clamp ring of console frame and then fix them to console with 4pcs of Inside hexagon cylinder head full - tooth bolts, 4 pcs of Ø8 flat washer and 4 pcs of Ø8 spring washer.
  • Seite 53 Connect communicate wire inside stand post with communicate wire inside console handle bar as following picture. Then fix the console with upright post with 8 pcs of the inner hexagonal large flat head full - tooth bolts. (Lock the bolts)
  • Seite 54 Take out the stand post cover and then fix them to the each side of running deck as following picture. Then tighten all screws. Assembly finished.
  • Seite 55: Overview Of Cardio Training

    OVERVIEW OF CARDIO TRAINING Regular cardio training stimulates the cardiovascular (heart and blood vessels) and respiratory system. It improves your general health and helps you to burn fat. It is the recommended workout if you want to lose weight. When exercising, glucose is burned off first, then the fat stored in the body.
  • Seite 56 The cardio training phase is considered aerobic or anaerobic training depending on the energy expenditure. These two types of training are defined as follows: Aerobic Training Zone While you are in this zone, you are improving your cardiovascular system and burning fat.
  • Seite 57 3. Cool-down Phase At the end of the cardio training phase, you begin the cool-down phase, which should last for at least 5 minutes. Here, you use low levels of resistance. The recovery or cool-down phase is also helpful with regard to preventing possible muscle soreness.
  • Seite 58: Warming Up Before A Workout

    WARMING UP BEFORE A WORKOUT Perform the movements before each workout to mobilize your joints and activate your muscles. Should a movement be uncomfortable or painful, skip this movement and consult your doctor or fitness instructor about suitable warm-up movements. Each movement should be repeated (right and left) so that you can start the cardio training relaxed.
  • Seite 59 Turn the hips while the arms are Bend at the hip with one arm stretched. The feet are not firmly stretched upward. Stay in this fixed to the ground; the ankles position for a few seconds on each follow the body’s rotation. side.
  • Seite 60 When squatting, place your feet Sit with your legs bent so that the about shoulder-width apart and soles of your feet touch. Slightly flap lower your hips while keeping your the knees by moving the knees up arms straight. Try to also keep your and down while keeping the feet on back straight.
  • Seite 61: Control Panel And Key Functions

    CONTROL PANEL AND KEY FUNCTIONS Program (P) When the treadmill is under STOP mode, the user can choose different program mode from P0 to P36 and U1 to U3 and Fat program circulatory by pressing this button. P0 is USER training program; P1-P36 is the preset auto program;...
  • Seite 62 Mode (M) With the treadmill stopped, press the button to select the desired mode. You can select one of the following options: • Time count down (The entered time is counted down) • Calories count down (the calories entered are counted down) •...
  • Seite 63 Quick incline button Increase the incline directly by pressing the quick incline key 3 %, 6 %, 9 % or 12 %. Fan button Key Fan (optional) is to turn on/off fan function. Changing speed from miles to kilometers 1. Pull out the safety key, press the MODE and PROGRAM keys at the same time.
  • Seite 64: Modes And Programs

    MODES AND PROGRAMS Note: In any state, pull-out safety locks, window displays:”E7” and sound buzzer “DI-DI-DI”. Then put well the safety lock, all show that the full light for 2 seconds, then go to manual start mode. Quickstart • Put the safety key on the correct position and peg safety key cord with your clothes then tum on the power, the LED window light is shining for 2 seconds.
  • Seite 65 Preset Programs • P1-P36 are preset programs. Only the time can be set here. Press the [+] or [-] button to change the value. The time can be set between 5-99 minutes. The default setting is 30:00 minutes. Press the „MODE“ button to return to the default settings.
  • Seite 66 Measuring body fat percentage When the treadmill is stopped, press the „PROG“ button until FAT appears. Then press MODE to set the parameter. • F1 (Gender): select 1 (male) or 2 (female). If window shows 1, male is selected. The default setting is male. •...
  • Seite 67 HRC Function (Optional) 1. Press the PROG until HRC is displayed. 2. Then press MODE to confirm to advance to the next setting. 3. Use the speed +/- button to set the following parameters: Age: 15-80 years, default is 25 years. Standard heart rate: (220 years - current age) x 0.6 Target heart rate: 80-180 bpm Default time: 30 minutes by default...
  • Seite 68: Program And Speed Tables

    PROGRAM AND SPEED TABLES Segment Program Speed Incline Speed Incline Speed Incline Speed Incline Speed Incline Speed Incline Speed Incline Speed Incline Speed Incline Speed Incline Speed Incline Speed Incline Speed Incline Speed Incline Speed Incline...
  • Seite 69 Segment Program Speed Incline Speed Incline Speed Incline Speed Incline Speed Incline Speed Incline Speed Incline Speed Incline Speed Incline Speed Incline Speed Incline Speed Incline Speed Incline Speed Incline Speed Incline Speed Incline...
  • Seite 70: Troubleshooting

    Segment Program Speed Incline Speed Incline Speed Incline Speed Incline Speed Incline TROUBLESHOOTING Problem Possible Cause Suggested Solution Treadmill doesn’t work. Disconnect of power or the Connet the power, and power is turn off turn on the switch. Safety key is not put well. Put the safety key on the correct position.
  • Seite 71: Care And Maintenance

    Problem Mögliche Ursache Lösungsansatz Error code E7 Console does not detect Check the safety key . the safety key signal. No pule measurement. Hand pulse wire is not Connect the wire well or connect well or wire change the wire. defected.
  • Seite 72 Adjusting the belt tension If the running belt feels as though it is slipping or hesitating when you plant you foot during a run, the tension on the running belt may have to be increased. To increase the running belt tension: 1.
  • Seite 73 • If toward the left side of the deck, using wrench, turn the left adjustment bolt clockwise 1/4 turn and the left adjustment bolt counter clockwise 1/4. • If toward the right side of the deck, turn the right adjustment bolt clockwise 1/4 turn and the left adjustment bolt counter clockwise 1/4.
  • Seite 74: Training Via Kinomap App

    TRAINING VIA KINOMAP APP With the Kinomap app you can run, drive or row more than 100,000 km around the world with the help of real-life videos that are updated daily by the users themselves. Try to follow their pace under the same conditions as seen in the video.
  • Seite 75 Activation Code • The standard version is free and provides you with access to a number of free videos and interval training (not currently available on all devices). • A subscription is required later on to gain access to all eligible content, including thousands of videos, a multiplayer mode and more.
  • Seite 76 Data Preview The “Data Preview” feature lets you instantly see the data sent by the device. This feature is especially useful if you have trouble committing when you start a new activity. In accordance with the configuration, the app will receive some values.
  • Seite 77 Training Video Selection • There are several lists of videos from which you can select the desired video. • There is a filter function to ensure that you find the videos you wish to train to (featured, popular, most viewed, most recent, duration, distance, incline, among others).
  • Seite 78 Playlists • There are also many playlists created by Kinomap or the users of Kinomap themselves. • Each playlist has a specific theme, such as a 30-minute training session or visiting a country. • You can track your progress on any playlist and any video. •...
  • Seite 79 Beginning of Training Select the video you Choose the mode in Just start pedaling to would like to train to. which you would like start training. to train.
  • Seite 80 Discovery and Challenge Mode Challenge Mode: The video will be played at your speed so that you can achieve the same overall performance as the producer of the video. If you‘re not as fast, the video slows down the frame rate. If you perform better, the frame rate can be increased to twice the original speed.
  • Seite 81 Training Display At the top of the screen, the following relevant information is displayed: • The duration • The instantly produced power • The instant speed • Your heart rate (only if you add an extra heart rate monitor belt or if your device has one already integrated) •...
  • Seite 82 End of Training If you want to pause or stop exercising, just stop pedaling or use the pause button in the corner. Click the “Resume Session” button to continue the training session. If you want to stop completely, simply confirm by tapping on “Save and Exit”.
  • Seite 83 Profile training is a form of training that involves a series of low to high intensity training sessions with periods of rest or relief. Varying the intensity trains the heart muscle, provides cardiovascular training and improves a person’s aerobic capacity and endurance. Profile training is not yet available for all devices.
  • Seite 84 Evaluations Activity History • Open the main menu on the left side to find „Activity History“. • You can see the history of your past workouts, including the name of the video you trained with, the date of the workout, the duration and the distance.
  • Seite 85 Search This button is always available in the top right corner no matter which menu you are in for you to browse the available videos. There are several ways to find the right video: • You can search by clicking the Search button. Once you have entered at least 3 characters, an auto-complete search will be performed.
  • Seite 86: Hints On Disposal

    HINTS ON DISPOSAL According to the European waste regulation 2012/19/EU this symbol on the product or on its packaging indicates that this product may not be treated as household waste. Instead it should be taken to the appropriate collection point for the recycling of electrical and electronic equipment.
  • Seite 87 Estimado cliente: Le felicitamos por la adquisición de este producto. Lea atentamente el siguiente manual y siga cuidadosamente las instrucciones de uso con el fi n de evitar posibles daños. La empresa no se responsabiliza de los daños ocasionados por un uso indebido del producto o por haber desatendido las indicaciones de seguridad.
  • Seite 88: Indicaciones De Seguridad

    INDICACIONES DE SEGURIDAD Lea atentamente estas indicaciones de seguridad antes de utilizar el aparato por primera vez y conserve este manual para futuras consultas. Las características del producto pueden variar ligeramente de las representadas en las imágenes. El fabricante puede realizar modificaciones sin aviso previo. •...
  • Seite 89 • Antes de cada entrenamiento, asegúrese de que los manillares, el sillín y todos los tornillos y tuercas están montados correctamente. • Asegúrese de no superar la posición máxima de las piezas móviles y no exceder la marca «Stop», pues existe riesgo de lesiones. •...
  • Seite 90: Visión General Del Aparato

    VISIÓN GENERAL DEL APARATO Consola Agarradera del pulsómetro Agarradera Poste vertical Cubierta del motor Correa de carrera Carril lateral Cubierta Marco base Marco principal Cubierta trasera...
  • Seite 91: Contenido Del Paquete

    CONTENIDO DEL PAQUETE Aparato principal Piezas Consola Poste Cubiertas Cubiertas de las agarraderas Instrucciones Sujeción del marco de la consola Llave de seguridad Aceite de silicona...
  • Seite 92: Piezas Pequeñas

    PIEZAS PEQUEÑAS Tornillo hexagonal M8 x 60 Tornillo cilíndrico M8 x 15 Tornillo ST4 x 16 Tornillo hexagonal M8 x 15 Arandela plana Ø8 Arandela grower Ø8 Llave en T Llave de estrella Llave Allen...
  • Seite 93: Instalación

    INSTALACIÓN Extraiga el aparato de su caja y colóquelo en el suelo. Conecte el cable de comunicación del poste al cable del marco base. Guíe los postes por el anillo de sujeción de ambos lados del marco principal y fíjelos con tornillos hexagonales M8 x 60 x 20 y tornillos hexagonales M8 x 15.
  • Seite 94 Extraiga las cubiertas del manillar y fije la consola con 4 tornillos ST4 x 16. Quite las pinzas del marco de la consola y fíjelo con 4 tornillos cilíndricos, 4 arandelas y 4 arandelas grower a la consola. Nota: En el montaje, asegúrese de que la cubierta del manillar y la consola no se arañen;...
  • Seite 95 Conecte el cable de comunicación del poste de soporte al cable de comunicación en la consola como se muestra en la siguiente ilustración. Fije a continuación la consola con 8 tornillos Allen al poste vertical. Apriete bien los tornillos.
  • Seite 96 Para finalizar, coloque las cubiertas y apriete los tornillos. El aparato ya está montado.
  • Seite 97 ENTRENAMIENTO DE CARDIO EN RESUMEN El entrenamiento regular de cardio estimula el sistema cardiovascular (corazón y respiración). Uno mejora su condición física, pierde peso y quema grasas. Por ello, es el entrenamiento recomendado cuando uno quiere adelgazar. Durante el entrenamiento, primero se quema la glucosa, a continuación se queman las grasas acumuladas en el cuerpo a través de los ejercicios.
  • Seite 98 La fase de entrenamiento de cardio está clasificada, en función del consumo de energía, en entrenamiento aeróbico y anaeróbico. Estos dos tipos se definen del siguiente modo: Entrenamiento aeróbico En esta zona mejorará su sistema cardiovascular y quemará grasas. A pesar del esfuerzo ligero a pulsaciones elevadas, respiración profunda, acaloramiento y sudor ligero, no se sentirá...
  • Seite 99 3. Fase de recuperación Para finalizar, realice como mínimo 5 minutos de fase de recuperación y utilice aquí también los niveles de resistencia más bajos sin un esfuerzo requerido elevado. La fase de recuperación también es muy útil para evitar posibles agujetas tras el entrenamiento.
  • Seite 100: Calentamiento Antes Del Entrenamiento

    CALENTAMIENTO ANTES DEL ENTRENAMIENTO Realice los siguientes ejercicios de calentamiento antes de cada entrenamiento. Así movilizará las articulaciones y activará la musculatura. Si siente molestias o dolor al realizar alguno de los movimientos, obvie dicho ejercicio y planifique un entrenamiento de calentamiento específico con su médico o entrenador.
  • Seite 101 Extienda los brazos y gire las Inclínese a la derecha con el caderas. Las piernas deben estar brazo extendido hacia arriba. A relajadas (los tobillos acompañan el continuación, inclínese a la izquierda. giro del cuerpo). Quédese en esta posición durante unos segundos en cada lado.
  • Seite 102 Al hacer sentadillas, separe los pies a Siéntase con las piernas dobladas de la misma distancia que los hombros manera que las plantas de los pies y baje la cadera con los brazos se toquen. Mueva ligeramente las estirados. Mantenga la espalda rodillas.
  • Seite 103: Panel De Control Y Funciones De Los Botones

    PANEL DE CONTROL Y FUNCIONES DE LOS BOTONES Programa (P) Pulse el botón (P) cuando se encuentre en la cinta para seleccionar uno de los programas siguientes: P1-P36 > U1-U3 > FAT. P0 es el modo manual, P1-36 son los programas predeterminados, U1-U3 son los programas personalizados y FAT es la medición de grasa corporal.
  • Seite 104 Modo (M) Pulse el botón (M) cuando se encuentre en la cinta para seleccionar uno de los modos deseados: Puede seleccionar uno de los siguientes modos: • Time count down (se realiza una cuenta atrás del tiempo introducido) • Calories count down (se realiza una cuenta atrás de las calorías introducidas) •...
  • Seite 105 Botón de selección rápida de inclinación Modifique directamente el ángulo de inclinación pulsando los botones de selección rápida 3 %, 6 %, 9 % o 12 %. Ventilador Pulse el botón del ventilador para encenderlo o apagarlo. Modificar la velocidad de millas a kilómetros 1.
  • Seite 106: Modos Y Programas

    MODOS Y PROGRAMAS Nota: Puede tirar de la llave de seguridad en cualquier momento para detener la cinta de correr. El display muestra el aviso de error [E7] y suena una señal de aviso. Fije de nuevo la llave de seguridad a su soporte. El display se ilumina y pasa a continuación a la pantalla de inicio.
  • Seite 107 Programas predeterminados • P1-P36 son programas predeterminados. En este caso, solamente podrá configurar el tiempo. Utilice los botones [+] y [-] para modificar el valor. El tiempo puede ajustarse en un rango de 5 a 99 minutos. El valor predeterminado es de 30:00 minutos. Pulse el botón MODE para regresar a la configuración estándar.
  • Seite 108 Medir el porcentaje de grasa corporal Con la cinta de correr detenida, pulse el botón „PROG“ hasta que aparezca FAT. A continuación, pulse MODE para regular los parámetros. • F1 (Sexo): Seleccione 1 (hombre) o 2 (mujer). Si la ventana muestra 1, se habrá...
  • Seite 109 Programa de pulso objetivo HRC (opcional) 1. Pulse PROG hasta que aparezca HRC. 2. Para confirmar, pulse MODE y accederá al siguiente ajuste. 3. Utilice los botones de velocidad +/- para ajustar los siguientes parámetros: Edad: 15-80 años, el valor predeterminado es de 25 años. Frecuencia cardiaca estándar: (220 años - edad actual) x 0,6 Frecuencia cardiaca estándar: 80-180 ppm Tiempo estándar: el valor predeterminado es de 30 minutos.
  • Seite 110: Programm- Und Geschwindigkeitstabellen

    PROGRAMM- UND GESCHWINDIGKEITSTABELLEN Segmento Programa Velocidad Inclinación Velocidad Inclinación Velocidad Inclinación Velocidad Inclinación Velocidad Inclinación Velocidad Inclinación Velocidad Inclinación Velocidad Inclinación Velocidad Inclinación Velocidad Inclinación Velocidad Inclinación Velocidad Inclinación Velocidad Inclinación Velocidad Inclinación Velocidad Inclinación...
  • Seite 111 Segmento Programa Velocidad Inclinación Velocidad Inclinación Velocidad Inclinación Velocidad Inclinación Velocidad Inclinación Velocidad Inclinación Velocidad Inclinación Velocidad Inclinación Velocidad Inclinación Velocidad Inclinación Velocidad Inclinación Velocidad Inclinación Velocidad Inclinación Velocidad Inclinación Velocidad Inclinación Velocidad Inclinación...
  • Seite 112: Detección Y Resolución De Problemas

    Segmento Programa Velocidad Inclinación Velocidad Inclinación Velocidad Inclinación Velocidad Inclinación Velocidad Inclinación DETECCIÓN Y RESOLUCIÓN DE PROBLEMAS Problema Posible causa Solución propuesta El aparato no funciona. El aparato está Conéctelo a la electricidad desconectado. y enciéndalo. La llave de seguridad no Coloque la llave de está...
  • Seite 113: Cuidado Y Mantenimiento

    Problema Posible causa Solución propuesta Mensaje de error E7 La consola no detecta Fije de nuevo la llave de la señal de la llave de seguridad a su soporte. seguridad. No se ha registrado el El cable del pulsómetro Conecte el cable pulso.
  • Seite 114 Regular la tensión de la correa Si la correa se destensa un poco transcurrido algún tiempo, deberá aumentarse la tensión en la misma. Cómo tensar la correa: 1. Coloque una llave allen de 1,8 mm en el tornillo izquierdo de la correa. Gire la llave en el sentido de las agujas del reloj 1/4 de giro para aumentar la tensión.
  • Seite 115 • Si la correa sigue sin situarse en el centro, repita los pasos anteriores hasta que la correa se sitúe en el centro. • Cuando la cinta esté centrada, aumente la velocidad a 16 km/h y compruebe si funciona correctamente. Repita los pasos anteriores si fuera necesario.
  • Seite 116: Entrenamiento Con La App Kinomap

    ENTRENAMIENTO CON LA APP KINOMAP Con la app KINOMAP puede correr, pedalear o remar por todo el mundo con más de 100.000 km de vídeos en movimiento y son los propios usuarios quienes pueden actualizarlo diariamente. Intente seguir el ritmo en las mismas condiciones en las que se han grabado los vídeos.
  • Seite 117 Código de activación • La versión estándar es gratuita y le ofrece acceso a una serie de vídeos gratuitos y entrenamiento de intervalos (actualmente no disponibles para todos los dispositivos). • Posteriormente se requerirá una suscripción para tener acceso a todos los contenidos, entre los que se encuentran miles de vídeos reales, un modo multijugador y mucho más.
  • Seite 118 Previsualización de los datos Con la función „Previsualización de los datos“ puede ver enseguida los datos enviados por el aparato. Esta función es especialmente útil si tiene problemas a la hora de iniciar una actividad. En función del equipamiento, la app recibirá los valores correspondientes.
  • Seite 119 Entrenamiento Selección de vídeo • Tiene a su disposición varias listas con vídeos en los que puede seleccionar el vídeo deseado para entrenarse con ellos durante el entrenamiento. • Existe una función de filtro para garantizar que accede a los vídeos buscados (Featured, popular, most viewed, most recent, duration, distance, incline...).
  • Seite 120 Listas de reproducción • Aquí accederá a muchas listas de reproducción que Kinomap o los usuarios han ido creado. • Cada lista de reproducción tiene un tema determinado, como entrenamiento de 30 min o visita de un país. • Puede realizar el seguimiento de sus avances en todas las listas de reproducción y en cada vídeo que cree.
  • Seite 121 Comienzo del entrenamiento. Seleccione el vídeo Seleccione el modo Comience caminando o en el que desea en el que desea pedaleando para iniciar entrenarse. entrenarse. el entrenamiento.
  • Seite 122 Modo descubrimiento o reto Modo reto: El vídeo se reproduce a la velocidad que lleve para que pueda rendir lo mismo que el creador del mismo. Si no va lo suficientemente rápido, el vídeo reduce poco a poco la tasa de fotogramas. Si va a buen ritmo, la tasa de fotogramas puede aumentarse hasta el doble de la velocidad original.
  • Seite 123 Pantalla de entrenamiento En el marco superior de la pantalla aparece la información relevante: • La duración • La electricidad generada • La velocidad actual • El ritmo cardiaco (solo si añade un cinturón cardiaco original o si su equipamiento tiene uno de fábrica) •...
  • Seite 124 Finalizar entrenamiento Si desea pausar o detener el entrenamiento, deje de correr/pedalear o utilice la tecla Pause situada en la esquina de la unidad de entrenamiento. Haga clic en la interfaz „Continuar sesión“ para continuar con un entrenamiento inacabado. Si desea finalizar esa actividad, confirme pulsando en „Guardar y finalizar“. Perfil de entrenamiento...
  • Seite 125 El perfil de entrenamiento es una forma de entrenamiento que contiene una serie de entrenamientos de intensidad baja a alta y fases de descanso o reposo. Al variar la intensidad de su esfuerzo, se entrena el corazón, se mejora el entrenamiento cardiovascular, se mejora la capacidad aeróbica y permite a la persona entrenarse durante más tiempo y/o o a mayor intensidad.
  • Seite 126 Valoraciones Historial de entrenamiento • Abra el menú principal situado en la parte izquierda para hacer clic en „Historial de entrenamiento“. • Puede ver el historial de sus anteriores sesiones de entrenamiento, incluido el nombre del vídeo con el que se ha entrenado, la fecha del entrenamiento, su duración y distancia.
  • Seite 127 Búsqueda Este botón siempre está disponible en la esquina superior derecha para buscar vídeos, independientemente del menú en el que se encuentre. Existen varias opciones para buscar el vídeo que desea: • Puede buscar haciendo clic en la tecla Buscar. En cuanto haya introducido al menos 3 caracteres, se abrirá...
  • Seite 128: Retirada Del Aparato

    RETIRADA DEL APARATO Si el aparato lleva adherida la ilustración de la izquierda (el contenedor de basura tachado) entonces rige la normativa europea, directiva 2012/19/UE. Este producto no debe arrojarse a un contenedor de basura común. Infórmese sobre las leyes territoriales que regulan la recogida separada de aparatos eléctricos y electrónicos.
  • Seite 129: Fiche Technique

    Cher client, Toutes nos félicitations pour l’acquisition de ce nouvel appareil. Veuillez lire attentivement les instructions suivantes de branchement et d’utilisation afi n d’éviter d’éventuels dommages. Le fabricant ne saurait être tenu pour responsable des dommages dus au non-respect des consignes de sécurité et à la mauvaise utilisation de l’appareil.
  • Seite 130: Consignes De Sécurité

    CONSIGNES DE SÉCURITÉ Lisez attentivement le mode d‘emploi avant d‘utiliser l‘appareil et conservez-le pour référence ultérieure. Les caractéristiques du produit peuvent différer légèrement des illustrations. Le fabricant est susceptible d‘effectuer des modifications sans préavis. • Conservez le mode d‘emploi en lieu sûr afin de pouvoir vous y référer à tout moment.
  • Seite 131 • Avant chaque utilisation, vérifiez que les poignées, la selle et les écrous et boulons sont bien serrés. • Faites attention à la position maximale réglable des pièces de l‘appareil et n‘allez pas au-delà de la marque „Stop“, car cela créerait un risque. •...
  • Seite 132: Aperçu De L'appareil

    APERÇU DE L‘APPAREIL Console Poignée capteur de pulsations Poignée de maintien Montant vertical Cache du moteur Bande de roulement Bande latérale Cache Cadre de base Cadre principal Cache arrière...
  • Seite 133: Contenu De L'emballage

    CONTENU DE L‘EMBALLAGE Appareil principal Petits éléments Console Montant Caches Couvre-poignées Notice Support du cadre de la console Clé de sécurité Huile de silicone...
  • Seite 134: Petits Éléments

    PETITS ÉLÉMENTS Vis Allen M8*60*20 Vis cylindrique M8*15 Vis ST4*16 Vis Allen M8*15 Rondelle plate Ø8 Rondelle à ressort Ø8 Clé en T Clé cruciforme Clé Allen...
  • Seite 135: Installation

    INSTALLATION Retirez l‘appareil de son emballage et posez-le à plat sur le sol. Branchez le câble de communication du montant aux câbles du châssis. Insérez ensuite les montants dans la bague de serrage des deux côtés du cadre principal et fixez-les avec des vis Allen à tête cylindrique M8 * 60 * 20 et des vis Allen à...
  • Seite 136 Retirez les caches du guidon et fixez-les à la console avec 4 vis ST4 * 16. Retirez les supports du châssis de la console et fixez-les au support avec 4 vis à tête cylindrique, 4 rondelles et 4 rondelles à ressort. Remarque : Lors du montage, assurez-vous que le cache du guidon et la console ne sont pas rayés;...
  • Seite 137 Branchez le câble de communication du montant au câble de communication de la console, comme indiqué dans la figure suivante. Fixez ensuite la console au montant vertical avec 8 vis Allen. Serrez les vis.
  • Seite 138 Enfin, mettez les couvercles et serrez toutes les vis. L‘appareil est maintenant prêt à être assemblé.
  • Seite 139: Aperçu De L'entrainement Cardio

    APERÇU DE L‘ENTRAINEMENT CARDIO L‘entraînement cardio régulier stimule le système cardio-vasculaire (cœur et respiration). Vous améliorez votre condition, perdez du poids et brûlez les graisses. C‘est donc l‘entraînement recommandé si vous souhaitez perdre du poids. Pendant l‘exercice, le glucose est brûlé en premier, puis les exercices brûlent les graisses stockées dans le corps.
  • Seite 140 La phase d‘entraînement cardio est liée à la zone d‘entraînement aérobie ou anaérobie en fonction de la dépense énergétique. Ces zones sont définies comme suit : Domaine d‘entraînement aérobie Dans cette zone vous améliorez votre système cardio-vasculaire et brûlez des graisses.
  • Seite 141 3. Phase de récupération Pour terminer, restez en phase de récupération pendant au moins 5 minutes et utilisez à nouveau de faibles niveaux de résistance sans fournir trop d‘efforts. La phase de détente ou de récupération aide également à prévenir d‘éventuelles courbatures musculaires après l‘effort.
  • Seite 142: Échauffement Avant L'entrainement

    ÉCHAUFFEMENT AVANT L‘ENTRAINEMENT Effectuez Les mouvements d‘échauffement avant chaque séance d‘entraînement. Vous mobilisez ainsi vos articulations et activez vos muscles. Si vous ne vous sentez pas bien en effectuant certains mouvements ou que vous ressentez des douleurs, n‘effectuez pas cet exercice et convenez avec votre médecin ou votre coach de fitness d‘une méthode d‘échauffement spécifique.
  • Seite 143 Tournez les hanches en gardant les Pliez les hanches, un bras tendu vers bras étirés. Les pieds ne doivent le haut. Restez dans cette position pas rester collés au sol (les chevilles une seconde de chaque côté. accompagnent la rotation du corps). Tenez-vous sur une jambe et tenez le cou-de-pied avec votre main.
  • Seite 144 En vous accroupissant, placez vos Asseyez-vous avec les jambes pieds à peu près à la largeur des repliées de sorte que les plantes épaules et abaissez vos hanches avec de vos pieds se touchent. Poussez les bras tendus. Pendant ce temps, doucement sur les genoux.
  • Seite 145: Panneau De Commande Et Fonctions Des Touches

    PANNEAU DE COMMANDE ET FONCTIONS DES TOUCHES Programme (P) Le tapis de course à l‘arrêt, appuyez sur la touche (P) pour sélectionner l‘un des programmes suivants : P1-P36> U1-U3> FAT. P0 est le mode manuel, P1-36 sont des programmes prédéfinis, U1-U3 sont des programmes personnalisés et FAT est la mesure de la graisse corporelle.
  • Seite 146 Mode (M) Le tapis de course à l‘arrêt, appuyez sur la touche (M) pour sélectionner le mode souhaité. Vous pouvez choisir l‘une des options suivantes : • Time count down (la durée saisie sera comptée à rebours) • Calories count down (les calories saisies seront comptées à rebours) •...
  • Seite 147 Touche d‘accès rapide pour l‘angle d‘inclinaison Modifiez directement l‘angle d‘inclinaison à 3 %, 6 %, 9 % ou 12 % en appuyant sur les touches d‘accès rapide. Ventilateur Appuyez ur la touche du ventilateur pour allumer ou éteindre le ventilateur. Passer des miles aux kilomètres pour l‘affichage de la vitesse 1.
  • Seite 148: Modes Et Programmes

    MODES ET PROGRAMMES Remarque : Vous pouvez retirer la clé de sécurité à tout moment pour arrêter le tapis de course. L‘écran affiche alors le message d‘erreur [E7] et un signal d‘avertissement retentit. Replacez à nouveau la clé de sécurité. L‘écran s‘allume brièvement complètement puis passe à...
  • Seite 149 Programmes pré définis • P1-P36 sont des programmes pré définis. Dans ces programmes, vous ne pouvez régler que la durée. Appuyez sur la touche [+] ou [-] pour modifier la valeur. Vous pouvez régler la durée entre 5-99 minutes. La durée par défaut est de 30:00 minutes.
  • Seite 150 Mesure du taux de graisse corporelle Lorsque le tapis de course est arrêté, appuyez sur la touche PROG jusqu‘à ce que FAT apparaisse. Appuyez ensuite sur MODE pour définir le paramètre. • F1 (genre): choisissez 1 (masculin) ou 2 (féminin). Lorsque la fenêtre 1 apparaît, c‘est masculin qui est sélectionné.
  • Seite 151 HRC programme de fréquence cardiaque cible (en option) 1. Appuyez sur PROG jusqu‘à ce que HRC s‘affiche. 2. Appuyez ensuite sur MODE pour confirmer et passer au paramétrage du segment suivant. 3. Utilisez la touche vitesse +/- pour définir les paramètres suivants : Âge : 15-80 ans, réglage par défaut 25 ans.
  • Seite 152: Tableaux Des Programmes Et Des Vitesses

    TABLEAUX DES PROGRAMMES ET DES VITESSES Segment Programme Vitesse Pente Vitesse Pente Vitesse Pente Vitesse Pente Vitesse Pente Vitesse Pente Vitesse Pente Vitesse Pente Vitesse Pente Vitesse Pente Vitesse Pente Vitesse Pente Vitesse Pente Vitesse Pente Vitesse Pente...
  • Seite 153 Segment Programme Vitesse Pente Vitesse Pente Vitesse Pente Vitesse Pente Vitesse Pente Vitesse Pente Vitesse Pente Vitesse Pente Vitesse Pente Vitesse Pente Vitesse Pente Vitesse Pente Vitesse Pente Vitesse Pente Vitesse Pente Vitesse Pente...
  • Seite 154: Identification Et Résolution Des Problèmes

    Segment Programme Geschwindigkeit Steigung Geschwindigkeit Steigung Geschwindigkeit Steigung Geschwindigkeit Steigung Geschwindigkeit Steigung IDENTIFICATION ET RÉSOLUTION DES PROBLÈMES Problème Cause possible Solution L'appareil ne fonctionne L'alimentation n'est pas Branchez l'alimentation et pas. branchée. allumez l'appareil. La clé de sécurité n'est pas Installez la clé...
  • Seite 155: Entretien Et Maintenance

    Problème Cause possible Solution Message d'erreur E7 La console ne reconnaît Fixez la clé de sécurité à la pas la clé de sécurité. console. Pas de mesure de la Le câble de la fréquence Branchez le câble fréquence cardiaque. cardiaque n'est pas correctement.
  • Seite 156 Réglage de la tension de la courroie Si la bande de roulement semble un peu glissante au bout d‘un certain temps, il peut être nécessaire d‘augmenter sa tension. Comment augmenter la tension : 1. Insérez une clé Allen de 1,8 mm dans la vis de tension de la courroie gauche.
  • Seite 157 • Si la bande de roulement n‘est toujours pas centrée, répétez l‘étape ci- dessus, jusqu‘à ce que la bande de roulement soit centrée. • Une fois que la bande est centrée, augmentez la vitesse jusqu‘à 16 km/h et vérifiez qu‘elle reste centrée. Répétez les étapes ci-dessus si besoin. •...
  • Seite 158: Entrainement Avec L'appli Kinomap

    ENTRAINEMENT AVEC L‘APPLI KINOMAP Avec l‘application KINOMAP, vous pouvez faire plus de 100 000 km de course, de route ou de rame sur des vidéos de déplacement à travers le monde et mises à jour quotidiennement par les utilisateurs eux-mêmes. Essayez de suivre leur rythme dans les mêmes conditions qu‘ils l‘ont enregistré.
  • Seite 159 Code d‘activation • La version standard est gratuite et vous donne accès à un certain nombre de vidéos gratuites et à des séances par intervalles (non disponible actuellement sur tous les appareils). • L‘abonnement est requis plus tard pour accéder à tous les contenus, y compris des milliers de vidéos real life, le mode multi-joueurs et plus encore.
  • Seite 160 Prévisualisation des données Avec la fonction de „prévisualisation des données“, vous pouvez visualiser immédiatement les données envoyées par l‘appareil. Cette fonction est particulièrement utile si vous avez des difficultés au démarrage d‘une activité. Selon l‘équipement, l‘application reçoit certaines valeurs.
  • Seite 161 Entrainement Choix d‘une vidéo • Plusieurs listes de vidéos sont à votre disposition pour vous permettre de sélectionner celle qui vous convient. • Pour vous entraîner avec pendant votre séance. Une fonction de filtrage vous assure que vous avez bien accès aux vidéos que vous recherchez (plébiscité, populaire, le plus vu, le plus récent, la durée, la distance, l‘inclinaison ..).
  • Seite 162 Listes de lecture • Vous trouverez également de nombreuses listes de lecture créées par Kinomap ou par les utilisateurs eux-mêmes. • Chaque playlist a un thème spécifique, par exemple 30 minutes pour s‘entraîner ou visiter un pays. • Vous pouvez suivre votre progression sur n‘importe quelle playlist et n‘importe quelle vidéo créée.
  • Seite 163 Début de l‘entraînement Sélectionnez la vidéo Choisissez le mode Commencez sur laquelle vous voulez dans lequel vous voulez simplement à vous entraîner. entraîner. pédaler pour débuter l'entraînement.
  • Seite 164 Modes découverte et défi Mode défi : La vidéo est lue à votre rythme afin que vous puissiez réaliser la même performance globale que le producteur de la vidéo. Si vous n‘êtes pas assez rapide, la vidéo ralentit la fréquence d‘images. Si vous avez de bonnes performances, la fréquence d‘images peut être augmentée jusqu‘à...
  • Seite 165 Affichage de la séance En haut de l‘écran, les informations pertinentes sont affichées : • La durée • Le nombre de watts instantanés • La vitesse instantanée • Votre fréquence cardiaque (seulement si vous ajoutez un capteur cardiaque à la ceinture ou si votre équipement en intègre une) •...
  • Seite 166 Terminer la séance Si vous voulez faire une pause ou terminer votre séance, arrêtez simplement de pédaler ou utilisez le bouton pause dans le coin de l‘entraînement. Cliquez sur le bouton Reprendre la session pour continuer une séance non terminée. Si vous souhaitez quitter cette activité, confirmez simplement en appuyant sur „enregistrer et quitter“.
  • Seite 167 Le profil d‘entraînement est une forme d‘entraînement qui implique une série de séances de faible à haute intensité avec des périodes de repos ou de détente. Varier l‘intensité de votre effort entraîne le muscle cardiaque, offre un entraînement cardiovasculaire, améliore la capacité aérobie et permet à la personne de faire de l‘exercice plus longtemps et/ou plus intensément.
  • Seite 168 Évaluations Historique des exercices • Ouvrez le menu principal sur le côté gauche pour cliquer sur „Historique d‘entraînement“. • Ici, vous pouvez consulter l‘historique de vos entraînements passés, y compris le nom de la vidéo que vous avez visionnée, la date de l‘entraînement, la durée et la distance.
  • Seite 169 Recherche Ce bouton est toujours accessible dans le coin supérieur droit pour parcourir les vidéos, quel que soit le menu dans lequel vous vous trouvez. Il existe plusieurs possibilités pour trouver la bonne vidéo : • Vous pouvez effectuer une recherche en cliquant sur le bouton Rechercher.
  • Seite 170: Conseils Pour Le Recyclage

    CONSEILS POUR LE RECYCLAGE Le pictogramme ci-contre apposé sur le produit signifie que la directive européenne 2012/19/UE s‘applique (poubelle à roues barrée d’une croix). Ces produits ne peuvent être jetés dans les poubelles domestiques courantes. Renseignez-vous concernant les règles appliquées pour la collecte d’appareils électriques et électroniques.
  • Seite 171 Gentile cliente, La ringraziamo per aver acquistato il dispositivo. La preghiamo di leggere attentamente le seguenti istruzioni per l’uso e di seguirle per evitare possibili danni tecnici. Non ci assumiamo alcuna responsabilità per danni scaturiti da una mancata osservazione delle avvertenze di sicurezza e da un uso improprio del dispositivo.
  • Seite 172: Avvertenze Di Sicurezza

    AVVERTENZE DI SICUREZZA Leggere attentamente tutto il manuale prima di procedere all’uso del dispositivo e conservarlo per future consultazioni. Le caratteristiche del prodotto possono essere leggermente diverse da quelle rappresentate nelle immagini. Il produttore si riserva il diritto di effettuare modifiche senza preavviso.
  • Seite 173 • Prima di ogni utilizzo, controllare che impugnature, sella, dadi e bulloni siano avvitati saldamente. • Rispettare la posizione massima per i componenti del dispositivo regolabili e non superare mai il segno “Stop”, in quanto potrebbero insorgere rischi. • Utilizzare il dispositivo solo secondo le modalità descritte. Se durante il montaggio o il controllo doveste notare componenti difettose o udire strani rumori durante l’utilizzo, interrompete immediatamente l’utilizzo.
  • Seite 174: Descrizione Del Dispositivo

    DESCRIZIONE DEL DISPOSITIVO Consolle Impugnatura battito cardiaco Impugnatura Barra verticale Copertura motore Superficie scorrevole Barra laterale Copertura Telaio base Telaio principale Copertura posteriore...
  • Seite 175: Volume Di Consegna

    VOLUME DI CONSEGNA Dispositivo principale Piccoli componenti Consolle Barre verticali Coperture Coperture impugnature Manuale Morsetti del telaio della consolle Chiave di sicurezza Olio a base di silicone...
  • Seite 176: Piccoli Componenti

    PICCOLI COMPONENTI Vite a brugola M8*60*20 Vite a cilindro M8*15 Vite ST4*16 Vite a brugola M8*15 Rondella piatta Ø8 Rondella elastica Ø8 Chiave a T Cacciavite a croce Chiave a brugola...
  • Seite 177: Montaggio

    MONTAGGIO Togliere il tapis roulant dall’imballaggio e poggiarlo sul pavimento. Collegare i cavi di comunicazione della barra verticale destra con il cavo del telaio base. Inserire la barra nell’anello di bloccaggio su entrambi i lati del telaio principale e fissarla con viti a brugola M8*60*20 e viti a brugola M8*15.
  • Seite 178 Prendere le coperture del manubrio e fissarle alla consolle con 4 viti ST4*16. Prendere i morsetti del telaio della consolle e fissarli alla consolle con 4 viti a cilindro, 4 rondelle e 4 rondelle elastiche. Avvertenza: durante il montaggio, assicurarsi che la copertura del manubrio e la consolle non vengano graffiate;...
  • Seite 179 Collegare il cavo di comunicazione nella barra verticale con il cavo di comunicazione della consolle come mostrato in immagine. Fissare la consolle alla barra verticale con 8 viti a brugola. Stringere le viti.
  • Seite 180 Infine, posizionare le coperture e stringere tutte le viti. Il montaggio è ora concluso.
  • Seite 181: Descrizione Dell`allenamento Cardio

    DESCRIZIONE DELL`ALLENAMENTO CARDIO Un allenamento cardio regolare stimola il sistema cardiovascolare (cuore e respirazione). Si migliora la propria forma fisica, si perde peso e si bruciano i grassi. Questo è l‘allenamento consigliato per perdere peso. Durante l‘allenamento, per prima cosa viene bruciato il glucosio e in seguito vengono bruciati i grassi accumulati nel corpo.
  • Seite 182 La fase di allenamento cardio viene assegnata all‘area di allenamento aerobica o anaerobica, a seconda della quantità di energia richiesta. Tali aree sono definite come segue: Zona di allenamento aerobica In questa zona si migliora il sistema cardiovascolare e si bruciano i grassi. Nonostante il battito accelerato, la respirazione più...
  • Seite 183 3. Fase di recupero Al termine dell´allenamento cardio rimanere almeno 5 minuti nella fase di recupero usando bassi livelli di resistenza. La fase di recupero è utile anche per prevenire possibili dolori muscolari dopo l‘allenamento. Inoltre dopo una sessione di allenamento intensivo, si consiglia la rigenerazione attiva ad esempio con un bagno caldo, una sauna o un massaggio.
  • Seite 184: Riscaldamento Prima Dell'allenamento

    RISCALDAMENTO PRIMA DELL’ALLENAMENTO Eseguire gli esercizi di riscaldamento prima di ogni sessione di allenamento. In questo modo verranno mobilitate le articolazioni e attivati i muscoli. Se durante movimenti singoli dovessero sorgere sensazioni di malessere o dolori, saltare l’esercizio in questione e concordare un riscaldamento specifico con il medico o il personal trainer.
  • Seite 185 Ruotare i fianchi tenendo le Piegare i fianchi lateralmente braccia distese. I piedi non sono tenendo un braccio disteso verso fissi sul pavimento (le caviglie l’alto. Mantenere la posizione per accompagnano la rotazione del qualche secondo per ogni lato. corpo). Posizionarsi su una sola gamba e mantenere in tensione con la mano.
  • Seite 186 Piegarsi sulle ginocchia tenendo i Sedersi con le gambe piegate piedi divaricati in corrispondenza in modo che le suole dei piedi si delle spalle e abbassarsi con le tocchino. Molleggiare delicatamente braccia distese in avanti fino a con le ginocchia. In questo modo quando i fianchi sono all’altezza delle si mobilizzano le caviglie e la parte ginocchia.
  • Seite 187: Pannello Di Controllo E Tasti Funzione

    PANNELLO DI CONTROLLO E TASTI FUNZIONE Programma (P) A tapis roulant fermo, premere (P) per selezionare un programma: P1-P36 > U1-U3 > FAT. P0 è la modalità manuale, P1-P36 sono programmi predefiniti, U1.U3 sono programmi definiti dall’utente e FAT è la misurazione del grasso corporeo.
  • Seite 188 Modalità (M) A tapis roulant fermo, premere (M) per selezionare la modalità desiderata. Sono disponibili le seguenti opzioni: • Time count down (conto alla rovescia del tempo impostato) • Calories count down (conto alla rovescia delle calorie impostate) • Distance count down (conto alla rovescia della distanza impostata) Start/Pausa A tapis roulant fermo, premere questo tasto per attivare il dispositivo.
  • Seite 189 Selezione rapida dell’inclinazione Premere il tasto di selezione rapida per modificare direttamente l’inclinazione su 3 %, 6 %, 9 % o 12 %. Ventilatore Premere il tasto del ventilatore per accenderlo o spegnerlo. Cambiare la velocità da miglia a kilometri 1.
  • Seite 190: Modalità E Programmi

    MODALITÀ E PROGRAMMI Avvertenza: la chiave di sicurezza può essere tirata in ogni momento per arrestare il tapis roulant. Il display mostra l’avviso di errore [E7] e viene emesso un segnale di avvertimento. Reinserire la chiave di sicurezza. Il display si illumina brevemente e passa alla schermata di Start. Avvio rapido •...
  • Seite 191 Programmi predefiniti • P1-P36 sono programmi predefiniti. Qui è possibile impostare solo la durata. Premere [+] o [-] per modificare il valore. Il tempo può essere impostato tra 5 e 99 minuti. Il tempo predefinito è di 30:00 minuti. Premere MODE per tornare alle impostazioni standard. •...
  • Seite 192 Misurare il grasso corporeo A tapis roulant fermo, premere PROGRAMMA fino a quando compare FAT. Premere poi MODE per impostare il parametro. • F1 (genere): selezionare 1 (maschio) o 2 (femmina). Se compare 1, è stato selezionato maschio. L’impostazione predefinita è maschio. •...
  • Seite 193 HRC programma per il battito cardiaco da raggiungere (opzionale) 1. Premere PROG fino a quando compare HRC. 2. Premere MODE per confermare e raggiungere l’impostazione seguente. 3. Utilizzare Velocità +/- per impostare i seguenti parametri: Età: 15-80 anni, predefiniti sono 25 anni. Battito cardiaco standard: (220 anni –...
  • Seite 194: Tabelle Su Velocità E Programma

    TABELLE SU VELOCITÀ E PROGRAMMA Segmento Programma Velocità Inclinazione Velocità Inclinazione Velocità Inclinazione Velocità Inclinazione Velocità Inclinazione Velocità Inclinazione Velocità Inclinazione Velocità Inclinazione Velocità Inclinazione Velocità Inclinazione Velocità Inclinazione Velocità Inclinazione Velocità Inclinazione Velocità Inclinazione Velocità Inclinazione...
  • Seite 195 Segmento Programma Velocità Inclinazione Velocità Inclinazione Velocità Inclinazione Velocità Inclinazione Velocità Inclinazione Velocità Inclinazione Velocità Inclinazione Velocità Inclinazione Velocità Inclinazione Velocità Inclinazione Velocità Inclinazione Velocità Inclinazione Velocità Inclinazione Velocità Inclinazione Velocità Inclinazione Velocità Inclinazione...
  • Seite 196: Ricerca E Correzione Degli Errori

    Segmento Programma Velocità Inclinazione Velocità Inclinazione Velocità Inclinazione Velocità Inclinazione Geschwindigkeit Steigung RICERCA E CORREZIONE DEGLI ERRORI Problema Possibile causa Soluzioni Il dispositivo non funziona. Non è connesso alla rete Collegare il dispositivo e elettrica. accenderlo. La chiave di sicurezza non Inserire la chiave di è...
  • Seite 197: Pulizia E Manutenzione

    Problema Possibile causa Soluzioni Avviso di errore E7. La consolle non rileva il Mettere la chiave di segnale della chiave di sicurezza nella posizione sicurezza. corretta. Nessuna misurazione del Il cavo del battito cardiaco Collegare il cavo battito cardiaco. non è ben collegato. correttamente.
  • Seite 198 Regolare la tensione della cinghia Se la cinghia di trazione si smolla, è necessario aumentare la tensione. Come aumentare la tensione: 1. Inserire una chiave a brugola da 1,8 mm nella vite di tensionamento sinistra. Ruotare in senso orario di ¼ di giro per aumentare la tensione della cinghia.
  • Seite 199 • Se il nastro ancora non è centrato, ripetere il passaggio precedente fino a quando è centrato. • Quando il nastro è al centro, aumentare la velocità fino a 16 km/h e controllare se il movimento è fluido e senza rumore. Se necessario, ripetere i passaggi precedenti.
  • Seite 200: Allenamento Tramite Kinomap App

    ALLENAMENTO TRAMITE KINOMAP APP Con l‘App KINOMAP è possibile percorrere più di 100.000 km in tutto il mondo grazie al sistema Real Life Video ed essere aggiornati quotidianamente dagli utenti stessi. Cercare di seguire il ritmo alle stesse condizioni come mostrato nel video.
  • Seite 201 Codice di attivazione • La versione standard è gratuita e consente di accedere ad una serie di video gratuiti e allenamenti a intervalli (attualmente non disponibili su tutti i dispositivi). • In seguito è necessario un abbonamento per accedere a tutti i contenuti autorizzati, tra cui migliaia di Real Life Video, una modalità...
  • Seite 202 Anteprima dei dati Con la funzione „Data Preview“ è possibile visualizzare immediatamente i dati inviati dal dispositivo. Questa funzione è particolarmente utile in caso di problemi con l´inizio di una nuova attività. L‘applicazione riceverà alcuni di questi valori in base alla configurazione.
  • Seite 203 Allenamento Selezione video • Sono disponibili diversi elenchi dai quali è possibile selezionare il video desiderato. • Per allenarsi con il video: è disponibile una funzione di filtro per essere certi di accedere ai video che si stanno cercando (featured, popular, most viewed, most recent, duration, distance, incline...).
  • Seite 204 Playlists • Inoltre sono disponibili molte playlist create da Kinomap o dagli utenti stessi. • Ogni playlist ha un tema specifico, ad esempio per allenarsi per 30 minuti o per visitare un paese. • È possibile seguire i propri progressi su qualsiasi playlist o video creato. •...
  • Seite 205 Iniziare l´allenamento Selezionare il video Selezionare la modalità Iniziare a pedalare per con il quale ci si vuole con la quale ci si vuole iniziare l´allenamento. allenare. allenare.
  • Seite 206 Modalità sfida e scoperta Modalità Challenge: il video viene riprodotto con la velocità dell´utente in modo da raggiungere la stessa performance mostrata nel video. Se non si è abbastanza veloci, il video ridurrà lentamente il frame rate. Con buone prestazioni, il frame rate può essere aumentato fino al doppio della velocità originale.
  • Seite 207 Display allenamento Nella parte superiore del display vengono visualizzate le informazioni rilevanti: • La durata • La potenza prodotta all´istante • La velocità istantanea • La frequenza cardiaca (solo se si aggiunge una fascia con sensori cardiaci o se l‘attrezzatura ne ha una integrata) •...
  • Seite 208 Terminare l´allenamento Se si desidera mettere in pausa o interrompere l‘allenamento, è sufficiente interrompere la pedalata o utilizzare il tasto di pausa nell‘angolo. Fare clic sul tasto „Resume session“ per continuare un allenamento non raggiunto. Se si desidera terminare questa attività, è sufficiente confermare toccando „Save and Exit“.
  • Seite 209 Il profilo di allenamento è una forma di allenamento che comprende una serie di sessioni di allenamento di bassa o alta intensità e fasi di riposo o di distensione. Variare l‘intensità dello sforzo allena il muscolo cardiaco, offre un allenamento cardiovascolare, migliora la capacità aerobica e permette alla persona di allenarsi più...
  • Seite 210 Valutazioni Protocollo allenamento • Aprire il menu principale a sinistra e cliccare su „protocollo di allenamento“. • E´ possibile vedere le sessioni di allenamento passate, incluso il nome del video con il quale ci si è allenati, la data dell´allenamento, la durata e la distanza.
  • Seite 211 Ricerca Questo tasto è sempre disponibile nell‘angolo in alto a destra per sfogliare i video, indipendentemente dal menu in cui ci si trova. Ci sono diversi modi per trovare il video idoneo: • È possibile effettuare la ricerca cliccando sul tasto Cerca. Dopo aver immesso almeno 3 caratteri, viene eseguita una ricerca automatica.
  • Seite 212: Smaltimento

    SMALTIMENTO Se sul prodotto è presente la figura a sinistra (il cassonetto dei rifiuti mobile sbarrato), si applica la direttiva europea 2012/19/UE. Questi prodotti non possono essere smaltiti con i rifiuti normali. Informarsi sulle disposizioni vigenti in merito alla raccolta separata di dispositivi elettrici ed elettronici. Non smaltire i vecchi dispositivi con i rifiuti domestici.

Inhaltsverzeichnis