Herunterladen Inhalt Inhalt Diese Seite drucken
Inhaltsverzeichnis

Werbung

Verfügbare Sprachen
  • DE

Verfügbare Sprachen

  • DEUTSCH, seite 1
Pure Blizzard 3 2G
Klimaanlage
Air Conditioner
Aire acondicionado
Climatiseur
Condizionatore d'aria
10028187 10028188

Werbung

Inhaltsverzeichnis
loading

Inhaltszusammenfassung für Klarstein Pure Blizzard 3 2G

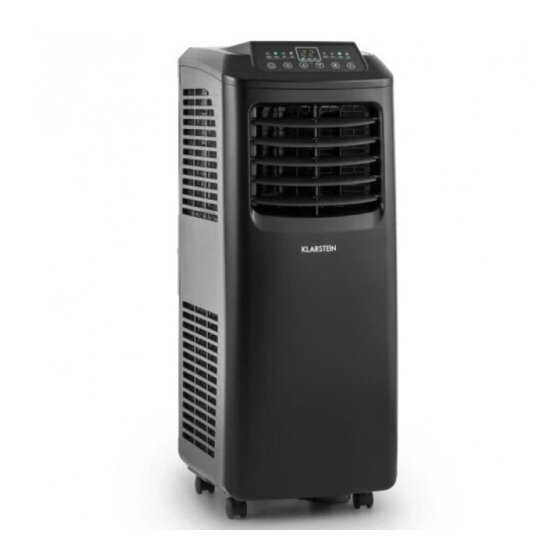
  • Seite 1 Pure Blizzard 3 2G Klimaanlage Air Conditioner Aire acondicionado Climatiseur Condizionatore d’aria 10028187 10028188...
  • Seite 3: Inhaltsverzeichnis

    Sehr geehrter Kunde, wir gratulieren Ihnen zum Erwerb Ihres Gerätes. Lesen Sie die folgenden Hinweise sorgfältig durch und befolgen Sie diese, um möglichen Schäden vorzubeugen. Für Schäden, die durch Missachtung der Hinweise und unsachgemäßen Gebrauch entstehen, übernehmen wir keine Haftung. Scannen Sie den folgenden QR-Code, um Zugriff auf die aktuellste Bedienungsanleitung und weitere Informationen rund um das Produkt zu erhalten.
  • Seite 4: Sicherheitshinweise

    SICHERHEITSHINWEISE • Lesen Sie sich alle Hinweise sorgfältig durch und bewahren Sie die Bedienungsanleitung zum Nachschlagen gut auf. • Benutzen Sie die Klimaanlage nur in Innenräumen. • Schließen Sie das Gerät nur an Steckdosen an, die der Spannung des Geräts entsprechen.
  • Seite 5: Hinweise Zum Kältemittel R290

    HINWEISE ZUM KÄLTEMITTEL R290 Warnhinweise • Die Klimaanlage muss aufrecht aufbewahrt und transportiert werden. Andernfalls können irreparable Kompressorschäden entstehen. Lassen Sie das Gerät im mindestens 24 Stunden stehen, bevor Sie es in Betrieb nehmen. • Schalten Sie den das Gerät vor der Reinigung aus und trennen Sie es von der Stromversorgung.
  • Seite 6: Geräteübersicht

    GERÄTEÜBERSICHT Bedienfeld Unterer Luftkanal Horizontale Lüftungsschlitze Kabelhalter Vertikale Lüftungsschlitze Wasserablaufventil Luftauslassgitter Verdunster-Filter Vertikale Lamelle Filterrahmen Rollfuß Feinfilter Obere Abdeckung Kondensator-Filter Horizontale Lamelle Filterrahmen Vertikaler Hauptlüftungsschlitz Basisplatte Vordere Abdeckung Fernbedienung Griff mit Einschub für die Fernbedienung Kurzer Anschluss Hintere Abdeckung Wärmeabluftschlauch C-förmige Klemme für den Dichtungsrahmen Abluftschlauch...
  • Seite 7: Bedienfeld Und Fernbedienung

    BEDIENFELD UND FERNBEDIENUNG Bedienfeld und Funktionstasten An/Aus Zum an- und ausschalten des Geräts. Modus Kühlen, Entfeuchten und Ventilator. Lüfter Druck auf die Taste ändert die Geschwindigkeit (schnell oder langsam) Timer Mit dem Timer kann das Gerät automatisch ein- und ausgeschaltet werden.
  • Seite 8: Installation

    INSTALLATION Wichtige Hinweise zur Installation • Lassen Sie das Gerät 2 Stunden lang aufrecht stehen, bevor Sie es das erste Mal benutzen. • Sie können das Gerät innerhalb der Wohnung bequem bewegen. Achten Sie darauf, dass das Gerät in aufrechter Position bewegt wird. •...
  • Seite 9 Wärmeabluftschlauch und Zubehör installieren • Ziehen Sie die Enden des Wärmeabluftschlauchs auseinander, indem Sie ihn mehrfach drehen. • Halten Sie das Ende der C-Klemme mit der linken Hand und den kurzen Anschluss das Abluftschlauchs mit der rechten Hand und drehen Die Klemme herum, bis Sie im Schnappverschluss einrastet (Bild links).
  • Seite 10: Installation Der Klimaanlage

    Installation der Klimaanlage Stellen Sie die Klimaanlage in die Nähe des Fensters. Achten Sie dabei darauf, dass rund um die Klimaanlage 50 cm Platz bleibt, damit die Luft ungehindert zirkulieren kann. Schieben Sie das flache Ende des Verbindungsstücks ins ellipsenförmige Loch des Dichtungsrahmens (siehe Bild).
  • Seite 11: Inbetriebnahme Und Funktionen

    INBETRIEBNAHME UND FUNKTIONEN Schlafmodus Nach zwei Betriebsstunden erhöht sich die eingestellte Temperatur automatisch um 1°C. Nach weiteren 2 Stunden Betrieb erhöht sich die eingestellte Temperatur erneut um 1°C. Danach bleibt die Temperatur gleich und der lüfter läuft mit niedriger Geschwindigkeit. Kühl-Modus Ist die Raumtemperatur höher als die eingestellte Temperatur, beginnt das Gerät zu kühlen.
  • Seite 12: Schutzfunktionen

    • Sollte das Gerät während der Timer läuft an- oder ausgeschaltet werden, wird die eingestellte Zeit gelöscht und der Timer muss neu eingestellt werden. • Sobald der Timer läuft können sie sich die verbleibende Zeit anzeigen lassen, indem Sie einmal auf die Timer-Taste drücken. Um den Timer anzubrechen, drücken Sie zweimal hintereinander auf die Timer-Taste.
  • Seite 13: Wassertank Und Permanenter Wasserablauf

    WASSERTANK UND PERMANENTER WASSERABLAUF Wassertank manuell entleeren Sollte sich das Gerät aufgrund eines vollen Tanks automatisch ausschalten ziehen Sie den Stecker aus der Steckdose. Bewegen Sie das Gerät vorsichtig, damit kein Wasser aus dem Tank in die Maschine tropft. • Stellen Sie ein Auffanggefäß unter das Wasserablaufventil an der Rückseite des Geräts.
  • Seite 14 Permanenter Wasserablauf Entfernen Sie Verschlusskappe und Stopfen und befestigen Sie einen Wasserablaufschlauch mit einem Innendurchmesser von 8-10 mm am Auslassventil. Stecken Sie das andere Ende in den Abfluss. Wichtige Hinweise zur Einrichtung eines permanenten Wasserablaufs • Der Wasserablaufschlauch kann nur angebracht werden wenn der Wassertank komplett leer ist.
  • Seite 15: Reinigung Und Pflege

    REINIGUNG UND PFLEGE Reinigen Sie die Oberfläche mit einem feuchten, weichen Lappen. Benutzen Sie keine chemischen Lösemittel wie Alkohol, andernfalls könnten Sie das Gerät oder die Oberfläche beschädigen. Filterrahmen und Filter reinigen Reinigen Sie den Filter alle zwei Wochen. Falls Filterrahmen und Filter mit Staub zugesetzt sind, vermindert sich die Leistung der Klimaanlage.
  • Seite 16 Handgriff und Fernbedienungseinschub reinigen Nehmen Sie die Fernbedienung aus dem Einschub. Reinigen Sie den Griff und den Einschub mit einem leicht feuchten, weichen Lappen. Wringen Sie den Lappen vorher aus, damit kein Wasser ins Gerät eindringt. Trocknen Sie den Griff und die Fernbedienung ab und stecken Sie die Fernbedienung zurück in den Einschub.
  • Seite 17: Fehlerbehebung

    So lagern Sie das Gerät zum Saisonende richtig ein • Schrauben Sie die Verschlusskappe ab, entfernen Sie den Stopfen und entleeren Sie den Tank. Neigen Sie das Gerät dafür nicht mehr als 30°. • Starten Sie das Gerät und schalten Sie den Lüftungs-Modus ein. Lassen Sie das Gerät eine halbe Stunde laufen, damit es von innen trocknen kann und keinen Schimmel ansetzt.
  • Seite 18 Problem Mögliche Ursache Lösung Kühlung/ Die Filter sind verstopft. Reinigen oder ersetzen Sie Entfeuchtung die Filter. funktioniert nicht. Lufteinlass/Luftauslass ist Entfernen Sie alle verstopft. Fremdkörper. Laute Geräusche. Das Gerät steht uneben. Stellen Sie das Gerät auf einen ebenen Untergrund. Der Kompressor Der Überhitzungsschutz Lassen Sie den funktioniert nicht.
  • Seite 19: Hinweise Zur Entsorgung

    HINWEISE ZUR ENTSORGUNG Befindet sich die linke Abbildung (durchgestrichene Mülltonne auf Rädern) auf dem Produkt, gilt die Europäische Richtlinie 2012/19/EU. Diese Produkte dürfen nicht mit dem normalen Hausmüll entsorgt werden. Informieren Sie sich über die örtlichen Regelungen zur getrennten Sammlung elektrischer und elektronischer Gerätschaften.
  • Seite 21 Dear Customer, Congratulations on purchasing this equipment. Please read this manual carefully and take care of the following hints to avoid damages. Any failure caused by ignoring the items and cautions mentioned in the instruction manual is not covered by our warranty and any liability. Scan the QR code to get access to the latest user mannual and other information about the product.
  • Seite 22: Safety Instructions

    SAFETY INSTRUCTIONS • Read all the safety and operating instructions carefully and retain them for future reference. • This air-conditioner is suitable for indoor use only rather than for other occasions. • Rated operating range: this unit shall be connected to 220-240V / 50Hz power output end.
  • Seite 23: Notes On Refrigerant R290

    NOTES ON REFRIGERANT R290 Warnings • The air conditioning system must be kept and transported upright. Otherwise, irreparable compressor damage may occur. Leave the unit for at least 24 hours before putting it into operation. • Switch off the device and disconnect it from the power supply before cleaning. •...
  • Seite 24: Product Overview

    PRODUCT OVERVIEW Control panel Lower air duct bottom Horizontal louvre Wire-winding post Vertical louvre Drain cap Air outlet frame Evaporator filter mesh Vertical louvre connecting lever Evaporator filter frame Caster Radiating fine mesh Top cap Condenser filter mesh Horizontal louvre connecting lever Condenser filter frame Main vertical louvre Base plate...
  • Seite 25: Control Panel And Remote Control

    CONTROL PANEL AND REMOTE CONTROL Control Panel and Key Functions Power Press the key to start the unit, and press this key again to turn unit off. Mode Set the Cooling, Dehumidifying and Fan Mode when unit is working. Fan speed Change fan speed low - high.
  • Seite 26: Installation

    INSTALLATION Important Hints on Installation • Leave this mobile air-conditioner in an upright position for at least 2 hours before first use. • This air-conditioner may be moved indoor conveniently; leave the air-conditioner in an upright position while moving it. •...
  • Seite 27 Installation of the heat exhaust hose assembly and unit • Pull the end of the heat exhaust hose apart by several turns. • Hold the end handle of the C shape buckle with the left hand and the heat exhaust hose short connector with the right hand, put one end of the heat exhaust hose that is pulled apart onto the snap of the lower air duct bottom, press the C shape buckle with the left hand by force so that the C shape buckle of the heat exhaust hose clips...
  • Seite 28 Installation of the unit Move the machine with the heat exhaust hose assembly installed before the window and keep the unit at least 50 cm away from the walls or other objects. Snap the flat end of the heat exhaust hose short connector into the elliptical hole of the window sealing board assembly (see picture below).
  • Seite 29: Use And Operation

    USE AND OPERATION Sleep Mode After two hours of operation, the set temperature automatically increases by 1°C. After another 2 hours of operation, the set temperature increases again by 1°C. The temperature then remains the same and the fan runs at low speed. Cooling Mode If the room surrounding temperature is higher than the setting temperature, the cooling is starting.
  • Seite 30: Protection Functions

    • ON/OFF operations caused by the button or remote control will clear all timing settings. • Once the timing is determined, if the timer button is pressed once, it is possible to query the remaining timed start/shutdown time. If the timer button is pressed twice continuously within 5s, it is possible to cancel timing.
  • Seite 31: Water Tank And Continuous Drainage

    WATER TANK AND CONTINUOUS DRAINAGE Empty water tank manually Once the unit shuts down upon full water, turn off the power of the unit and then unplug the power plug. Move the unit carefully to avoid spillage of water in the water tray at the bottom of the unit •...
  • Seite 32 Contimuous Drainage Screw off the water cap in the direction shown by the arrow and unplug the water plug. Insert the OD 13 mm PVC drain hose 8-10 mm into the water outlet and connect the drain hose to a sink. Important Hints on Continuous Drainage •...
  • Seite 33: Cleaning And Care

    CLEANING AND CARE Clean the surface of the unit with wet soft cloth. Do not use chemical solvents such as alcohol and gasoline; otherwise, the surface of the air-conditioner may be damaged and even the whole unit may be damaged. Cleaning of the filter frame and filter mesh Clean the filter mesh once every two weeks.
  • Seite 34 Cleaning of the handle position and remote control storage area Take the remote control out of the storage area in the direction shown by the arrow. Clean the handle position and remote control storage area of this unit with wringed wet soft cloth.
  • Seite 35: Troubleshooting

    End of Season Storage • Screw off the drain cap, unplug the water plug and drain the water in the water tray to another vessel that holds water. The tilt angle of the unit shall not be greater than 30 degrees. •...
  • Seite 36 Problem Cause Remedy Bad cooling/heating Filter mesh very dirty. Clean or replace the filter effects mesh. Air inlet or air outlet Remove the obstruction. clogged. Large noise. Air-conditioner not put Put the air-conditioner in on a flat a flat and firm place (may surface.
  • Seite 37: Hints On Disposal

    HINTS ON DISPOSAL According to the European waste regulation 2012/19/EU this symbol on the product or on its packaging indicates that this product may not be treated as household waste. Instead it should be taken to the appropriate collection point for the recycling of electrical and electronic equipment.
  • Seite 39: Datos Técnicos

    Estimado cliente: Le felicitamos por la adquisición de este producto. Lea atentamente el siguiente manual y siga cuidadosamente las instrucciones de uso con el fin de evitar posibles daños. La empresa no se responsabiliza de los daños ocasionados por un uso indebido del producto o por haber desatendido las indicaciones de seguridad.
  • Seite 40: Indicaciones De Seguridad

    INDICACIONES DE SEGURIDAD • Por favor, lea con atención las siguientes indicaciones y conserve el manual de instrucciones mientras tenga el aparato en su poder. • No utilice el aparato al aire libre. Utilícelo solamente en espacios cerrados y secos. •...
  • Seite 41: Indicaciones Sobre El Refrigerante R290

    INDICACIONES SOBRE EL REFRIGERANTE R290 Advertencias • Transporte y guarde el aparato en posición vertical. De lo contrario, podría dañar de forma irreparable el compresor. Deje el aparato en posición vertical durante al menos 24 horas antes de ponerlo en marcha. •...
  • Seite 42: Vista General Del Aparato

    VISTA GENERAL DEL APARATO Panel de control Canal inferior de aire Rendijas de ventilación horizontales Sujeción para el cable Rendijas de ventilación verticales Válvula de salida de agua Rejilla de salida de aire Filtro del vaporizador Lamas verticales Marco para filtro Ruedas Filtro del condensador Cubierta superior...
  • Seite 43: Panel De Control Y Mando A Distancia

    PANEL DE CONTROL Y MANDO A DISTANCIA Panel de control y teclas de función On/Off Encender/apagar el climatizador. Modus Modo enfriamiento, deshumificación o ventilación Ventilación Pulse para aumentar o disminuir la velocidad del aire. Timer Ajuste automático de la hora de encendido/apagado. Aumentar/ Aumentar o disminuir la temperatura en tramos de 1C°.
  • Seite 44: Instalación

    INSTALACIÓN Indicaciones importantes para la instalación • Deje reposar el climatizador en posición vertical cerca de 2 horas antes de ponerlo en marcha. • Puede desplazar el aparato cómodamente por el interior de la habitación. Desplace el climatizador siempre en posición vertical. •...
  • Seite 45 Instalación de la manguera de aire caliente y de los accesorios • Separe los extremos de la manguera girándola varias veces. • Sostenga el extremo para la clema con la mano izquierda y el acople corto de la manguera con la derecha. Gire la clema hasta que encaje en el cierre de trinquete (ver imagen izda).
  • Seite 46 Instalación del climatizador Coloque el climatizador cerca de una ventana. Procure que no haya ningún objeto en un radio de 50 cm alrededor del climatizador para que el aire pueda circular con normalidad. Encaje el extremo plano de la manguera en la cavidad con forma de elipse del marco para ventanas (ver imagen).
  • Seite 47: Puesta En Marcha Y Funciones

    PUESTA EN MARCHA Y FUNCIONES Modo de reposo Después de dos horas de funcionamiento, la temperatura ajustada aumenta automáticamente en 1°C. Después de otras 2 horas de funcionamiento, la temperatura ajustada vuelve a aumentar en 1°C. La temperatura sigue siendo la misma y el ventilador funciona a baja velocidad.
  • Seite 48: Funciones De Protección

    • Si enciende o apaga el aparato mientras el temporizador está programado, los datos introducidos se borrarán y necesitará realizar de nuevo los ajustes. • Cuando el temporizador se active, podrá visualizar el tiempo restante pulsando una vez la tecla del temporizador. Si desea interrumpir el temporizador, pulse dos veces seguidas esta misma tecla.
  • Seite 49: Depósito De Agua Y Desagüe Permanente

    DEPÓSITO DE AGUA Y DESAGÜE PERMANENTE Vaciado manual del tanque Si el climatizador se apaga debido a que el depósito está lleno de agua, desenchufe el aparato y muévalo con cautela para que el agua del depósito no penetre en el interior. •...
  • Seite 50 Desagüe permanente Retire el cierre de rosca y el tapón y acople en la válvula de salida de agua una manguera con un diámetro interior de 8-10 mm. Coloque el otro extremo de la manguera en un sumidero. Indicaciones importantes acerca del desagüe permanente •...
  • Seite 51: Limpieza Y Cuidado

    LIMPIEZA Y CUIDADO Limpie la superficie del climatizador con un trapo húmedo. No emplee limpiadores químicos como alcohol. Podría dañar el aparato. Limpieza de los marcos y de los filtros Limpie los filtros una vez cada dos semanas. Si los marcos y los filtros están cubiertos de polvo, el rendimiento del climatizador disminuirá...
  • Seite 52 Limpieza del asa y del compartimento del mando a distancia Saque el mando a distancia de su compartimento. Limpie el asa y el compartimento con un trapo húmedo. Escurra bien el trapo para que no caiga agua en el interior del aparato.
  • Seite 53: Reparación De Anomalías

    Cómo guardar el climatizador • Saque el cierre de rosca, retire el tapón y vacíe completamente el depósito. No incline el aparato más de 30 °. • Ponga en marcha el climatizador en modo ventilación durante una media hora para que se seque el interior y evitar así la formación de moho. •...
  • Seite 54 Problema Posible causa Solución Los modos Los filtros están obstruidos. Limpie o sustituya los enfriamiento y filtros. humidificación no Las salidas o entradas de Retire los objetos que las funcionan. aire están obstruidas. bloquean. El climatizador hace El aparato no está Coloque el climatizador mucho ruido.
  • Seite 55: Retirada Del Aparato

    RETIRADA DEL APARATO Si el aparato lleva adherida la ilustración de la izquierda (el contenedor de basura tachado) entonces rige la normativa europea, directiva 2012/19/UE. Este producto no debe arrojarse a un contenedor de basura común. Infórmese sobre las leyes territoriales que regulan la recogida separada de aparatos eléctricos y electrónicos.
  • Seite 57 Chère cliente, cher client, Toutes nos félicitations pour l’acquisition de ce nouvel appareil. Veuillez lire attentivement et respecter les instructions de ce mode d’emploi afin d’éviter d’éventuels dommages. Le fabricant ne saurait être tenu pour responsable des dommages dus au non- respect des consignes de sécurité...
  • Seite 58: Consignes De Sécurité

    CONSIGNES DE SÉCURITÉ • Lire attentivement les consignes et conserver ce mode d’emploi pour une consultation ultérieure. • Utiliser le climatiseur seulement en intérieur. • S’assurer que la tension de votre installation électrique correspond à la tension de l‘appareil. • Pour éviter tout risque d’électrocution dû à une anomalie ou un dysfonctionnement, l’appareil doit être branché...
  • Seite 59: Remarques Concernant Le Réfrigérant R290

    REMARQUES CONCERNANT LE RÉFRIGÉRANT R290 Mises en garde • Le climatiseur doit être entreposé et transporté à la verticale. Faute de quoi, le compresseur pourrait être endommagé de façon irréparable. En cas de doute, laissez l‘appareil reposer pendant au moins 24 heures avant de le mettre en service.
  • Seite 60: Aperçu De L'appareil

    APERÇU DE L’ APPAREIL Panneau de commande Canal d’air inférieur Volets d’aération horizontaux Support pour le cordon Volets d’aération verticaux Valve d’évacuation d’eau Grille de sortie d’air Filtre de l’évaporateur Lamelle verticale Cadre du filtre Roulette Filtre fin Panneau de protection supérieur Filtre du condensateur Lame horizontale Cadre du filtre...
  • Seite 61: Panneau De Commande Et Télécommande

    PANNEAU DE COMMANDE ET TÉLÉCOMMANDE Panneau de commande et touches de fonction Allumer/éteindre Pour allumer et éteindre l’appareil. Mode Climatisation, déshumidification, ventilation. Ventilation Appuyer sur la touche pour changer la vitesse (élevée ou faible). TIMER (minuterie) Utiliser la minuterie pour allumer ou éteindre l’appareil automatiquement.
  • Seite 62: Installation

    INSTALLATION Indications importantes pour l’installation • Laisser l’appareil en position verticale pendant deux heures avant une première utilisation. • Il est possible de déplacer facilement l’appareil. Veiller cependant à le déplacer en position verticale. • Placer l’appareil sur une surface plane. •...
  • Seite 63 Installer le conduit d’évacuation d’air chaud et les accessoires • Déployer l’extrémité du conduit d’évacuation d’air chaud en le tournant plusieurs fois. • Soutenir l’extrémité du support en forme de C avec une main et l’extrémité plus étroite du conduit avec l’autre main. Insérer le conduit et tourner le support jusqu’à ce que le verrouillage à...
  • Seite 64 Installation de l’appareil Placer le climatiseur près d’une fenêtre. Veiller à laisser un espace libre de 50 cm autour de l’appareil pour que l’air puisse circuler librement. Insérer l’extrémité aplanie du conduit dans la fente du cadre d’étanchéité. Note : l’extrémité aplanie du conduit doit bien être enclenchée dans le cadre d’étanchéité.
  • Seite 65: Mise En Marche Et Fonctions

    MISE EN MARCHE ET FONCTIONS Mode veille Après deux heures de fonctionnement, la température réglée augmente automatiquement de 1°C. Après 2 heures de fonctionnement, la température réglée augmente à nouveau de 1°C. La température reste alors la même et le ventilateur tourne à...
  • Seite 66: Fonctions De Protection

    • Si l’appareil est allumé/éteint lorsque la minuterie est en marche, le temps préréglé est effacé et la minuterie doit être réglée une nouvelle fois. • Dès que la minuterie se met en marche, il est possible d’afficher le temps restant en appuyant une fois sur la touche TIMER.
  • Seite 67: Réservoir D'eau Et Évacuation D'eau Fixe

    RÉSERVOIR D’EAU ET ÉVACUATION D’EAU FIXE Vider le réservoir d’eau manuellement Lorsque le réservoir d’eau est plein, l’appareil s’arrête automatiquement. Débrancher alors l’appareil. Déplacer l’appareil avec précaution pour que l’eau du réservoir ne déborde pas à l’intérieur de l’appareil. • Placer un récipient sous la valve d’évacuation d’eau, située à l’arrière de l’appareil. Retirer le bouchon et le capuchon.
  • Seite 68 Évacuation d’eau fixe Retirer le capuchon et le bouchon et fixer un tuyau d’évacuation d’eau d’un diamètre de 8 à 10 mm à la valve d’évacuation. Placer l’autre extrémité dans une évacuation. Indications importantes pour l’installation d’une évacuation d’eau fixe •...
  • Seite 69: Nettoyage Et Entretien

    NETTOYAGE ET ENTRETIEN Nettoyer la surface externe avec un chiffon doux et humide. Ne pas utiliser de solvants chimiques tels que de l’alcool pour ne pas endommager les surfaces externes ou l’appareil. Nettoyer les cadres de filtre et les filtres Il est recommandé...
  • Seite 70 Nettoyer la poignée et le compartiment pour la télécommande Sortir la télécommande du compartiment. Nettoyer la poignée et le compartiment avec un chiffon doux et humide. Bien essorer le chiffon avant de nettoyer pour éviter que de l’eau ne pénètre dans l’appareil. Essuyer la poignée et la télécommande puis replacer la télécommande dans le compartiment.
  • Seite 71: Résolution Des Problèmes

    Stocker correctement l’appareil • Retirer le bouchon et le capuchon et vider le réservoir d’eau. Ne pas incliner l’appareil à plus de 30 °. • Démarrer l’appareil et lancer le mode ventilation. Laisser l’appareil fonctionner pendant une heure et demie pour que l’intérieur puisse sécher complètement et éviter la formation de moisissures.
  • Seite 72 Problem Mögliche Ursache Lösung Climatisation et Les filtres sont bouchés. Nettoyer ou remplacer déshumidification les filtres. ne fonctionnent pas L’entrée ou la sortie d’air Retirer tout objet pouvant correctement. gêner la bloquée. circulation de l’air. L'appareil produit de forts L'appareil est bancal ou Placer l'appareil sur un sol bruits.
  • Seite 73: Informations Sur Le Recyclage

    INFORMATIONS SUR LE RECYCLAGE Le pictogramme ci-contre apposé sur le produit signifie que la directive européenne 2012/19/UE s‘applique (poubelle à roues barrée d’une croix). Ces produits ne peuvent être jetés dans les poubelles domestiques courantes. Renseignez- vous concernant les règles appliquées pour la collecte d’appareils électriques et électroniques.
  • Seite 75 Gentile cliente, La ringraziamo per aver acquistato il dispositivo. La preghiamo di leggere attentamente le seguenti istruzioni per l’uso e di seguirle per evitare possibili danni tecnici. Non ci assumiamo alcuna responsabilità per danni scaturiti da una mancata osservazione delle avvertenze di sicurezza e da un uso improprio del dispositivo.
  • Seite 76: Avvertenze Di Sicurezza

    AVVERTENZE DI SICUREZZA • Leggere attentamente le seguenti avvertenze di sicurezza e conservare il presente manuale d’istruzioni per consultazioni future. • Utilizzare il dispositivo esclusivamente in ambienti interni. • Collegare il dispositivo solo a prese che corrispondono alla tensione indicata. •...
  • Seite 77: Avvertenze Sul Refrigerante R290

    AVVERTENZE SUL REFRIGERANTE R290 Avvertenze • Il climatizzatore deve essere conservato e trasportato in verticale, altrimenti possono risultare danni irreparabili al compressore. Lasciare il dispositivo in posizione verticale per almeno 24 ore prima di metterlo in funzione. • Spegnere il dispositivo e staccare la spina prima di pulirlo. •...
  • Seite 78: Descrizione Del Prodotto

    DESCRIZIONE DEL PRODOTTO Pannello di controllo Canale inferiore dell’aria Deflettori orizzontali Porta cavo Deflettori verticali Valvola per lo scarico dell’acqua Griglia uscita aria Filtro del vaporizzatore Lamelle verticali Telaio del filtro Ruote Filtro fine Pannello superiore Filtro del condensatore Lamelle orizzontali Telaio del filtro Deflettore verticale principale Base d’appoggio...
  • Seite 79: Pannello Di Controllo E Tasti Funzione

    PANNELLO DI CONTROLLO E TASTI FUNZIONE Pannello di controllo e tasti funzione sul dispositivo Accensione/ Per accendere e spegnere il dispositivo Spegnimento Modalità Raffreddamento, deumidificazione, ventilazione Ventilatore Premere il tasto per modificare la velocità (rapida o lenta) Timer Per accendere e spegnere automaticamente il dispositivo Freccia su/ Aumentare o abbassare la temperatura di 1 °C.
  • Seite 80: Installazione

    INSTALLAZIONE • Lasciare due ore il dispositivo in posizione verticale prima di utilizzarlo la prima volta. • E’ possibile spostare comodamente il dispositivo all’interno dell’abitazione. Spostare il dispositivo in posizione verticale. • Collocare il dispositivo su una superficie piana. • Non collocare il dispositivo in bagno o in altri ambienti umidi. Fissare il morsetto a C per il tubo dello scarico dell’aria •...
  • Seite 81 Installazione del tubo di scarico dell’aria calda e degli accessori • Girare ripetutamente il tubo di scarico per aprirlo. • Con una mano tenere l’estremità del morsetto a C, con l’altra il connettore corto per il tubo di scarico e l’estremità del tubo di scarico. Inserire il tubo di scarico e ruotare il morsetto fino al suo inserimento con la chiusura di bloccaggio (figura a sinistra).
  • Seite 82 Installazione del climatizzatore Collocare il climatizzatore nelle vicinanze della finestra. Assicurarsi che intorno al climatizzatore rimangano 50 cm di spazio in modo da garantire un’adeguata circolazione dell’aria. Inserire l’estremità piatta del connettore corto del tubo di scarico nel foro a forma di elisse della piastra d’installazione (vedere la figura). Nota: L’estremità...
  • Seite 83: Messa In Funzione E Utilizzo

    MESSA IN FUNZIONE E UTILIZZO Modo sleep Dopo due ore di funzionamento, la temperatura impostata aumenta automaticamente di 1°C. Dopo altre 2 ore di funzionamento, la temperatura impostata aumenta di nuovo di 1°C. La temperatura rimane invariata e il ventilatore funziona a bassa velocità. Modalità...
  • Seite 84: Funzioni Di Protezione

    • Nel caso in cui si spegna o si accenda il dispositivo mentre il timer è in funzione, il tempo impostato viene cancellato e il timer deve essere di nuovo impostato. • Appena il timer si avvia, è possibile visualizzare il tempo rimanente premendo il tasto Timer.
  • Seite 85: Serbatoio E Drenaggio Permanente

    SERBATOIO E DRENAGGIO PERMANENTE Svuotare il serbatoio manualmente Nel caso in cui il dispositivo dovesse spegnersi automaticamente poiché il dispositivo è pieno, staccare la spina dalla presa. Spostare il dispositivo con cautela affinché non penetri acqua nel dispositivo. • Posizionare un contenitore di raccolta sotto la valvola di scarico dell’acqua posta sulla parte posteriore del dispositivo.
  • Seite 86 Drenaggio permanente Rimuovere il tappo di protezione e il tappo di chiusura e fissare un tubo di scarico con diametro interno di 8-10 mm alla valvola di uscita. Inserire l’altra estremità nell’uscita dello scarico dell’acqua. Importanti indicazioni per il fissaggio del drenaggio permanente •...
  • Seite 87: Pulizia E Manutenzione

    PULIZIA E MANUTENZIONE Pulire le superfici con un panno umido e morbido. Non utilizzare solventi chimici come alcool, per non danneggiare il dispositivo o le superfici. Pulire il filtro e il telaio del filtro Pulire il filtro ogni due settimane. La polvere che si deposita sul filtro e sul telaio del filtro influisce negativamente sulle prestazioni del dispositivo.
  • Seite 88 Pulire l’impugnatura e l’alloggiamento per il telecomando Rimuovere il telecomando dall’alloggiamento. Pulire l’impugnatura e l’alloggiamento con un panno umido e morbido. Strizzare prima il panno affinché non penetri acqua nel dispositivo. Asciugare l’impugnatura e il telecomando e reinserire il telecomando nell’alloggiamento.
  • Seite 89: Risoluzione Dei Problemi

    Ecco come conservare il dispositivo al termine della stagione • Svitare il tappo di protezione, rimuovere il tappo di chiusura e svuotare il serbatoio. Non inclinare il dispositivo più di 30°. • Azionare il dispositivo e attivare la modalità di aereazione. Lasciare il dispositivo in funzione per mezz’ora affinché...
  • Seite 90 Problema Causa possibile Soluzione Il raffreddamento e la I filtri sono ostruiti. Pulire o sostituire il filtro. deumidificazione non L’uscita o l’entrata dell’aria Rimuovere tutti i corpi funzionano. è ostruita estranei. Forti rumori. Il dispositivo non è Posizionare il dispositivo collocato su una superficie su una piana.
  • Seite 91: Smaltimento

    SMALTIMENTO Se sul prodotto è presente la figura a sinistra (il cassonetto dei rifiuti mobile sbarrato), si applica la direttiva europea 2012/19/UE. Questi prodotti non possono essere smaltiti con i rifiuti normali. Informarsi sulle disposizioni vigenti in merito alla raccolta separata di dispositivi elettrici ed elettronici. Non smaltire i vecchi dispositivi con i rifiuti domestici.

Diese Anleitung auch für:

1002818710028188

Inhaltsverzeichnis