Herunterladen Inhalt Inhalt Diese Seite drucken
Klarstein 10028188 Anleitung
Vorschau ausblenden Andere Handbücher für 10028188:
Inhaltsverzeichnis

Werbung

Verfügbare Sprachen
  • DE

Verfügbare Sprachen

  • DEUTSCH, seite 1
Zitruspresse orange
Klimaanlage
10008166
10008167
10008168
10028187
10028188

Werbung

Inhaltsverzeichnis
loading

Inhaltszusammenfassung für Klarstein 10028188

  • Seite 1 Zitruspresse orange Klimaanlage 10008166 10008167 10008168 10028187 10028188...
  • Seite 2: Inhaltsverzeichnis

    Sehr geehrter Kunde, wir gratulieren Ihnen zum Erwerb Ihres Klarstein Gerätes. Lesen Sie die folgenden Anschluss- und Anwendungshinweise sorgfältig durch und befolgen Sie diese, um möglichen technischen Schäden vorzubeugen. Für Schäden, die durch Missachtung der Sicherheitshinweise und unsachgemäßen Ge- brauch entstehen, übernehmen wir keine Haftung.
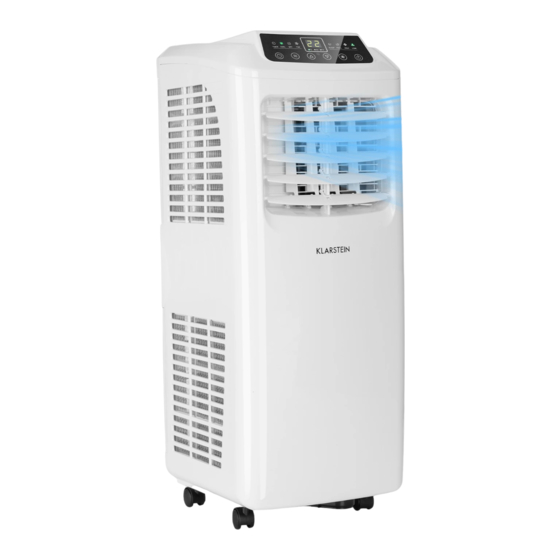
  • Seite 3: Geräteübersicht

    • Schalten Sie das Gerät nicht aus, indem Sie den Stecker ziehen. • Stellen Sie keine Gegenstände auf dem Gerät ab, die Wasser oder andere Flüssigkeiten enthalten. • Versprühen Sie in der Nähe des Geräts keinen brennbare Flüssigkeiten. • Reinigen Sie das Gerät nicht mit chemischen Lösemitteln, wie Gas, Alkohol oder Ähnlichem. Bevor Sie das Gerät reinigen, ziehen Sie zuerst den Stecker aus der Steckdose.
  • Seite 4: Bedienfeld Und Fernbedienung

    Bedienfeld und Fernbedienung Bedienfeld und Funktionstasten am Gerät An/Aus Zum an- und ausschalten des Geräts. Modus Kühlen, Entfeuchten und Ventilator. Lüfter Druck auf die Taste ändert die Geschwindigkeit (schnell oder langsam) Timer Mit dem Timer kann das Gerät automatisch ein- und ausgeschaltet werden. Hoch/Runter Temperatur um 1°C erhöhen oder senken.
  • Seite 5 C-förmige Klemme für den Abluftschlauch anbringen • Nehmen Sie die C-förmige Klemme und entfernen Sie die Plastikverpackung. • Drehen Sie die Klemme so, dass das Drehgewinde zum Gewindebolzen, das offene Ende zum Schnappverschluss zeigt. Schieben Sie die Klemme auf den Gewindebolzen. Wenn der Schnapp- verschluss am Ende der Gleitführung einrastet, befindet sich die Klemme für den Abluftschlauch am richtigen Platz.
  • Seite 6: Inbetriebnahme Und Funktionen

    Dichtungsrahmen im Fenster anbringen Öffnen Sie das Schiebenster zur Hälfte und bringen Sie den Dichtungsrahmen entweder horizontal oder vertikal an, je nachdem in welche Richtung sich Ihr Fenster auf- schieben lässt (siehe Bilder). Ziehen Sie den Dichtungs- rahmen auseinander, bis er an beiden Seiten den Fenster- rahmen berührt und schrauben Sie ihn dann fest.
  • Seite 7: Schutzfunktionen

    Timer einstellen • Drücken Sie im An-Zustand auf die Timer-Taste, um die Zeit einzustellen zu der das Gerät auto- matisch ausgeht. Drücken Sie im Aus-Zustand auf die Timer-Taste, um die Zeit einzustellen zu der das Gerät automatisch angeht. • Sobald Sie auf die Taste drücken, leuchtet die Timer-Anzeige auf. Benutzen Sie die Hoch- und Runter-Taste, die gewünschte Zeit einzustellen.
  • Seite 8: Reinigung Und Pflege

    Permanenter Wasserablauf Entfernen Sie Verschlusskappe und Stopfen und befestigen Sie einen Wasserablaufschlauch mit ei- nem Innendurchmesser von 8-10 mm am Auslassventil. Stecken Sie das andere Ende in den Abfluss. Wichtige Hinweise zur Einrichtung eines permanenten Wasserablaufs • Der Wasserablaufschlauch kann nur angebracht werden wenn der Wassertank komplett leer ist. •...
  • Seite 9: Gerät Bewegen Und Einlagern

    Handgriff und Fernbedienungseinschub reinigen Nehmen Sie die Fernbedienung aus dem Einschub. Reinigen Sie den Griff und den Einschub mit einem leicht feuchten, weichen Lappen. Wringen Sie den Lappen vorher aus, damit kein Wasser ins Gerät ein- dringt. Trocknen Sie den Griff und die Fernbedienung ab und stecken Sie die Fernbedienung zurück in den Einschub.
  • Seite 10: Hinweise Zur Entsorgung

    Problem Mögliche Ursache Lösung Kühlung/ Die Filter sind verstopft. Reinigen oder ersetzen Sie die Filter. Entfeuchtung Lufteinlass/Luftauslass ist verstopft. Entfernen Sie alle Fremdkörper. funktioniert nicht. Laute Geräu- Das Gerät steht uneben. Stellen Sie das Gerät auf einen sche. ebenen Untergrund. Der Kompres- Der Überhitzungsschutz ist aktiv.
  • Seite 11: Technical Data

    Dear Customer, Congratulations on purchasing this Klarstein equipment. Please read this manual carefully and take care of the following hints on installation and use to avoid technical damages. Any failure caused by ignoring the mentioned items and cautions mentioned in the operation and installation instructions are not covered by our warranty and any liability.
  • Seite 12: Product Description

    • Do not turn off this unit by removing the plug. • Do not place such objects as cups on the unit to prevent water or other liquids from spilling into the air-conditioner. • Do not use pest control aerosol or other flammable substances near the air-conditioner. •...
  • Seite 13: Control Setting And Remote Control

    Control Setting and Remote Control Controls on the Unit Power Press the key to start the unit, and press this key again to turn unit off. Mode Set the Cooling, Dehumidifying and Fan Mode when unit is working. Fan speed Change fan speed low - high.
  • Seite 14 Installation of the C shape buckle of the heat exhaust hose and unit • Take out the C shape buckle of the heat exhaust hose and remove the plastic bag. • Point the rotary hole at the end of the heat exhaust hose snap toward the rotation shaft of the back shell and slide it onto the back shell in accordance with the snap joint direction of the rotation shaft on the back shell (see picture).
  • Seite 15: Use And Operation

    Installation of the window sealing board assembly Half open the window and mount the window sealing board assembly onto the window, either vertically or ho- rizontally (see picture). Pull apart the parts of the assem- bly, adjust the distance of assembly pulled apart so that the two ends of the assembly come into contact with the frame, and fasten the parts of the assembly with screws.
  • Seite 16: Protection Functions

    Timer Setting • Press the Timer button to enter timed shutdown. Upon shutdown, press this button to enter timed start. In the meanwhile, the timer indicator illuminates. Press the Timer button to enter timed start/timed shutdown. Adjust the up or down button to set the timing time. The time will cycle in the order of 1 to 24 to 1.
  • Seite 17: Cleaning And Care

    Contimuous Drainage Screw off the water cap in the direction shown by the arrow and unplug the water plug. Insert the OD 13 mm PVC drain hose 8-10 mm into the water outlet and connect the drain hose to a sink. Important Hints on Continuous Drainage •...
  • Seite 18: Moving And Storing The Unit

    Cleaning of the handle position and remote control storage area Take the remote control out of the storage area in the direction shown by the arrow. Clean the handle position and remote control storage area of this unit with wringed wet soft cloth. Do not drip water into the unit.
  • Seite 19: Disposal Considerations

    Problem Cause Remedy Bad cooling/ Filter mesh very dirty. Clean or replace the fi lter mesh. heating eff ects Air inlet or air outlet clogged. Remove the obstruction. Large noise. Air-conditioner not put on a fl at Put the air-conditioner in a fl at and surface.
  • Seite 20: Dati Tecnici

    Pulizia e manutenzione 26 Spostare il dispositivo e conservarlo 27 Ricerca e risoluzione degli errori 27 Avvertenze per lo smaltimento 28 Dichiarazione di conformità 28 Dati tecnici Numero articolo 10028187, 10028188 Alimentazione 220-240 V ~ 50-60 Hz Temperatura ambiente 10-35°C Temperatura impostabile 17-30°C Avvertenze di sicurezza •...
  • Seite 21: Descrizione Del Prodotto

    • Non collocare oggetti sul dispositivo che contengano acqua o altri liquidi. • Non vaporizzare liquidi infiammabili nelle vicinanze del dispositivo. • Non pulire il dispositivo con soluzioni chimiche come alcool o simili. Prima di pulire il dispositivo, staccare la spina. Pulire il dispositivo con un panno morbido e umido. Nel caso in cui il dispositivo sia molto sporco, utilizzare un detergente neutro.
  • Seite 22: Pannello Di Controllo E Tasti Funzione

    Pannello di controllo e tasti funzione Pannello di controllo e tasti funzione sul dispositivo Accensione/ Per accendere e spegnere il dispositivo Spegnimento Modalità Raffreddamento, deumidificazione, ventilazione Ventilatore Premere il tasto per modificare la velocità (rapida o lenta) Timer Per accendere e spegnere automaticamente il dispositivo Freccia su/frec- Aumentare o abbassare la temperatura di 1 °C.
  • Seite 23 Fissare il morsetto a C per il tubo dello scarico dell’aria • Prendere il morsetto a C e rimuoverlo dall’involucro in plastica. • Ruotare il morsetto in modo tale che la filettatura sia rivolta verso il bullone filettato e l’altra est- remità...
  • Seite 24: Messa In Funzione E Utilizzo

    Fissare la piastra d’installazione alla finestra Aprire a metà la finestra a scorrimento e fissare la piast- ra d’installazione orizzontalmente o verticalmente in base alla direzione di scorrimento della finestra (vedere le figu- re). Regolare la piastra d’installazione finché questa tocca entrambi i lati della finestra e fissarla saldamente.
  • Seite 25: Funzioni Di Protezione

    Impostare il timer • Quando il dispositivo è acceso, premere il tasto Timer per impostare il tempo di spegnimento. Quando il dispositivo è spento, premere il tasto Timer per impostare il tempo di accensione. • Appena si premere il tasto, la spia del timer si accende. Utilizzare il tasto freccia su e freccia giù per impostare il tempo desiderato.
  • Seite 26: Pulizia E Manutenzione

    Drenaggio permanente Rimuovere il tappo di protezione e il tappo di chiusura e fissare un tubo di scarico con diametro in- terno di 8-10 mm alla valvola di uscita. Inserire l’altra estremità nell’uscita dello scarico dell’acqua. Importanti indicazioni per il fissaggio del drenaggio permanente •...
  • Seite 27: Spostare Il Dispositivo E Conservarlo

    Pulire l’impugnatura e l’alloggiamento per il telecomando Rimuovere il telecomando dall’alloggiamento. Pu- lire l’impugnatura e l’alloggiamento con un pan- no umido e morbido. Strizzare prima il panno af- finché non penetri acqua nel dispositivo. Asciugare l’impugnatura e il telecomando e reinserire il teleco- mando nell’alloggiamento.
  • Seite 28: Avvertenze Per Lo Smaltimento

    Problema Causa possibile Soluzione Il raff reddamento e I fi ltri sono ostruiti. Pulire o sostituire il fi ltro. la deumidifi cazione L’uscita o l’entrata dell’aria è Rimuovere tutti i corpi estranei. non funzionano. ostruita Forti rumori. Il dispositivo non è collocato su Posizionare il dispositivo su una una superfi cie piana.
  • Seite 29: Données Techniques

    Nettoyage et entretien 35 Déplacer et stocker l’appareil 36 Résolution des problèmes 36 Informations sur le recyclage 37 Déclaration de conformité 37 Données techniques Numéro d’article 10028187, 10028188 Alimentation électrique 220-240 V ~ 50-60 Hz Température ambiante 10-35 °C Température réglable 17-30 °C Consignes de sécurité...
  • Seite 30: Aperçu De L'appareil

    • Ne pas tirer sur la fiche pour éteindre l’appareil. • Ne pas placer d’objet contenant de l’eau ou d’autres liquides sur l’appareil. • Ne pas pulvériser de liquides inflammables près de l’appareil. • Ne pas nettoyer l’appareil avec des solvants chimiques tel du gaz, de l’alcool ou des solvants si- milaires.
  • Seite 31: Panneau De Commande Et Télécommande

    Panneau de commande et télécommande Panneau de commande et touches de fonction Allumer/éteindre Pour allumer et éteindre l’appareil. Mode Climatisation, déshumidification, ventilation. Ventilation Appuyer sur la touche pour changer la vitesse (élevée ou faible). TIMER (minuterie) Utiliser la minuterie pour allumer ou éteindre l’appareil automatique- ment.
  • Seite 32 Installer le support (en forme de C) pour le tuyau d’évacuation • Retirer l’emballage en plastique du support pour le conduit d’évacuation d’air. • Retourner le support de manière à ce que le filetage soit aligné avec le boulon fileté et l’autre ex- trémité...
  • Seite 33: Mise En Marche Et Fonctions

    Installation du cadre d’étanchéité Ouvrir la fenêtre coulissante de moitié et insérer le cad- re d’étanchéité verticalement ou horizontalement (voir schéma). Déployer le cadre d’étanchéité jusqu’à atteindre les deux bords de la fenêtre et bien le fixer. Installation de l’appareil Placer le climatiseur près d’une fenêtre.
  • Seite 34: Fonctions De Protection

    Ajuster la minuterie • Appuyer sur la touche TIMER lorsque l’appareil est en fonctionnement pour régler la minuterie d’arrêt. Appuyer sur la touche TIMER lorsque l’appareil est à l’arrêt pour régler la minuterie de démarrage • Dès que vous appuyez sur la touche, le témoin lumineux s’allume. Utiliser les touches fléchées pour ajuster le temps désiré.
  • Seite 35: Nettoyage Et Entretien

    Évacuation d’eau fixe Retirer le capuchon et le bouchon et fixer un tuyau d’évacuation d’eau d’un diamètre de 8 à 10 mm à la valve d’évacuation. Placer l’autre extrémité dans une évacuation. Indications importantes pour l’installation d’une évacuation d’eau fixe •...
  • Seite 36: Déplacer Et Stocker L'appareil

    Nettoyer la poignée et le compartiment pour la télécommande Sortir la télécommande du compartiment. Nettoyer la poignée et le compartiment avec un chiffon doux et humide. Bien essorer le chiffon avant de nettoyer pour éviter que de l’eau ne pénètre dans l’appareil. Essuyer la poignée et la télécommande puis replacer la télécommande dans le compartiment.
  • Seite 37: Informations Sur Le Recyclage

    Problem Mögliche Ursache Lösung Climatisation et Les fi ltres sont bouchés. Nettoyer ou remplacer les fi ltres. déshumidifi cation L’entrée ou la sortie d’air est Retirer tout objet pouvant gêner la ne fonctionnent bloquée. circulation de l’air. pas correctement. L'appareil produit L'appareil est bancal ou penché.
  • Seite 38: Datos Técnicos

    Estimado cliente: Le felicitamos por la adquisición de su aparato Klarstein. Por favor, lea con atención el siguiente manual y siga cuidadosamente las instrucciones de uso con el fin de evitar posibles daños técnicos. Sobre los daños acaecidos debido a una deficiente aplicación de las indicaciones de seguridad o a un uso inapropiado del aparato, declinamos asumir cualquier responsabilidad.
  • Seite 39: Vista General Del Aparato

    • No apague el aparato desenchufando el cable de alimentación. Para encenderlo o apagarlo utilice siempre el interruptor. • No coloque objetos con agua o líquidos encima del climatizador. • No utilice pulverizadores con líquidos inflamables cerca del aparato. • No emplee productos químicos para limpiar el aparato. No lo limpie con gas, alcohol o productos similares.
  • Seite 40: Panel De Control Y Mando A Distancia

    Panel de control y mando a distancia Panel de control y teclas de función ON/OFF Encender/apagar el climatizador. Modus Modo enfriamiento, deshumificación o ventilación Ventilación Pulse para aumentar o disminuir la velocidad del aire. Timer Ajuste automático de la hora de encendido/apagado. Aumentar/Disminuir Aumentar o disminuir la temperatura en tramos de 1C°.
  • Seite 41 Clema con forma de C para la manguera de salida • Localice la clema en forma de C dentro del envío y retire el plástico de protección. • Gire la clema de tal modo que la rosca para el perno de unión quede alineada con la abertura del cierre de trinquete.
  • Seite 42: Puesta En Marcha Y Funciones

    Acople de los marcos a la ventana Abra una hoja de la ventana corredera hasta la mitad. Coloque los marcos en posición vertical o horizontal dependiendo de la dirección de abertura de la ventana (ver imagen). Extienda los marcos hasta que toquen ambos extremos de la ventana.
  • Seite 43: Funciones De Protección

    Ajuste del temporizador • Pulse la tecla del temporizador con el aparato encendido para programar el tiempo en el que desea que el climatizador deje de funcionar. Pulse esta misma tecla con el aparato apagado para programar cuándo desea que se ponga en marcha. •...
  • Seite 44: Limpieza Y Cuidado

    Desagüe permanente Retire el cierre de rosca y el tapón y acople en la válvula de salida de agua una manguera con un diámetro interior de 8-10 mm. Coloque el otro extremo de la manguera en un sumidero. Indicaciones importantes acerca del desagüe permanente •...
  • Seite 45: Mover Y Guardar El Aparato

    Limpieza del asa y del compartimento del mando a distancia Saque el mando a distancia de su compartimento. Limpie el asa y el compartimento con un trapo húmedo. Escurra bien el trapo para que no caiga agua en el interior del aparato. Seque todo bien.
  • Seite 46: Indicaciones Para La Retirada Del Aparato

    Problema Posible causa Solución Los modos Los fi ltros están obstruidos. Limpie o sustituya los fi ltros. enfriamiento y Las salidas o entradas de aire están Retire los objetos que las bloquean. humidifi cación no obstruidas. funcionan. El climatizador El aparato no está derecho. Coloque el climatizador en una hace mucho superfi cie plana.

Diese Anleitung auch für:

10028187

Inhaltsverzeichnis