Herunterladen Inhalt Inhalt Diese Seite drucken

Werbung

Verfügbare Sprachen
  • DE

Verfügbare Sprachen

  • DEUTSCH, seite 1
Florentina IR
Heizung
Heater
Radiador
Radiateur
Riscaldatore
10032819 10032820
Hinweis: Das Gerät eignet sich nicht zur Nutzung
als primäre Heizquelle.
Note: The device is not suitable for use as a
primary heat source.
Remarque : l'appareil ne convient pas en tant que
source principale de chauffage.
Nota: il dispositivo non è idoneo ad essere
utilizzato come fonte di riscaldamento primaria.
Advertencia: el aparato no es apto para utilizar
como fuente de calefacción primaria.

Werbung

Inhaltsverzeichnis
loading

Inhaltszusammenfassung für Klarstein Florentina IR

  • Seite 1 Florentina IR Hinweis: Das Gerät eignet sich nicht zur Nutzung als primäre Heizquelle. Note: The device is not suitable for use as a Heizung primary heat source. Heater Remarque : l‘appareil ne convient pas en tant que Radiador source principale de chauffage.
  • Seite 3: Inhaltsverzeichnis

    Sehr geehrter Kunde, wir gratulieren Ihnen zum Erwerb Ihres Gerätes. Lesen Sie die folgenden Hinweise sorgfältig durch und befolgen Sie diese, um möglichen Schäden vorzubeugen. Für Schäden, die durch Missachtung der Hinweise und unsachgemäßen Gebrauch entstehen, übernehmen wir keine Haftung. Scannen Sie den folgenden QR-Code, um Zugriff auf die aktuellste Bedienungsanleitung und weitere Informationen rund um das Produkt zu erhalten:...
  • Seite 4: Produktdatenblatt

    PRODUKTDATENBLATT Modellkennung(en) 10032819, 10032820 Angabe Symbol Wert Einheit Angabe Einheit Wärmeleistung Nur bei elektrischen Speicher-Einzelraumheizgeräten: Art der Regelung der Wärmezufuhr Nennwärmeleistung Manuelle Regelung der Wärmezufuhr mit nein integriertem Thermostat Mindestwärmeleistung Manuelle Regelung der Wärmezufuhr nein (Richtwert) mit Rückmeldung der Raum- und/oder Außentemperatur Maximale kontinuierliche Elektronische Regelung der Wärmezufuhr...
  • Seite 5: Sicherheitshinweise

    SICHERHEITSHINWEISE • Prüfen Sie vor der Benutzung die Spannung auf der Geräteplakette und schließen Sie das Gerät nur an Steckdosen an, die der Spannung des Geräts entsprechen. • Falls das Netzkabel beschädigt ist, lassen Sie es von einer ausgebildeten Fachkraft ersetzen. •...
  • Seite 6: Wandinstallation

    WANDINSTALLATION Markieren Sie die Positionen der vier Stellen Sie sicher, dass der Abstand Bohrlöcher an der Wand und bohren zwischen den zwei horizontalen Sie die Löcher mit einer Bohrmaschine. Löchern 710 mm und zwischen den zwei vertikalen Löchern 160 mm beträgt. Führen Sie die vier Dübel in die Löcher Entnehmen Sie die Metallschiene aus ein.
  • Seite 7 Es sind insgesamt zwei Metallschienen. Heben Sie das Heizgerät an und richten Sie die vier Schrauben an dessen Seiten an den vier Bohrungen der Schienen aus. Montieren Sie die Halterung für das Entnehmen Sie die vier Muttern der Bediengerät an der Wand neben der Verpackung und setzen Sie sie auf die Heizung.
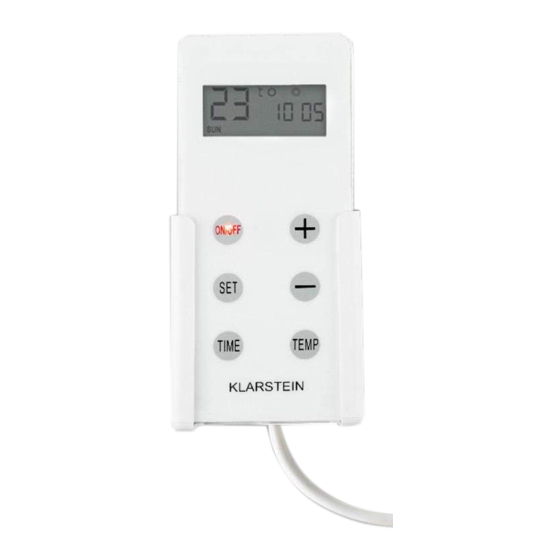
  • Seite 8: Geräteübersicht Und Bedienfeld

    GERÄTEÜBERSICHT UND BEDIENFELD Bedienfeld Schaltelement Halterung Beleuchteter ON/OFF- Schalter Heizung DISPLAYANZEIGEN Wochentimer Heizung Power Temperaturanzeige Woche Stunde Minuten...
  • Seite 9: Bedienung

    BEDIENUNG • Überprüfen Sie die Heizung, um sicherzugehen, dass sie nicht beschädigt ist. • STecken Sie den Stecker in die Steckdose imd schalten Sie den beleuchteten Hauptschalter an der Seite des Heizgerätes ein. Es gibt zwei Möglichkeiten, die Heizung zu benutzen: (1) Ein-/Ausschalten Drücken Sie die ON/OFF-Taste am Bedienfeld, um die Heizung zu arbeiten zu starten.
  • Seite 10 3. Das Gruppierungssymbol in der Anzeige beginnt zu blinken. Drücklen Sie [+] oder [-], um eine Gruppe zu programmieren. Sie können insgesamt 4 Gruppen pro Tag von P1 bis P4 einstellen. Drücken Sie SET, um die Einschaltzeit für die ausgewählte Gruppe einzustellen.
  • Seite 11: Fehlersuche Und Fehlerbehebung

    Automatische Erkennung offener Fenster Das Heizgerät verfügt über eine Funktion, die offene Fenster erkennt. Wenn das Heizgerät eingeschaltet ist (unabhängig vom Normalmodus oder Wochentimer- Modus), schaltet sich die Heizung automatisch aus, wenn die gemessene Temperatur innerhalb von 5 Minuten um 5 °C (oder mehr) fällt. FEHLERSUCHE UND FEHLERBEHEBUNG Wenn Ihr Heizgerät nicht funktioniert, befolgen Sie bitte diese Anweisungen: •...
  • Seite 12: Hinweise Zur Entsorgung

    HINWEISE ZUR ENTSORGUNG Befindet sich die linke Abbildung (durchgestrichene Mülltonne auf Rädern) auf dem Produkt, gilt die Europäische Richtlinie 2012/19/EU. Diese Produkte dürfen nicht mit dem normalen Hausmüll entsorgt werden. Informieren Sie sich über die örtlichen Regelungen zur getrennten Sammlung elektrischer und elektronischer Gerätschaften.
  • Seite 13 Dear Customer, Congratulations on purchasing this equipment. Please read this manual carefully and take care of the following hints to avoid damages. Any failure caused by ignoring the items and cautions mentioned in the instruction manual is not covered by our warranty and any liability. Scan the QR code to get access to the latest user mannual and other information about the product CONTENT...
  • Seite 14: Product Data Sheet

    PRODUCT DATA SHEET Model identifier(s): 10032819, 10032820 Item Symbol Value Unit Item Unit Heat output Type of heat input, for electric storage local space heaters only Nominal heat output manual heat charge control, with integrated thermostat Minimum heat output manual heat charge control with room and/or (indicative) outdoor temperature feedback Maximum continuous heat...
  • Seite 15: Safety Instructions

    SAFETY INSTRUCTIONS • Do not use the appliance until it is securely fi xed as described in this manual. • Check that the voltage indicates on the data plate corresponds with that of the local network before connecting the appliance to the mains power supply. •...
  • Seite 16: Wall Mounting

    WALL MOUNTING Mark the positions of the four holes Make sure the distance between each to be drilled on the wall, and Drill the holes is 710 mm for the two Horizontal holes with the drill bit. holes, and 160 mm for the two vertical holes.
  • Seite 17 Totally there are two metal brackets. Lift the heater and aim the four screws on the side of the heater to the 4 holes on the brackets. Install the control panel holder onto the Find the 4 nuts in the package and fit wall beside the heater.
  • Seite 18: Overview And Control Panel

    OVERVIEW AND CONTROL PANEL Control Panel Main switch box Holder Illuminated ON/OFF switch Heating panel DISPLAY SCREEN Week timer Heater Power Temperature display Week Hour Minute...
  • Seite 19: Operation

    OPERATION • Check the heater to be sure it is not damaged. • Then, plug in it and then switch on the main illuminated ON/OFF switch on the side of the heater. There are two way to use the heater: (1) Power ON/OFF Press the on/off button on the control panel, and then the heater will start to work until your room temperature reached the set temperature.
  • Seite 20 3. The grouping symbol in the display will start to flash, press [+] or [-] to choose the group you want to set. You can totally set 4 groups per day from P1 to P4. Press SET again to start to set the time of power on for the selected group. •...
  • Seite 21: Troubleshooting

    Open window Detective This heater has open window detective function, which is when the heater is power on (no matter normal mode or week timer mode), it will automatically power off if the detected temperature drops 5 °C ( or more) in 5 minutes. TROUBLESHOOTING If your heater fails to operate, please follow these instructions: •...
  • Seite 22: Hints On Disposal

    HINTS ON DISPOSAL According to the European waste regulation 2012/19/EU this symbol on the product or on its packaging indicates that this product may not be treated as household waste. Instead it should be taken to the appropriate collection point for the recycling of electrical and electronic equipment.
  • Seite 23: Datos Técnicos

    Estimado cliente: Le felicitamos por la adquisición de este producto. Lea atentamente el siguiente manual y siga cuidadosamente las instrucciones de uso con el fin de evitar posibles daños. La empresa no se responsabiliza de los daños ocasionados por un uso indebido del producto o por haber desatendido las indicaciones de seguridad.
  • Seite 24: Hoja De Datos Del Producto

    HOJA DE DATOS DEL PRODUCTO Denominación del modelo 10032819, 10032820 Dato Símbolo Valor Unidad Dato Unidad Potencia térmica Solo con disposítivos de acumulación de calor eléctricos para abastecimiento local: Tipo de regulación del abastecimiento de calor Potencia térmica nominal Regulación manual del abastecimiento de calor con termostato integrado: Potencia térmica mínima Regulación manual de abastecimiento de calor...
  • Seite 25: Indicaciones De Seguridad

    INDICACIONES DE SEGURIDAD • Antes del uso, compruebe la tensión en la placa del aparato y conecte el aparato sólo a enchufes que correspondan a la tensión del aparato. • Si el cable de alimentación está dañado, pídale a un electricista cualifi cado que lo sustituya.
  • Seite 26: Instalación En La Pared

    INSTALACIÓN EN LA PARED Marque las posiciones de los cuatro Asegúrese de que la distancia entre los orificios que debe perforar en la pared dos orificios horizontales sea de 710 y con un taladro realice los agujeros. mm y entre los dos verticales, de 160 Introduzca los cuatro tacos en los Retire los rieles metálicos del embalaje, orificios.
  • Seite 27 En total encontrará dos rieles de metal. Levante el calefactor y oriente los cuatro tornillos a los cuatro orificios de las guías. Monte el soporte para el control remoto Retire las cuatro tuercas del embalaje en la pared, junto al calefactor. y colóquelas sobre los cuatro tornillos.
  • Seite 28: Vista General Y Panel De Control

    VISTA GENERAL Y PANEL DE CONTROL Panel de control Elemento de activación Soporte Interruptor on/off de iluminación Calefactor INDICADORES DEL DISPLAY Temporizador semanal Indicador de Calefacción Encendido temperatura Semana Hora Minutos...
  • Seite 29: Utilización

    UTILIZACIÓN • Compruebe el radiador para asegurarse de que no esté dañado. • Conecte el enchufe a la toma de corriente y encienda el interruptor principal luminoso situado en la parte lateral del radiador. Hay dos opciones de utilizar el radiador: (1) Encender / apagar Pulse el botón ON/OFF del panel de control para poner en marcha la calefacción.
  • Seite 30 3. El símbolo de grupo comienza a parpadear en el indicador. Pulse [+] o [-] para programar un grupo. Puede configurar en total 4 grupos por día de P1 a P4. Pulse SET para configurar el tiempo de encendido para los grupos seleccionados. •...
  • Seite 31: Detección Y Resolución De Problemas

    Detección automática de ventana abierta El radiador dispone de una función que detecta las ventanas abiertas. Si el aparato está encendido (independientemente de si se encuentra en modo normal o en modo de temporizador semanal), se apagará automáticamente cuando la temperatura registrada descienda en 5 °C o más en el transcurso de 5 minutos.
  • Seite 32: Retirada Del Aparato

    RETIRADA DEL APARATO Si el aparato lleva adherida la ilustración de la izquierda (el contenedor de basura tachado) entonces rige la normativa europea, directiva 2012/19/UE. Este producto no debe arrojarse a un contenedor de basura común. Infórmese sobre las leyes territoriales que regulan la recogida separada de aparatos eléctricos y electrónicos.
  • Seite 33: Fiche Technique

    Cher client, Toutes nos félicitations pour l’acquisition de ce nouvel appareil. Veuillez lire attentivement les instructions suivantes de branchement et d’utilisation afin d’éviter d’éventuels dommages. Le fabricant ne saurait être tenu pour responsable des dommages dus au non-respect des consignes de sécurité et à la mauvaise utilisation de l’appareil.
  • Seite 34: Fiche De Données Produit

    FICHE DE DONNÉES PRODUIT Référence (s) du produit 10032819, 10032820 Donnée Symbole Valeur Unité Donnée Unité Puissance calorifique Uniquement pour les radiateurs électriques à accumulation : Type de régulation de l'apport de chaleur Puissance calorifique Régulation manuelle de l'apport de chaleur Sans nominale avec thermostat intégré...
  • Seite 35: Consignes De Sécurité

    CONSIGNES DE SÉCURITÉ • Avant d‘utiliser l‘appareil, vérifi ez la tension sur la plaque signalétique et branchez l‘appareil uniquement aux prises correspondant à la tension indiquée. • Si le câble d‘alimentation est endommagé, faites-le remplacer par un professionnel qualifi é. •...
  • Seite 36: Installation Murale

    INSTALLATION MURALE Marquez les emplacements des quatre Assurez-vous que la distance entre trous sur le mur et percez-les avec une les deux trous horizontaux est de 710 perceuse. mm et de 160 mm entre les deux trous verticaux. Insérez les quatre chevilles dans les Retirez le rail métallique de l'emballage, trous.
  • Seite 37 Il y a deux rails métalliques en tout. Soulevez le radiateur et alignez les quatre vis latérales sur les quatre trous des rails. Montez le support pour l'élément Retirez les quatre écrous de l'emballage de commande sur le mur à côté du et placez-les sur les quatre vis.
  • Seite 38: Aperçu Et Panneau De Commande

    APERÇU ET PANNEAU DE COMMANDE Panneau de commande Interrupteur Support Interrupteur ON:OFF de l‘éclairage Radiateur AFFICHAGES DE L‘ÉCRAN Minuterie hebdomadaire Affichage de la Chauffage Alimentation température Semaine Heure Minutes...
  • Seite 39: Utilisation

    UTILISATION • Vérifiez le radiateur pour vous assurer qu‘il n‘est pas endommagé. • Branchez la fiche dans la prise et allumez l’interrupteur principal sur le côté de l‘appareil. Il y a deux façons d‘utiliser le radiateur : (1) Pour allumer/éteindre Appuyez sur le bouton ON / OFF du panneau de commande pour que le radiateur commence à...
  • Seite 40 3. L‘icône de regroupement se met à clignoter à l‘écran. Appuyez sur [+] ou [-] pour programmer un groupe. Vous pouvez définir un total de 4 groupes par jour de P1 à P4. Appuyez sur SET pour régler l’heure de mise en marche du groupe sélectionné. •...
  • Seite 41: Résolution Des Problèmes

    Détection automatique de fenêtre ouverte Le radiateur dispose d‘une fonction de détection des fenêtres ouvertes. Lorsque le radiateur est allumé (quel que soit le mode normal ou le mode de minuterie hebdomadaire), le chauffage s‘éteint automatiquement lorsque la température mesurée chute de 5 °C (ou plus) en 5 minutes.
  • Seite 42: Conseils Pour Le Recyclage

    CONSEILS POUR LE RECYCLAGE Le pictogramme ci-contre apposé sur le produit signifie que la directive européenne 2012/19/UE s‘applique (poubelle à roues barrée d’une croix). Ces produits ne peuvent être jetés dans les poubelles domestiques courantes. Renseignez- vous concernant les règles appliquées pour la collecte d’appareils électriques et électroniques.
  • Seite 43 Gentile cliente, La ringraziamo per aver acquistato il dispositivo. La preghiamo di leggere attentamente le seguenti istruzioni per l’uso e di seguirle per evitare possibili danni tecnici. Non ci assumiamo alcuna responsabilità per danni scaturiti da una mancata osservazione delle avvertenze di sicurezza e da un uso improprio del dispositivo.
  • Seite 44: Scheda Informativa Del Prodotto

    SCHEDA INFORMATIVA DEL PRODOTTO Identificazione del modello (i) 10032819, 10032820 Indicazione Simbolo Valore Unità Indicazione Unità Potenza termica Solo per gli apparecchi per il riscaldamento d'ambiente locale elettrici ad accumulo: Tipo di controllo dell´apporto termico Potenza termica nominale Controllo manuale del carico termico con N.D.
  • Seite 45: Avvertenze Di Sicurezza

    AVVERTENZE DI SICUREZZA • Prima dell’utilizzo, controllare la tensione indicata sulla targhetta del dispositivo e collegarlo solo a prese elettriche con tensione corrispondente. • Se il cavo di alimentazione è danneggiato, farlo sostituire da un tecnico. • Non posizionare il camino direttamente sotto a una presa elettrica. •...
  • Seite 46: Installazione A Parete

    INSTALLAZIONE A PARETE Segnare le posizioni dei 4 fori sulla Assicurarsi che vi sia una distanza parete ed effettuare i fori con un di 710 mm tra i due fori orizzontali e trapano. una distanza di 160 mm tra i due fori verticali.
  • Seite 47 In totale sono presenti due guide Sollevare il riscaldatore e allineare le metalliche. quattro viti con i quattro fori delle guide. Montare il supporto per la centralina Estrarre i quattro dadi dalla confezione sulla parete vicina al radiatore. e posizionarli sulle quattro viti. Assicurarsi che la distanza tra il riscaldatore montato e il pavimento non sia inferiore a 20 cm.
  • Seite 48: Indicatori Del Display

    PANORAMICA E PANNELLO DI CONTROLLO Pannello di controllo Commutatore Supporto Interruttore ON/OFF illuminato Riscaldamento INDICATORI DEL DISPLAY Timer Riscaldamento Potenza Indicatore Settimana Minuti...
  • Seite 49 FUNZIONAMENTO • Verificare il riscaldamento per essere sicuri che non sia danneggiato. • Collegare la spina alla presa e l’interruttore illuminato sul lato del riscaldatore. Ci sono due possibilità di utilizzo del riscaldamento: (1) Accensione/Spegnimento Premere il pulsante ON/OFF sul pannello di controllo per attivare il riscaldamento. Il riscaldamento si riscalderà...
  • Seite 50 3. L’icona di raggruppamento sul display inizia a lampeggiare. Premere [+] o [-] per programma un gruppo. È possibile impostare complessivamente 4 gruppi al giorno da P1 a P4. Premere SET per impostare l’ora di accensione per il gruppo selezionato. •...
  • Seite 51: Ricerca E Risoluzione Degli Errori

    Rilevamento automatico della finestra aperta Il riscaldatore dispone di una funzione per rilevare la finestra aperta. Se il riscaldatore è acceso (indipendentemente dalla modalità normale o timer settimanale), il riscaldamento si spegne automaticamente se la temperatura rilevata entro 5 minuti diminuisce di 5 °C o più.
  • Seite 52: Smaltimento

    SMALTIMENTO Se sul prodotto è presente la figura a sinistra (il cassonetto dei rifiuti mobile sbarrato), si applica la direttiva europea 2012/19/UE. Questi prodotti non possono essere smaltiti con i rifiuti normali. Informarsi sulle disposizioni vigenti in merito alla raccolta separata di dispositivi elettrici ed elettronici. Non smaltire i vecchi dispositivi con i rifiuti domestici.

Inhaltsverzeichnis