Herunterladen Inhalt Inhalt Diese Seite drucken

Werbung

Verfügbare Sprachen
  • DE

Verfügbare Sprachen

  • DEUTSCH, seite 1
Smartwave
Infrarotheizer
IR Heater
Radiateur infrarouge
Radiador por infrarrojos
Stufa a infrarossi
10034761 10034762

Werbung

Inhaltsverzeichnis
loading

Inhaltszusammenfassung für Klarstein Smartwave

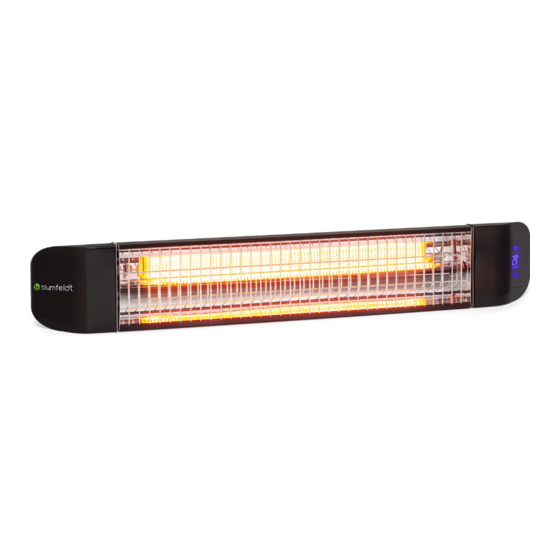
  • Seite 1 Smartwave Infrarotheizer IR Heater Radiateur infrarouge Radiador por infrarrojos Stufa a infrarossi 10034761 10034762...
  • Seite 3: Inhaltsverzeichnis

    Sehr geehrter Kunde, wir gratulieren Ihnen zum Erwerb Ihres Gerätes. Lesen Sie die folgenden Hinweise sorgfältig durch und befolgen Sie diese, um möglichen Schäden vorzubeugen. Für Schäden, die durch Missachtung der Hinweise und unsachgemäßen Gebrauch entstehen, übernehmen wir keine Haftung. Scannen Sie den QR-Code, um Zugriff auf die aktuellste Bedienungsanleitung und weitere Informationen rund um das Produkt zu erhalten.
  • Seite 4: Sicherheitshinweise

    SICHERHEITSHINWEISE • Lesen Sie alle Anweisungen, bevor Sie dieses Gerät benutzen. • Lassen Sie das Gerät nicht unbeaufsichtigt, wenn es in Betrieb ist. • Diese Heizung wird während der Benutzung heiß. Berühren Sie nicht die heißen Oberflächen. VORSICHT Verbrennungsgefahr! Einige Teile dieses Produktes können sehr heiß werden und Verbrennungen verursachen.
  • Seite 5 oder ähnlich qualifizierten Personen ausgetauscht werden, um eine Gefährdung zu vermeiden.Fassen Sie das Heizelement nicht mit bloßen Händen an. Wenn es versehentlich berührt wird, entfernen Sie Fingerabdrücke mit einem weichen Tuch, da sich diese sonst in das Element einbrennen und einen vorzeitigen Ausfall der Heizung verursachen.
  • Seite 6: Montage

    MONTAGE Montagehinweise Warnung: Brandgefahr Installieren Sie das Gerät nicht in der Nähe von Vorhängen und anderen brennbaren Materialien. • Das Gerät muss von einem hierfür qualifizierten Elektriker installiert werden. • Vor der Installation des Geräts muss sichergestellt werden, dass der Netzstecker aus der Steckdose gezogen wurde und das Gerät kühl ist.
  • Seite 7 32mm Entnehmen Sie das Ausdehnungsgummi und die Schrauben aus der Zubehörtasche, bohren Sie vier Löcher mit einem Durchmesser von 8 mm und einer Tiefe von 70 mm in die Wand. Der Lochabstand beträgt 32 mm (300 mm ≤ L ≤ 450 mm). Bringen Sie das Ausdehnungsgummi in der Muffe im Loch an und bringen Sie anschließend die im Lieferumfang enthaltene Wandhalterung an.
  • Seite 8 Ziehen Sie die Wandhalterung, welche sich nun an der Rückseite des Geräts befindet und mit der Wand verbunden ist, in der gewünschten Position fest. Verwenden Sie hierfür die Mutter und die Schraube aus dem Zubehörbeutel:...
  • Seite 9 Aufhängediagramm Ceiling Decke ≥500 mm ≥500 mm Wall ≥1800 mm Boden floor Decke Ceiling ≥500 mm ≥500 mm ≥1800 mm Wand Wall floor...
  • Seite 10: Geräteübersicht

    GERÄTEÜBERSICHT Display Körpererkennung Betriebsanzeige Kindersicherung Temperaturanzeige Einstellungsanzeige Intelligente Heizfunktion Heizanzeige Offene-Fenster-Erkennung Timeranzeige 10 WLAN-Anzeige 1 1 Gerätetemperaturanzeige 12 Timeranzeige 13 Offene Fensteranzeige...
  • Seite 11: Fernbedienung

    Fernbedienung Ein/Aus Timertaste Nach oben Leistungseinstellung Intelligente Heizfunktion Kindersicherung Nach untenx Set (Einstelltaste) Display (Bildschirmtaste) 10 Body Sensor (Körpererkennungstaste)
  • Seite 12: Inbetriebnahme Und Bedienung

    INBETRIEBNAHME UND BEDIENUNG Warnung: Gefahr einer Personenverletzung Dieses Heizgerät ist nicht mit einer Vorrichtung zur Regelung der Raumtemperatur ausgestattet. Verwenden Sie dieses Heizgerät nicht in kleinen Räumen, wenn diese von Personen besetzt sind, die den Raum nicht allein verlassen können, es sei denn, es ist eine ständige Überwachung vorgesehen.
  • Seite 13 12. Drücken Sie die Taste SWITCH und dann die Taste POWER SELECT, um die Fenstererkennungsfunktion auszuwählen. Wenn die Fenstererkennungsfunktion läuft, leuchtet das Symbol „WO „auf. Wenn das Gerät erkennt, dass die Umgebungstemperatur innerhalb von zwei Minuten um 3 Grad sinkt, stoppt sie die Heizung. Zu diesem Zeitpunkt leuchtet das Symbol für die Betriebsanzeige der Fenstererkennung auf.
  • Seite 14: Gerätesteuerung Per Smartphone

    GERÄTESTEUERUNG PER SMARTPHONE Wenn Sie Ihr Klarstein-Gerät in Ihr heimisches WLAN einbinden, können Sie es ganz bequem über die dazugehörige Klarstein-App bedienen. Die App ermöglicht es Ihnen, nicht nur das Gerät über Ihr Smartphone fernzusteuern, sondern bietet Ihnen Zugang zu weiterführenden Informationen.
  • Seite 15 Fehlerbehebung bei Verbindungsproblemen Wenn Ihr Klarstein-Gerät im WLAN nicht gefunden werden kann, überprüfen Sie Folgendes: • Ist das Gerät eingesteckt? • Ist die WLAN-Funktion des Smartphones aktiviert? • Ist die WLAN-Funktion des Klarstein-Gerätes aktiviert? (Befolgen Sie die Anweisun- gen in der App.) •...
  • Seite 16: Reinigung Und Pflege

    REINIGUNG UND PFLEGE • Ziehen Sie vor der Reinigung den Netzstecker aus der Steckdose. • Lassen Sie das Gerät vor der Reinigung abkühlen, um Verbrennungen zu vermei- den. • Nur die äußeren Oberflächen des Geräts dürfen vom Nutzer selbst gereinigt werden.
  • Seite 17: Hinweise Zur Entsorgung

    HINWEISE ZUR ENTSORGUNG Befindet sich die linke Abbildung (durchgestrichene Mülltonne auf Rädern) auf dem Produkt, gilt die Europäische Richtlinie 2012/19/EU. Diese Produkte dürfen nicht mit dem normalen Hausmüll entsorgt werden. Informieren Sie sich über die örtlichen Regelungen zur getrennten Sammlung elektrischer und elektronischer Gerätschaften.
  • Seite 18: Produktdatenblatt

    PRODUKTDATENBLATT Modellkennung(en) 10034761, 10034762 Angabe Symbol Wert Einheit Angabe Einheit Wärmeleistung Nur bei elektrischen Speicher-Einzelraumheizgeräten: Art der Regelung der Wärmezufuhr Nennwärmeleistung Manuelle Regelung der Wärmezufuhr nein mit integriertem Thermostat Mindestwärmeleistung 0,24 Manuelle Regelung der Wärmezufuhr nein (Richtwert) mit Rückmeldung der Raum- und/ oder Außentemperatur Maximale kontinuierliche 2,36...
  • Seite 19: Technical Data

    Dear Customer, Congratulations on purchasing this equipment. Please read this manual carefully and take care of the following hints to avoid damages. Any failure caused by ignoring the items and cautions mentioned in the instruction manual are not covered by our warranty and any liability. Scan the QR code to get access to the latest user manual and other information about the product.y CONTENTS...
  • Seite 20: Safety Instructions

    SAFETY INSTRUCTIONS • Read all instructions before using this unit. • Do not leave this unit unattended when in use. • This heater will get hot when in use. Do not touch hot surfaces. CAUTION Risk of burns! Some parts of this product can become very hot and cause burns.
  • Seite 21 • Do not use this heater in the immediate surroundings of a bath, shower or swimming pool. • This product must not be left outdoors exposed to the elements for long periods of time. • Do not touch the plug with wet or damp hands. •...
  • Seite 22: Installation

    INSTALLATION Installation Notes Warning: Danger of fire Do not install the appliance close to curtains and other combustible materials. • This heater must be installed by a qualified person, that is, a qualified electrician. • Before installation and during installation, ensure that the heater is always discon- nected from the power supply and is in a cool state.
  • Seite 23 32mm Remove the expansion rubber and screws from the accessory bag, drill four holes with a diameter of 8mm on the wall, the hole depth is 70mm, the hole distance is 32mm, 300mm≤L≤450mm install the expansion rubber in the fitting in the hole, and then mount the wall bracket from the accessories.
  • Seite 24 Lock the wall bracket mounted on the back of the heater and the wall, adjust the heater to a suitable position, and lock the lock with the nut and screw from the accessory sleeve to ensure that it will not loosen.
  • Seite 25 Wall hanging diagram: Ceiling ≥500 mm ≥500 mm Wall ≥1800 mm floor Ceiling ≥500 mm ≥500 mm ≥1800 mm Wall floor...
  • Seite 26: Appliance Overview

    APPLIANCE OVERVIEW Display Human body sensing indicator icon Power indicator icon Child lock indicator icon Temperature indicator icon Gear indication icon Intelligent heating operation indicator icon Heating indicator icon Window detection indicator icon Timing indicator icon 10 WIFI indicator icon 1 1 Temperature unit indicator icon 12 Appointment timing indicator icon 13 Window detection operation indicator icon...
  • Seite 27 Remote Control On/Off button Timing button Up button Gear button Intelligent heating button Child lock button Down button Switch button On-screen display button 10 Human body sensing button...
  • Seite 28: Operation

    OPERATION Warning: Danger of personal injury This heater is not equipped with a device to control the room temperature. Do not use this heater in small ro oms when they are occupied by persons not capable of leaving the room on their own, unless constant supervision is provided.
  • Seite 29: Device Control By Smartphone

    Klarstein device is to be connected to. 3. Open the Klarstein app. 4. Sign in to your account. If you do not have an account, sign up in the Klarstein app. 5. Follow the instructions from the app. App Download Use the scan function of your smartphone to scan the QR code and save the app on your smartphone.
  • Seite 30 If your Klarstein device cannot be found in the WLAN, check the following: • Is the device plugged in? • Is the WiFi feature of my phone enabled? • Is the WiFi function of the Klarstein device activated? (Follow the instructions in the app) • Has the WLAN password been entered correctly? •...
  • Seite 31: Cleaning And Care

    CLEANING AND CARE • Disconnect the heater from the power supply. Do not clean before cooling to avoid burns! • The only thing that needs to be cleaned is the exterior surface of the heater. • Do not use strong abrasives or solvent cleaners when cleaning the heater as they maydamage the plastic parts.
  • Seite 32: Hints On Disposal

    HINTS ON DISPOSAL According to the European waste regulation 2012/19/EU this symbol on the product or on its packaging indicates that this product may not be treated as household waste. Instead it should be taken to the appropriate collection point for the recycling of electrical and electronic equipment.
  • Seite 33: Product Data Sheet

    PRODUCT DATA SHEET Model identifier(s): 10034761, 10034762 Item Symbol Value Unit Item Unit Heat output Type of heat input, for electric storage local space heaters only Nominal heat output manual heat charge control, with integrated thermostat Minimum heat output 0.24 manual heat charge control with room (indicative) and/or outdoor temperature feedback...
  • Seite 35: Fiche Technique

    Chère cliente, cher client, Toutes nos félicitations pour l’acquisition de ce nouvel appareil. Veuillez lire attentivement et respecter les instructions de ce mode d’emploi afin d’éviter d’éventuels dommages. Nous ne saurions être tenus pour responsables des dommages dus au non-respect des consignes et à la mauvaise utilisation de l’appareil.
  • Seite 36: Consignes De Sécurité

    CONSIGNES DE SÉCURITÉ • Lisez toutes les consignes de sécurité avant d‘utiliser cet appareil. • Ne laissez pas cet appareil fonctionner sans surveillance. • Le radiateur devient très chaud pendant le fonctionnement, ne touchez pas les surfaces chaudes. ATTENTION Risque de brûlure! Certaines parties de ce produit peuvent devenir très chaudes et provoquer des brûlures.
  • Seite 37 • Ne touchez pas l‘élément chauffant à mains nues. Si vous le touchez accidentel- lement, effacez les marques de doigts avec un chiffon doux, sinon elles brûleront dans l‘élément et entraîneront une panne prématurée du radiateur. • Ne remplacez pas et ne tentez pas de retirer l‘élément chauffant. •...
  • Seite 38: Installation

    INSTALLATION Instructions de montage Mise en garde : risque d'incendie N'installez pas l'appareil à proximité de rideaux ou d'autres matériaux inflammables. • L‘appareil doit être installé par un électricien qualifié. • Avant d‘installer l‘appareil, vérifiez que la fiche secteur a été retirée de la prise et que l‘appareil est froid.
  • Seite 39 32mm Retirez le caoutchouc d‘expansion et les vis du sac d‘accessoires, percez quatre trous d‘un diamètre de 8 mm et d‘une profondeur de 70 mm dans le mur. L‘espacement des trous est de 32 mm (300 mm ≤ L ≤ 450 mm). Fixez le caoutchouc d‘expansion dans le manchon dans le trou, puis fixez le support mural inclus.
  • Seite 40 Serrez le support mural qui se trouve maintenant à l‘arrière de l‘appareil et qui touche le mur, dans la position souhaitée. Utilisez pour cela l‘écrou et la vis du sac d‘accessoires :...
  • Seite 41 Schéma de suspension Ceiling Plafond ≥500 mm ≥500 mm Wall ≥1800 mm floor Plafond Ceiling ≥500 mm ≥500 mm ≥1800 mm Wall floor...
  • Seite 42: Aperçu De L'appareil

    APERÇU DE L‘APPAREIL Ecran Détection de personne Témoin de fonctionnement Verrouillage parental Affichage de la température Affichage des paramètres Fonction de chauffage intelligent Témoin de chauffage Détection de fenêtre ouverte Affichage de la minuterie 10 Voyant de Wifi 1 1 Affichage de la température de l‘appareil 12 Affichage de la minuterie 13 Voyant de fenêtre ouverte...
  • Seite 43 Télécommande Marche/arrêt Touche de la minuterie Haut Réglage de la puissance Fonction de chauffage intelligent Verrouillage parental Set (touche de paramétrage) Display (touche d‘affichage) 10 Body Sensor (touche de détection de personne)
  • Seite 44: Mise En Marche Et Utilisation

    MISE EN MARCHE ET UTILISATION Mise en garde : risque de blessure Ce radiateur n'est pas équipé d'un dispositif de contrôle de la température ambiante. N'utilisez pas ce radiateur dans de petites pièces si elles sont occupées par des personnes qui ne peuvent pas la quitter seules, sauf si une surveillance permanente est assurée.
  • Seite 45: Contrôle De L'appareil Avec Un Smartphone

    CONTRÔLE DE L‘APPAREIL AVEC UN SMARTPHONE Si vous intégrez votre appareil Klarstein dans votre Wifi domestique, vous pourrez facilement le contrôler avec l‘application Klarstein associée. L‘application vous permet non seulement de contrôler l‘appareil à distance depuis votre smartphone, mais vous donne également accès à...
  • Seite 46 Résolution des problèmes de connexion Si vous ne trouvez pas votre appareil Klarstein sur le Wifi, vérifiez les points suivants : • L‘appareil est-il branché ? • La fonction Wifi du smartphone est-elle activée ? • La fonction Wifi de l‘appareil Klarstein est-elle activée? (Suivez les instructions de l‘application.)
  • Seite 47: Nettoyage Et Entretien

    NETTOYAGE ET ENTRETIEN • Avant le nettoyage, débranchez la fiche de la prise. • Laissez l‘appareil refroidir avant de le nettoyer pour éviter les brûlures. • Seules les surfaces extérieures de l‘appareil peuvent être nettoyées par l‘utilisateur. • N‘utilisez pas d‘agents de nettoyage agressifs ou abrasifs, car cela pourrait en- dommager les composants en plastique de l‘appareil.
  • Seite 48: Informations Sur Le Recyclage

    INFORMATIONS SUR LE RECYCLAGE Vous trouverez sur le produit l’image ci-contre (une poubelle sur roues, barrée d‘une croix), ce qui indique que le produit se trouve soumis à la directive européenne 2012/19/ UE. Renseignez-vous sur les dispositions en vigueur dans votre région concernant la collecte séparée des appareils électriques et électroniques.
  • Seite 49: Fiche Produit

    FICHE PRODUIT Référence (s) du produit 10034761, 10034762 Donnée Symbole Valeur Unité Donnée Unité Puissance calorifique nominale Uniquement pour les radiateurs électriques à accumulation : Type de régulation de l'apport de chaleur Puissance calorifique Régulation manuelle de l'apport de minimale (indicative) chaleur avec thermostat intégré...
  • Seite 51: Datos Técnicos

    Estimado cliente: Le felicitamos por la adquisición de este producto. Lea atentamente el siguiente manual y siga cuidadosamente las instrucciones de uso con el fin de evitar posibles daños. La empresa no se responsabiliza de los daños ocasionados por un uso indebido del producto o por haber desatendido las indicaciones de seguridad.
  • Seite 52: Indicaciones De Seguridad

    INDICACIONES DE SEGURIDAD • Lea atentamente todas las indicaciones antes de utilizar este aparato. • No deje el aparato en marcha si no se encuentra bajo supervisión. • Este radiador alcanza temperaturas muy elevadas durante su uso. No toque las superficies calientes.
  • Seite 53 • No toque la resistencia con las manos mojadas. Si se ha tocado por accidente, retire las manchas de dedos con un paño suave; de lo contrario, estas se quedarán marcadas en la resistencia y provocarán una merma anticipada del radiador. •...
  • Seite 54: Installation

    INSTALLATION Indicaciones de montaje Advertencia: Riesgo de incendio No instale el aparato cerca de cortinas ni de otros materiales inflamables. • El aparato debe ser instalado por un electricista cualificado. • Antes de instalar el aparato, debe asegurarse de que el enchufe esté desconecta- do y que el aparato se haya enfriado.
  • Seite 55 32mm Extraiga la junta de expansión y los tornillos de la bolsa de accesorios, perfore cuatro orificios con un diámetro de 8 mm y una profundidad de 70 mm en la pared. La distancia entre los orificios es de 32 mm (300 mm ≤ L ≤ 450 mm). Coloque la junta de expansión en el orificio y, a continuación, encaje el soporte para pared incluido en el envío.
  • Seite 56 Apriete el soporte para pared que ahora se encuentra en la parte trasera del aparato y está unido a la pared en la posición deseada. Para ello, utilice la tuerca y el tornillo de la bolsa de accesorios:...
  • Seite 57 Diagrama de sujeción Ceiling Techo ≥500 mm ≥500 mm Wall ≥1800 mm Suelo floor Techo Ceiling ≥500 mm ≥500 mm ≥1800 mm Pared Wall floor...
  • Seite 58: Vista General Del Aparato

    VISTA GENERAL DEL APARATO Pantalla Detección corporal Indicador de funcionamiento Bloqueo para niños Indicador de temperatura Indicador de configuración Calefacción inteligente Indicador de calefacción Detección de ventana abierta Indicador del temporizador 10 Indicador wifi 1 1 Indicador de temperatura del aparato 12 Indicador del temporizador 13 Indicador de ventana abierta...
  • Seite 59 Mando a distancia On/off Botón del temporizador Arriba Configuración de potencia Calefacción inteligente Bloqueo para niños Abajo Set (configuración) Display (botón de la pantalla) 10 Body sensor (botón para la detección corporal)
  • Seite 60: Puesta En Funcionamiento

    PUESTA EN FUNCIONAMIENTO Advertencia: Riesgo de lesiones Este radiador no está equipado con un dispositivo para regular la temperatura ambiente. No utilice este radiador en estancias pequeñas si en ellas se encuentran personas que no pueden abandonar por sí mismas la estancia excepto que estén acompañadas de una persona que se encargue de su supervisión..
  • Seite 61: Control Del Dispositivo Por Smartphone

    CONTROL DEL DISPOSITIVO POR SMARTPHONE Si conecta el aparato de Klarstein a su red wifi doméstica, podrá controlarlo cómodamente mediante la App correspondiente de Klarstein. La App le permite no solo controlar el aparato mediante su smartphone, sino que también le ofrece acceso a recetas y otra información adicional.
  • Seite 62 Resolución de problemas en caso de problemas de conexión Si el aparato de Klarstein no se ha encontrado en wifi, compruebe lo siguiente: • ¿Está el aparato encendido? • ¿Está activada la función wifi del smartphone? • ¿Está activada la función wifi del aparato Klarstein? (Siga las instrucciones de la aplicación.)
  • Seite 63: Limpieza Y Cuidado

    LIMPIEZA Y CUIDADO • Desconecte el enchufe antes de limpiar el aparato. • Deje que el aparato se enfríe por completo antes de limpiarlo para evitar quema- duras. • El usuario solo puede limpiar la superficie exterior del aparato. • No utilice productos de limpieza agresivos ni abrasivos para limpiar el aparato, pues podrían dañarse sus componentes plásticos.
  • Seite 64: Retirada Del Aparato

    RETIRADA DEL APARATO Si el aparato lleva adherida la ilustración de la izquierda (el contenedor de basura tachado) entonces rige la normativa europea, directiva 2012/19/UE. Estos productos no pueden depositarse en los contenedores destinados a la basura común. Infórmese sobre las leyes territoriales que regulan la recogida separada de aparatos eléctricos y electrónicos.
  • Seite 65: Hoja De Datos Del Producto

    HOJA DE DATOS DEL PRODUCTO Número de artículo 10034761, 10034762 Indicación Símbolo Valor Unidad Indicación Unidad Capacidad de calentamiento nominal Sólo para calentadores eléctricos: Tipo de control de entrada de calor Salida de calor nominal Control manual del suministro de ca- lor con termostato integrado Salida mínima de calor 0,24...
  • Seite 67: Dati Tecnici

    Gentile Cliente, La ringraziamo per aver acquistato il dispositivo. La preghiamo di leggere attentamente le seguenti istruzioni per l’uso e di seguirle per evitare possibili danni tecnici. Non ci assumiamo alcuna responsabilità per danni scaturiti da una mancata osservazione delle avvertenze di sicurezza e da un uso improprio del dispositivo.
  • Seite 68: Iavvertenze Di Sicurezza

    AVVERTENZE DI SICUREZZA • Leggere tutto il manuale prima di utilizzare il dispositivo. • Non lasciare il dispositivo privo di controllo mentre è in funzione. • Questa stufa diventa estremamente calda mentre è in funzione. Non toccare le superfici bollenti. ATTENZIONE Pericolo di ustione! Alcuni componenti di questo prodotto possono diventare estremamente caldi e causare ustioni.
  • Seite 69 • Non toccare l’elemento riscaldante a mani nude. Se viene toccato per sbaglio, rimuovere subito le impronte delle dita con un panno umido, altrimenti si imprimono nell’elemento e causano un guasto prematuro della stufa. • Non sostituire l’elemento riscaldante e non cercare di rimuoverlo. •...
  • Seite 70: Installazione

    INSTALLAZIONE Note sul montaggio Avvertimento: pericolo d‘incendio Non installare il dispositivo vicino a tende e altri materiali infiammabili. • Il dispositivo deve essere installato da un elettricista qualificato. • Prima dell’installazione, è necessario assicurarsi che la spina sia stata scollegata dalla presa elettrica e che il dispositivo sia freddo.
  • Seite 71 32mm Togliere il gommino a espansione e le viti dal sacchetto degli accessori e realizzare quattro fori da 8 mm di diametro e 70 mm di profondità nella parete. La distanza tra i fori è di 32 mm (300 mm ≤ L ≤ 450 mm). Inserire il gommino a espansione nel manicotto nel foro e montare poi il supporto a parete incluso in consegna.
  • Seite 72 Fissare il supporto a parete, che si trova ora sul retro del dispositivo e collegato alla parete, nella posizione desiderata. Utilizzare dadi e viti dal sacchetto degli accessori.
  • Seite 73 Diagramma per la sospensione Ceiling Soffitto ≥500 mm ≥500 mm Wall ≥1800 mm Pavimento floor Soffitto Ceiling ≥500 mm ≥500 mm ≥1800 mm Parete Wall floor...
  • Seite 74: Descrizione Del Dispositivo

    DESCRIZIONE DEL DISPOSITIVO Display Sensore di rilevamento corpo umano Indicazione di funzionamento Sicura per bambini Indicazione temperatura Indicazione impostazioni Funzione riscaldante intelligente Indicazione di calore Rilevamento finestra aperta Indicazione timer 10 Indicazione Wi-Fi 1 1 Indicazione temperatura del dispositivo 12 Indicazione timer 13 Indicazione finestra aperta...
  • Seite 75 Telecomando On/Off Timer In alto Impostazione potenza Funzione riscaldante intelligente Sicura per bambini In basso Set (impostare) Display 10 Body Sensor (tasto sensore di rilevamento del corpo umano).
  • Seite 76: Messa In Funzione E Utilizzo

    MESSA IN FUNZIONE E UTILIZZO Avvertimento: pericolo di lesioni a persone Questo dispositivo non è dotato di un sistema di regolazione della temperatura ambiente. Non utilizzare questo dispositivo in locali di piccole dimensioni, in cui si trovano persone incapaci di abbandonare la stanza in modo autonomo, a meno che sia garantita una costante supervisione.
  • Seite 77: Controllo Del Dispositivo Con Smartphone

    CONTROLLO DEL DISPOSITIVO CON SMARTPHONE Se si collega il dispositivo Klarstein con la rete Wi-Fi di casa, è possibile utilizzarlo comodamente con l’apposita app di Klarstein. La app permette non solo di controllare il dispositivo a distanza con lo smartphone, ma offre anche accesso a utili informazioni.
  • Seite 78 • La funzione Wi-Fi del dispositivo Klarstein è attiva? (seguire le indicazioni nell’app) • È stata inserita la password corretta per la rete Wi-Fi? • Router, dispositivo Klarstein e smartphone si trovano vicini tra loro mentre si cerca di stabilire la connessione? (idealmente a non più di 5 metri l’uno dall’altro) •...
  • Seite 79: Pulizia E Manutenzione

    PULIZIA E MANUTENZIONE • Staccare la spina prima della pulizia. • Lasciare che il dispositivo si raffreddi prima della pulizia, in modo da evitare ustioni. • Possono essere pulite dall’utente solo le superfici esterne del dispositivo. • Non utilizzare detergenti aggressivi o abrasivi, altrimenti possono rovinarsi i com- ponenti in plastica del dispositivo.
  • Seite 80: Smaltimento

    SMALTIMENTO Se sul prodotto è presente la figura a sinistra (il bidone dei rifiuti con le ruote), si applica la direttiva europea 2012/19/ UE. Questi prodotti non possono essere smaltiti con i rifiuti normali. Informarsi sulle disposizioni vigenti per la raccolta di dispositivi elettrici ed elettronici.
  • Seite 81: Scheda Dati Del Prodotto

    SCHEDA DATI DEL PRODOTTO Numero articolo 10034761, 10034762 Voce Simbolo Valore Unità Voce Unità Potenza riscaldante Solo per dispositivi elettrici di accumu- lo di calore per locali singoli Tipo di regolazione dell’afflusso di calore Potenza riscaldante nominale Regolazione manuale dell’afflusso di calore con termostato integrato Potenza riscaldante minima 0,24...

Inhaltsverzeichnis