Herunterladen Inhalt Inhalt Diese Seite drucken

Werbung

Verfügbare Sprachen
  • DE

Verfügbare Sprachen

  • DEUTSCH, seite 1
Norderney
Konvektionsheizgerät
Convection Heater
Radiateur convecteur
Stufa a convezione
Radiador convector
10032787 10032788 10032789 10032790
Hinweis: Dieses Produkt ist nur für gut isolierte Räume
oder für den gelegentlichen Gebrauch geeignet.
Note: This product is only suitable for well insulated
spaces or occasional use.
Remarque : Ce produit ne peut être utilisé que dans des
locaux bien isolés ou de manière occasionnelle.
Nota: questo prodotto è adatto solo per spazi ben
isolati o uso occasionale.
Nota: este producto está indicado únicamente en
lugares abrigados o para una utilización punctual.

Werbung

Inhaltsverzeichnis
loading

Inhaltszusammenfassung für Klarstein Norderney

  • Seite 1 Norderney Hinweis: Dieses Produkt ist nur für gut isolierte Räume oder für den gelegentlichen Gebrauch geeignet. Note: This product is only suitable for well insulated Konvektionsheizgerät spaces or occasional use. Convection Heater Remarque : Ce produit ne peut être utilisé que dans des locaux bien isolés ou de manière occasionnelle.
  • Seite 3: Technische Daten

    Sehr geehrter Kunde, wir gratulieren Ihnen zum Erwerb Ihres Gerätes. Lesen Sie die folgenden Hinweise sorgfältig durch und befolgen Sie diese, um möglichen Schäden vorzubeugen. Für Schäden, die durch Missachtung der Hinweise und unsachgemäßen Gebrauch entstehen, übernehmen wir keine Haftung. Technische Daten Artikelnummer 10032787, 10032788...
  • Seite 4 Produktdatenblatt Modellkennung(en) 10032787, 10032788 Angabe Symbol Wert Einheit Angabe Einheit Wärmeleistung Nur bei elektrischen Speicher-Einzelraumheizgeräten: Art der Regelung der Wärmezufuhr Nennwärmeleistung Manuelle Regelung der Wärmezufuhr mit k.A. integriertem Thermostat Mindestwärmeleistung Manuelle Regelung der Wärmezufuhr k.A. (Richtwert) mit Rückmeldung der Raum- und/oder Außentemperatur Maximale kontinuierliche Elektronische Regelung der Wärmezufuhr...
  • Seite 5 Modellkennung(en) 10032789, 10032790 Angabe Symbol Wert Einheit Angabe Einheit Wärmeleistung Nur bei elektrischen Speicher-Einzelraumheizgeräten: Art der Regelung der Wärmezufuhr Nennwärmeleistung Manuelle Regelung der Wärmezufuhr mit k.A. integriertem Thermostat Mindestwärmeleistung Manuelle Regelung der Wärmezufuhr k.A. (Richtwert) mit Rückmeldung der Raum- und/oder Außentemperatur Maximale kontinuierliche Elektronische Regelung der Wärmezufuhr...
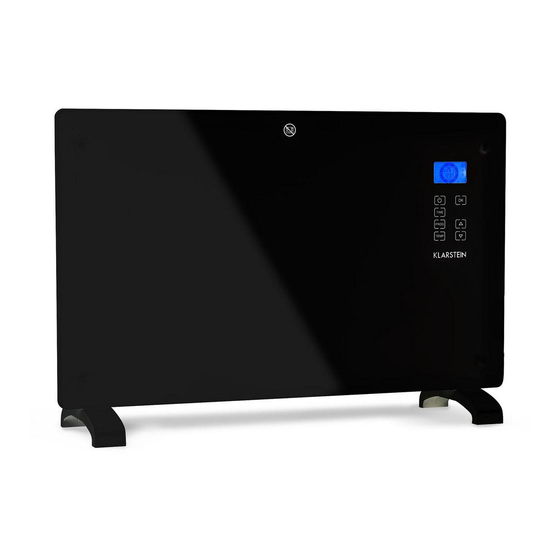
  • Seite 6 Geräteübersicht 1 Zierblende Glas 2 LCD-Anzeige 3 Bedienfeld 4 Standfüße Displayanzeigen Bedienfeld Standby-Taste: Temperatur- Wert erhöhen Gerät ein-/ausschalten. einstellungen Eingabe bestätigen / Uhrzeit einstellen. Wert verringern Menü aufrufen Programmeinstellungen...
  • Seite 7: Montage

    Montage Standmontage 1. Drehen Sie das Gerät auf den Kopf. Setzen Sie es auf einem weichen Tuch oder Teppich ab. 2. Bringen Sie den Fuß an der richtigen Stelle auf der Unterseite des Geräts an (siehe Bild unten). Verwenden Sie dazu die beiliegenden Schrauben. Ziehen Sie die Schrauben mit einem Schraubenzieher fest. Wandmontage 1.
  • Seite 8 2. Bringen Sie auf der Unterseite des Geräts 2 Halterungen an. 3. Halten Sie das Gerät seitlich. Sehen Sie auf die Position der Bohrungen auf der Gehäuse-Rückseite. Setzen Sie das Gerät auf die Halterungen.
  • Seite 9 Inbetriebnahme und Bedienung Ein-/Ausschalten Drücken Sie die Standby-Taste, um den Standby-Modus zu verlassen. Die LCD-Anzeige (2) zeigt die aktuelle Raumtemperatur und die Uhrzeit (Voreinstellung 00:00) an. Durch erneutes Drücken dieser Taste wechselt das Gerät zurück in den Standby-Modus. Hinweis: Wenn Sie den Netzstecker ziehen, wird nur die Timer-Einstellung gelöscht. Alle anderen Funktions- einstellungen bleiben erhalten.
  • Seite 10 Programmierter wöchentlicher Heizmodus 1. Um in den Wochenheizmodus zu gelangen, drücken Sie „PROG” und bewegen Sie den Cursor über das Uhrensymbol unten links auf dem Display und drücken Sie „OK“. 2. Nun blinkt der Cursor über die Wochentage (linke Seite des Menüs). 3.
  • Seite 11 Verriegelung / Kindersicherung 1. Um die Heizung in den Standby-Modus mit aktivierter Kindersicherung zu schalten, drücken und halten Sie die OK-Taste für 5 Sekunden. Im Display erscheint das Schloss-Symbol. 2. Zum Entsperren halten Sie zuerst „OK“ 5 Sekunden lang gedrückt. Uhrzeit einstellen Drücken Sie zum Stellen der Uhrzeit die TIME-Taste und die Stunden beginnen zu blinken.
  • Seite 12: Reinigung Und Pflege

    Reinigung und Pflege Wartung Trennen Sie die Heizung vor jeder Wartung vom Stromnetz und lassen Sie diese vollständig abkühlen. Entfernen Sie mittels eines Staubsaugers Staub und Flusen von den Lüftungsgittern. Reinigen Sie das Gehäuse mit einem feuchten Lappen und trocknen es anschließend ab. Es darf kein Wasser in das Geräteinnere gelangen. Lagerung Trennen Sie die Heizung vor dem Lagern vom Stromnetz und lassen Sie diese vollständig abkühlen.
  • Seite 13: Technical Data

    Dear Customer, Congratulations on purchasing this equipment. Please read this manual carefully and take care of the following hints to avoid damages. Any failure caused by ignoring the mentioned items and cautions mentioned in the instruction manual are not covered by our warranty and any liability. Technical Data Item number 10032787, 10032788...
  • Seite 14: Product Data Sheet

    Product Data Sheet Model identifier(s): 10032787, 10032788 Item Symbol Value Unit Item Unit Heat output Type of heat input, for electric storage local space heaters only Nominal heat output manual heat charge control, with integrated thermostat Minimum heat output manual heat charge control with room and/or (indicative) outdoor temperature feedback Maximum continuous heat...
  • Seite 15 Model identifier(s): 10032789, 10032790 Item Symbol Value Unit Item Unit Heat output Type of heat input, for electric storage local space heaters only Nominal heat output manual heat charge control, with integrated thermostat Minimum heat output manual heat charge control with room and/or (indicative) outdoor temperature feedback Maximum continuous heat...
  • Seite 16: Product Description

    Product Description 1 Decoration glass 2 LCD screen 3 Operation board 4 Standing feet Display Control Panel Standby key: Switching Setting temperature Adjusting value up the appliance on/off level Confirming an input / Setting the time Adjusting value down entering menu Setting the program mode...
  • Seite 17: Installation

    Installation Free-standing installation 1. Put the product upside down on a soft cotton cloth or carpet. 2. Mount the stand in the corresponding location of the lower part of the product as shown above, and then fix the randomly supplied screw at the bottom of the product with a screwdriver and tighten the screw. Wall mount 1.
  • Seite 18 2. Fix 2 brackets onto the bottom of product, as depicted in the picture below. 3. Hold the side of the product, look at the position of the wall hole of the rear cover, and slide the wall to the top of the slot, that is, the installation of the wall is completed, as depicted in the picture below.
  • Seite 19: Use And Operation

    Use and Operation Switching the appliance on/off Press the Standby key to exit the standby mode, the LCD display (2) shows current ambient temperature and set time (default 00:00). Press the standby key again to activate the standby mode. Note: When pull out the plug, deletes the timer setting only and other function settings remain unchanged. Choosing operation mode This heater provides two different operation modes: •...
  • Seite 20 Programmed weekly heating mode 1. To enter the weekly heating mode press PROG and move the cursor over the clock icon at the bottom left hand side of the LCD screen and press OK. 2. Now the cursor is flashing over the days of the week (left side of menu). 3.
  • Seite 21 Child lock function 1. To set the heater to a standby mode and apply the child lock function, simply hold the OK key and wait for 5 seconds. You will see the padlock image lock on the LCD screen. 2. To unlock, press the OK key for 5 seconds. Setting time To set the time press the TIME key, when the hour digits “12”...
  • Seite 22: Cleaning And Care

    Cleaning and Care Maintenance Always disconnect the appliance and let it completely cool before any maintenance. Use a vacuum cleaner to remove dust on grilles. Clean the outside of the unit with a damp cloth and then dry it with a dry cloth. Never immerse the unit in water, nor let water drip into the unit.
  • Seite 23: Fiche Technique

    Chère cliente, cher client, Toutes nos félicitations pour l’ a cquisition de ce nouvel appareil. Veuillez lire attentivement les instructions sui- vantes de branchement et d’utilisation afin d’ é viter d’ é ventuels dommages. Le fabricant ne saurait être tenu pour responsable des dommages dus au non-respect des consignes de sécurité...
  • Seite 24 FICHE DE DONNÉES PRODUIT Référence (s) du produit 10032787, 10032788 Donnée Symbole Valeur Unité Donnée Unité Puissance calorifique Uniquement pour les radiateurs électriques à accumulation : Type de régulation de l'apport de chaleur Puissance calorifique Régulation manuelle de l'apport de chaleur avec Sans objet nominale thermostat intégré...
  • Seite 25 Référence (s) du produit 10032789, 10032790 Donnée Symbole Valeur Unité Donnée Unité Puissance calorifique Uniquement pour les radiateurs électriques à accumulation : Type de régulation de l'apport de chaleur Puissance calorifique Régulation manuelle de l'apport de chaleur avec Sans objet nominale thermostat intégré...
  • Seite 26: Aperçu De L'appareil

    Aperçu de l‘appareil 1 Panneau de verre décoratif 2 Écran LCD 3 Panneau de commande 4 Pieds de support Affichages de l‘écran Échelle de 24 heures (chaque point équivaut à 30 min) Température Température Verrouillage parental Lundi Fonction confort Mardi Fonction économie Mercredi d‘énergie...
  • Seite 27 Montage Montage en pose libre 1. Retournez l‘appareil. Mettez-le sur un chiffon doux ou un tapis. 2. Placez le pied dans la bonne position sur la face inférieure de l‘appareil (voir l‘image ci-dessous). Utilisez les vis fournies. Serrez les vis avec un tournevis. Montage mural 1.
  • Seite 28 2. Fixez 2 supports sous l‘appareil. 3. Tenez l‘appareil de côté. Repérez l‘emplacement des trous à l‘arrière de du boîtier de l‘appareil. Mettez l‘appareil sur les supports.
  • Seite 29: Mise En Marche Et Utilisation

    Mise en marche et utilisation Marche/arrêt Appuyez sur la touche Standby pour quitter le mode veille. L‘écran (2) indique maintenant la température et l‘heure actuelles (par défaut 00:00). Une nouvelle pression sur ce bouton ramènera l‘appareil en mode veille. Remarque : Si vous débranchez la prise, seul le réglage de la minuterie sera effacé. Tous les autres paramètres de fonction sont conservés.
  • Seite 30 Mode programme de chauffage hebdomadaire 1. Pour entrer dans le mode de chauffage hebdomadaire, appuyez sur PROG et déplacez le curseur sur l‘icône de l‘horloge en bas à gauche du Display et appuyez sur OK. 2. Le curseur clignote maintenant sur les jours de la semaine (à gauche du menu). 3.
  • Seite 31 Verrouillage des touches / verrouillage parental 1. Pour mettre le radiateur en mode veille avec le verrouillage parental activé, appuyez sur le bouton OK et maintenez-le enfoncé pendant 5 secondes. 2. Pour déverrouiller, appuyez d‘abord sur “OK” pendant 5 secondes. Réglage de l'heure Appuyez sur la touche TIME pour régler l'heure, les heures se mettent à...
  • Seite 32: Nettoyage Et Entretien

    Nettoyage et entretien Entretien Débranchez le chauffage du secteur avant tout entretien et laissez-le refroidir complètement. Utilisez un aspirateur pour enlever la poussière et les peluches des grilles de ventilation. Nettoyez le boîtier avec un chiffon humide et séchez-le ensuite. Il ne doit pas y avoir d'eau à l'intérieur de l'appareil. Stockage Avant de ranger le chauffage, débranchez-le du secteur et laissez-le refroidir complètement.
  • Seite 33: Dati Tecnici

    Gentile Cliente, La ringraziamo per aver acquistato il dispositivo. La preghiamo di leggere attentamente le seguenti istruzioni per l’uso e di seguirle per evitare possibili danni tecnici. Non ci assumiamo alcuna responsabilità per danni sca- turiti da una mancata osservazione delle avvertenze di sicurezza e da un uso improprio del dispositivo. Dati tecnici Numero articolo 10032787, 10032788...
  • Seite 34: Scheda Informativa Del Prodotto

    Scheda informativa del prodotto Identificazione del modelli 10032787, 10032788 Indicazione Simbolo Valore Unità Indicazione Unità Potenza termica Solo per gli apparecchi per il riscaldamento d'ambiente locale elettrici ad accumulo: Tipo di controllo dell´apporto termico Potenza termica nominale Controllo manuale del carico termico con termostato integrato Potenza termica minima Controllo manuale del carico termico con...
  • Seite 35 Identificazione del modelli 10032789, 10032790 Indicazione Simbolo Valore Unità Indicazione Unità Potenza termica Solo per gli apparecchi per il riscaldamento d'ambiente locale elettrici ad accumulo: Tipo di controllo dell´apporto termico Potenza termica nominale Controllo manuale del carico termico con termostato integrato Potenza termica minima Controllo manuale del carico termico con (valore indicativo)
  • Seite 36: Descrizione Del Prodotto

    Descrizione del prodotto 1 Copertura decorativa in vetro 2 Schermo LCD 3 Pannello di controllo 4 Piedi d’ a ppoggio Spie del display Scala 24 ore (ogni punto = 30 min.) Température Temperatura Blocco sicurezza bambini Lunedì Funzione comfort Martedì Mercoledì...
  • Seite 37 Montaggio Installazione con piedi d’ a ppoggio 1. Ribaltare il dispositivo e poggiarlo su un panno morbido o su un tappeto. 2. Montare i piedi d’ a ppoggio negli appositi punti sul lato inferiore del dispositivo (v. immagine sotto). Utilizzare le viti incluse in consegna.
  • Seite 38 2. Montare 2 supporti sul lato inferiore del dispositivo 3. Tenere il dispositivo di lato. Cercare la posizione dei fori sul lato posteriore del dispositivo. Poggiare il dispositivo sui supporti.
  • Seite 39: Messa In Funzione E Utilizzo

    Messa in funzione e utilizzo Accendere/spegnere Premere il tasto standby per lasciare la modalità standby. Lo schermo (2) indica la temperatura e l’ o ra attuale (standard 00:00). Premendo nuovamente questo tasto il dispositivo torna in modalità standby. Nota: quando si estrae la spina, le impostazioni del timer vengono cancellate. Tutte le altre impostazioni di funzione vengono mantenute.
  • Seite 40 Modalità di riscaldamento settimanale programmato 1. Per entrare nella modalità di riscaldamento settimanale, premere PROG e spostare il cursore sull‘icona dell‘orologio in basso a sinistra del display e premere OK. 2. Ora il cursore lampeggia nei giorni feriali (lato sinistro del menu). 3.
  • Seite 41 Blocco/sicura per i bambini 1. Per accendere il riscaldatore in modalità standby con la sicura per i bambini attivata, tenere premuto il tasto OK per 5 secondi. 2. Per sbloccare tenere premuto “OK” per 5 secondi. Impostare l’ora Premere TIME per impostare l’ o rologio e le ore iniziano a lampeggiare. Impostare le ore con i tasti freccia e confermare con il tasto Orologio.
  • Seite 42: Pulizia E Manutenzione

    Pulizia e manutenzione Manutenzione Scollegare il dispositivo dalla rete elettrica e lasciarlo raffreddare completamente prima di ogni manutenzione. Rimuovere polvere e peluzzi con un aspirapolvere dalle griglie di ventilazione. Pulire l’ a lloggiamento con un panno umido e asciugarlo. Non far penetrare acqua nel dispositivo. Conservazione Scollegare il dispositivo dalla rete elettrica e lasciarlo raffreddare completamente prima di riporlo.
  • Seite 43: Datos Técnicos

    Estimado cliente, Le felicitamos por la adquisición de este producto. Lea atentamente el siguiente manual y siga cuidadosamen- te las instrucciones de uso con el fin de evitar posibles daños. La empresa no se responsabiliza de los daños ocasionados por un uso indebido del producto o por haber desatendido las indicaciones de seguridad. Datos técnicos Número de artículo 10032787, 10032788...
  • Seite 44: Hoja De Datos Del Producto

    Hoja de datos del producto Denominación del modelo 10032787, 10032788 Dato Símbolo Valor Unidad Dato Unidad Potencia térmica Solo con disposítivos de acumulación de calor eléctricos para abastecimiento local: Tipo de regulación del abastecimiento de calor Potencia térmica nominal Regulación manual del abastecimiento de calor con termostato integrado: Potencia térmica mínima Regulación manual de abastecimiento de calor...
  • Seite 45 Denominación del modelo 10032789, 10032790 Dato Símbolo Valor Unidad Dato Unidad Potencia térmica Solo con disposítivos de acumulación de calor eléctricos para abastecimiento local: Tipo de regulación del abastecimiento de calor Potencia térmica nominal Regulación manual del abastecimiento de calor con termostato integrado: Potencia térmica mínima Regulación manual de abastecimiento de calor...
  • Seite 46: Descripción Del Aparato

    Descripción del aparato 1 Cristal decorativo 2 Display LCD 3 Panel de control 4 Patas Indicadores del display Escala de 24 horas (cada punto = 30 min) Temperatura Bloqueo para niños Lunes Función confort Martes Miércoles Función ahorro Jueves Función anti Viernes escarcha Sábado...
  • Seite 47 Montaje Montaje del soporte 1. Poner el dispositivo al revés Colóquelo en un paño suave o en una alfombra. 2. Coloque el pie en la posición correcta en la parte inferior de la unidad (ver imagen abajo). Use los tornillos que se adjuntan.
  • Seite 48 2. Monte los 2 soportes en la parte inferior del aparato. 3. Coloque el aparato en posición lateral. Vea la posición de los orificios desde la parte trasera del aparato. Coloque el aparato sobre los soportes.
  • Seite 49: Puesta En Marcha Y Uso

    Puesta en marcha y uso Encender / apagar Pulse el botón Standby para abandonar el modo standby. El indicador (2) muestra la temperatura ambiente actual y la hora (por defecto 00:00). Pulsando varias veces este botón, el aparato cambia al modo standby. Nota: Si saque el enchufe, se eliminarán los ajustes del temporizador.
  • Seite 50 Modo calefacción programable por semana 1. Para entrar en el modo de calefacción semanal, pulse PROG y mueva el cursor sobre el icono del reloj en la parte inferior izquierda de la pantalla y pulse OK. 2. Ahora el cursor parpadea sobre los días de la semana (a la izquierda del menú). 3.
  • Seite 51 Bloqueo/Bloqueo para niños 1. Para activar el modo standby de la calefacción con el bloqueo para niños, mantenga pulsado el botón OK durante 5 segundos. 2. Para desbloquear, mantenga pulsando el botón “OK“ durante 5 segundos. Ajustar la hora Para ajustar la hora, pulse TIME y las horas comienzan a parpadear. Ajuste las horas con los botones de flechas y confirme la selección con el botón del reloj.
  • Seite 52: Limpieza Y Cuidado

    Limpieza y cuidado Mantenimiento Desconecte el radiador de la red eléctrica antes de realizar labores de mantenimiento y deje que se enfríe por completo. Retire el polvo y las pelusas de las rejillas de ventilación mediante una aspiradora. Limpie la carcasa con un paño húmedo y séquela a continuación.

Inhaltsverzeichnis