Herunterladen Inhalt Inhalt Diese Seite drucken

Werbung

Verfügbare Sprachen
  • DE

Verfügbare Sprachen

  • DEUTSCH, seite 1
NORDERNEY
Konvektions-Heizung
Convection Heater
Radiador de convección
Radiateur convecteur
Radiatore a convezione
10032787 10032788 10032789 10032790
www.klarstein.com
Hinweis: Dieses Produkt ist nur für gut isolierte Räume
oder für den gelegentlichen Gebrauch geeignet.
Note: This product is only suitable for well insulated
spaces or occasional use.
Nota: Este producto está indicado únicamente en
lugares abrigados o para una utilización punctual.
Remarque : Ce produit ne peut être utilisé que dans
des locaux bien isolés ou de manière occasionnelle.
Advertencia: Questo prodotto è adatto solo per spazi
ben isolati o uso occasionale.

Werbung

Inhaltsverzeichnis
loading

Inhaltszusammenfassung für Klarstein NORDERNEY 10032787

  • Seite 1 Radiador de convección Radiateur convecteur Radiatore a convezione 10032787 10032788 10032789 10032790 www.klarstein.com Hinweis: Dieses Produkt ist nur für gut isolierte Räume oder für den gelegentlichen Gebrauch geeignet. Note: This product is only suitable for well insulated spaces or occasional use.
  • Seite 3: Inhaltsverzeichnis

    Sehr geehrter Kunde, wir gratulieren Ihnen zum Erwerb Ihres Gerätes. Lesen Sie die folgenden Hinweise sorgfältig durch und befolgen Sie diese, um möglichen Schäden vorzubeugen. Für Schäden, die durch Missachtung der Hinweise und unsachgemäßen Gebrauch entstehen, übernehmen wir keine Haftung. Scannen Sie den folgenden QR-Code, um Zugriff auf die aktuellste Bedienungsanleitung und weitere Informationen rund um das Produkt zu erhalten.
  • Seite 4: Sicherheitshinweise

    SICHERHEITSHINWEISE • Prüfen Sie vor der Benutzung die Spannung auf der Geräteplakette und schließen Sie das Gerät nur an Steckdosen an, die der Spannung des Geräts entsprechen. • Falls das Netzkabel beschädigt ist, lassen Sie es von einer ausgebildeten Fachkraft ersetzen. •...
  • Seite 5: Produktdatenblatt

    PRODUKTDATENBLATT Modellkennung(en) 10032787, 10032788 Angabe Symbol Wert Einheit Angabe Einheit Wärmeleistung Nur bei elektrischen Speicher-Einzelraumheizgeräten: Art der Regelung der Wärmezufuhr Nennwärmeleistung Manuelle Regelung der Wärmezufuhr mit k.A. integriertem Thermostat Mindestwärmeleistung Manuelle Regelung der Wärmezufuhr k.A. (Richtwert) mit Rückmeldung der Raum- und/oder Außentemperatur Maximale kontinuierliche Elektronische Regelung der Wärmezufuhr...
  • Seite 6 Modellkennung(en) 10032789, 10032790 Angabe Symbol Wert Einheit Angabe Einheit Wärmeleistung Nur bei elektrischen Speicher-Einzelraumheizgeräten: Art der Regelung der Wärmezufuhr Nennwärmeleistung Manuelle Regelung der Wärmezufuhr mit k.A. integriertem Thermostat Mindestwärmeleistung Manuelle Regelung der Wärmezufuhr k.A. (Richtwert) mit Rückmeldung der Raum- und/oder Außentemperatur Maximale kontinuierliche Elektronische Regelung der Wärmezufuhr...
  • Seite 7: Geräteübersicht

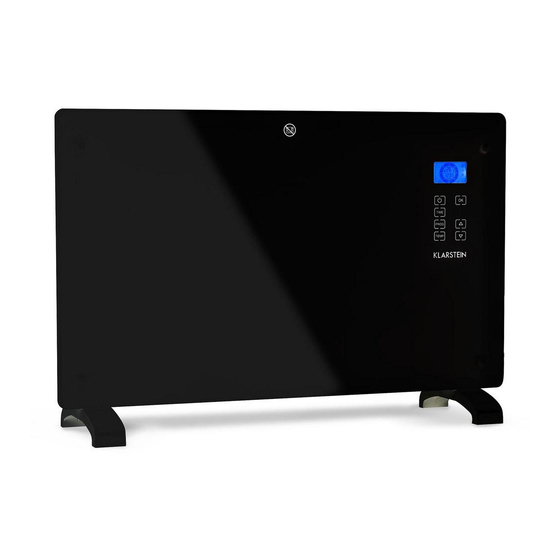
    GERÄTEÜBERSICHT Zierblende Glas LCD-Anzeige Bedienfeld Standfüße DISPLAYANZEIGEN...
  • Seite 8: Bedienfeld

    BEDIENFELD Standby-Taste: Temperatur- Wert erhöhen Gerät ein-/ausschalten einstellungen Eingabe bestätigen / Uhrzeit einstellen Wert verringern Menü aufrufen Programmeinstellungen MONTAGE Standmontage Drehen Sie das Gerät auf den Kopf. Setzen Sie es auf einem weichen Tuch oder Teppich ab. Bringen Sie den Fuß an der richtigen Stelle auf der Unterseite des Geräts an (siehe Bild unten).
  • Seite 9: Wandmontage

    Wandmontage Sie benötigen 4 Halterungen, 6 Dübelschrauben und 6 weitere Schrauben aus der Box. Befestigen Sie 2 Halterungen an der Wand. Zeichnen Sie die Bohrungen an (siehe Bild unten). Einheit: mm Montagebohrung 1000 W Gesamtbild Montagebohrung 2000 W Gesamtbild Bringen Sie auf der Unterseite des Geräts 2 Halterungen an.
  • Seite 10: Inbetriebnahme Und Bedienung

    Halten Sie das Gerät seitlich. Sehen Sie auf die Position der Bohrungen auf der Gehäuse-Rückseite. Setzen Sie das Gerät auf die Halterungen. INBETRIEBNAHME UND BEDIENUNG Ein-/Ausschalten Drücken Sie die Standby-Taste, um den Standby-Modus zu verlassen. Die LCD- Anzeige (2) zeigt die aktuelle Raumtemperatur und die Uhrzeit (Voreinstellung 00:00) an.
  • Seite 11: Frostfrei

    Freier Heizmodus Dieser Modus umfasst mehrere Heizfunktionen: Mit der Komfort-Funktion wird der Raum auf eine gewünschte Temperatur aufgeheizt. Zum Aktivieren drücken Sie die Pfeiltasten, bis das Symbol Komfort angezeigt wird. Die voreingestellte Temperatur beträgt 35 °C. Drücken Sie zum Einstellen die Taste Mit der Spar-Funktion wird die eingestellte Temperatur gehalten.
  • Seite 12: Temperatur Einstellen

    24-Stunden-Skala Vierecke innen und außen zeigen die Komfort-Funktion. 24-Stunden-Skala: Jedes Viereck Vierecke innen zeigen die entspricht Frostfrei-Funktion. 30 Minuten. Vierecke außen zeigen die Spar- Funktion. Das Beispielbild zeigt folgende Einstellungen: 0 - 6 Uhr: Frost frei-Funktion 6 - 12 Uhr: Komfort-Funktion 12 - 18 Uhr: Spar-Funktion Hinweis: 1.
  • Seite 13: Uhrzeit Einstellen

    Verriegelung / Kindersicherung Um die Heizung in den Standby-Modus mit aktivierter Kindersicherung zu schalten, drücken und halten Sie die OK-Taste für 5 Sekunden. Im Display erscheint das Schloss-Symbol. Zum Entsperren halten Sie zuerst „OK“ 5 Sekunden lang gedrückt. Uhrzeit einstellen Drücken Sie zum Stellen der Uhrzeit die TIME-Taste und die Stunden beginnen zu blinken.
  • Seite 14: Hinweise Zur Entsorgung

    HINWEISE ZUR ENTSORGUNG Wenn es in Ihrem Land eine gesetzliche Regelung zur Entsorgung von elektrischen und elektronischen Geräten gibt, weist dieses Symbol auf dem Produkt oder auf der Verpackung darauf hin, dass dieses Produkt nicht im Hausmüll entsorgt werden darf. Stattdessen muss es zu einer Sammelstelle für das Recycling von elektrischen und elektronischen Geräten gebracht werden.
  • Seite 15 Dear Customer, Congratulations on purchasing this device. Please read the following instructions carefully and follow them to prevent possible damages. We assume no liability for damage caused by disregard of the instructions and improper use. Scan the QR code to get access to the latest user manual and more product information.
  • Seite 16: Safety Instructions

    SAFETY INSTRUCTIONS • Check that the voltage indicates on the data plate corresponds with that of the local network before connecting the appliance to the mains power supply. • If the supply cord is damaged, it must be replaced by a qualifi ed engineer in order to avoid a hazard.
  • Seite 17: Product Data Sheet

    PRODUCT DATA SHEET Model identifier(s): 10032787, 10032788 Item Symbol Value Unit Item Unit Heat output Type of heat input, for electric storage local space heaters only Nominal heat output manual heat charge control, with integrated thermostat Minimum heat output manual heat charge control with room and/or (indicative) outdoor temperature feedback Maximum continuous heat...
  • Seite 18 Model identifier(s): 10032789, 10032790 Item Symbol Value Unit Item Unit Heat output Type of heat input, for electric storage local space heaters only Nominal heat output manual heat charge control, with integrated thermostat Minimum heat output manual heat charge control with room and/or (indicative) outdoor temperature feedback Maximum continuous heat...
  • Seite 19: Product Description

    PRODUCT DESCRIPTION Decoration glass LCD screen Operation board Standing feet DISPLAY...
  • Seite 20: Control Panel

    CONTROL PANEL Standby key: Switching Setting temperature Adjusting value up the appliance on/off level Confi rming an input / Setting the time Adjusting value down entering menu Setting the program mode INSTALLATION Free-standing installation Put the product upside down on a soft cotton cloth or carpet. Mount the stand in the corresponding location of the lower part of the product as shown above, and then fi x the randomly supplied screw at the bottom of the product with a screwdriver and tighten the screw.
  • Seite 21: Wall Mount

    Wall mount Take out 4 brackets, 6 expansion screws and 6 screws out from the box, and fi x 2 brackets onto the wall ccording to the distances between holes of the bracket, as depicted in the picture below. Unit: mm Mounting hole 1000 W General view Mounting hole 2000 W...
  • Seite 22: Use And Operation

    Hold the side of the product, look at the position of the wall hole of the rear cover, and slide the wall to the top of the slot, that is, the installation of the wall is completed, as depicted in the picture below. USE AND OPERATION Switching the appliance on/off Press the Standby key to exit the standby mode, the LCD display (2) shows current...
  • Seite 23 Free heating mode Free heating mode provides three additional heating functions: Comfortable function is intended to heat the room to the set temperature. To ac- tivate or deactivate Comfortable function, press the up or down key, if activated Comfort icon appears on the LCD display.
  • Seite 24 24-hour scale Squares on the outside and inside of the scale indicate Comfortable function. 24-hour scale: Each square Squares on the inside of the scale represents indicate Frost-free function. 30 minutes Squares on the outside of the scale indicate Economy function. The drawing illustrates the following setting: 0 - 6 am: Frost-free function 6 - 12 pm: Comfortable function...
  • Seite 25: Child Lock Function

    Child lock function To set the heater to a standby mode and apply the child lock function, simply hold the OK key and wait for 5 seconds. You will see the padlock image lock on the LCD screen. To unlock, press the OK key for 5 seconds. Setting time To set the time press the TIME key, when the hour digits “12”...
  • Seite 26: Disposal Considerations

    DISPOSAL CONSIDERATIONS If there is a legal regulation for the disposal of electrical and electronic devices in your country, this symbol on the product or on the packaging indicates that this product must not be disposed of with household waste. Instead, it must be taken to a collection point for the recycling of electrical and electronic equipment.
  • Seite 27: Datos Técnicos

    Estimado cliente: Le felicitamos por la adquisición de este producto. Lea atentamente el siguiente manual y siga cuidadosamente las instrucciones de uso con el fin de evitar posibles daños. La empresa no se responsabiliza de los daños ocasionados por un uso indebido del producto o por haber desatendido las indicaciones de seguridad.
  • Seite 28: Indicaciones De Seguridad

    INDICACIONES DE SEGURIDAD • Antes de su utilización, compruebe la tensión indicada en la placa técnica del aparato y conéctelo solamente a tomas de corriente con la misma tensión. • Si el cable de alimentación está dañado, contacte con un técnico cualifi cado para su sustitución.
  • Seite 29: Ficha Técnica Del Producto

    FICHA TÉCNICA DEL PRODUCTO Denominación del modelo 10032787, 10032788 Datos Símbolo Valor Unidad Datos Unidad Potencia calorífica Solo en calefactores eléctricos para habitaciones individuales: tipo de regulación del suministro de calor Potencia calorífica nominal Regulación manual del suministro calorífico con termostato integrado Potencia calorífica mínima Regulación manual del suministro calorífico mín.
  • Seite 30 Denominación del modelo 10032789, 10032790 Datos Símbolo Valor Unidad Datos Unidad Potencia calorífica Solo en calefactores eléctricos para habitaciones individuales: tipo de regulación del suministro de calor Potencia calorífica nominal Regulación manual del suministro calorífico con termostato integrado Potencia calorífica mínima Regulación manual del suministro calorífico mín.
  • Seite 31: Vista General Del Aparato

    VISTA GENERAL DEL APARATO Panel decorativo de cristal Pantalla LCD Panel de control Patas PANTALLA DE VISUALIZACIÓN...
  • Seite 32: Panel De Control

    PANEL DE CONTROL Tecla Standby: Encender/apagar el Ajustes de temperatura Aumentar el valor aparato Confi rmar entrada de Ajustar la hora Disminuir valor datos / Llamar a menú Ajustes de programa MONTAJE Montaje del soporte Ponga el aparato boca abajo. Ponga el aparato sobre un trapo suave o alfombra.
  • Seite 33 Montaje en pared Usted necesita 4 soportes, 6 tornillos para espigas y 6 tornillos más de la caja. Fije dos soportes en la pared. Marque los agujeros (véase imagen abajo) Unidad: mm Agujero de montaje 1000 W Imagen completa Agujero de montaje 2000 W Imagen completa Coloque 2 soportes en el lado inferior del aparato.
  • Seite 34: Puesta En Funcionamiento Y Manejo

    Sujete el aparato en el lateral. Mire la posición de los agujeros en el lado trasero de la carcasa. Coloque el aparato sobre los soportes. PUESTA EN FUNCIONAMIENTO Y MANEJO Encender/apagar Pulse la tecla Standby para abandonar el modo Standby. El indicador LCD (2) muestra la temperatura de ambiente actual y la hora (preajuste 00:00).
  • Seite 35 Modo de calefacción libre Este modo incluye varias funciones de calefacción: Con la función de confort la habitación se calienta a la temperatura deseada. Para activar pulse los botones de dirección hasta que se visualice el símbolo Confort . La temperatura predetermimada es de 35 °C. Pulse para ajustar la tecla Con la función ahorro se mantiene la temperatura deseada.
  • Seite 36 Escala de 24 horas Los cuadrados interiores y exteriores muestran la función confort. Escala de 24 horas: Los cuadrados interiores muestran Cada cuadrado la función de libre de escarcha. corresponde a 30 minutos. Los cuadrados exteriores muestran la función ahorro. La imagen de ejemplo muestra los siguientes ajustes: 0 - 6 horas: función libre de escarcha 6 - 12 horas: función de confort...
  • Seite 37: Limpieza Y Cuidado

    Cierre / seguro para niños Para conmutar la calefacción en el modo Standby con seguro para niños activado, pulse y mantenga la tecla OK durante 5 segundos. En la pantalla aparecerá el símbolo de cerradura. Para desbloquear pulse primero la tecla "OK" durante 5 segundos. Ajustar la hora Para ajustar la hora pulse la tecla TIME y las horas comienzan a parpadear.
  • Seite 38: Indicaciones Sobre La Retirada Del Aparato

    INDICACIONES SOBRE LA RETIRADA DEL APARATO Si en su país existe una disposición legal relativa a la eliminación de aparatos eléctricos y electrónicos, este símbolo estampado en el producto o en el embalaje advierte que no debe eliminarse como residuo doméstico. En lugar de ello, debe depositarse en un punto de recogida de reciclaje de aparatos eléctricos y electrónicos.
  • Seite 39: Fiche Technique

    Cher client, chère cliente, Toutes nos félicitations pour l’acquisition de ce nouvel appareil. Lisez attentivement les indications suivantes et suivez-les pour éviter d'éventuels dommages. Nous ne saurions être tenus pour responsables des dommages dus au non-respect des consignes et à la mauvaise utilisation de l’appareil.
  • Seite 40: Consignes De Sécurité

    CONSIGNES DE SÉCURITÉ • Avant toute utilisation, vérifi ez la tension sur l'étiquette de l'appareil et connectez l'appareil uniquement à des prises qui correspondent à sa tension. • Si le cordon d'alimentation est endommagé, faites-le remplacer par un spécialiste qualifi é. •...
  • Seite 41: Fiche De Données Produit

    FICHE DE DONNÉES PRODUIT Référence du modèle 10032787, 10032788 Donnée Symbole Valeur Unité Donnée Unité Puissance thermique Uniquement pour les radiateurs électriques à accumulation : type de contrôle de l'apport de chaleur Puissance thermique Contrôle manuel de l'apport de chaleur avec n.c.
  • Seite 42 Référence du modèle 10032789, 10032790 Donnée Symbole Valeur Unité Donnée Unité Puissance thermique Uniquement pour les radiateurs électriques à accumulation : type de contrôle de l'apport de chaleur Puissance thermique Contrôle manuel de l'apport de chaleur avec n.c. nominale un thermostat intégré Puissance thermique Contrôle manuel de l'apport de chaleur avec n.c.
  • Seite 43: Aperçu De L'appareil

    APERÇU DE L'APPAREIL Verre décoratif Affichage LCD Panneau de commande Pieds de support AFFICHAGE...
  • Seite 44: Panneau De Commande

    PANNEAU DE COMMANDE Touche de veille : Réglage de la Allumer / éteindre Augmenter la valeur température l'appareil Confi rmer la saisie / Réglage de l'heure Diminuer la valeur Accéder au menu Paramètres du pro- gramme MONTAGE Montage en position debout Retournez l'appareil.
  • Seite 45: Montage Mural

    Montage mural Vous avez besoin de 4 fi xations, 6 vis à cheville et 6 autres vis de la boîte. Fixez 2 fi xations au mur. Marquez les points de vissage requis (voir illustration ci- dessous) Unité : mm Forage 1000 W Aperçu général Forage 2000 W Aperçu général...
  • Seite 46: Mise En Marche Et Utilisation

    Placez l'appareil sur le côté. Repérez la position des trous à l'arrière du boîtier. Posez l'appareil sur les fi xations. MISE EN MARCHE ET UTILISATION Allumer / éteindre Appuyez sur la touche de veille pour quitter le mode de veille. L'écran LCD (2) affi che la température ambiante actuelle et l'heure (par défaut 00:00).
  • Seite 47 Mode de chauffage libre Ce mode comporte plusieurs fonctions de chauffage : Avec la fonction Confort, la pièce est chauffée à la température souhaitée. Pour l’activer, appuyez sur les touches fléchées jusqu'à ce que le symbole Confort s'affiche. La température par défaut est de 35 °C. Pour régler, appuyez sur la touche La fonction Économique permet de maintenir la température préréglée.
  • Seite 48 Échelle de 24 heures Les cases intérieures et extérieures indiquent la fonction Confort. Échelle de 24 heures : Les cases intérieures indiquent la chaque case fonction Hors gel. correspond à 30 minutes. Les cases exétrieures indiquent la fonction économique. L'illustration d'exemple indique les réglages suivants : 0 - 6 heures: fonction Hors gel 6 - 12 heures : fonction Confort 12 - 18 heures: fonction Économique...
  • Seite 49: Nettoyage Et Entretien

    Verrouillage / Sécurité enfant Pour faire passer le radiateur en mode veille avec la sécurité enfant activée, maintenez enfoncée la touche OK pendant 5 secondes. Le symbole de verrouillage apparaît à l'écran. Pour déverrouiller, maintenez d'abord la touche " OK " enfoncée pendant 5 secondes.
  • Seite 50: Informations Sur Le Recyclage

    INFORMATIONS SUR LE RECYCLAGE Si l'élimination des appareils électriques et électroniques est réglementée dans votre pays, ce symbole sur le produit ou sur l'emballage indique qu'il ne doit pas être mis au rebut avec les ordures ménagères. Vous devez l'acheminer vers un point de collecte pour le recyclage des appareils électriques et électroniques.
  • Seite 51 Gentile cliente, la ringraziamo per l'acquisto del dispositivo. La preghiamo di leggere attentamente le seguenti istruzioni per l’uso e di seguirle per evitare possibili danni. Non ci assumiamo alcuna responsabilità per danni scaturiti da una mancata osservanza delle avvertenze di sicurezza e da un uso improprio del dispositivo.
  • Seite 52: Avvertenze Di Sicurezza

    AVVERTENZE DI SICUREZZA • Prima dell'utilizzo, verifi care la tensione sulla targhetta del dispositivo e collegarlo solo a prese con tensione equivalente. • Se il cavo d'alimentazione è danneggiato, farlo sostituire da un tecnico qualifi cato. • Non posizionare la stufa direttamente sotto a una presa elettrica. •...
  • Seite 53: Scheda Informativa Del Prodotto

    SCHEDA INFORMATIVA DEL PRODOTTO Contrassegno/i del 10032787, 10032788 modello Indicazione Simbolo Valore Unità Indicazione Unità Potenza termica Solo per dispositivi elettrici di accumulo di calore per locali singoli: tipo di regolazione dell'afflusso di calore Potenza termica nominale Controllo manuale dell'apporto termico con n.d.
  • Seite 54 Contrassegno/i del 10032789, 10032790 modello Indicazione Simbolo Valore Unità Indicazione Unità Potenza termica Solo per dispositivi elettrici di accumulo di calore per locali singoli: tipo di regolazione dell'afflusso di calore Potenza termica nominale Controllo manuale dell'apporto termico con n.d. termostato integrato Potenza termica minima Controllo manuale dell'apporto termico con n.d.
  • Seite 55: Descrizione Del Dispositivo

    DESCRIZIONE DEL DISPOSITIVO Pannello decorativo in vetro Schermo LCD Pannello di controllo Piedi d'appoggio INDICAZIONI DEL DISPLAY...
  • Seite 56: Pannello Di Controllo

    PANNELLO DI CONTROLLO Tasto standby: Impostazioni della Accendere/spegnere il Aumentare il valore temperatura dispositivo Confermare Impostare l'ora l'inserimento/aprire il Diminuire il valore menu Impostazioni di pro- grammazione MONTAGGIO Montaggio a posizionamento libero Rovesciare il dispositivo. Poggiarlo su un panno morbido o su un tappeto. Montare il piede d'appoggio nel punto corretto sul lato inferiore del dispositivo (v.
  • Seite 57 Montaggio a parete Sono necessari 4 supporti, 6 viti per tasselli e 6 viti aggiuntive dalla confezione. Fissare 2 supporti alla parete. Segnare i punti in cui realizzare i fori (v. immagine sotto). Unità: mm Fori per il montaggio 1000 W Schema completo Fori per il montaggio 2000 W Schema completo...
  • Seite 58: Messa In Funzione E Utilizzo

    Tenere il dispositivo lateralmente. Fare attenzione alla posizione dei fori sul lato posteriore dell'alloggiamento. Poggiare il dispositivo sui supporti. MESSA IN FUNZIONE E UTILIZZO Accensione/spegnimento Premere Standby per abbandonare la modalità standby. Lo schermo LCD (2) mostra la temperatura attuale della stanza e l'ora (impostazione predefi nita 00:00). Premendo di nuovo questo tasto, il dispositivo torna in standby.
  • Seite 59 Modalità riscaldante libera Questa modalità include diverse funzioni riscaldanti: Con la funzione Comfort, la stanza viene scaldata a una temperatura a scelta. Per attivarla, premere i tasti freccia fino a quando sullo schermo compare il Comfort simbolo . La temperatura predefinita è di 35 °C. Premere per impostare.
  • Seite 60: Impostare La Temperatura

    Scala da 24 ore Quadrati all'interno e all'esterno indicano la funzione Comfort. Scala da 24 ore: ogni quadrato Quadrati all'interno indicano la corrisponde a funzione Antigelo. 30 minuti. Quadrati all'esterno indicano la funzione Risparmio. L'immagine esemplifi cativa mostra le seguenti impostazioni: Ore 0-6: funzione Antigelo Ore 6-12: funzione Comfort Ore 12-18: funzione Risparmio...
  • Seite 61: Pulizia E Manutenzione

    Blocco/sicura per i bambini Per far passare il dispositivo in standby con sicura per i bambini attivata, tenere premuto OK per 5 secondi. Sullo schermo compare il simbolo del lucchetto. Per sbloccare il dispositivo, tenere premuto OK per 5 secondi. Impostare l'ora Per impostare l'ora, premere TIME.
  • Seite 62: Avviso Di Smaltimento

    AVVISO DI SMALTIMENTO Se nel vostro Paese sono vigenti regolamenti legislativi relativi allo smaltimento di dispositivi elettrici ed elettronici, questo simbolo sul prodotto o sull'imballaggio indica che non è consentito smaltire questo prodotto nei rifiuti casalinghi. Il dispositivo deve invece essere portato in un centro di raccolta per il riciclaggio di dispositivi elettrici ed elettronici.

Inhaltsverzeichnis