SPALDING 61259 Bedienungsanleitung
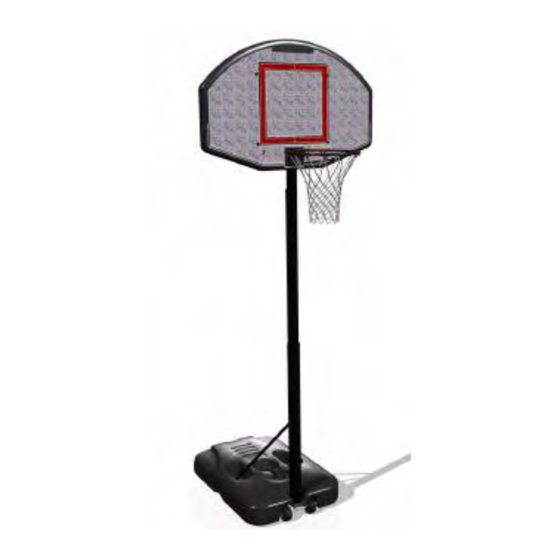
Portable system
Inhaltsverzeichnis
Quicklinks
REQUIRED
MATERIALS:
• 2 People
• Wood Board
(scrap)
• Sawhorse or
Support Table
• Garden Hose or Sand
© COPYRIGHT 2005 by SPALDING
Portable System
Owners Manual
Customer Service Center
• N53 W24700 South Corporate Circle • Sussex, WI 53089 • U.S.A.
WARNING!
READ AND UNDERSTAND
OPERATOR'S MANUAL
BEFORE USING THIS UNIT.
FAILURE TO FOLLOW
OPERATING INSTRUCTIONS
COULD RESULT IN INJURY
OR DAMAGE TO
PROPERTY.
Toll-Free Customer Service Number for U.S: 1-800-558-5234,
For Canada: 1-800-284-8339,
For Europe: 00 800 555 85234 (Sweden: 009 555 85234),
For Australia: 1-800-632 7921
Internet Address: http://www.huffysports.com
1
Write Model Number
From Box Here:
12/05
ID# M611704
Inhaltsverzeichnis

Verwandte Anleitungen für SPALDING 61259


Inhaltszusammenfassung für SPALDING 61259
- Seite 1 COULD RESULT IN INJURY OR DAMAGE TO PROPERTY. Toll-Free Customer Service Number for U.S: 1-800-558-5234, For Canada: 1-800-284-8339, For Europe: 00 800 555 85234 (Sweden: 009 555 85234), For Australia: 1-800-632 7921 Internet Address: http://www.huffysports.com 12/05 ID# M611704 © COPYRIGHT 2005 by SPALDING...
-
Seite 2: Height Adjustment
WARNING HEIGHT ADJUSTMENT Read and understand warnings listed Rest unit on support table. Remove adjustment knobs (A) below before using this product. and carriage bolts (B) to extend or retract backboard and rim. Height adjustment from 7-1/2' to 10'. Failure to follow these warnings may result in serious injury and/or property WARNING damage. -
Seite 3: Safety Instructions
SAFETY INSTRUCTIONS FAILURE TO FOLLOW THESE SAFETY INSTRUCTIONS MAY RESULT IN SERIOUS INJURY OR PROPERTY DAMAGE AND WILL VOID WARRANTY. Owner must ensure that all players know and follow these rules for safe operation of the system. To ensure safety, do not attempt to assemble this system without following the instructions carefully. Proper and complete assembly, use, and supervision are essential for proper operation and to reduce the risk of accident or injury. -
Seite 4: Front View
Get to know the basic parts of your basketball system... FRONT VIEW BACK VIEW BACKBOARD ELEVATOR ASSEMBLY TOP POLE MIDDLE POLE STRUTS BOTTOM POLE BASE WHEEL CARRIAGE ASSEMBLY ID# M611704 12/05... - Seite 5 PARTS LIST Item Qty. Part No. Description 206646 Tank (Black) 200628 Wheel Axle 226401 Wheel 908200 Top Pole Section 908246 Middle Pole Section with Label 900644 Bottom Pole Section Assembly 203041 Nut, Hex Flange, 3/8-16 201342 Wheel Bracket 201651 Spacer, Wheel Axle 902319 Rim Bracket 206219...
- Seite 6 P P A A R R T T S S I I D D E E N N T T I I F F I I E E R R - Actual Size #13 (1) 21 (3) #16 (3) 7 (1) 203041 NUT, HEX FLANGE, 3/8-16 #19 (2)
- Seite 7 Correctly identify each pole section. Poles have an identification sticker that will be used as a reference point in the next step. Reference Stickers MIDDLE BOTTOM 12/05 ID# M611704...
- Seite 8 IMPORTANT! ONCE POLE SECTIONS ARE POUNDED TOGETHER- THEY CANNOT BE TAKEN APART Align poles using alignment marks. First, pound top CAUTION! and middle poles together by bouncing them on a scrap piece of wood on the ground as shown in FIG A. until THE IDENTIFICATION STICKER IS LOCATED 5"...
- Seite 9 Install wheel axle (2) through wheel bracket (9) and install wheels (3) onto wheel axle (2) with spacers (10) as shown. IMPORTANT!: THE SPACER (10) WILL FIT LOOSELY UNTIL SECURED INTO THE CAVITY OF THE BASE. Attach wheel carriage assembly to base (1) with bolt (13), washer (21), and nut (7) as shown.
- Seite 10 Attach pole assembly to tank assembly as shown. Secure pole assembly to tank and wheel bracket by turning the pole assembly clockwise as shown. Tighten pole completely and further rotate pole until struts are aligned correctly as shown in FIG B. WARNING! TWO PEOPLE REQUIRED FOR THIS PROCEDURE.
- Seite 11 Rotate struts down and bend struts outward to line up with holes on base as shown. Secure free ends of tank struts to tank with carriage bolt (16), washer (21), and knob (17) as shown. Repeat for other side. WARNING! KNOBS MUST BE TIGHTENED COMPLETELY AND CHECKED PERIODICALLY...
- Seite 12 Pole bracket (20) will need to be lightly pressed into backboard ribbing. Be sure to press completely into place. Attach rim (18) to backboard (22) and pole bracket (20) with knob (17), reinforcement bracket (11), and carriage bolt (16) as shown. Tighten knob completely.
- Seite 13 Attach board assembly to pole with carriage bolts (19) and knobs (17) as shown. Install pole cap (12) as shown. Install net (8) 12/05 ID# M611704...
- Seite 14 Attach height and moving Place assembled unit in desired location. Fill label (15) to front of pole as tank with water (26 gallons/98.4 liters) or shown. Regulation rim height sand (approx. 360 lb./163 kg) and snap tank is 10 feet (3.05 m). cap (14) in place.
- Seite 15 AVERTISSEMENT! WARNUNG! ¡ADVERTENCIA! Aucun outil requis requis Assemblage Assemblage LISEZ LE MODE D'EMPLOI facile facile facile Economie de AVANT D'UTILISER CE SYSTÈME temps de 40 % temps de 40 % SOUS PEINE D'ENCOURIR DES BLESSURES OU DES DÉGÂTS MATÉRIELS. Keine Werkzeuge erforderlich erforderlich Einfacher...
- Seite 16 ID# M611704 12/05...
-
Seite 17: Réglage De La Hauteur
RÉGLAGE DE LA HAUTEUR HÖHENEINSTELLUNG Posez l'ensemble sur une table. Retirez les boutons de réglage (A) et les Die Vorrichtung auf einem Stütztisch ablegen. Die Einstellknopfregler (A) boulons ordinaires (B) pour allonger ou rétracter le panneau et le cerceau. und Schlossschrauben (B) entfernen, um Korbwand und Korbrand zu Réglage de la hauteur entre 2,3 et 3,05 m. -
Seite 18: Hinweis Für Die Personen, Die Den Zusammenbau Durchführen
Des questions ou des Fragen oder fehlende Teile? pièces manquantes ? STOP! STOP! HALT! HALT! Gehen Sie NICHT zum Laden zurück! NE RETOURNEZ PAS au magasin ! Rufen Sie die GEBÜHRENFREIE Telefonnummer Appelez le numéro du service clientèle (in den USA und Kanada) auf der Vorderseite an! (NUMÉRO GRATUIT) qui figure en première page! ¿Tiene preguntas o le faltan piezas? Des questions ou des... -
Seite 19: Consignes De Sécurité
CONSIGNES DE SÉCURITÉ ! SUIVEZ CES CONSIGNES DE SÉCURITÉ SOUS PEINE DE PROVOQUER DES BLESSURES GRAVES, DES DÉGÂTS MATÉRIELS ET L'ANNULATION DE LA GARANTIE. Le propriétaire doit s'assurer que tous les joueurs connaissent et suivent ces règles d'utilisation sûre du système. Par mesure de sécurité, n'essayez pas de monter ce système sans suivre scrupuleusement les instructions. - Seite 20 LISTE DES PIÈCES TEILELISTE LISTA DE PIEZAS Légende Quantité No de réf. Description Anz. Teilenummer Beschreibung 206646 Réservoir (noir) 206646 Tank (Schwarz) 200628 Axe des roues 200628 Radachse 226401 Roue 226401 908200 Section de poteau supérieure 908200 Oberes Stangenteil 908246 Section de poteau centrale avec étiquette 908246 Mittleres Stangenteil mit Aufkleber...
- Seite 21 DESCRIPTIF DES PIÈCES - La visserie est grandeur nature. TEILESCHLÜSSEL - Die Befestigungsteile sind in ihrer tatsächlichen Größe abgebildet. IDENTIFICADOR DE PIEZAS: El herraje aparece en su tamaño real #13 (1) #7 (1) #21 (3) #10 (2) 203041 NUT, HEX FLANGE, 3/8-16 #16 (3) #19 (2) IDENTIFICATION DES PIÈCES - Pas à...
- Seite 22 Identifiez correctement chaque section de poteau. Les poteaux ont une étiquette d'identification qui servira de point de repère à l'étape suivante. Jedes Stangenteil richtig identifizieren. Die Stangenteile sind mit Aufklebern markiert, die als Orientierungshilfe für den nächsten Schritt dienen. Identifique correctamente cada sección del poste. Los postes tienen una calcomanía de identificación que se usará...
- Seite 23 IMPORTANT! ATTENTION! UNE FOIS LES SECTIONS DE POTEAU ENTRECHOQUÉES ENSEMBLE, ELLES NE PEUVENT PLUS ÊTRE DÉMONTÉES. WICHTIG! VORSICHT! NACH DEM ZUSAMMENSTAUCHEN DER STANGENTEILE KÖNNEN DIESE NICHT MEHR VONEINANDER GETRENNT WERDEN. ¡PRECAUCIÓN! ¡IMPORTANTE! L'ÉTIQUETTE D'IDENTIFICATION SE SITUE À 12,7 (5") UNA VEZ QUE LAS SECCIONES DEL POSTE SE HAN EMBRAGADO ENTRE SÍ, YA NO SE PODRÁN SEPARAR CM DE L'EXTRÉMITÉ...
- Seite 24 Enfilez l'axe des roues (2) dans le chariot à roues (9) et installez les roues IMPORTANT! ¡IMPORTANTE! (3) sur l'axe (2) avec les entretoises (10), comme illustré. WICHTIG! Die Radachse (2) wie gezeigt durch das Radlaufwerk (9) schieben und die Räder (3) mit Abstandsstücken (10) auf die Radachse (2) schieben. Instale el eje de la rueda (2) a través del carro portamuela (9) e instale las ruedas (3) en el eje de la rueda (2) con los espaciadores (10) como se muestra.
- Seite 25 Attachez l'ensemble du poteau au réservoir, comme illustré. Fixez le poteau sur le réservoir et le support des roues en tournant le poteau dans le sens des aiguilles d'une montre, comme illustré. Serrez le poteau à fond et tournez-le encore jusqu'à ce que les contrefiches soient correctement alignées, comme illustré...
- Seite 26 Tournez les contrefiches vers le bas et courbez les contrefiches vers l'extérieur pour les aligner sur les trous du socle, comme illustré. Fixez les extrémités libres des contrefiches sur le réservoir avec le boulon ordinaire (16), la rondelle (21) et le bouton (17), comme illustré. Faites de même de l'autre côté. Die Streben wie gezeigt nach unten klappen und nach außen biegen, damit sie mit den Löchern am Sockel zur Deckung kommen.
- Seite 27 Vous devrez appuyer légèrement sur le support de poteau pour l'insérer dans les crans du panneau. Veillez à l'enfoncer complètement en position. Attachez le cerceau au panneau et le support de poteau (20) avec le bouton (17), le support de renforcement (11) et le boulon ordinaire (16), comme illustré.
- Seite 28 Attachez le panneau au poteau avec les boulons ordinaires (19) et les boutons (17), comme illustré. Placez le capuchon (12) sur le poteau, comme illustré. Den Korbwandaufbau wie gezeigt mit den Schlossschrauben (19) und Drehknöpfen (17) an der Stange befestigen. Die Stangenkappe (12) wie gezeigt aufsetzen.
- Seite 29 Placez l'ensemble à l'emplacement de votre choix. Remplissez le ATTENTION! réservoir d'eau (98,4 litres / 26 gallons) ou de sable (163 kg / 360 VORSICHT! lb.) et fermez avec le bouchon (14). ¡PRECAUCIÓN! Die zusammengebaute Vorrichtung an den gewünschten AJOUTEZ 7,6 LITRES (2 GALLONS) Aufstellungsort bringen.
- Seite 30 Collez l'étiquette de hauteur et de déplacement (15) sur l'avant du poteau, comme illustré. La hauteur réglementaire du cerceau est de 3,05 m (10 pieds). Den Höhen- und Transportaufkleber (15) wie gezeigt an der Vorderseite der Stange anbringen. Der Korbrand wird den offiziellen Regeln gemäß...