Assembly and installation instructions Monterings- och installationsanvisning Montage- und Installationsanleitung Instructions de montage et d’installation...
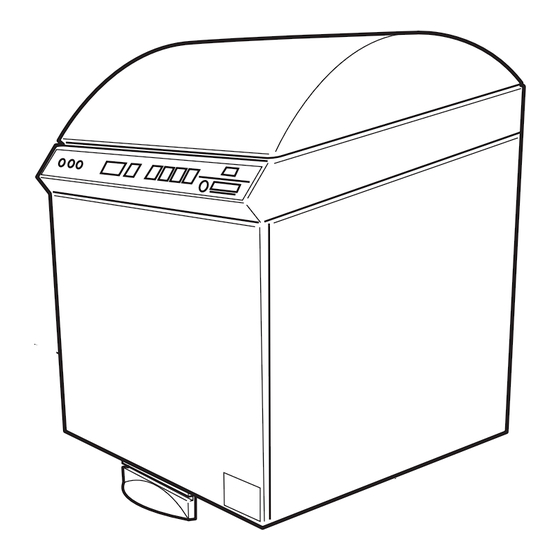
Assembly and installation instructions Foreword These installation instructions apply to all Getinge 600 models. Getinge 600 is one of Getinge’s range of flusher-disinfectors. It is available as a free-standing or wall-mounted model. The models are supplied with different levels of equipment:...
Installation Safety regulations The flusher-disinfector must be assembled and installed by • qualified personnel. • in accordance with current local regulations and rules. Warning Two people are need to assemble and install this equipment, to avoid the risk of back injury. When the work is complete, check that •...
Installation Unpacking The wash disinfector is supplied bolted securely to a freight pallet. Remove the packaging. The following items shall accompany the delivery of the wash disinfector: 1 wall bracket, plus 2 or 4 legs 1 folder containing documentation N.B. Before installation, check that the wash disinfector has not suffered any transport damage.
Installation Installing the wash disinfector 1. Hot water connection 2. Cold water connection 3. Drain connection, P, wall ø110 mm 4. Drain connection, S, floor ø110 mm 5. Electrical connection 6. External steam supply 1/2" V660 Free-standing Carry out the installation in the following sequence: 1.
Installation Wall-mounted Carry out the installation in the following sequence: 1. Drill the hole pattern for the wall bracket, see the Figure below Wall fixture Wall bracket 179,5 179,5 235,5 235,5 V669 2. Fit the wall bracket, using the wall fixture if the wall is too weak.
Installation Connection of water Shut-off valve 1. Flush through the water pipes that are to be connected to the machine, to prevent blockage of the filter and valves. 2. Connect the wash disinfector to the cold and hot water. The water connections must satisfy the following requirements: Filter 607/608...
Installation Electrical connection Isolating device • Install the machine in accordance with installation category CAT II. • Connect the machine to a separate isolator switch approved to local standards. The isolator must be mounted on the wall close to the machine. •...
Installation Functional check • Check that the wash disinfector is connected to the right voltage, as indicated ion the rating plate. • Open the water valves and switch on the operating switch. The message ”Ready for use. Select program” shall appear in the display window. •...
Installation Technical data 607/608 Weight 85 kg Width 590 m m Depth 640 m m Height 995 m m Environmental requirements: Maximum air humidity 80% at 31 °C Room temperature 5-40 °C Water consumption (without cooling*) Economy programme 9 l/process Normal programme 21 l/process Intensive programme...
Installation Technical data 617/618 Weight 70 kg Width 590 m m Depth 640 m m Height 995(1025) m m Environmental requirements: Maximum air humidity 80% at 31 °C Room temperature 5-40 °C Water consumption (without cooling*) Economy programme 17 l/process Normal programme 25 l/process Intensive programme...
Installation Component list 617/618 -A11 -TE1 -TE2 -F1, F2 -A21 -XPE -LS2 -LS3 -S11 -LS4 -LS6 -LS5 V1063 Control system, processor card Limit switch, anti-trapping protection -A11 Control panel Limit switch, door closed Electrical element in steam generator Limit switch, door open Fuse for auxiliary transformer Safety switch, door closed Fuse 24V on processor card...
Installation Accessories Description Article number Isolating device 4987618-00 Cable gland to isolating device 5004224-00 Water trap P, ∅ 110 5005880-00 Water trap S, ∅ 110 5005879-00 Water trap P, ∅ 90 5001531-00 Water trap S, ∅ 90 5001532-00 Service instructions 5013249-00 5013246-00 Edition 040210...
Seite 18
Spoldesinfektor Monterings- och installationsanvisning Förord Denna installationsanvisning gäller för samtliga modeller av Getinge 600. Getinge 600 ingår i Getinges serie av spoldesinfektorer och finns som fristå- ende och vägghängd modell. Modellerna levereras med olika utrustning: Vändare Process- eller spraydosering Avkalkningsdosering...
Installation Säkerhetsföreskrifter Se till att montering och installation utförs • kvalificerad personal. • i enlighet med gällande lokala föreskrifter och regler. Varning! Montering och installation av denna utrustning kräver två personer, för att undvika ryggskador. När arbetet är avslutat, kontrollera att •...
Installation Uppackning Spoldesinfektorn levereras fastbultad till en fraktpall. Tag bort emballaget. Följande saker skall medfölja i leveransen av spoldesinfektorn: Om maskinen är beställd för att monteras vägghängd: 1 st. väggfäste och alt. 2 st. ben Om maskinen är beställd för att monteras fristående: 4 st.
Installation Att installera spoldesinfektorn 1. Varmvattenanslutning 2. Kallvattenanslutning 3. Avloppsanslutning, P, vägg ø110 mm 4. Avloppsanslutning, S, golv ø110 mm 5. Elanslutning 6. Extern ånga 1/2" V660 Fristående Gör installationen i följande ordning: 1. Ställ maskinen på plats med hjälp av en palltruck. 2.
Installation Vägghängd Gör installationen i följande ordning: 1. Borra hålbilden för väggfästet, se bilden nedan: Väggfixtur Väggfäste 179,5 179,5 235,5 V669 2. Montera väggfästet, använd väggfixtur om väggen är för svag. 3. Lossa transportskydden och haka på maskinen på väggfästet. För att undvika personskador ska maskinen lyftas av en person på...
Installation Anslutning av vatten Avstängningsventil 1. Spola rent de vattenrör som skall anslutas till maskinen för att på så sätt undvika att filter och ventiler sätts igen. 2. Anslut spoldesinfektorn till kall- och varmvatten. Vattenanslutningarna måste uppfylla följande krav: 607/608 Filter Kallvatten Anslutning...
Installation Anslutning av el Säkerhetsbrytare Utför den elektriska installationen enligt följande: • Installera maskinen enligt installationskategori CAT II. • Anslut maskinen till en separat frånskiljning- sanordning godkänd enligt lokala normer, placerad på väggen i nära anslutning till maskinen. • Anslut till skyddsjord och till den spänning som finns angiven på...
Installation Funktionskontroll • Kontrollera att spoldesinfektorn är ansluten till rätt spänning enligt typskylten. • Öppna vattenventilerna och slå till arbetsbrytaren. I teckenfönstret ska Driftklar Välj program visas, efter ca. 20 sek. • Om maskinen är försedd med dosering av rengöringsmedel: Tryck på s och kontrollera att lampan i knappen tänds.
Seite 26
Installation Tekniska data 607/608 Vikt 85 kg Bredd 590 mm Djup 640 mm Höjd 995 mm Omgivningskrav: Luftfuktighet maximalt 80% vid 31 °C Rumstemperatur 5-40 °C Vattenförbrukning (utan avkylning*) Ekonomiprogram 17 l/process Normalprogram 25 l/process Intensivprogram 35 l/process * Avkylning ca 3 l. Kallvatten Anslutning 15 (1/2") mm...
Seite 28
Installation Tekniska data 617/618 Vikt 70 kg Bredd 590 mm Djup 640 mm Höjd 995(1025) mm Omgivningskrav: Luftfuktighet maximalt 80% vid 31 °C Rumstemperatur 5-40 °C Vattenförbrukning (utan avkylning*) Ekonomiprogram 17 l/process Normalprogram 25 l/process Intensivprogram 35 l/process * Avkylning ca 3 l. Kallvatten Anslutning 20 (3/4”) mm...
Installation Sicherheitsvorschriften Montage und Installation des Spül- u. Desinfektionsgeräts darf nur erfolgen durch: • Fachpersonal • in Übereinstimmung mit den örtlichen Bestimmungen und Vorschriften. Warnung! Wegen des Gewichts der Ausrüstung sind zwei Personen für Mon- tage und Installation erforderlich. Nach Beendigung der Arbeit ist zu kontrollie- ren, •...
Installation Auspacken Das Spül- u. Desinfektionsgerät ist bei Lieferung an einer Frachtpalette montiert. Verpackung entfernen. Folgende Artikel sind im Lieferumfang des Spül- und Desinfektionsgeräts enthalten: 1 Wandhalterung mit 2 bzw. 4 Füßen 1 Mappe mit Gerätedokumentation. HINWEIS: Vor der Installation ist das Gerät auf Transportschäden hin zu untersuchen.
Installation Modell für Wandmontage Die Installation ist in folgender Reihenfolge durchzuführen: 1. Löcher für die Wandhalterung bohren (siehe Abb. unten) Wandfixtur Wandhalterung 179,5 179,5 235,5 235,5 V669 2. Wandhalterung anbringen. Bei zu schwacher Wand die Wandfixtur benutzen! 3. Transportschutz entfernen und Gerät an die Wandhalterung hängen.
Installation Wasseranschluss Abschaltventil 1. Vor dem Anschluss sind die Rohrleitungen durchzuspülen, damit Filter und Ventile nicht von eventuellen Schmutzpartikeln blockiert werden. 2. Gerät an Kalt- und Warmwasser anschließen. Der Wasseranschluss muss folgende Anforderungen erfüllen: 607/608 Filter Kaltwasser Anschluss 15 (1/2") m m Druck 70-800 kPa Durchflussmenge...
Installation Elektr. Anschlüsse Trennvorrichtung • Das Gerät ist gemäß Installationskategorie CAT II zu installieren. • Das Gerät ist an einen separaten Trennschalter gemäß örtlichem Standard anzuschließen. Der Trennschalter ist an der Wand in Gerätenähe anzubringen. • Speisespannung und Erdung müssen dem Typenschild des Geräts entsprechen.
Installation Funktionskontrolle • Kontrollieren Sie, dass das Gerät für die korrekte Spannung gemäß Leistungsschild angeschlossen ist. • Wasserventile öffnen und Betriebsschalter einschalten. Es erscheint die Meldung ”Betriebsbereit. Programm wählen” auf dem Display. • Falls das Gerät über Dosierung des Reinigungsmittels verfügt: Drücken Sies und kontrollieren Sie, dass die Leuchtdiode der Taste aufleuchtet.
Installation Technische Daten 607/608 Gewicht 85 kg Breite 590 m m Tiefe 640 m m Höhe 995 m m Anforderungen an die Umgebung: Maximal zulässige Luftfeuchtigkeit 80%bei 31 °C Raumtemperatur 5-40 °C Wasserverbrauch (ohne Kühlung*) Sparprogramm 9 l/Prozess Normalprogramm 21 l/Prozess Intensivprogramm 24 l/Prozess * Kühlung ca.
Seite 40
Installation Komponentenliste 607/608 -A11 -TE1 -F1, F2 -LS1 -A21 -XPE -LS2 -LS3 -S11 -LS4 -LS6 -LS5 V654 Steuersystem, Prozessorkarte Hauptschalter -A21 Steuersystem, Expansionskarte (Option) Grenzschalter, trennt Entleerungs -A11 Bedientafel schutz Elektroheizung im Dampferzeuger Grenzschalter, Entleerungsschutz Sicherung für Hilfstransformator Grenzschalter, Tür geschlossen Sicherung 24V an Prozessorkarte Grenzschalter, Tür geöffnet Sicherung Steuerspannung Phase 1...
Seite 41
Installation Technische Daten 617/618 Gewicht 70 kg Breite 590 m m Tiefe 640 m m Höhe 995(1025) m m Anforderungen an die Umgebung: Maximal zulässige Luftfeuchtigkeit 80% bei 31 °C Raumtemperatur 5-40 °C Wasserverbrauch (ohne Kühlung*) Sparprogramm 17 l/Prozess Normalprogramm 25 l/Prozess Intensivprogramm 35 l/Prozess...
Seite 42
Installation Komponentenliste 617/618 -A11 -TE1 -TE2 -F1, F2 -A21 -XPE -LS2 -LS3 -S11 -LS4 -LS6 -LS5 V1063 Steuersystem, Prozessorkarte Grenzschalter, Entleerungsschutz -A11 Bedientafel Grenzschalter, Tür geschlossen Elektroheizung im Dampferzeuger Grenzschalter, Tür geöffnet Sicherung für Hilfstransformator Sicherheitsschalter, Tür geschlossen Sicherung 24V an Prozessorkarte Grenzschalter, Drehkopf abwärts (Option) Sicherung Steuerspannung Phase 1 Grenzschalter, Drehkopf aufwärts (Option)
Instructions de montage et d’installation Avant-propos Ces instructions d’installation s’appliquent à tous les modèles Getinge 600. L’appareil de rinçage et de désinfection Getinge 600 est disponible en modèle autonome ou mural. Les appareils sont livrés avec différents équipements : Agitateur Distributeur de produit de pulvérisation...
Installation Consignes de sécurité L’appareil de rinçage et de désinfection doit être monté et installé • par un personnel qualifié. • conformément aux réglementations locales en vigueur. Avertissement Deux personnes sont nécessaires pour monter et installer cet appareil afin d’éviter les risques de blessures au dos. Vérifications après installation •...
Installation Déballage L’appareil de rinçage et de désinfection est livré ferme- ment arrimé sur une palette. Enlevez l’emballage. A la livraison, l’appareil de rinçage et de désinfection est accompagné des éléments suivants : 1 support mural, ainsi que 2 ou 4 pieds 1 dossier de documentation.
Installation Installation de l’appareil de rinçage et de désinfection 1. Raccord d’eau chaude 2. Raccord d’eau froide 3. Raccord de vidange, P, mur ø110 mm 4. Raccord de vidange, S, sol ø110 mm 5. Connexion électrique 6. Alimentation en vapeur extérieure 1/2" V660 Modèle autonome Procédez à...
Installation Modèle mural Procédez à l’installation de la manière suivante : 1. Percez le trou prévu pour le support mural (voir figure ci-dessous). Fixation Support murale mural 179,5 179,5 235,5 235,5 V669 2. Installez le support mural ; utilisez la fixation si le mur est trop faible.
Installation Raccordement à l’eau Vanne d’arrêt 1. Purgez les tuyaux d’eau à raccorder à l’appareil pour éviter toute obstruction du filtre et des vannes. 2. Raccordez l’appareil de rinçage et de désinfection à l’eau chaude et froide. Les raccords d’eau doivent être conformes aux spécifications suivantes : 607/608 Filtre...
Installation Connexions électriques Dispositif • Installez l’appareil conformément à la catégorie d’isolation d’installation CAT II. • Branchez l’appareil à un isolateur séparé agréé par les normes locales. L’isolateur doit être installé sur le mur à proximité de l’appareil. • Branchez l’appareil à la terre et à la tension d’alimentation mentionnée sur la plaque signalétique.
Installation Contrôle de fonction • Vérifiez que l’appareil de rinçage et de désinfection est raccordé sur la tension appropriée, comme indiqué sur la plaque signalétique. • Ouvrez les vannes d’eau et actionnez l’interrupteur principal. Le message ”Ready for use. Select program” doit apparaître dans la fenêtre d’affichage.
Seite 52
Installation Données techniques 607/608 Poids 85 kg Largeur 590 m m Profondeur 640 m m Hauteur 995 m m Exigences environnementales : Humidité de l’air max. 80 % à 31 °C Température ambiante 5-40° C Consommation d’eau (sans refroidissement*) Programme économique 9 l/procédé...
Installation Liste des composants 607/608 -A11 -TE1 -F1, F2 -LS1 -A21 -XPE -LS2 -LS3 -S11 -LS4 -LS6 -LS5 V654 Système de commande, carte processeur Interrupteur de fin de course, désactive la protection -A21 Système de commande, carte d’extension (option) contre pincement -A11 Panneau de commande Interrupteur de fin de course, protection contre...
Seite 54
Installation Données techniques 617/618 Poids 70 kg Largeur 590 m m Profondeur 640 m m Hauteur 995(1025) m m Exigences environnementales : Humidité de l’air max. 80 % à 31 °C Température ambiante 5-40 °C Consommation d’eau (sans refroidissement*) Programme économique 17 l/procédé...
Seite 55
Installation Liste des composants 617/618 -A11 -TE1 -TE2 -F1, F2 -A21 -XPE -LS2 -LS3 -S11 -LS4 -LS6 -LS5 V1063 Système de commande, carte processeur Interrupteur de fin de course, protection contre -A11 Panneau de commande pincement Composant électrique du générateur de vapeur Interrupteur de fin de course, porte fermée Fusible pour transformateur auxiliaire Interrupteur de fin de course, porte ouverte...
Seite 58
This product is manufactured by: GETINGE DISINFECTION AB, Ljungadalsgatan 11, Box 1505, 351 15 Växjö, Sweden Subject to alterations - Rätt till ändringar förbehålles - Recht auf technische Änderungen vorbehalten - Sujet à modification...