Herunterladen Inhalt Inhalt Diese Seite drucken
Inhaltsverzeichnis

Werbung

Verfügbare Sprachen
  • DE

Verfügbare Sprachen

  • DEUTSCH, seite 1
seca 674

Werbung

Inhaltsverzeichnis
loading

Inhaltszusammenfassung für Seca 674

  • Seite 1 674...
  • Seite 2 Bedienungsanleitung und Garantieerklärung ..3 Instruction manual and guarantee ....43 Mode d’emploi et garantie ......81 Manuale di istruzioni e garanzia .
  • Seite 3: Inhaltsverzeichnis

    Deutsch Deutsch INHALTSVERZEICHNIS 1. Mit Brief und Siegel ... . 5 5. Bevor es richtig los geht… ..18 2. Gerätebeschreibung ... 6 5.1 Lieferumfang .
  • Seite 4 6.2 Weitere Funktionen (Menü) . . . 30 7. Hygienische Aufbereitung ..36 Im Menü navigieren ..30 7.1 Reinigung ....36 Gespeicherte Werte 7.2 Desinfektion .
  • Seite 5: Mit Brief Und Siegel

    Deutsch 1. MIT BRIEF UND SIEGEL Mit seca Produkten kaufen Sie nicht nur über ein Jahr- hundert ausgereifte Technik, sondern auch eine behördlich, gesetzlich und durch Institute bestätigte Qualität. seca Produkte entsprechen den europäischen Richtlinien, Normen und den nationalen Gesetzen. Mit seca kaufen Sie Zukunft.
  • Seite 6: Gerätebeschreibung

    674 haben Sie ein hochpräzises und gleichzeitig robustes Gerät erworben. Seit über 170 Jahren stellt seca seine Erfahrung in den Dienst der Gesundheit und setzt als Marktführer in vie- len Ländern der Welt mit innovativen Entwicklungen für das Wiegen und Messen immer neue Maßstäbe.
  • Seite 7: Anwenderqualifikation

    2.4 Anwenderqualifikation Montage Geräte, die teilmontiert ausgeliefert werden, dürfen ausschließlich von ausreichend qualifizierten Personen z. B. Fachhändler, Krankenhaustechniker oder dem seca service montiert werden. Bedienung Das Gerät darf ausschließlich von medizinischem Fachpersonal bedient werden. 3. SICHERHEITSINFORMATIONEN 3.1 Sicherheitshinweise in dieser Gebrauchsanweisung GEFAHR! Kennzeichnet eine außergewöhnlich große...
  • Seite 8: Grundlegende Sicherheitshinweise

    • Lassen Sie Wartungen regelmäßig durchfüh- ren, wie im entsprechenden Abschnitt in die- sem Dokument beschrieben. • Technische Veränderungen am Gerät sind unzulässig. Das Gerät enthält keine durch den Anwender zu wartenden Teile. Lassen Sie Wartungen und Reparaturen ausschließlich von einem autorisierten seca-Servicepartner 8 •...
  • Seite 9: Vermeidung Eines Elektrischen

    Deutsch durchführen. Den Servicepartner in Ihrer Nähe finden Sie unter www.seca.com oder senden Sie eine Email an service@seca.com. • Verwenden Sie ausschließlich Original seca Zubehör und Ersatzteile. Andernfalls gewährt seca keinerlei Garantie. VORSICHT! Patientengefährdung, Fehlfunktion • Halten Sie mit elektrischen medizinischen Geräten z.
  • Seite 10: Vermeidung Von Infektionen

    Vermeidung von WARNUNG! Infektionen Infektionsgefahr • Bereiten Sie das Gerät in regelmäßigen Abständen hygienisch auf, wie im ent- sprechenden Abschnitt in diesem Dokument beschrieben. • Stellen Sie sicher, dass der Patient keine ansteckenden Krankheiten hat. • Stellen Sie sicher, dass der Patient keine offenen Wunden oder infektiösen Hautver- änderungen hat, die mit dem Gerät in Berüh- rung kommen können.
  • Seite 11: Vermeidung Von Geräteschäden

    Deutsch Vermeidung von ACHTUNG! Geräteschäden Geräteschaden • Achten Sie darauf, dass niemals Flüssigkeiten in das Innere des Gerätes gelangen. Diese können die Elektronik zerstören. • Schalten Sie das Gerät aus, bevor Sie das Netzgerät aus der Steckdose ziehen. • Wenn Sie das Gerät längere Zeit nicht benut- zen, ziehen Sie das Netzgerät aus der Steckdose.
  • Seite 12: Umgang Mit Messergebnissen

    Datenverlust • Bevor Sie mit diesem Gerät erfasste Mess- werte speichern und weiterverwenden (z. B. in der PC-Software oder in seca analytics einem Krankenhausinformationssystem), stellen Sie sicher, dass die Messwerte plausi- bel sind. • Wenn Messwerte an die PC-Software oder an ein Krankenhausinfor- seca analytics mationssystem übertragen worden sind,...
  • Seite 13: Umgang Mit Verpackungsmaterial

    Deutsch Umgang mit WARNUNG! Verpackungsmaterial Erstickungsgefahr Verpackungsmaterial aus Kunststofffolie (Tüten) stellen eine Erstickungsgefahr dar. – Bewahren Sie Verpackungsmaterial für Kinder unzugänglich auf. – Sollte das Orginalverpackungsmaterial nicht mehr vorhanden sein, verwenden Sie ausschließlich Kunststofftüten mit Sicherheitslöchern, um die Erstickungsgefahr zu reduzieren. HINWEIS: Bewahren Sie das Originalverpackungsmaterial zur späteren Verwendung auf (z.
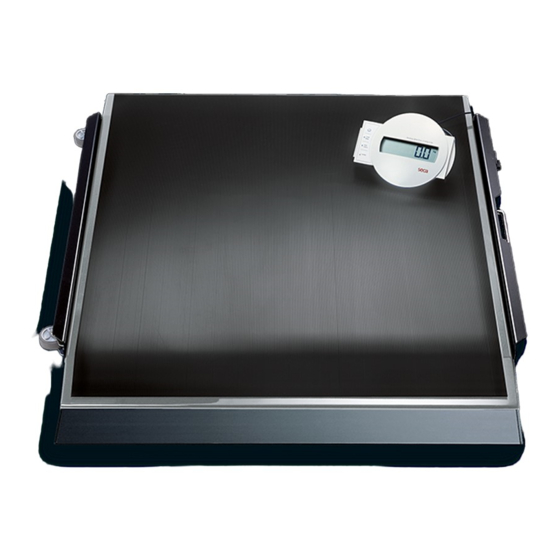
  • Seite 14: Übersicht

    4. ÜBERSICHT 4.1 Bedienelemente Bedienelement Funktion • Zentrales Bedien- und Anzeigeelement Anzeige- • Kann auf einer Arbeitsfläche aufgestellt oder an einer gehäuse Wand montiert werden Ein- und Ausschalten der Waage Pfeil-Taste • Während des Wiegens: - Kurzes Drücken: Hold-Funktion aktivieren - Langes Drücken: Tare-Funktion aktivieren tare •...
  • Seite 15: Symbole Im Display

    Deutsch Bedienelement Funktion Enter-Taste • Im Menü: enter - Ausgewählten Menüpunkt bestätigen - Eingestellten Wert speichern Anzeigeelement für Messergebnisse und zur Display Konfiguration des Gerätes Transportrollen Auf diesen Rollen kann die Waage verfahren werden Auffahrrampen Erleichtern das Befahren der Waage mit einem Rollstuhl Libelle Zeigt an, ob das Gerät waagerecht steht Netzgeräte-...
  • Seite 16: Kennzeichen Auf Der Verpackung

    • max xxx mA: maximale Stromaufnahme x-y V max. xxx mA • : Polung des Gerätesteckers beachten use compatible seca adapter only • : Gerät mit Gleichstrom betreiben Gerät nicht im Hausmüll entsorgen 4.4 Kennzeichen auf der Verpackung Vor Nässe schützen...
  • Seite 17: Menü-Struktur

    Deutsch 4.5 Menü-Struktur Im Menü des Gerätes stehen Ihnen weitere Funktionen zur Verfügung. So können Sie das Gerät optimal für Ihre Nutzungsbedingungen konfigurieren (Details ab Seite 30). Reset Sto 1 (Weight) Sto 2 (Weight) Net Weight Sto 3 (Weight) ‹ on Autohold ‹...
  • Seite 18: Bevor Es Richtig Los Geht

    5. BEVOR ES RICHTIG LOS GEHT… 5.1 Lieferumfang USA/Japan Euro Australia Komponente Stck. Wägeplattform Wandhalter Winkeladapter Schrauben, 3 x 35 mm Dübel Ø 5 mm Anzeigegehäuse mit Verbindungskabel Netzgerät mit Adaptern (modellabhängig: Netzgerät mit Euro-Stecker) Gebrauchsanweisung, o. Abb. 18 •...
  • Seite 19: Anzeigegehäuse Betriebsbereit Machen (Tischanzeige)

    Deutsch 5.2 Anzeigegehäuse betriebsbereit machen (Tischanzeige) ACHTUNG! Geräteschaden Der Winkeladapter kann nach der Montage nicht wieder gelöst werden. – Vergewissern Sie sich vor der Montage, dass das Anzeigegehäuse auf einem Tisch aufgestellt werden soll. Winkeladapter montieren Click! => => 1. Setzen Sie den Winkeladapter in der gezeigten Position am Anzeigegehäuse an.
  • Seite 20: Anzeigegehäuse Betriebsbereit Machen (Wandanzeige)

    2. Schließen Sie das Verbindungskabel an der Elektronikbox der Waage an. ACHTUNG! Fehlmessung durch Kraftnebenschluss Wenn das Kabel des Anzeigegehäuses die Wägeplattform berührt, kann das Gewicht des Patienten nicht korrekt gemessen werden. – Verlegen Sie das Kabel so, dass es die Wägeplattform nicht berühren kann.
  • Seite 21: Verbindungskabel An Plattform Anschließen

    Deutsch Verbindungskabel an Plattform anschließen HINWEIS: Beachten Sie bei der Wahl des Aufstellungs- ortes die Länge des Verbindungskabels, sodass Sie das Anzeigegehäuse auf den Wandhalter setzen können. 1. Legen Sie die Waage auf eine feste und ebene Fläche. 2. Schließen Sie das Verbindungskabel an der Elektronikbox der Waage an.
  • Seite 22: Wandhalter Montieren

    Wandhalter montieren Wählen Sie eine ausreichend tragfähige Wand als Montagestelle. Für die Montage an massivem Mauer- werk sind Standarddübel im Lieferumfang enthalten. Für andere Wandbeschaffenheiten empfehlen wir, ent- sprechende Spezialdübel zu verwenden. HINWEIS: Beachten Sie bei der Wahl der Montagehöhe die Länge des Verbindungskabels.
  • Seite 23: Stromversorgung Herstellen

    Spannung liefern, als auf ihnen angegeben ist. Die Waage kann überhitzen, in Brand geraten, schmelzen oder kurzgeschlossen werden. – Verwenden Sie ausschließlich Original- Steckernetzgeräte von seca mit 9-Volt- Ausgangsspannung oder geregelter 12-Volt- Ausgangsspannung. 1. Stecken Sie, falls notwendig, den für Ihre Stromver- sorgung notwendigen Netzstecker auf das Netzgerät.
  • Seite 24: Waage Aufstellen

    5.5 Waage aufstellen Waage ausrichten ACHTUNG! Fehlmessung durch Kraftnebenschluss Wenn die Waage mit dem Gehäuse aufliegt, z. B. auf einem Handtuch, wird das Gewicht nicht korrekt gemessen. – Stellen Sie die Waage so auf, dass sie ausschließlich mit den Fußschrauben Bodenkontakt hat.
  • Seite 25: Bedienung

    Waage zu stellen. – Platzieren Sie Krankentransportmittel mittig auf der Waage. Waage einschalten Drücken Sie die Start-Taste. Alle Elemente des Displays werden kurz angezeigt, dann erscheint SECA im Display. Die Waage ist betriebsbereit, wenn 0.00 im Display erscheint. Bedienung • 25...
  • Seite 26: Patient Wiegen

    Patient wiegen Das in diesem Abschnitt beschriebene Vorgehen eignet sich für Patienten, die während des gesamten Wiege- vorganges selbstständig und ruhig stehen können. 1. Stellen Sie sicher, dass die Waage unbelastet ist. 2. Bitten Sie den Patienten, die Waage zu betreten. 3.
  • Seite 27: Messergebnis Dauerhaft

    Deutsch 5. Wiegen Sie den Patienten so, wie es seine Mobilität ermöglicht. – Bitten Sie den Patienten, die Waage zu betreten und ruhig stehen zu bleiben. – Helfen Sie dem Patienten, die Waage zu be- treten und auf dem bereitgestellten Rollstuhl Platz zu nehmen.
  • Seite 28: Body-Mass-Index Ermitteln Und Bewerten (Bmi)

    Body-Mass-Index Der Body-Mass-Index setzt Körpergröße und Körper- ermitteln und bewerten gewicht zueinander in Beziehung und ermöglicht dadurch genauere Angaben als z. B. das Idealgewicht (BMI) nach Broca. Es wird ein Toleranzbereich angegeben, der als gesundheitlich optimal gilt. Das Gerät verfügt über drei Speicherplätze für Körper- größen.
  • Seite 29: Waage Ausschalten

    Deutsch 9. Lesen Sie den BMI ab und vergleichen ihn mit den weiter unten angegebenen Kategorien. 10. Um die BMI-Funktion zu deaktivieren, drücken Sie kurz die Enter-Taste (Enter). enter Bewertung Der Patient wiegt zu wenig. Es könnte eine Tendenz zur Magersucht vorliegen.
  • Seite 30: Weitere Funktionen (Menü)

    6.2 Weitere Funktionen (Menü) Im Menü der Waage stehen Ihnen weitere Funktionen zur Verfügung. So können Sie die Waage optimal für Ihre Nutzungsbedinungen konfigurieren. Reset Sto 1 (Weight) Sto 2 (Weight) Net Weight Sto 3 (Weight) • on Autohold • off •...
  • Seite 31: Gespeicherte Werte Automatisch Löschen (Aclr)

    Deutsch 5. Um die Einstellung zu ändern oder ein anderes Un- termenü aufzurufen, drücken Sie eine der Pfeil- tare Tasten so oft, bis die gewünschte Einstellung (hier: Stufe „2“) angezeigt wird. 6. Bestätigen Sie die Einstellung mit der Enter-Taste enter (Enter).
  • Seite 32 Das Gerät verfügt über drei Speicherplätze für Gewichtswerte. Sie können unterschiedliche Gewichts- werte speichern und je nach Ausgangssituation einzeln aufrufen, so dass sie automatisch vom Messergebnis abgezogen werden. Sto 1 (Weight) Sto 2 (Weight) Sto 3 (Weight) Net Weight 1. Wählen Sie im Menü den Punkt „Pt“ aus. Die Meldung „Pt“...
  • Seite 33: Autohold-Funktion Aktivieren (Ahold)

    Deutsch HINWEIS: Wenn Sie die Waage ausschalten, wird die Funktion abgeschaltet. Die Meldung „Pt“ wird beim Wiedereinschalten nicht mehr im Display angezeigt. Autohold-Funktion Wenn Sie die Autohold-Funktion aktivieren, wird das Messergebnis bei jedem Wiegevorgang nach Entlas- aktivieren (Ahold) tung der Waage weiterhin angezeigt. Es ist dann nicht mehr notwendig, bei jedem einzelnen Wiegevorgang die Hold-Funktion manuell zu aktivieren.
  • Seite 34: Dämpfung Einstellen (Fil)

    6. Bestätigen Sie Ihre Auswahl. Das Menü wird automatisch verlassen. 7. Wenn Sie auch für die zweite Funktion die Signal- töne aktivieren wollen, wiederholen Sie den Vor- gang. Dämpfung einstellen Mit der Dämpfung (Fil = Filter) können Sie Störungen bei der Gewichtsermittlung (z. B. durch Patientenbewe- (Fil) gungen) reduzieren.
  • Seite 35: Werkseinstellungen Wiederherstellen (Reset)

    Deutsch Die aktuelle Einstellung wird angezeigt. Wählen Sie die Einheit aus, in der Sie sich das Gewicht anzeigen lassen wollen: – 9r: Kilogamm (kg) – LbS: Pounds (lbs) – StS: Stones (sts) 3. Bestätigen Sie die Auswahl. Das Menü wird automatisch verlassen. Werkseinstellungen Für folgende Funktionen können Sie die Werksein- wiederherstellen...
  • Seite 36: Hygienische Aufbereitung

    7. HYGIENISCHE AUFBEREITUNG WARNUNG! Elektrischer Schlag Das Gerät ist nicht stromlos, wenn die Ein-/Aus- Taste gedrückt wird und das Display erlischt. Bei der Anwendung von Flüssigkeiten am Gerät kann es zu einem elektrischen Schlag kommen. – Um das Gerät stromlos zu machen, ziehen Sie vor jeder hygienischen Aufbereitung den Netzstecker.
  • Seite 37: Desinfektion

    Deutsch 7.2 Desinfektion ACHTUNG! Geräteschaden Sichtscheiben auf Skalen und Displays bestehen aus Acrylglas. Acrylglasscheiben können reißen oder eintrüben, wenn ungeeignete Desinfektionsmittel verwendet werden. – Verwenden Sie ausschließlich Desinfektionsmittel, die für empfindliche Oberflächen geeignet sind. Geeignete Desinfektionsmittel sind im Fachhandel erhältlich. 1.
  • Seite 38: Funktionskontrolle

    Abweichungen feststellen, die nicht mit Hilfe des Kapitels „Was tun, wenn…?” ab Seite 38 behoben werden können, dürfen Sie das Gerät nicht verwenden. – Lassen Sie das Gerät durch den seca service oder einen autorisierten Servicepartner reparieren. – Beachten Sie den Abschnitt „Wartung” auf Seite 39.
  • Seite 39: Wartung

    Nullpunkt konnte nicht ermittelt werden. erscheint? - Waage neu starten. 10.WARTUNG Ihre seca Waage verlässt das Werk mit einer Genauig- keit besser ±0,15 %. Damit diese Genauigkeit auch weiterhin erreicht wird, muss das Produkt sorgfältig aufgestellt und regelmäßig gewartet werden. Wir emp- fehlen je nach Häufigkeit der Benutzung eine Wartung...
  • Seite 40: Technische Daten

    11.TECHNISCHE DATEN Technische Daten seca 674 Abmessungen Waage • Tiefe 965 mm • Breite 890 mm • Höhe 65 mm Abmessungen Wiegeplattform • Tiefe 965 mm • Breite 800 mm • Höhe 65 mm Eigengewicht ca. 26 kg Temperaturbereich • Betrieb +10 °C bis +40 °C / +50 °F bis 104 °F...
  • Seite 41: Optionales Zubehör

    Deutsch Technische Daten seca 674 Genauigkeit • 0 bis 67 kg ±100 g • 67 kg bis Maximallast ±0,15 % • 0 bis 147,7 lbs ±0,2 lbs • 147,7 lbs bis Maximallast ±0,15 % • 0 bis 10,55 sts ±0,2 lbs •...
  • Seite 42: Gewährleistung

    Bewahren Sie daher alle Verpackungsteile auf. Es besteht keine Gewährleistung, wenn das Gerät durch Personen geöffnet wird, die hierzu nicht aus- drücklich von seca autorisiert worden sind. Kunden im Ausland bitten wir, sich im Gewährleis- tungsfall direkt an den Verkäufer des jeweiligen Landes zu wenden.
  • Seite 43 English English TABLE OF CONTENTS 1. Signed and sealed ... . 45 5. Before you really get started… . 57 2. Device description ... 46 5.1 Scope of delivery .
  • Seite 44 7. Hygiene treatment ... 75 11. Technical data ... . . 78 7.1 Cleaning ....75 12.
  • Seite 45: Signed And Sealed

    English 1. SIGNED AND SEALED With seca products, you are not only purchasing tech- nology which has been perfected over 100 years, but also quality with official legal certification confirmed by institutions. seca products comply with European directives, standards and national laws. When you buy seca, you buy the future.
  • Seite 46: Device Description

    674 have purchased a highly precise and simultaneously robust device. For over 170 years, seca has used its experience in the service of healthcare and, as a market leader, it has always set standards in many countries of the world with innovative developments in weighing and measuring.
  • Seite 47: User Qualification

    English 2.4 User qualification Assembly Devices that are shipped partially assembled may only be mounted by sufficiently qualified persons such as specialist dealers, hospital technicians or seca service technicians. Operation The device may only be operated by healthcare professionals. 3. SAFETY INFORMATION 3.1 Safety information in these instructions for use...
  • Seite 48: Basic Safety Instructions

    The device does not contain any parts for servicing by the user. Only have serv- icing and repairs performed by an authorized seca service partner. You can find service partners in your area at www.seca.com or by sending an e-mail to service@seca.com. 48 •...
  • Seite 49: Preventing Electric Shock

    English • Only use original seca accessories and spare parts, otherwise seca will not grant any war- ranty. CAUTION! Patient hazard, malfunction • Keep other electrical medical devices, e.g. high-frequency surgical devices, a minimum distance of approx. 1 meter away to prevent incorrect measurements or wireless transmis- sion interference.
  • Seite 50: Avoiding Injuries

    Avoiding injuries WARNING! Risk of falling • Ensure that the device is positioned firmly and level. • Route the mains cable so that there is no risk of tripping for the patient or user. • The device is not designed as a standing aid. Assist people with limited motor skills when they are getting up, e.g.
  • Seite 51: Handling Measuring Results

    English • Ensure that there is no heat source in the immediate vicinity. Do not expose to direct sunlight. The excessive temperature could damage the electronics. • Avoid rapid temperature fluctuations. When the device is transported so that a tempera- ture difference of more than 20 °C occurs, it must stay turned off for at least 2 hours before it can be turned on again.
  • Seite 52: Handling Packaging Material

    • Before you save measurements aquired with this device and process them for further use (e.g. in the PC software or in a seca analytics hospital information system), make sure the measurement values are plausible. • If measurement values are transmitted to the...
  • Seite 53: Overview

    English 4. OVERVIEW 4.1 Controls Control Function • Central control and display element Display housing • Can be set up on a work surface or fitted to a wall Switch scale on and off Arrow key • During weighing: - press briefly: activate hold function - press and hold: activate tare function tare •...
  • Seite 54: Symbols In The Display

    Control Function Arrow key • During weighing: - press briefly: activate BMI function - press and hold: call up menu • In the menu: - select submenu, select menu item - reduce value Enter key • In the menu: enter - confirm selected menu item - save set value Display element for measuring results and to configure...
  • Seite 55: Marking On The Packaging

    V max. xxx mA • : note polarity of device plug use compatible seca adapter only • : operate device with direct current Do not dispose of device with household waste 4.4 Marking on the packaging Protect from moisture Arrows indicate top of product.
  • Seite 56: Menu Structure

    4.5 Menu structure Other functions are available to you in the menu for the device. This enables you to configure the device per- fectly to suit your needs (details from page 69). Reset Sto 1 (Weight) Sto 2 (Weight) Net Weight Sto 3 (Weight) ‹...
  • Seite 57: Before You Really Get Started

    English 5. BEFORE YOU REALLY GET STARTED… 5.1 Scope of delivery USA/Japan Euro Australia Component Pcs. Weighing platform Wall bracket Angle adapter Screws, 3 x 35 mm Wall plugs Ø 5 mm Display housing with connecting cable Power pack with adapters (depending on model: power pack with Euro connector) Instructions for use, not shown Before you really get started…...
  • Seite 58: Making Display Housing Ready For Use (Desktop Display)

    5.2 Making display housing ready for use (desktop display) ATTENTION! Damage to device The angle adapter cannot be removed once fitted. – Ensure before fitting that the display housing is to be set up on a desktop. Fitting the angle adapter Click! =>...
  • Seite 59: For Use (Wall-Mounted Display)

    English ATTENTION! Incorrect measurement due to force shunts If the cable of the display housing contacts the weighing platform, the patient's weight cannot be measured correctly. – Route the cable in such a way that it cannot contact the weighing platform. 3.
  • Seite 60: Connecting The Connecting Cable To The Platform

    Connecting the connecting cable to the platform NOTE When selecting the setup location, take account of the length of the connecting cable so that you can place the display housing on the wall bracket. 1. Place the scales on a firm, level surface. 2.
  • Seite 61: Installing The Wall Bracket

    English Installing the wall Choose an adequately strong load-bearing wall to bracket mount the device. Standard wall plugs are supplied for installation on solid brick walls. We recommend use of appropriate special wall plugs for other types of wall. NOTE When selecting mounting height, take account of the length of the connecting cable.
  • Seite 62: Establishing Power Supply

    The scale may overheat, catch fire, melt or short-circuit. – Use only original seca plug-in power packs with a 9 V or controlled 12 V output voltage. 1. If required, insert the power supply connector nec- essary for your power supply into the power pack.
  • Seite 63: Setting Up The Scale

    English 5.5 Setting up the scale Aligning the scale ATTENTION! Incorrect measurement due to force shunts If the scale and housing is in contact with some- thing, e.g. a towel, weight will not be measured correctly. – Set the scale up so that only its foot screws are in contact with the floor.
  • Seite 64: Operation

    – Position the means of patient transport centrally on the scales. Switching on the scale Press the Start key. All the elements of the display are shown briefly, then SECA appears in the display. The scale is operational when 0.00 appears in the display. 64 •...
  • Seite 65: Weighing A Patient

    English Weighing a patient The procedure described in this section is suitable for patients who can stand on their own and stand still throughout the entire weighing operation. 1. Ensure that the scale has no load. 2. Ask the patient to step onto the scale. 3.
  • Seite 66: Keeping The Measurement Result In The Display (Hold)

    7. To deactivate the TARE function, press the (hold/ tare) arrow key until the message "NET" is no long- tare er displayed or turn off the scale. NOTE The maximum weight which can be displayed is reduced by the weight of the objects already placed on the scale.
  • Seite 67: Determining And Rating Body Mass Index (Bmi)

    English Determining and rating Body mass index relates height and weight to one body mass index (BMI) another and consequently allows more accurate infor- mation than ideal Broca weight, for example. A toler- ance range is quoted which is considered ideal for health.
  • Seite 68: Switching Off The Scale

    10. To deactivate the BMI function, briefly press the Enter key (Enter). enter Rating Patient is underweight. There could be anorexic tendencies. Below 18.5 Weight should be increased to improve well-being and perfor- mance. If in doubt, seek the advice of a consultant. Between 18.5 and The patient's weight is normal.
  • Seite 69: Other Functions (Menu)

    English 6.2 Other functions (menu) Other functions are available to you in the menu for the scale. This enables you to configure the scale to suit your conditions of use perfectly. Reset Sto 1 (Weight) Sto 2 (Weight) Net Weight Sto 3 (Weight) •...
  • Seite 70: Deleting Saved Values Automatically (Aclr)

    5. To amend the setting or call up a different sub- menu, press one of the arrow keys until the desired tare setting (in this case: level "2") is displayed. 6. Confirm the setting with Enter (Enter). enter You exit the menu automatically. 7.
  • Seite 71: Activating The Auto Hold (Ahold) Function

    English 1. Select the item "Pt" from the menu. The message "Pt" appears. 2. Confirm your selection. The last memory used is displayed. 3. You can adopt the memory displayed or select a different memory. 4. Confirm your selection. Arrows flash in the display. The additional weight saved to the selected memory is displayed.
  • Seite 72: Activating Beeps (Beep)

    1. Select the item "Ahold" from the menu. 2. Confirm your selection. The current setting is displayed. 3. Select the desired setting: – on – off 4. Confirm your selection. You exit the menu automatically. Activating beeps You can set whether a beep is heard every time a key is pressed and when a stable weight value is achieved.
  • Seite 73: Switching Unit Of Weight (Unit)

    English 3. Select a filtering level. – 0: no filtering – 1: moderate filtering – 2: high filtering 4. Confirm your selection. You exit the menu automatically. Switching unit of weight On non-calibrated scales, you can select the unit (Unit) in which you want weight to be displayed.
  • Seite 74: Restoring Factory Settings (Reset)

    Restoring factory You can restore the factory settings for the functions below. settings (RESET) Function Factory setting Auto hold (Ahold") Model-dependent Beep (Press) Beep (Hold) Filtering (Fil) Autoclear (Aclear) Model-dependent Pre-tare (Pt) 0 kg Height for Body Mass Index 170 cm (BMI) Unit of weight 1.
  • Seite 75: Hygiene Treatment

    English 7. HYGIENE TREATMENT WARNING! Electric shock The device is not de-energized when the on/off key is pressed and the display goes out. Use of fluids on the device may cause electric shock. – Before each hygiene treatment, remove the mains cable to de-energize the device.
  • Seite 76: Sterilizing

    "Troubleshooting" from page 77, you may not use the device. – Have the device repaired by seca service or by an authorized service partner. – Please see the section entitled "Servicing" on page 78.
  • Seite 77: Troubleshooting

    English 9. TROUBLESHOOTING Problem Cause / Solution No weight displayed The scale has no power supply. with a load on the scale. - Check whether the scale is switched on. A load was already on the scale before it was 0.00 does not appear switched on.
  • Seite 78: Servicing

    10.SERVICING On leaving the factory, your seca scale has an accu- racy of ±0.15 % or better. To preserve this level of accuracy, the product must be set up with care and serviced regularly. Depending on how frequently the scale is used, we recommended servicing at intervals of 3 to 5 years.
  • Seite 79: Optional Accessories

    English Technical data seca 674 Height of digits 25 mm Power supply Power pack Power consumption approx. 20 mA Medical device in accordance with Class I with measuring function Directive 93/42/EEC EN 60601-1: • insulated device, protection class II • electrical medical device, type B...
  • Seite 80: Disposal

    The warranty shall become null and void where the device is opened by persons not expressly authorised to do so by seca. We ask customers based abroad to contact their local sales agent direct in the case of warranty claims.
  • Seite 81 Français Français TABLE DES MATIÈRES 1. Toutes les garanties de qualité . 83 5. Avant de commencer… ..97 2. Description de l'appareil ..84 5.1 Éléments livrés ... . 97 5.2 Montage de l'unité...
  • Seite 82 6.2 Autres fonctions (menu) ..109 7. Traitement hygiénique ..116 Navigation dans le menu . . . 109 7.1 Nettoyage ....116 Suppression automatique 7.2 Désinfection .
  • Seite 83: Toutes Les Garanties De Qualité

    également une qualité certifiée conforme aux normes et aux lois, ainsi que par les instituts. Les produits seca satisfont aux exigences des directives et normes européennes ainsi qu'à celles des lois nationales. En achetant les produits seca, vous achetez des produits d'avenir.
  • Seite 84: Description De L'appareil

    , vous avez fait l'acquisition d'un appareil à la seca 674 fois robuste et de grande précision. Depuis plus de 170 ans, seca met son expérience au service de la santé et fait figure de leader dans de nom- breux pays grâce à de constantes innovations en matière de pesage et de mesure.
  • Seite 85: Qualification De L'utilisateur

    Montage Les appareils livrés partiellement montés doivent être montés exclusivement par des personnes suffisam- ment qualifiés, par ex. les revendeurs, les techniciens hospitaliers ou le S.A.V. seca. Utilisation L'appareil peut être utilisé exclusivement par un personnel qualifié médical. 3. INFORMATIONS RELATIVES À LA SÉCURITÉ...
  • Seite 86: Consignes De Sécurité De Base

    • Il est interdit de procéder à des modifications techniques sur l'appareil. L'appareil ne contient aucune pièce nécessitant un entre- tien par l'utilisateur. Les entretiens et répara- tions doivent être exclusivement confiés à des partenaires S.A.V. seca autorisés. Pour 86 •...
  • Seite 87: Éviter Les Décharges Électriques

    S.A.V. le plus proche, rendez-vous sur www.seca.com ou envoyez un e-mail à service@seca.com. • Utilisez exclusivement des accessoires et pièces de rechange seca d'origine. Sinon, seca n'offre aucune garantie. PRUDENCE ! Mise en danger du patient, dysfonctionnement • Avec les autres appareils médicaux élec- triques, comme par ex.
  • Seite 88: Éviter Les Infections

    Éviter les infections AVERTISSEMENT ! Risque d'infection • Traitez l'appareil de manière hygiénique à intervalles réguliers comme décrit dans le paragraphe correspondant de ce document. • Assurez-vous que la patient ne présente aucune maladie contagieuse. • Assurez-vous que le patient ne présente pas de plaie ouverte ni de modifications cutanées infectieuses qui pourraient entrer en contact avec l'appareil.
  • Seite 89: Éviter Les Dommages Matériels

    Français Éviter les dommages ATTENTION ! matériels Dommages matériels • Veillez à ce qu'aucun liquide ne pénètre à l'intérieur de l'appareil. Cela pourrait détruire les composants électroniques. • Mettez l'appareil hors tension avant de débrancher le bloc d'alimentation de la prise. •...
  • Seite 90: Utilisation Des Résultats De Mesure

    • Avant d'enregistrer les valeurs mesurées avec cet appareil en vue d'une exploitation ulté- rieure (par ex. avec le logiciel seca analytics ou dans un système d'information hospitalier), assurez-vous qu'elles sont plausibles. • Si des valeurs de mesures du logiciel PC ont été...
  • Seite 91: Utilisation Du Matériel D'emballage

    Français Utilisation du matériel AVERTISSEMENT ! d'emballage Risque d’asphyxie Le matériel d'emballage sous film plastique (sacs) représente un risque d'asphyxie. – Conservez le matériel d'emballage à l'abri des enfants. – Si l'emballage d'origine n'est plus disponible, utilisez exclusivement des sacs plastique munis de perforations de sécurité...
  • Seite 92: Aperçu

    4. APERÇU 4.1 Éléments de commande Élément de N° Fonction commande • Élément de commande et d'affichage central Unité • Peut être posé sur une surface de travail ou fixé au d'affichage Mise sous et hors tension de la balance Touche fléchée •...
  • Seite 93: Symbole Sur L'afficheur

    Français Élément de N° Fonction commande Touche fléchée • Pendant la pesée : - Pression brève : Activer la fonction BMI - Pression longue : appeler le menu • Dans le menu : - Sélectionner un sous-menu, sélectionner un point de menu - Réduire la valeur Touche Enter •...
  • Seite 94: Marquages Sur L'appareil Et Sur La Plaque Signalétique

    • max xxx mA : consommation de courant maximale x-y V • : respecter la polarité du connecteur max. xxx mA d'alimentation use compatible seca adapter only • : l'appareil doit fonctionner uniquement avec du courant continu Ne pas jeter l'appareil avec les ordures ménagères 94 •...
  • Seite 95: Marquages Sur L'emballage

    Français 4.4 Marquages sur l'emballage Protéger de l'humidité Les flèches indiquent le dessus du produit Transporter et stocker en position verticale Fragile Ne pas jeter ni laisser tomber Température min. et max. admissibles pour le transport et le stockage Humidité de l'air min. et max. admissibles pour le transport et le stockage Le matériel d'emballage peut être recyclé...
  • Seite 96: Structure Du Menu

    4.5 Structure du menu D'autres fonctions sont disponibles dans le menu de l'appareil. Vous pouvez ainsi configurer l'appareil de manière optimale en fonction de vos conditions d'utili- sation (détails à partir de la page 109). Reset Sto 1 (Weight) Sto 2 (Weight) Net Weight Sto 3 (Weight) ‹...
  • Seite 97: Avant De Commencer

    Français 5. AVANT DE COMMENCER… 5.1 Éléments livrés USA/Japan Euro Australia N° Composant Pièce Plateforme de pesée Fixation murale Support d'inclinaison Vis, 3 x 35 mm Cheville Ø 5 mm Unité d'affichage avec câble de raccordement Adaptateur secteur avec adaptateurs (en fonction du modèle : adaptateur secteur avec prise euro) Mode d'emploi, non illustré...
  • Seite 98: Montage De L'unité D'affichage (Afficheur De Table)

    5.2 Montage de l'unité d'affichage (afficheur de table) ATTENTION ! Dommages matériels Le support d'inclinaison ne peut plus être détaché après montage. – Assurez-vous avant le montage que l'unité d'affichage sera bien posée sur une table. Montage du support d'inclinaison Click! =>...
  • Seite 99: Montage De L'unité D'affichage (Afficheur Mural)

    Français 2. Raccordez le câble de raccordement au boîtier électronique de la balance. ATTENTION ! Mesure faussée due à une dérivation de force Si le câble de l'unité d'affichage touche la plate- forme de pesée, il n'est pas possible de mesu- rer le poids du patient correctement.
  • Seite 100: Brancher Le Câble De Raccordement Sur La Plateforme

    Brancher le câble de raccordement sur la plateforme REMARQUE : Au moment de choisir l'endroit où vous allez installer la balance, assurez-vous que le câble de raccordement est assez long pour que l'unité d'affichage puisse être fixée au mur. 1. Placez la balance sur une surface dure et plane. 2.
  • Seite 101: Montage De La Fixation Murale

    Français Montage de la fixation Choisissez un mur d'une résistance suffisante comme murale emplacement d'installation. Des chevilles standard sont fournies pour le montage sur des murs massifs. Pour les autres types de mur, nous vous recomman- dons d'utiliser des chevilles spécialement adaptées. REMARQUE : Avant de décider de la hauteur de montage, vérifiez la longueur du câble de raccordement.
  • Seite 102: Établissement De L'alimentation Électrique

    – Utilisez exclusivement des adaptateurs secteur enfichables seca d'origine avec une tension de 9 V ou une tension de sortie régulée de 12  V. 1. Enfichez, si nécessaire, la fiche secteur requise dans l'adaptateur secteur.
  • Seite 103: Installation De La Balance

    Français 5.5 Installation de la balance Réglage horizontal de la ATTENTION ! Mesure faussée due à une dérivation de force balance Si la balance et le châssis reposent par ex. sur une serviette, le poids mesuré est faussé. – Placez la balance sur le sol de manière que seuls les pieds de réglage soient en contact avec le sol.
  • Seite 104: Utilisation

    Mise de la balance sous tension Appuyez sur la touche Start. Tous les éléments de l'afficheur apparaissent brièvement, SECA apparaît ensuite sur l'afficheur. La balance est prête à fonctionner lorsque 0.00 apparaît sur l'afficheur. 104 •...
  • Seite 105: Pesée Du Patient

    Français Pesée du patient La procédure décrite dans la présente section s'applique aux patients capables de rester debout seuls et sans bouger pendant toute la pesée. 1. Assurez-vous qu'aucune charge ne repose sur la balance. 2. Demandez au patient de monter sur la balance. 3.
  • Seite 106: Affichage En Permanence Du Résultat De Mesure (Hold)

    5. Peser le patient selon la procédure correspondant à son degré de mobilité. – Demandez au patient de se placer sur la balance et de rester debout sans bouger. – Aidez le patient à monter sur la balance et à prendre place sur la chaise roulante mise en place.
  • Seite 107: Calcul Et Évaluation De L'indice De Masse Corporelle (Body Mass Index, Bmi)

    Français REMARQUE : Si la fonction Autohold est activée, la valeur du poids reste affichée en permanence jusqu'à ce que la balance se mette ou soit mise à l'arrêt, voir « Activation de la fonction Autohold (Ahold) » à la page 112. Calcul et évaluation de L'indice de masse corporelle (BMI) établit un rapport l'indice de masse entre la taille et le poids, permettant ainsi d'obtenir des...
  • Seite 108: Arrêt De La Balance

    REMARQUE : Notez l'emplacement de mémoire afin de pou- voir appeler à nouveau la taille pour un nouveau calcul de l'indice de masse corporelle. 8. Pesez le patient comme décrit à la section « Pesée du patient ». L'indice de masse corporelle du patient est calculé et affiché...
  • Seite 109: Autres Fonctions (Menu)

    Français 6.2 Autres fonctions (menu) D'autres fonctions sont disponibles dans le menu de la balance. Vous pouvez ainsi configurer la balance de manière optimale en fonction de vos conditions d'utili- sation. Reset Sto 1 (Weight) Sto 2 (Weight) Net Weight Sto 3 (Weight) •...
  • Seite 110: Suppression Automatique Des Valeurs Enregistrées (Aclr)

    5. Pour modifier le réglage ou pour appeler un autre sous-menu, appuyez sur l'une des touches flé- tare chées jusqu'à ce que le réglage souhaité (ici : Niveau « 2 ») s'affiche. 6. Confirmez le réglage avec la touche Enter (Enter). enter Le programme quitte le menu automatiquement. 7.
  • Seite 111: Enregistrement De Manière Permanente Du Poids Supplémentaire (Pt)

    Français Enregistrement de Cette fonction s'applique aux patients invalides devant manière permanente du être pesés par exemple dans une chaise roulante. Vous pouvez enregistrer le poids d'une chaise roulante vide poids supplémentaire indépendamment de la pesée. Pendant la pesée, vous (Pt) pouvez appeler le poids de la chaise roulante vide pour le déduire automatiquement du résultat de mesure.
  • Seite 112: Activation De La Fonction Autohold (Ahold)

    9. Confirmez votre sélection. La fonction est désactivée. Le programme quitte le menu automatiquement. REMARQUE : Si vous mettez la balance hors tension, la fonc- tion est désactivée. Le message « Pt » n'appa- raît plus sur l'afficheur lors de la remise sous tension.
  • Seite 113: Réglage De L'atténuation (Fil)

    Français 4. Confirmez votre sélection. Le réglage actuel s'affiche. 5. Sélectionnez le réglage souhaité : – On – Off 6. Confirmez votre sélection. Le programme quitte le menu automatiquement. 7. Si vous souhaitez activer également les signaux so- nores pour la deuxième fonction, répétez la procé- dure.
  • Seite 114: Changement De L'unité De Poids (Unit)

    Changement de l'unité Avec des balances non étalonnées, vous pouvez sélec- tionner l'unité (Unit) dans laquelle vous souhaitez affi- de poids (Unit) cher le poids. PRUDENCE ! Mise en danger du patient Afin d'éviter de mauvaises interprétations, les résultats de mesure à des fins médicales doi- vent être affichés et utilisés exclusivement en unités SI.
  • Seite 115: Rétablissement Des Réglages D'usine (Reset)

    Français Rétablissement des Vous pouvez rétablir les réglages d'usine pour les réglages d'usine fonctions suivantes : (RESET) Fonction Réglage d'usine en fonction du Autohold (Ahold) modèle Signal sonore (Press) Signal sonore (Hold) Atténuation (Fil) en fonction du Autoclear (Aclear) modèle Pré-Tare (Pt) 0 kg Taille pour l'indice de 170 cm...
  • Seite 116: Traitement Hygiénique

    7. TRAITEMENT HYGIÉNIQUE AVERTISSEMENT ! Décharge électrique L'appareil n'est pas hors tension si le bouton marche/arrêt est enfoncé et si l'écran tactile s'éteint. Si des liquides sont utilisés sur l'appa- reil, il existe un risque de décharge électrique. – Pour mettre l'appareil hors tension, retirez la fiche d'alimentation avant chaque traitement hygiénique.
  • Seite 117: Stérilisation

    Français 1. Respecter les consignes du mode d'emploi du désinfectant. 2. Désinfectez l'appareil régulièrement à l'aide d'un chiffon doux imprégné de désinfectant approprié. 3. Observez les délais suivants : Délai Composant Avant chaque mesure avec Plateforme de pesage un contact cutané direct Après chaque mesure avec Plateforme de pesage un contact cutané...
  • Seite 118: Que Faire Si

    « Que faire si… » à partir de la page 118 ne permettent pas de corriger, n'utili- sez pas l'appareil. – Envoyez l'appareil à réparer au S.A.V. seca ou à un partenaire S.A.V. homologué. – Respectez les indications de la section «...
  • Seite 119: Maintenance

    - Redémarrer la balance. 10.MAINTENANCE À son départ de l'usine, votre balance seca possède une précision supérieure à ±0,15 %. Pour continuer à obtenir cette précision, le produit doit être monté avec soin et entretenu à intervalles réguliers. Selon la fré- quence d'utilisation, nous vous recommandons de pro- céder à...
  • Seite 120: Caractéristiques Techniques

    11.CARACTÉRISTIQUES TECHNIQUES Caractéristiques techniques seca 674 Dimensions balance • Profondeur 965 mm • Largeur 890 mm • Hauteur 65 mm Dimensions plateforme • Profondeur 965 mm • Largeur 800 mm • Hauteur 65 mm Poids à vide env. 26 kg Plage de températures...
  • Seite 121: Accessoires Optionnels

    Français Caractéristiques techniques seca 674 Précision • 0 à 67 kg ±100 g • 67 kg à charge maximale ±0,15 % • 0 à 147,7 lbs ±0,2 lbs • 147,7 lbs à charge maximale ±0,15 % • 0 à 10,55 sts ±0,2 lbs • 10,55 sts à charge maximale ±0,15 %...
  • Seite 122: Garantie

    Aucun cas de garantie ne peut être invoqué si l'appareil est ouvert par des personnes qui ne sont pas explicite- ment autorisées par seca. Nous prions nos clients à l'étranger de bien vouloir contacter directement le revendeur de leur pays respectif pour les cas de garantie.
  • Seite 123 Italiano Italiano INDICE 1. Con lettera e sigillo ..125 5. Prima di cominciare veramente… ....138 2. Descrizione dell'apparecchio . 126 5.1 Dotazione .
  • Seite 124 6.2 Altre funzioni (menu) ..150 7. Trattamento igienico ..156 Navigazione nel menu ..150 7.1 Pulizia ....156 Cancellazione automatica dei 7.2 Disinfezione .
  • Seite 125: Con Lettera E Sigillo

    I prodotti seca sono conformi alle direttive e alle norme europee, nonché alle leggi nazionali. Con seca acquistate il futuro.
  • Seite 126: Descrizione Dell'apparecchio

    674 avete acquistato un apparecchio di grande precisione e al contempo robusto. Da oltre 170 anni, seca mette al servizio della salute la propria esperienza e, in quanto leader di mercato in molti paesi del mondo, stabilisce sempre nuovi stan- dard per la pesatura e la misurazione grazie a prodotti innovativi.
  • Seite 127: Qualifica Dell'utilizzatore

    Montaggio Gli apparecchi forniti parzialmente montati devono essere montati esclusivamente da persone con ade- guata qualifica, ad es. rivenditori specializzati, tecnici ospedalieri o dal servizio di assistenza seca. Utilizzo L'apparecchio deve essere utilizzato esclusivamente da personale medico. 3. INFORMAZIONI SULLA SICUREZZA 3.1 Indicazioni per la sicurezza utilizzate nelle presenti...
  • Seite 128: Indicazioni Basilari Per La Sicurezza

    • Non è ammesso apportare modifiche tecni- che all'apparecchio. L'apparecchio non con- tiene componenti che possono essere riparati dall'utilizzatore. Fare eseguire i lavori di manu- tenzione e di riparazione solo da partner di seca assistenza autorizzati. Il partner di assi- 128 •...
  • Seite 129: Come Evitare Scosse Elettriche

    Italiano stenza più vicino è reperibile su www.seca.com oppure inviando una e-mail all’indirizzo service@seca.com. • Utilizzare esclusivamente accessori e ricambi originali seca. In caso contrario, seca non for- nisce alcuna garanzia. CAUTELA Pericolo di lesioni per il paziente e malfunzionamento •...
  • Seite 130: Come Evitare Infezioni

    Come evitare infezioni AVVERTENZA! Pericolo di infezioni • Sottoporre regolarmente l'apparecchio a trat- tamento igienico, come descritto nel corri- spondente paragrafo di questo documento. • Assicurarsi che il paziente non abbia alcuna malattia infettiva. • Assicurarsi che il paziente non abbia ferite aperte o alterazioni cutanee infettive che potrebbero entrare in contatto con l'apparec- chio.
  • Seite 131: Utilizzo Dei Risultati Delle Misurazioni

    Italiano • Se l'apparecchio non viene utilizzato per un lungo periodo, staccare l'alimentatore dalla presa. Solo così l'apparecchio è privo di cor- rente. • Non fare cadere l'apparecchio. • Non esporre l’apparecchio a forti urti o vibrazioni. • Effettuare a intervalli regolari un controllo del funzionamento, come descritto nel corrispon- dente paragrafo di questo documento.
  • Seite 132: Utilizzo Del Materiale Di Imballaggio

    • Prima di salvare e riutilizzare i valori di misura rilevati con l'apparecchio (ad es. nel software o in un sistema informatico seca analytics ospedaliero), assicurarsi che i valori di misura siano plausibili. • Prima di trasmettere i valori di misura a un sof-...
  • Seite 133: Panoramica

    Italiano 4. PANORAMICA 4.1 Elementi di comando Elemento di Funzione comando • Elemento di comando e di visualizzazione centrale Alloggiamento • Può essere posizionato su un piano di lavoro o display montato alla parete Accensione e spegnimento della bilancia Tasto freccia •...
  • Seite 134: Simbolo Sul Display

    Elemento di Funzione comando Tasto freccia • Durante la pesatura: - breve pressione: attivazione della funzione BMI - lunga pressione: apertura del menu • Nel menu: - selezione del sottomenu, selezione della voce di menu - riduzione del valore Tasto Invio •...
  • Seite 135: Indicazioni Sull'apparecchio E Sulla Targhetta Del Modello

    • max xxx mA: assorbimento di corrente massimo x-y V max. xxx mA • : rispettare la polarità della spina dell'apparecchio use compatible • : utilizzare l'apparecchio solo con corrente seca adapter only continua Non smaltire l'apparecchio nei rifiuti domestici Panoramica • 135...
  • Seite 136: Indicazioni Sull'imballaggio

    4.4 Indicazioni sull'imballaggio Proteggere dall'umidità Frecce indicanti il lato superiore del prodotto Trasportare e conservare in posizione diritta Fragile Non lanciare o fare cadere Temperatura min. e max. ammessa per il trasporto e lo stoccaggio Umidità dell'aria min. e max. ammessa per il trasporto e lo stoccaggio Il materiale di imballaggio può...
  • Seite 137: Struttura Del Menu

    Italiano 4.5 Struttura del menu Nel menu dell’apparecchio sono disponibili altre fun- zioni. Queste consentono di configurare l’apparecchio in modo ottimale per le condizioni di utilizzo (dettagli da pagina 150). Reset Sto 1 (Weight) Sto 2 (Weight) Net Weight Sto 3 (Weight) ‹...
  • Seite 138: Prima Di Cominciare Veramente

    5. PRIMA DI COMINCIARE VERAMENTE… 5.1 Dotazione USA/Japan Euro Australia Componente Piattaforma di pesatura Supporti per parete Adattatore angolare Viti, 3 x 35 mm Tasselli Ø 5 mm Alloggiamento del display con cavo di collegamento Alimentatore con adattatore (in base al modello: alimentatore con spina di tipo C) Istruzioni per l'uso, senza figura 138 •...
  • Seite 139: Predisposizione Al Funzionamento Dell'alloggiamento Del Display (Su Tavolo)

    Italiano 5.2 Predisposizione al funzionamento dell'alloggiamento del display (su tavolo) ATTENZIONE! Danni all'apparecchio Una volta montato, l'adattatore angolare non può più essere rimosso. – Accertarsi prima del montaggio che l'alloggiamento del display debba essere installato su un tavolo. Montaggio dell'adattatore angolare Click! =>...
  • Seite 140: Predisposizione Al Funzionamento Dell'alloggiamento Del Display (A Parete)

    1. Collocare la bilancia su una superficie solida e piana. 2. Connettere il cavo di collegamento alla scatola dell'elettronica della bilancia. ATTENZIONE! Misurazione errata a seguito di accoppiamento Se il cavo dell'alloggiamento del display tocca la piattaforma di pesatura, il peso rilevato potrebbe non essere corretto.
  • Seite 141: Connessione Del Cavo Di Collegamento Alla Piattaforma

    Italiano Connessione del cavo di collegamento alla piattaforma INDICAZIONE: selezionare il luogo di installazione tenendo conto della lunghezza del cavo di collegamento in modo da poter installare l'alloggiamento del display presso il supporto per parete. 1. Collocare la bilancia su una superficie solida e piana.
  • Seite 142: Montaggio Del Supporto Per Parete

    Montaggio del supporto Scegliere come punto di montaggio una parete con portata sufficiente. Per il montaggio su muratura mas- per parete siccia, utilizzare i tasselli standard in dotazione. Per pareti con altre caratteristiche utilizzare i tasselli speciali corrispondenti. INDICAZIONE: calcolare l'altezza di montaggio considerando la lunghezza del cavo di collegamento.
  • Seite 143: Predisposizione Alimentazione Elettrica

    La bilancia può surriscaldarsi, incen- diarsi, fondere o andare in cortocircuito. – Utilizzare esclusivamente alimentatori a spina originali seca da 9 V o con tensione di uscita regolata a 12 Volt. 1. Se necessario innestare nell'alimentatore la spina di rete necessaria per l'alimentazione elettrica.
  • Seite 144: Installazione Della Bilancia

    5.5 Installazione della bilancia Allineamento della ATTENZIONE! bilancia Misurazione errata a seguito di accoppiamento Se la bilancia viene posata con il rispettivo allog- giamento ad es. su un asciugamano, il peso non viene misurato correttamente. – Posizionare la bilancia in modo che tocchi il fondo esclusivamente con le viti di fissaggio dei piedini.
  • Seite 145: Utilizzo

    – Posizionare il mezzo di trasporto per infermi al centro della bilancia. Accensione della bilancia Premere il tasto Start. Tutti gli elementi del display vengono mostrati brevemente, quindi sul display compare SECA. La bilancia è pronta all'uso quando sul display compare 0.00. Utilizzo • 145...
  • Seite 146: Pesatura Del Paziente

    Pesatura del paziente La procedura descritta nel presente paragrafo si applica nel caso di pazienti in grado di restare in piedi e fermi autonomamente. 1. Accertarsi che la bilancia non sia carica. 2. Chiedere al paziente di salire sulla bilancia. 3.
  • Seite 147: Visualizzazione Permanente Del Risultato Di Misura (Hold)

    Italiano 5. Pesare quindi il paziente tenendo conto della sua mobilità. – Chiedere al paziente di salire sulla bilancia e di restare fermo. – Aiutare il paziente a salire sulla bilancia e ad accomodarsi sulla sedia a rotelle precedente- mente posizionata. 6.
  • Seite 148: Determinazione E Valutazione Del Body Mass Index (Bmi)

    Determinazione e Il Body-Mass-Index mette in relazione la statura e il valutazione del Body peso, consentendo così di avere indicazioni più precise rispetto ad es. al peso ideale secondo la formula di Mass Index (BMI) Broca. Viene indicato un campo di tolleranza che vale come ottimale dal punto di vista della salute.
  • Seite 149: Spegnimento Della Bilancia

    Italiano 10. Per disattivare la funzione BMI, premere brevemente il tasto Invio (Invio). enter Valutazione Il paziente pesa troppo poco. Potrebbe esserci una tendenza all'anoressia. Si raccomanda un aumento di peso per miglio- Inferiore a 18,5 rare il benessere e le capacità. In caso di dubbi, consultare un medico specializzato.
  • Seite 150: Altre Funzioni (Menu)

    6.2 Altre funzioni (menu) Nel menu della bilancia sono disponibili altre funzioni. Queste consentono di configurare la bilancia in modo ottimale per le condizioni di utilizzo. Reset Sto 1 (Weight) Sto 2 (Weight) Net Weight Sto 3 (Weight) • on Autohold •...
  • Seite 151: Cancellazione Automatica Dei Valori Memorizzati (Aclr)

    Italiano 5. Per modificare l'impostazione o aprire un altro sot- tomenu, premere uno dei tasti freccia, finché non tare viene visualizzata l'impostazione desiderata (qui: li- vello "2"). 6. Confermare l'impostazione con il tasto Invio (Invio). enter Il menu si chiude automaticamente. 7.
  • Seite 152 L'apparecchio dispone di tre posizioni di memoria per il peso. Si possono memorizzare valori di peso diversi richiamabili singolarmente in base alla situazione di par- tenza, in modo che sia possibile detrarli in automatico dal risultato di misura. Sto 1 (Weight) Sto 2 (Weight) Sto 3 (Weight) Net Weight...
  • Seite 153: Attivazione Funzione Autohold (Ahold)

    Italiano Attivazione funzione Se si attiva la funzione Autohold, il valore di misura con- Autohold (Ahold) tinua a essere visualizzato ad ogni pesata dopo aver scaricato la bilancia. Non è quindi più necessario atti- vare manualmente ad ogni pesata la funzione Hold. INDICAZIONE: in alcuni modelli, questa funzione è...
  • Seite 154: Impostazione Dell'attenuazione (Fil)

    Impostazione Con la funzione Attenuazione (Fil = Filtro) è possibile dell'attenuazione (Fil) ridurre le anomalie durante la determinazione del peso (ad es. a causa di movimenti del paziente). 1. Selezionare nel menu la voce "Fil". 2. Confermare la selezione. L'impostazione attuale viene visualizzata. 3.
  • Seite 155: Ripristino Delle Impostazioni Di Fabbrica (Reset)

    Italiano Ripristino delle Per le seguenti funzioni è possibile ripristinare le impostazioni di fabbrica impostazioni di fabbrica (RESET) Impostazione di Funzione fabbrica Autohold (Ahold) In base al modello Segnale acustico (Press) Segnale acustico (Hold) Attenuazione (Fil) Autoclear (Aclear) In base al modello Pre-Tara (Pt) 0 kg Altezza per Body Mass Index...
  • Seite 156: Trattamento Igienico

    7. TRATTAMENTO IGIENICO AVVERTENZA! Scossa elettrica L'apparecchio non è collegato alla corrente elettrica quando si preme il tasto ON/OFF e il display si spegne. L'utilizzo di liquidi sull'appa- recchio può provocare una scossa elettrica. – Per scollegare l'apparecchio dalla corrente elettrica, disconnettere la presa di rete prima del trattamento igienico.
  • Seite 157: Sterilizzazione

    Italiano 2. Disinfettare l'apparecchio a intervalli regolari con un panno morbido, inumidito con un disinfettante adatto. 3. Rispettare le seguenti scadenze: Scadenza Componente Prima di ogni misurazione con Piattaforma di contatto diretto con la pelle pesatura Dopo di ogni misurazione con Piattaforma di contatto diretto con la pelle pesatura...
  • Seite 158: Cosa Fare, Se

    "Cosa fare, se…" da pagina 158, non utilizzare l'apparecchio. – Fare riparare l'apparecchio dal servizio di assistenza seca o da un partner di assistenza autorizzato. – Rispettare le indicazioni di cui al paragrafo "Manutenzione" a pagina 159.
  • Seite 159: Manutenzione

    "Er:X:16"? - Riavviare la bilancia. 10.MANUTENZIONE La vostra bilancia seca lascia la fabbrica con una preci- sione superiore a ±0,15 %. Per mantenere questa precisione anche successivamente, il prodotto deve essere installato correttamente e sottoposto a manu- tenzione a intervalli regolari.
  • Seite 160: Dati Tecnici

    11.DATI TECNICI Dati tecnici seca 674 Dimensioni bilancia • Profondità 965 mm • Larghezza 890 mm • Altezza 65 mm Dimensioni piattaforma di pesatura • Profondità 965 mm • Larghezza 800 mm • Altezza 65 mm Peso proprio circa 26 kg Campo di temperature •...
  • Seite 161: Accessori Opzionali

    Italiano Dati tecnici seca 674 Precisione • Da 0 a 67 kg ±100 g • 67 kg a carico massimo ±0,15 % • Da 0 a 147,7 lbs ±0,2 lbs • 147,7 lbs a carico massimo ±0,15 % • Da 0 a 10,55 sts ±0,2 lbs...
  • Seite 162: Garanzia

    Conservare pertanto tutte le parti dell'imballo. Non sussiste alcuna garanzia se l'apparecchio viene aperto da persone non espressamente autorizzate da seca. I clienti all'estero devono rivolgersi, per i casi coperti da garanzia, direttamente al venditore del rispettivo paese. 162 •...
  • Seite 163 Español Español ÍNDICE 1. Calidad garantizada ..165 5. Antes de empezar… ..179 2. Descripción del aparato ..166 5.1 Volumen de suministro .
  • Seite 164 6.2 Otras funciones (menú) ..191 7. Preparación higiénica ..197 Navegar por el menú ..191 7.1 Limpieza ....197 Borrar automáticamente los 7.2 Desinfección .
  • Seite 165: Calidad Garantizada

    • Directiva 93/42/CEE sobre productos sanitarios 0123 También desde el sector oficial se reconoce la profe- sionalidad de seca. La TÜV Süd Product Service, la ofi- cina competente en productos sanitarios, confirma con un certificado que seca cumple de forma consecuente los estrictos requisitos legales como fabricante de pro- ductos sanitarios.
  • Seite 166: Descripción Del Aparato

    Desde hace más de 170 años, por su experiencia en el servicio de la salud y, siendo líder del mercado en numerosos países, con sus desarrollos innovadores para el pesaje y la medición, seca sienta cada vez nuevas bases. 2.2 Uso previsto La báscula electrónica multifuncional...
  • Seite 167: Cualificación Del Usuario

    El montaje de los aparatos que se entregan parcial- mente montados solo puede encomendarse a per- sonal suficientemente cualificado, p. ej., distribuidores, técnicos de su hospital o al servicio técnico de seca. Manejo El aparato solo puede ser manejado por personal médico especializado.
  • Seite 168: Indicaciones De Seguridad Básicas

    El aparato no contiene ele- mentos cuyo mantenimiento pueda ser realizado por el usuario. Los trabajos de man- tenimiento y las reparaciones deben ser reali- zados únicamente por el equipo de servicio seca autorizado. El equipo de servicio más 168 •...
  • Seite 169: Prevención De Descargas Eléctricas

    • Utilice únicamente accesorios y piezas de recambio seca originales. De lo contrario, seca no asume ningún tipo de garantía. ¡PRECAUCIÓN! Peligro para el paciente, funcionamiento erró- • Mantenga los dispositivos médicos eléctricos, tales como los equipos quirúrgicos de alta fre- cuencia, a una distancia mínima de aprox.
  • Seite 170: Prevención De Infecciones

    ¡ADVERTENCIA! Peligro de resbalamiento • Cerciórese de que la plataforma de pesaje está seca antes de que suba el paciente. • Cerciórese de que el paciente tenga los pies secos antes de subir a la plataforma de pesaje.
  • Seite 171: Prevención De Daños En El Aparato

    Español Prevención de daños en ¡ATENCIÓN! el aparato Daños en el aparato • Preste atención a que no puedan penetrar nunca líquidos al interior del aparato. En este caso podría quedar destruido el sistema elec- trónico. • Desconecte el aparato antes de retirar la fuente de alimentación de la toma de corriente.
  • Seite 172: Manejo De Los Resultados De La Medición

    (por ejemplo en el software de PC o en un sistema de informa- seca analytics ción del hospital), asegúrese de que los valo- res de medición son plausibles. • Cuando se han transmitido valores de medi- ción al software de PC...
  • Seite 173: Manejo Del Material De Embalaje

    Español Manejo del material de ¡ADVERTENCIA! embalaje Peligro de asfixia Los materiales de embalaje de lámina de plás- tico (bolsas) representan un peligro de asfixia. – Conserve el material de embalaje fuera del alcance de los niños. – Si ya no estuviera disponible el material de embalaje original, utilice únicamente bolsas de plástico con perforaciones de seguridad para reducir el peligro de asfixia.
  • Seite 174: Vista General

    4. VISTA GENERAL 4.1 Elementos de mando Elemento de N.º Función mando • Elemento central de mando y visualización Caja del • Se puede colocar en una superficie de trabajo o indicador montar en una pared Encender y apagar la báscula Tecla de cursor •...
  • Seite 175: Símbolos En El Visor

    Español Elemento de N.º Función mando Tecla de cursor • Durante el pesaje: - Pulsación breve: activar la función BMI - Pulsación larga: acceder al menú • En el menú: - Seleccionar submenú, seleccionar punto del menú - Reducir el valor Tecla Enter •...
  • Seite 176: Indicaciones En El Aparato Y

    • max xxx mA: consumo máximo de electricidad x-y V max. xxx mA • : observar la polaridad de la clavija del aparato use compatible seca adapter only • : utilizar el aparato con corriente continua No eliminar el aparato con la basura doméstica 176 •...
  • Seite 177: Indicación En El Embalaje

    Español 4.4 Indicación en el embalaje Protegerlo de la humedad Las flechas señalan la parte superior del producto Debe transportarse y almacenarse derecho Frágil No arrojarlo ni dejarlo caer Temperatura mín. y máx. autorizada para el transporte y el almacenamiento Humedad atmosférica mín.
  • Seite 178: Estructura Del Menú

    4.5 Estructura del menú En el menú del aparato hay disponibles otras funcio- nes. De este modo puede configurar el aparato de forma óptima para los requisitos del uso que quiera darle (detalles a partir de página 191). Reset Sto 1 (Weight) Sto 2 (Weight) Net Weight Sto 3 (Weight)
  • Seite 179: Antes De Empezar

    Español 5. ANTES DE EMPEZAR… 5.1 Volumen de suministro USA/Japan Euro Australia N.º Componente Uds. Plataforma de pesaje Soporte de pared Adaptador angular Tornillos, 3 x 35 mm Taco Ø 5 mm Caja del indicador con cable de conexión Equipo de alimentación con adaptadores (dependiendo del modelo: equipo de alimentación con conector Euro) Instrucciones de uso, sin figura...
  • Seite 180: Preparar La Caja Del Indicador Para El Servicio (Indicador De Sobremesa)

    5.2 Preparar la caja del indicador para el servicio (indicador de sobremesa) ¡ATENCIÓN! Daños en el aparato El adaptador angular no se puede volver a sol- tar después del montaje. – Cerciórese antes del montaje de que la caja del indicador se coloque encima de una mesa.
  • Seite 181: Preparar La Caja Del Indicador Para El Servicio

    Español 2. Conecte el cable de conexión a la caja de electrónica de la báscula. ¡ATENCIÓN! Medición errónea por transmisión parcial de fuerza Si el cable de la caja del indicador toca la plata- forma de la báscula puede ocurrir que se mida incorrectamente el peso del paciente.
  • Seite 182: Conectar El Cable De Conexión A La Plataforma

    Conectar el cable de conexión a la plataforma NOTA: A la hora de elegir el lugar de instalación, tenga en cuenta la longitud del cable de conexión, de manera que pueda colocar la caja del indicador en el soporte de pared. 1.
  • Seite 183: Montar Los Soportes De Pared

    Español Montar los soportes de Elija una pared suficientemente estable como lugar de pared montaje. Para el montaje en mampostería maciza, el volumen de suministro incluye tacos estándar. Para paredes de otras características recomendamos utilizar los tacos especiales correspondientes. NOTA: A la hora de elegir la altura de montaje, tenga en cuenta la longitud del cable de conexión.
  • Seite 184: Establecer El Suministro De Corriente

    – Utilice exclusivamente equipos de alimentación originales de seca con 9 V o tensión de salida regulada de 12 V. 1. En caso necesario, enchufe en el equipo de alimen- tación la clavija necesaria para su suministro de corriente.
  • Seite 185: Colocar La Báscula

    Español 5.5 Colocar la báscula Nivelar la báscula ¡ATENCIÓN! Medición errónea por transmisión parcial de fuerza Si la báscula con la carcasa se coloca, por ejemplo, sobre una toalla, el peso no se mide correctamente. – Coloque la báscula de tal modo que estén en contacto con el suelo a través de los tornillos niveladores.
  • Seite 186: Manejo

    Encender la báscula Pulse la tecla Start. Todos los elementos del visor se muestran brevemente, luego aparece SECA en el visor. La báscula está operativa cuando aparece 0.00 en el visor. 186 •...
  • Seite 187: Pesar Al Paciente

    Español Pesar al paciente El procedimiento descrito en esta sección es apro- piado para pacientes que pueden mantenerse de pie por sí mismos y de forma estable durante todo el pro- ceso de pesaje. 1. Asegúrese de que sobre la báscula no haya ningún peso.
  • Seite 188: Indicación Continua Del Resultado De La Medición (Hold)

    5. Pese el paciente en función de su movilidad. – Pida al paciente que suba a la báscula y que permanezca de pie tranquilamente. – Ayude al paciente a subir a la báscula y sentarse en la silla de ruedas preparada. 6.
  • Seite 189: Calcular Y Valorar El Índice De Masa Corporal (Bmi)

    Español Calcular y valorar el El índice de masa corporal relaciona la altura y el peso índice de masa corporal proporcionando así datos más precisos que, p. ej., el peso ideal de Broca. Se indica un margen de tolerancia (BMI) que se considera óptimo desde el punto de vista de la salud.
  • Seite 190: Desconectar La Báscula

    9. Lea el BMI y compárelo con las categorías indicadas más abajo. 10. Para desactivar la función BMI, pulse brevemente la tecla Enter (Enter). enter Valoración El paciente pesa demasiado poco. Puede haber una tenden- cia a la anorexia. Se recomienda aumentar de peso para menos de 18,5 mejorar el bienestar y el rendimiento.
  • Seite 191: Otras Funciones (Menú)

    Español 6.2 Otras funciones (menú) En el menú de la báscula hay disponibles otras funcio- nes. De este modo puede configurar la báscula de forma óptima para los requisitos del uso que quiera darle. Reset Sto 1 (Weight) Sto 2 (Weight) Net Weight Sto 3 (Weight) •...
  • Seite 192: Borrar Automáticamente Los

    5. Para modificar el ajuste o acceder a otro submenú, presione una de las teclas de cursor tantas veces tare como sea necesario hasta que aparezca el ajuste que se desee (en este caso: nivel “2”). 6. Confirme el ajuste con la tecla Enter (Enter). enter El menú...
  • Seite 193 Español El aparato dispone de tres memorias para valores de peso. Usted puede almacenar diversos valores de peso y, según la situación de partida, acceder a ellos individualmente, de forma que se restan automática- mente del resultado de la medición. Sto 1 (Weight) Sto 2 (Weight) Sto 3 (Weight)
  • Seite 194: Activar La Función Autohold (Ahold)

    Activar la función Si activa la función Autohold, en cada pesaje el resul- Autohold (Ahold) tado de la medición se sigue indicando después de retirar el peso de la báscula. Ya no es necesario activar manualmente la función Hold en cada pesaje. NOTA: En algunos modelos esta función está...
  • Seite 195: Ajustar Filtrado (Fil)

    Español Ajustar filtrado (Fil) Con el filtrado (Fil = Filter) puede reducir las interferen- cias a la hora de calcular el peso (por ejemplo, las debi- das a movimientos del paciente). 1. Seleccione en el menú el punto “Fil”. 2. Confirme la selección. Se muestra el ajuste del momento.
  • Seite 196: Restablecer La Configuración

    Restablecer la Para las siguientes funciones puede restablecer la configuración de función de fábrica: fábrica (RESET) Configuración de Función fábrica dependiendo del Autohold (Ahold) modelo Tono de señal (Press) Tono de señal (Hold) Filtrado (Fil) dependiendo del Autoclear (Aclear) modelo Pre-Tara (Pt) 0 kg Longitud para el índice de...
  • Seite 197: Preparación Higiénica

    Español 7. PREPARACIÓN HIGIÉNICA ¡ADVERTENCIA! Electrocución El aparato no queda sin corriente cuando se pulsa la tecla CON/DES y se apaga el visor. En caso de aplicar líquidos en el aparato se puede producir una descarga eléctrica. – Para que el aparato quede sin corriente, desenchufe la clavija de alimentación antes de cada preparación higiénica.
  • Seite 198: Desinfección

    7.2 Desinfección ¡ATENCIÓN! Daños en el aparato Los cristales de las escalas y los visores son de vidrio acrílico. Los cristales de vidrio acrílico se pueden rajar o enturbiar si se utilizan desinfec- tantes inadecuados. – Utilice exclusivamente desinfectantes que sean adecuados para superficies sensibles.
  • Seite 199: Control Del Funcionamiento

    199, deberá abstenerse de utilizar el aparato. – Haga reparar el aparato por el servicio técnico de seca o un servicio postventa autorizado. – Tenga en cuenta la sección “Mantenimiento” en la página 200.
  • Seite 200: Mantenimiento

    “Er:X:16”? - Encender de nuevo la báscula. 10.MANTENIMIENTO Su báscula seca sale de fábrica con una precisión mejor que ±0,15 %. Para que se mantenga esta precisión, el producto se debe colocar con cuidado y revisar periódicamente. En función de la frecuencia de uso recomendamos realizar el mantenimiento cada 3 a 5 años.
  • Seite 201: Datos Técnicos

    Español 11.DATOS TÉCNICOS Datos técnicos seca 674 Dimensiones báscula • Fondo 965 mm • Ancho 890 mm • Alto 65 mm Dimensiones plataforma de pesaje • Fondo 965 mm • Ancho 800 mm • Alto 65 mm Peso propio aprox. 26 kg Margen de temperatura •...
  • Seite 202: Accesorios Opcionales

    Datos técnicos seca 674 Precisión • de 0 a 67 kg ±100 g • 67 kg hasta carga máxima ±0,15 % • de 0 a 147,7 lbs ±0,2 lbs • 147,7 lbs hasta carga máxima ±0,15 % • de 0 a 10,55 sts ±0,2 lbs...
  • Seite 203: Garantía

    La garantía no tiene validez cuando el aparato haya sido abierto por personas que no estén autorizadas para ello expresamente por seca. A los clientes residentes en el extranjero les rogamos se dirijan directamente al vendedor de su país corres- pondiente para casos relacionados con la garantía.
  • Seite 205 Português Português ÍNDICE 1. Certificado ....207 5. Antes de iniciar a utilização deve..... . . 221 2.
  • Seite 206 6.2 Outras funções (menu) ..233 7. Tratamento higiénico ..239 Navegar no menu ..233 7.1 Limpeza ....239 Apagar automaticamente 7.2 Desinfeção .
  • Seite 207: Certificado

    Português 1. CERTIFICADO Com os produtos seca, está a comprar não só uma técnica amadurecida há mais de um século como tam- bém uma qualidade certificada e regulamentada e comprovada por institutos. Os produtos seca estão em conformidade com as diretivas europeias, normas e legislações nacionais.
  • Seite 208: Descrição Do Aparelho

    Há mais de 170 anos que a seca coloca a sua experi- ência ao serviço da saúde, afirmando-se como líder de mercado em muitos países do mundo, graças às suas inovações na área da metrologia.
  • Seite 209: Qualificação Do Utilizador

    Montagem Os aparelhos fornecidos parcialmente montados só podem ser montados por pessoas com as devidas qualificações, p. ex. representante, técnico do hospital ou da assistência seca. Utilização O aparelho só pode ser operado por pessoal médico. 3. INFORMAÇÕES DE SEGURANÇA 3.1 Instruções de segurança neste manual de instruções...
  • Seite 210: Instruções Básicas De Segurança

    • Não são permitidas alterações técnicas no aparelho. O aparelho não contém partes para manutenção pelo utilizador. Os trabalhos de manutenção e reparação devem ser executa- dos apenas por um seca-serviço de pós- venda autorizado. Em www.seca.com encon- 210 •...
  • Seite 211: Eliminação Do Risco De Choque Elétrico

    Em alternativa, envie um e-mail para ser- vice@seca.com. • Utilize exclusivamente acessórios e peças sobressalentes originais seca. Caso contrário, a seca não garante o direito à garantia. CUIDADO! Perigo para o paciente, anomalia • Na utilização de aparelhos médicos elétricos, como p.
  • Seite 212: Eliminação Do Risco De Infeção

    AVISO! Perigo de escorregamento • Certifique-se de que a plataforma de pesa- gem está seca antes da subida do paciente. • Certifique-se de que o paciente tem os pés secos antes de subir para a plataforma de pesagem. • Certifique-se de que o paciente sobe para a plataforma de pesagem de forma lenta e segura.
  • Seite 213: Eliminação Do Risco De Danos No Aparelho

    Português Eliminação do risco de ATENÇÃO! danos no aparelho Danos do aparelho • Certifique-se de que nunca entram líquidos para dentro do aparelho. Estes podem preju- dicar a parte eletrónica. • Desligue o aparelho antes de retirar o alimen- tador da tomada. •...
  • Seite 214: Uso Dos Resultados De Medição

    • Antes de guardar e de reutilizar os valores medidos com este aparelho (p. ex. no sof- tware para PC ou num sis- seca analytics tema de informação hospitalar), certifique-se da sua plausibilidade. • Se os valores de medição tiverem sido trans-...
  • Seite 215: Manuseamento Do Material Da Embalagem

    Português Manuseamento do AVISO! material da embalagem Perigo de asfixia O material da embalagem da película de plás- tico (sacos) representa um perigo de asfixia. – Guarde o material da embalagem fora do alcance das crianças. – Se já não tiver o material original da embalagem, use apenas sacos de plástico com furos de segurança a fim de reduz o perigo de asfixia.
  • Seite 216: Vista Geral

    4. VISTA GERAL 4.1 Elementos de comando Elemento de N.º Função comando • Elemento de comando e de indicação central Caixa do • Pode ser colocado sobre uma superfície de trabalho mostrador ou montado numa parede Ligar e desligar a balança Tecla de seta •...
  • Seite 217: Símbolos No Display

    Português Elemento de N.º Função comando Tecla de seta • Durante a pesagem: - Breve pressão: ativar a função BMI (IMC) - Longa pressão: chamar o menu • No menu: - Selecionar o submenu, selecionar o item de menu - Reduzir o valor Tecla Enter •...
  • Seite 218: Símbolos No Aparelho E Na Placa De Características

    • max xxx mA: consumo máximo de corrente x-y V max. xxx mA • : Ter atenção à polaridade correta da ficha do use compatible aparelho seca adapter only • : Operar o aparelho com corrente contínua Não colocar o aparelho no lixo doméstico 218 •...
  • Seite 219: Símbolos Na Embalagem

    Português 4.4 Símbolos na embalagem Proteger da humidade As setas apontam para a parte superior do produto Transportar e armazenar na posição vertical Quebrável Não deitar ao chão, nem deixar cair Temperaturas mín. e máx. para o transporte e o armazenamento Humidade do ar mín.
  • Seite 220: Estrutura Do Menu

    4.5 Estrutura do menu No menu do aparelho estão disponíveis outras fun- ções. Assim, pode configurar o aparelho de forma ideal para as suas condições de utilização (detalhes a partir da página 233). Reset Sto 1 (Weight) Sto 2 (Weight) Net Weight Sto 3 (Weight) ‹...
  • Seite 221: Antes De Iniciar A Utilização Deve

    Português 5. ANTES DE INICIAR A UTILIZAÇÃO DEVE... 5.1 Escopo de fornecimento USA/Japan Euro Australia N.º Componente Unid. Plataforma de pesagem Suporte de parede Adaptador angular Parafusos, 3 x 35 mm Buchas Ø 5 mm Caixa do mostrador com cabo de ligação Alimentador com adaptadores (dependente do modelo: alimentador com ficha EURO) Manual de instruções de utilização, não ilustrado...
  • Seite 222: Preparar A Caixa Do Mostrador Para O Funcionamento (Mostrador De Mesa)

    5.2 Preparar a caixa do mostrador para o funcionamento (mostrador de mesa) ATENÇÃO! Danos do aparelho Após a montagem, o adaptador angular não pode voltar a ser retirado. – Certifique-se, antes da montagem, de que a caixa do mostrador deve ser colocada sobre uma mesa.
  • Seite 223: Preparar A Caixa Do Mostrador Para O Funcionamento (Mostrador De Parede)

    Português 1. Coloque a balança sobre uma superfície segura e plana. 2. Conecte o cabo de ligação à caixa eletrónica da balança. ATENÇÃO! Medição errada devido a derivação de força Se o cabo da caixa do mostrador tocar na pla- taforma de pesagem, não é...
  • Seite 224: Conectar O Cabo De Ligação À Plataforma

    Conectar o cabo de ligação à plataforma NOTA: Ao escolher o local de instalação tenha em atenção o comprimento do cabo de ligação, para que a caixa do mostrador possa ser colo- cada no suporte de parede. 1. Coloque a balança sobre uma superfície segura e plana.
  • Seite 225: Montar Os Suportes De Parede

    Português Montar os suportes de Escolha uma parede com capacidade de carga ade- parede quada para a montagem. Para a montagem em alve- naria maciça, são fornecidas buchas standard. Para paredes de outro tipo de constituição, recomendamos a utilização de buchas especiais adequadas. NOTA: Ao escolher a altura de montagem tenha em atenção o comprimento do cabo de ligação.
  • Seite 226: Providenciar A Alimentação De Energia

    A balança pode sobreaquecer, incendiar- se, derreter ou fazer curto-circuito. – Utilize exclusivamente alimentadores originais seca de 9 V ou uma tensão de saída regulada de 12 V. 1. Se necessário, insira a ficha necessária para a sua alimentação de energia no alimentador.
  • Seite 227: Montar A Balança

    Português 5.5 Montar a balança Alinhamento da ATENÇÃO! Medição errada devido a derivação de força balança Se a caixa da balança estiver colocada, p. ex. sobre uma toalha, o peso não será medido corretamente. – Coloque a balança de forma a que apenas os pés roscados tenham contacto com a superfície de apoio.
  • Seite 228: Utilização

    Ligar a balança Prima a tecla Start (Iniciar). Todos os elementos do display são indicados brevemente, a seguir aparece SECA no display. A balança está operacional quando aparecer a indi- cação 0.00 no display. 228 •...
  • Seite 229: Pesar O Paciente

    Português Pesar o paciente O procedimento descrito nesta secção é indicado para pacientes que podem permanecer quietos e sem acompanhamento durante todo o processo de pesagem. 1. Certifique-se de que a balança está vazia. 2. Peça ao paciente para se colocar sobre a balança. 3.
  • Seite 230: Indicar Permanentemente O

    5. Pese o paciente como a sua mobilidade permitir. – Peça ao paciente para se colocar sobre a balança e permanecer quieto. – Ajude o paciente a colocar-se sobre a balan- ça e a sentar-se na cadeira de rodas prepa- rada.
  • Seite 231: Determinar E Avaliar O Índice De Massa Corporal (Imc)

    Português Determinar e avaliar o O Índice de Massa Corporal relaciona a estatura e o Índice de Massa peso do corpo permitindo assim dar indicações mais precisas, como p. ex. o peso ideal segundo Broca. Corporal (IMC) É indicada uma faixa de tolerância que corresponde a uma faixa ideal do ponto de vista da saúde.
  • Seite 232: Desligar A Balança

    10. Para desativar a função BMI (IMC), prima brevemente a tecla Enter (Enter). enter Avaliação O paciente pesa muito pouco. Poderá existir uma tendência para anorexia nervosa. Recomenda-se um aumento de peso inferior a 18,5 de forma a melhorar o bem-estar e a capacidade de desem- penho.
  • Seite 233: Outras Funções (Menu)

    Português 6.2 Outras funções (menu) No menu da balança estão disponíveis outras funções. Assim, pode configurar a balança de forma ideal para as suas condições de utilização. Reset Sto 1 (Weight) Sto 2 (Weight) Net Weight Sto 3 (Weight) • on Autohold •...
  • Seite 234: Apagar Automaticamente Valores Guardados (Aclr)

    5. Para alterar a definição ou chamar outro submenu, prima uma das teclas de seta as vezes necessárias tare até que surja a definição desejada (aqui: nível "2"). 6. Confirme a definição com a tecla Enter (Enter). enter A saída do menu é feita automaticamente. 7.
  • Seite 235 Português O aparelho dispõe de três locais de memória para valo- res do peso. É possível memorizar diferentes valores do peso e chamá-los individualmente conforme a situ- ação inicial, de forma a serem automaticamente dedu- zidos do resultado da medição. Sto 1 (Weight) Sto 2 (Weight) Sto 3 (Weight)
  • Seite 236: Ativar A Função Autohold (Ahold)

    Ativar a função Quando ativa a função Autohold, o resultado da medi- Autohold (Ahold) ção continua a ser indicado em cada processo de pesagem, depois de a balança ser esvaziada. Deixa de ser necessário ativar manualmente a função Hold em cada processo de pesagem.
  • Seite 237: Ajustar O Amortecimento (Fil)

    Português Ajustar o Com o amortecimento (Fil = filtro) pode reduzir as amortecimento (Fil) falhas na determinação do peso (p. ex. devido aos movimentos do paciente). 1. No menu, selecione o item "Fil". 2. Confirme a seleção. É indicada a definição atual. 3.
  • Seite 238: Restabelecer As Definições De Fábrica (Reset)

    Restabelecer as As definições de fábrica podem ser restabelecidas definições de fábrica para as seguintes funções: (RESET) Definição de Função fábrica dependente do Autohold (Ahold) modelo Sinal acústico (Press) Sinal acústico (Hold) Amortecimento (Fil) dependente do Autoclear (Aclear) modelo Pré-taragem (Pt) 0 kg Altura para o Índice de 170 cm...
  • Seite 239: Tratamento Higiénico

    Português 7. TRATAMENTO HIGIÉNICO AVISO! Choque elétrico O aparelho não está sem corrente quando for premida a tecla Ligar/Desligar e o display se apaga. Na utilização de líquidos no aparelho pode haver choque elétrico. – Para retirar o aparelho da corrente, puxe a ficha de alimentação antes de qualquer tratamento higiénico.
  • Seite 240: Desinfeção

    7.2 Desinfeção ATENÇÃO! Danos do aparelho Os vidros de visualização nas escalas e dis- plays são compostos por vidro acrílico. Os vidros acrílicos podem quebrar-se ou ficar tur- vos, caso sejam utilizados desinfetantes inade- quados. – Utilize exclusivamente desinfetante adequado para superfícies sensíveis. Os desinfetantes adequados encontram-se à...
  • Seite 241: Controlo Do Funcionamento

    "O que fazer quando...?" a partir da página 242, não deve utilizar o aparelho. – Mande reparar o aparelho pelo serviço técnico da seca ou por um serviço de pós- venda autorizado. – Observe a secção "Manutenção" na página 243.
  • Seite 242: O Que Fazer Quando

    9. O QUE FAZER QUANDO...? Falha Causa/Eliminação ... com carga não apa- A balança não tem alimentação de energia. rece nenhuma indica- - Verificar se a balança está ligada. ção do peso? Foi colocada carga na balança antes de esta ser …...
  • Seite 243: Manutenção

    Português 10.MANUTENÇÃO A balança seca vem de fábrica com uma precisão superior a ±0,15 %. Para que esta precisão se mante- nha, é necessário montar bem o produto e efetuar uma manutenção regular. Consoante a frequência de utiliza- ção, recomendamos que a balança seja revista em intervalos de 3 a 5 anos.
  • Seite 244: Acessórios Opcionais

    Dados técnicos seca 674 Humidade do ar • Funcionamento 30 % - 80 % sem condensação • Armazenamento 0 % - 95 % sem condensação • Transporte 0 % - 95 % sem condensação Altura dos dígitos 25 mm Alimentação de energia...
  • Seite 245: Eliminação

    O direito à garantia é anulado se o aparelho tiver sido aberto por pessoas sem autorização expressa da seca. Para os clientes que se encontram no estrangeiro, pedimos que no caso de reivindicação do direito à...
  • Seite 247 Polski Polski SPIS TREŚCI 1. Gwarancja jakości ..249 5. Przed rozpoczęciem użytkowania....263 2. Opis urządzenia ... . . 250 5.1 Zakres dostawy .
  • Seite 248 6.2 Dalsze funkcje (menu) ..275 7. Preparacja higieniczna ..281 Nawigacja po menu ..275 7.1 Czyszczenie ... . . 281 Automatyczne usuwanie 7.2 Dezynfekcja .
  • Seite 249: Gwarancja Jakości

    Nabywając produkty firmy seca nabywają Państwo nie tylko dojrzałą, dopracowywaną przez ponad 100 lat technikę, ale również potwierdzoną urzędowo, prawnie i przez różne instytuty jakość. Produkty firmy seca spełniają dyrektywy i normy europejskie oraz przepisy krajowe. Kupując seca, kupują Państwo przyszłość.
  • Seite 250: Opis Urządzenia

    Zakup elektronicznej wagi wielofunkcyjnej seca 674 inwestycja w bardzo precyzyjne, a jednocześnie wytrzymałe urządzenie. Od ponad 170 lat firma seca wykorzystuje swoje doświadczenie w służbie zdrowia. Jako lider rynku w wielu krajach świata, seca dysponuje licznymi innowacyjnymi rozwiązaniami w zakresie ważenia i mierzenia, ciągle definiując nowe standardy...
  • Seite 251: Kwalifikacje Użytkownika

    2.4 Kwalifikacje użytkownika Montaż Urządzenia dostarczane w stanie częściowo zmonto- wanym muszą być montowane przez dostatecznie wykwalifikowany personel, np. sprzedawcę, technika szpitalnego czy serwis seca. Obsługa Urządzenie może obsługiwać wyłącznie personel medyczny. 3. BEZPIECZEŃSTWO 3.1 Zasady bezpieczeństwa w instrukcji obsługi NIEBEZPIECZEŃSTWO!
  • Seite 252: Podstawowe Zasady Bezpieczeństwa

    • Techniczne modyfikacje urządzenia są zabro- nione. Urządzenie nie zawiera żadnych części wymagających konserwacji przez użytkow- nika. Konserwacje i naprawy zlecać wyłącznie autoryzowanemu serwisowi seca. Adres 252 •...
  • Seite 253: Unikanie Porażenia Prądem Elektrycznym

    • Stosować wyłącznie oryginalne akcesoria i części zamienne firmy seca. W innym przy- padku firma seca nie udziela gwarancji. ZACHOWAJ OSTROŻNOŚĆ! Zagrożenie pacjenta, nieprawidłowe działanie • Stosując elektryczne urządzenia medyczne, np.
  • Seite 254: Unikanie Infekcji

    • Nie używać urządzenia powyżej wysokości 3000 m n. p. m. Unikanie infekcji OSTRZEŻENIE! Niebezpieczeństwo infekcji • Urządzenie należy preparować higienicznie w regularnych odstępach czasu zgodnie z opisem zawartym w odpowiednim rozdziale tego dokumentu. • Upewnić się, że pacjent nie choruje na cho- roby zakaźne! •...
  • Seite 255: Unikanie Uszkodzeń Urządzenia

    Polski Unikanie uszkodzeń UWAGA! urządzenia Uszkodzenie urządzenia • Wykluczyć dostanie się cieczy do wnętrza urządzenia. Ciecz może uszkodzić elementy elektroniczne. • Wyłączać urządzenie przed odłączaniem zasi- lacza od gniazda sieciowego. • Jeżeli urządzenie nie będzie używane przez dłuższy czas, odłączyć zasilacz od gniazda sieciowego.
  • Seite 256: Obchodzenie Się Z Wynikami Pomiaru

    Utrata danych • Przed zapisaniem i dalszym wykorzystaniem wyników pomiaru uzyskanych przy użyciu tego urządzenia (np. w aplikacji komputerowej seca analytics lub w szpitalnym systemie informatycznym) należy się upewnić, że war- tości pomiarowe są wiarygodne. • Jeżeli wartości pomiarowe zostały przekazane...
  • Seite 257: Postępowanie Z Materiałami Opakowaniowymi

    Polski Postępowanie OSTRZEŻENIE! z materiałami Niebezpieczeństwo uduszenia Materiał opakowaniowy i folie plastikowe (worki) opakowaniowymi grożą uduszeniem. – Materiał opakowaniowy należy przechowywać w miejscu niedostępnym dla dzieci. – Jeżeli oryginalny materiał opakowaniowy jest już niedostępny, używać wyłącznie worków plastikowych z otworami redukującymi niebezpieczeństwo uduszenia.
  • Seite 258: Przegląd

    4. PRZEGLĄD 4.1 Elementy obsługowe Element Funkcja obsługowy • Centralny element obsługowo-wskaźnikowy Wyświetlacz • Można go ustawiać na blacie roboczym albo montować na ścianie Włączanie i wyłączanie wagi Przycisk kierunkowy • W trakcie ważenia: - Krótkie naciśnięcie: włączanie funkcji Hold - Długie naciśnięcie: włączanie funkcji Tara tare •...
  • Seite 259: Symbole Na Wyświetlaczu

    Polski Element Funkcja obsługowy Przycisk kierunkowy • W trakcie ważenia: - Krótkie naciśnięcie: włączanie funkcji BMI - Długie naciśnięcie: otwieranie menu • W menu: - wybór podmenu, wybór punktu menu - zmniejszanie wartości Przycisk Enter • W menu: enter - potwierdzanie wybranego punktu menu - zapisywanie ustawionej wartości Element wskazujący wyniki pomiaru i umożliwiający Wyświetlacz...
  • Seite 260: Oznaczenia Na Urządzeniu I Na Tabliczce Znamionowej

    • max xxx mA: maksymalny pobór prądu x-y V • : zwracać uwagę na biegunowość wtyczki urzą- max. xxx mA dzenia use compatible seca adapter only • : urządzenia może być zasilane tylko prądem sta- łym Nie wyrzucać urządzenia do zwykłych odpadów domowych 260 •...
  • Seite 261: Oznaczenia Na Opakowaniu

    Polski 4.4 Oznaczenia na opakowaniu Chronić przed wodą Strzałki wskazują górną stronę produktu Transportować i przechowywać w pozycji stojącej Delikatna zawartość Nie rzucać i nie dopuszczać do rzucania Dopuszczalna min. i maks. temperatura transportu i przechowywania Dopuszczalna min. i maks. wilgotność powietrza dla transportu i przechowywania Materiały opakowaniowe można usuwać...
  • Seite 262: Struktura Menu

    4.5 Struktura menu W menu urządzenia dostępne są dalsze funkcje. Urządzenie można dzięki nim optymalnie konfigurować zależnie warunków użytkowania (szczegóły od strony 275). Reset Sto 1 (Weight) Sto 2 (Weight) Net Weight Sto 3 (Weight) ‹ on Autohold ‹ off ‹...
  • Seite 263: Przed Rozpoczęciem Użytkowania

    Polski 5. PRZED ROZPOCZĘCIEM UŻYTKOWANIA... 5.1 Zakres dostawy USA/Japan Euro Australia Komponent Szt. platforma ważąca uchwyt ścienny adapter kątowy śruby, 3 x 35 mm kołki, Ø 5 mm wyświetlacz z kablem zasilacz z adapterami (zależnie od modelu: zasilacz z wtyczką euro) instrukcja obsługi, b.
  • Seite 264: Przygotowywanie Wyświetlacza (Wyświetlacz Blatowy)

    5.2 Przygotowywanie wyświetlacza (wyświetlacz blatowy) UWAGA! Uszkodzenie urządzenia Po zamocowaniu adaptera kątowego nie będzie już można odłączyć. – Przed montażem należy uzyskać pewność, że wyświetlacz ma być ustawiony na blacie. Montaż adaptera kątowego Click! => => 1. Przyłożyć adapter kątowy w pokazanej pozycji do wyświetlacza.
  • Seite 265: Przygotowywanie Wyświetlacza (Wyświetlacz Ścienny)

    Polski UWAGA! Ryzyko błędnego pomiaru wskutek nieprawidłowego ustawienia wagi Jeżeli kabel wyświetlacza dotyka platformy ważącej, pomiar masy ciała pacjenta może być nieprawidłowy. – Ułożyć kabel tak, by nie mógł dotykać platformy ważącej. 3. Ustawić wyświetlacz na blacie roboczym. 5.3 Przygotowywanie wyświetlacza (wyświetlacz ścienny) UWAGA! Uszkodzenie urządzenia Po zamocowaniu adaptera kątowego nie...
  • Seite 266: Podłączanie Kabla Do Platformy

    Podłączanie kabla do platformy WSKAZÓWKA: Przy wyborze miejsca ustawienia uwzględnić długość kabla, aby umożliwić zamocowanie wyświetlacza na uchwycie ściennym. 1. Ustawić wagę na stabilnej i równej powierzchni. 2. Podłączyć kabel do modułu elektronicznego wagi. UWAGA! Ryzyko błędnego pomiaru wskutek nieprawidłowego ustawienia wagi Jeżeli kabel wyświetlacza dotyka platformy ważącej, pomiar masy ciała pacjenta może być...
  • Seite 267: Montaż Uchwytów Ściennych

    Polski Montaż uchwytów Na miejsce montażu należy wybrać wystarczająco ściennych wytrzymałą ścianę. W zakres dostawy wchodzą stan- dardowe kołki służące do montażu urządzenia na masywnej ścianie murowanej. Do montażu na ścianach innego typu zaleca się użycie odpowiednich kołków specjalnych. WSKAZÓWKA: Przy określaniu wysokości montażu należy uwzględnić...
  • Seite 268: Podłączanie Układu Zasilania

    Może wskutek tego dojść do przegrzania, zapalenia, stopienia lub zwarcia wagi. – Należy stosować wyłącznie oryginalne zasilacze firmy seca z zintegrowaną wtyczką, o napięciu wyjściowym 9 V lub regulowanym napięciu wyjściowym 12 V. 1. W razie potrzeby podłączyć wtyczkę odpowiadają- cą...
  • Seite 269: Ustawianie Wagi

    Polski 5.5 Ustawianie wagi Poziomowanie wagi UWAGA! Ryzyko błędnego pomiaru wskutek nieprawidłowego ustawienia wagi Ustawienie wagi z obudową leżącą na jakimś przedmiocie, np. na ręczniku, spowoduje błędny pomiar masy ciała. – Wagę należy ustawić tak, aby kontakt z podłożem miały wyłącznie śruby poziomujące.
  • Seite 270: Obsługa

    – Poprosić pacjenta, by stanął na środku wagi. – Ustawić środek transportu pośrodku wagi. Włączanie wagi Nacisnąć przycisk Start. Widać krótko wszystkie elementy wyświetlacza, a następnie na wyświetlaczu pojawia się słowo SECA. Waga jest gotowa do pracy, gdy na wyświetlaczu pojawi się wskazanie 0.00. 270 •...
  • Seite 271: Ważenie Pacjenta

    Polski Ważenie pacjenta Sposób postępowania opisany w tym rozdziale dotyczy pacjentów, którzy są w stanie samodzielnie i spokojnie stać przez cały czas ważenia. 1. Upewnić się, że waga nie jest obciążona. 2. Poprosić pacjenta o wejście na wagę. 3. Poprosić pacjenta, by stanął bez ruchu. 4.
  • Seite 272: Ciągłe Wyświetlanie Wyniku Pomiaru (Hold)

    5. Zważyć pacjenta w sposób, na jaki pozwala stopień jego zdolności ruchowej. – Poprosić pacjenta, by wszedł na wagę i stał spokojnie. – Pomóc pacjentowi wejść na wagę i usiąść na przygotowanym wózku inwalidzkim. 6. Odczytać wynik pomiaru. Dodatkowy ciężar został automatycznie odliczony. 7.
  • Seite 273: Pomiar I Interpretacja Wskaźnika Body Mass Index (Bmi)

    Polski Pomiar i interpretacja Wskaźnik Body Mass Index obliczany jest przez wskaźnika Body Mass porównanie wzrostu i masy ciała, co pozwala na uzyskanie dokładniejszych danych niż np. określenie Index (BMI) idealnej masy ciała według Broca. Podany zostaje obszar tolerancji, który uważany jest za optymalny pod względem zdrowotnym.
  • Seite 274: Wyłączanie Wagi

    9. Odczytać wartość wskaźnika BMI i porównać ją z podaną niżej tabelą. 10. Aby wyłączyć funkcję BMI, należy krótko nacisnąć przycisk Enter (Enter). enter Wskaźnik BMI Interpretacja Pacjent ma niedowagę. Może występować skłonność do anoreksji. Zaleca się przybranie na wadze w celu poprawy poniżej 18,5 samopoczucia i sprawności organizmu.
  • Seite 275: Dalsze Funkcje (Menu)

    Polski 6.2 Dalsze funkcje (menu) W menu wagi dostępne są dalsze funkcje. Dzięki nim wagę można optymalnie konfigurować zgodnie z warunkami użytkowania. Reset Sto 1 (Weight) Sto 2 (Weight) Net Weight Sto 3 (Weight) • on Autohold • off • on Beep Press •...
  • Seite 276: Automatyczne Usuwanie Zapisanych Wartości (Aclr)

    5. Aby zmienić ustawienie lub otworzyć inne podme- nu, należy naciskać przycisk kierunkowy odpowied- tare nią ilość razy, aż żądane ustawienie pojawi się na wyświetlaczu (tutaj: stopień „2”). 6. Potwierdzić ustawienie przyciskiem Enter (Enter). enter Menu zostaje automatycznie zamknięte. 7. Aby wprowadzić dalsze ustawienia, ponownie otworzyć...
  • Seite 277 Polski Urządzenie posiada trzy pozycje zapisu masy. Można zapisywać różne wartości masy i aktywować je pojedynczo zależnie od sytuacji wyjściowej; po aktywacji będą one automatycznie odejmowane od wyniku pomiaru. Sto 1 (Weight) Sto 2 (Weight) Sto 3 (Weight) Net Weight 1.
  • Seite 278: Włączanie Funkcji Autohold (Ahold)

    Włączanie funkcji Po włączeniu funkcji Autohold wynik każdego ważenia Autohold (Ahold) będzie dalej wyświetlany po zwolnieniu wagi. Nie jest potrzebne ręczne włączanie funkcji Hold przy każdym ważeniu. WSKAZÓWKA: W niektórych modelach funkcja ta jest włączona fabrycznie. W razie potrzeby można wyłączyć tę funkcję.
  • Seite 279: Ustawianie Funkcji Filtrowania (Fil)

    Polski Ustawianie funkcji Dzięki funkcji filtrowania (Fil = filtr) można zmniejszyć filtrowania (Fil) wpływ zakłóceń mechanicznych (spowodowanych np. przez poruszenie się pacjenta) na pomiar. 1. Wybrać w menu punkt „Fil”. 2. Potwierdzić wybór. Aktualne ustawienie pojawia się na wyświetlaczu. 3. Wybrać stopień filtrowania. –...
  • Seite 280: Przywracanie Ustawień Fabrycznych (Reset)

    3. Potwierdzić wybór. Menu zostaje automatycznie zamknięte. Przywracanie ustawień Ustawienia fabryczne można przywrócić dla fabrycznych (RESET) następujących funkcji: Ustawienie Funkcja fabryczne Autohold (Ahold) zależnie od modelu Sygnał dźwiękowy (Press) Sygnał dźwiękowy (Hold) Filtrowanie (Fil) Autoclear (Aclear) zależnie od modelu Pre-Tara (Pt) 0 kg Wzrost dla wskaźnika 170 cm...
  • Seite 281: Preparacja Higieniczna

    Polski 7. PREPARACJA HIGIENICZNA OSTRZEŻENIE! Porażenie prądem elektrycznym Urządzenie nie jest pozbawione zasilania po wyłączeniu włącznika-wyłącznika i zgaśnięciu wyświetlacza. Przy używaniu płynów przy urzą- dzeniu może dojść do porażenia prądem elek- trycznym. – Aby całkowicie odłączyć urządzenie od źródła prądu elektrycznego, przed każdą preparacją...
  • Seite 282: Dezynfekcja

    7.2 Dezynfekcja UWAGA! Uszkodzenie urządzenia Szybki podziałek i wyświetlaczy są wykonane ze szkła akrylowego. Szybki ze szkła akrylo- wego mogą pękać albo matowieć wskutek sto- sowania nieodpowiednich środków dezynfekcyjnych. – Stosować wyłączne środki dezynfekcyjne przystosowane do wrażliwych powierzchni. Odpowiednie środki dezynfekcyjne są dostępne w handlu specjalistycznym.
  • Seite 283: Kontrola Działania

    W razie stwierdzenia podczas kontroli błędów albo niezgodności, których nie można usunąć na podstawie rozdziału „Co robić, jeżeli…?“ od strony 284, urządzenia nie wolno używać. – Zlecić naprawę urządzenia serwisowi seca albo autoryzowanemu partnerowi serwisowemu. – Przestrzegać zasad podanych w rozdziale „Konserwacja“...
  • Seite 284: Co Robić, Jeżeli

    „Er:X:16“? - Uruchomić ponownie wagę. 10.KONSERWACJA Fabrycznie nowa waga seca waży z dokładnością powyżej ±0,15 %. Aby trwale zachować ten poziom dokładności, produkt należy starannie ustawić i regularnie konserwować. Zaleca się konserwację co 3- 5 lat, w zależności od częstotliwości używania urządzenia.
  • Seite 285: Dane Techniczne

    Polski UWAGA! Ryzyko błędnego pomiaru wskutek nieprawidłowej konserwacji – Konserwacje i naprawy zlecać wyłącznie serwisowi firmy seca albo autoryzowanemu partnerowi serwisowemu. – Adres najbliższego serwisu można znaleźć na stronie www.seca.com lub otrzymać e- mailem po wysłaniu zapytania na adres service@seca.com.
  • Seite 286: Akcesoria Opcjonalne

    Dane techniczne seca 674 EN 60601-1: • urządzenie z izolacją ochronną, klasa ochrony II: • urządzenie elektromedyczne, typ B: Maksymalne obciążenie 360 kg / 800 lbs / 57 sts Minimalne obciążenie 2,0 kg Jednostka skali 50 g / 0,1 lbs...
  • Seite 287: Gwarancja

    Polski 15.GWARANCJA Na wady spowodowane błędami materiałowymi albo produkcyjnymi udzielamy dwuletniej gwarancji, licząc od dnia dostawy. Gwarancja nie obejmuje części ruchomych, takich jak baterie, kable, zasilacze sie- ciowe, akumulatory itp. Wady objęte gwarancją są usu- wane bezpłatnie za okazaniem dowodu zakupu. Inne roszczenia nie będą...
  • Seite 289 Konformitätserklärung Declaration of conformity Declaration of conformity Certificat de conformité Dichiarazione di conformità Declaratión de conformidad Overensstemmelsesattest Försäkran om överensstämmelse Konformitetserklæring Vaatimuksenmukaisuusvakuutus Verklaring van overeenkomst Declaração de conformidade Δήλωση Συμβατότητας Prohlášení o shodĕ Vastavusdeklaratsioon Megfelelőségi nyilatkozat Atitikties patvirtinimas Atbilstības apliecinājums Oświadczenie o zgodności Izjava o skladnosti Vyhlásenie o zhode...
  • Seite 290 Η μη αυτόματη ζυγαριά ατόμων Osobní váhy s neautomatickou činností Tervishoiuteenuse osutamisel kasutatavad mitteautomaatkaalud A nem automatikus mũködésũ személyi mérleg Neautomatinòs buitinòs svarstyklòs Manuālie (neautomātiskie) personālsvari Nieautomatyczna waga osobowa Neavtomatska osebna tehtnica Nesamostatná osobná váha Otomatik olmayan yetiflkin tartısı Model: 674-13-21-004...
  • Seite 291 93/42/EEB ir medicinos prietaisų. Svari atbilst šādu direktīvu spēkā esošajām prasībām: 93/42/EEK par medicīnas ierīcēm. Hamburg, March 2013 Frederik Vogel CEO Development and Manufacturing seca gmbh & co. kg. Hammer Steindamm 9-25 22089 Hamburg Germany Phone: +49 40.200 000-0 Fax: +49 40.200 000-50...

Inhaltsverzeichnis