Herunterladen Inhalt Inhalt Diese Seite drucken

Werbung

Verfügbare Sprachen
  • DE

Verfügbare Sprachen

  • DEUTSCH, seite 1

Werbung

Inhaltsverzeichnis
loading

Inhaltszusammenfassung für auna 10032059

  • Seite 3: Inhaltsverzeichnis

    Sehr geehrter Kunde, wir gratulieren Ihnen zum Erwerb Ihres Gerätes. Lesen Sie die folgenden Anschluss- und Anwendungshinweise sorgfältig durch und befolgen Sie diese, um möglichen technischen Schäden vorzubeugen. Für Schäden, die durch Missachtung der Sicherheitshinweise und unsachgemäßen Gebrauch entstehen, übernehmen wir keine Haftung. INHALT Technische Daten 4 Sicherheitshinweise 5 Geräteübersicht 7...
  • Seite 4: Technische Daten

    TECHNISCHE DATEN Artikelnummer 10032059 10032060 Stromversorgung 230 V / 50 Hz Netzgerät 6 x 1,5 V (LR 14) Batteries CD-Player Unterstützte Formate MP3 (MPEG 1 Audio Layer-3) FM Radio Frequenzbereich 87,5 MHz - 108 MHz DAB radio Frequenzbereich 174,926 MHz (5A) - 239,2 MHz (13F) AUDIO IN Stereo-Mini-Anschluss Eingänge...
  • Seite 5: Sicherheitshinweise

    SICHERHEITSHINWEISE Schutz gegen Strahleneinwirkung • Versuchen Sie nicht, das Gehäuse des Geräts zu öffnen, da die  Strahleneinwirkung des Lasers schädlich für die Augen ist. • Schalten Sie das Gerät sofort aus, wenn Flüssigkeiten oder feste  Gegenstände in das Geräteinnere gelangen sollten. • Fassen Sie die Linse nicht an und stoßen Sie sie nicht, da Sie dadurch die Linse beschädigen könnten, was dazu führen könnte, dass das Gerät  nicht mehr richtig funktioniert. • Stecken Sie nichts in die Sicherheitsnut, da dadurch die Laserdiode  aktiviert wird, während das CD-Fach noch offen ist. • Wenn Sie das Gerät für einen längeren Zeitraum nicht benutzen, schalten Sie das Gerät aus. Ziehen Sie den Netzstecker aus der ...
  • Seite 6 • Verwenden Sie das Gerät nur in Kombination mit einem vom Hersteller empfohlenen oder mit dem Gerät gelieferten Rollwagen, Stand, Stativ, Halterung oder Tisch. Kondensation • Wenn das Gerät in einem warmen und feuchten, geheizten Raum abgestellt wird, können sich im Geräteinneren Wassertropfen oder  Kondensation bilden. • Die Funktionstüchtigkeit des Geräts kann durch Kondensation im ...
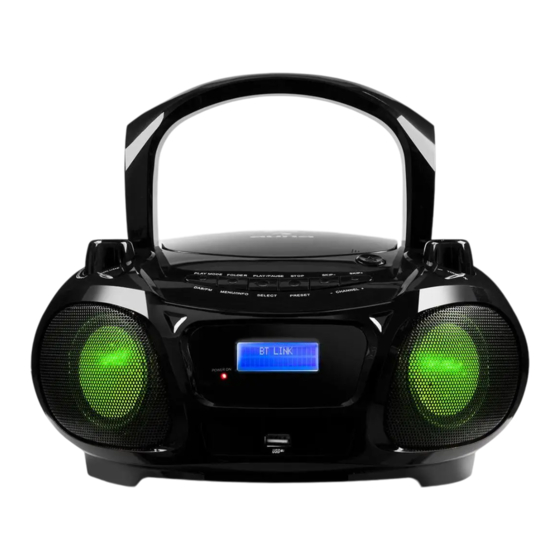
  • Seite 7: Geräteübersicht

    GERÄTEÜBERSICHT...
  • Seite 8 Funktionsschalter (Aus/DAB_FM/CD_USB/AUX/BT) Laustärkeregler Wiedergabemodus DAB/FM Funktionstaste MP3-Ordner - MENU/INFO Taste Wiedergabe/Pause USB Funktionstaste, DAB Auswahl-/Suchtaste Stopptaste / Verbindungstaste PAIR/ Speichertaste Vorheriger Titel / Rückwärtssuche / Kanal - Nächster Titel / Vorwärtssuche / Kanal + CD-Fach öffnen/schließen 10 Bass Kontrollknopf Lichtschalter an/aus 12 Linker Lautsprecher 13 USB-Anschluss 14 LCD-Bildschirm...
  • Seite 9: Inbetriebnahme

    INBETRIEBNAHME Stromversorgung Dieses Gerät läuft mit einer Stromspannung von 230V~50Hz oder 6 1,5V „C“ (UM-„) Batterien. Versuchen Sie nicht, das Radio mit einer anderen Stromspannung zu verwenden, da das Gerät dadurch beschädigt werden könnte und die Garantie somit hinfällig wäre. Vergewissern Sie sich vor der  Verwendung des Geräts, dass die Steckdose, die Sie verwenden möchten  funktionstüchtig ist und eine konstante Stromleistung aufweist. Batteriebetrieb 1. Entfernen Sie die Abdeckung des Batteriefachs. 2. Fügen Sie 6 1,5V Batterien des Typs „C“ richtig gepolt in das Batteriefach ein (die Batterien sind nicht im Lieferumfang enthalten).
  • Seite 10 Collegare ad una presa di corrente. Collegare all’ingresso jack AUX IN  Cavo di alimentazione AC una presa di corrente. (incluso in consegna) IMPORTANTE Utilizzo della gestione energetica (possibile solo per modelli europei). Questo dispositivo è dotato di funzione standby automatica. Se per 15 minuti il dispositivo non viene utilizzato e non c’è musica in riproduzione, il dispositivo passa in modalità...
  • Seite 11: Dab+ Radio

    DAB+ RADIO Wenn dieses Gerät das erste Mal mit dem Stromnetz verbunden und vom Standby-Modus aus eingeschaltet wird, wird das Gerät automatisch in den DAB-Modus wechseln und einen automatischen Sendersuchlauf starten. Während des Sendersuchlaufs wird der LCD-Bildschirm das Wort „Suche…“, einen Balken mit dem Suchfortschritt und die Anzahl der bisher gefundenen Sender anzeigen.
  • Seite 12 2. Drücken Sie zur Auswahl von „DRC“ die Tasten  CHANNEL +/- drücken  Sie anschließend zum Bestätigen die Taste SELECT. 3. Drücken Sie zur Auswahl von „aus/hoch/niedrig“ die Tasten CHANNEL  +/-. 4. Drücken Sie zum Bestätigen die Taste SELECT. Anzahl der Sender verringern Gegebenenfalls möchten Sie alle nicht verfügbaren Sender aus der Senderliste löschen. 1. Drücken Sie während des DAB-Modus die Taste MENU/INFO, um das  Menü anzuzeigen. 2. Drücken Sie die Tasten CHANNEL +/-  zur Auswahl von „Sender  verringern“ und drücken Sie anschließend zum Bestätigen die Taste   .  3. Drücken Sie zur Auswahl von „Ja“ die Tasten CHANNEL +/- und drücken  Sie die Taste ...
  • Seite 13 3. Der Sender wird innerhalb von wenigen Sekunden gespeichert und  der  LCD-Bildschirm wird „Sender # gespeichert“ anzeigen Einen gespeicherten Sender aufrufen 1. Sobald Sie einen Sender einem Speicherplatz zugewiesen haben, können Sie diesen durch Drücken der Taste Speichertaste  aufrufen. 2. Drücken Sie so lange die Taste CH+, bis der von Ihnen gewünschte  Sender auf dem Bildschirm angezeigt wird. Drücken Sie die Auswahltaste     zum Starten der Senderwiedergabe.  DAB INFO MODI Wenn Sie die Taste MENU/INFO drücken, wird der Bildschirm durch die  folgenden Anzeigemodi wechseln. Die Informationen des jeweiligen Anzeigemodus werden im unteren Abschnitt des LCD-Bildschirms angezeigt.
  • Seite 14: Ukw Radio

    an einen anderen Platz zu stellen. Audio Bit Rate Der LCD-Bildschirm zeigt Ihnen die empfangene Audio Bit Rate an. DLS (Dynamic Label Segment) DLS ist eine Nachricht, die ein Radiosender während der Übertragung im Lauftext anzeigen lassen kann. Diese Nachricht enthält meistens  Informationen wie Programmdetails etc. UKW RADIO Von DAB zu FM wechseln Um das Gerät in den FM-Modus zu wechseln, drücken Sie entweder ...
  • Seite 15 oder   „Audioeinstellungen“ aus. Drücken Sie zum  Bestätigen die Taste  SELECT. 2. Drücken Sie die Tasten CHANNEL +/- um „Stereo erlaubt“ oder „nur Mono“ auszuwählen und bestätigen Sie Ihre Auswahl mit der Taste  .  Audiomodus Drücken Sie die MONO/STEREO-Taste , um zwischen den Stereo- und  Mono-Modi hin- und her zu wechseln. Senderspeicherung Sie können bis zu 20 Ihrer Lieblingssender in der Senderliste speichern.  Dadurch wird es Ihnen ermöglicht, Ihre Lieblingssender schnell und einfach einzustellen.
  • Seite 16 Frequenz Die Frequenz des eingestellten Senders wird angezeigt, wie beispielsweise „87,5 MHz“. Audioformat Die Radiosender werden entweder in Mono oder Stereo angezeigt.
  • Seite 17: Cd-Betrieb

    CD-BETRIEB Die in diesem Gerät verwendeten CD-Mechanismen sind zum Lesen aller kommerziellen CDs konzipiert. Das Gerät kann ebenfalls selbst gebrannte  MP3s und CD-E/CD-RW abspielen, wobei es allerdings bis zu 10 Sekunden  dauern kann, bis die eigentliche Wiedergabe startet. Wenn die Wiederga- be dennoch nicht beginnen sollte, ist es wahrscheinlich, dass dies an der Qualität der CD liegt oder daran, dass die gebrannte CD mit der Software des Geräts nicht kompatibel ist. Der Hersteller des Geräts ist nicht für die  Wiedergabequalität von CDs verantwortlich.
  • Seite 18: Usb-Anschluss

    nur noch den von Ihnen ausgewählten Titel wiederholt abspielen. 2. Drücken Sie die Taste PLAY MODE zweimal, wird der LCD-Bildschirm  „REP_ALL“ anzeigen. Die CD wiederholt nun alle Titel. 3. Drücken Sie die Taste PLAY MODE dreimal, wird der LCD-Bildschirm  „RANDOM“ anzeigen. Die Zufallswiedergabe ist aktiviert. Alle Titel  werden in zufälliger Reigenfolge wiedergegeben. Nachdem jeder Titel einmal abgespielt wurde, stoppt die Wiedergabe automatisch. 4. Bei viermaligem drücken der Taste PLAY MODE wird die  Zufallswiedergabe deaktiviert. Speichermodus Bis zu 30 (CD) bzw. 99 (MP3) Titel können für die CD-Wiedergabe in ...
  • Seite 19: Aux-In-Betrieb

    USB-Modus zu wechseln. 4. Die Bedienung der Tasten Wiedergabe/Pause, Stopp, Titel überspringen, wiederholen und speichern sind dieselben wie im CD/MP3-Modus. Drücken Sie einmal die Taste PLAY MODE. Der LCD-Bildschirm zeigt dann  „REP_ONE“ an. Es wird nun nur noch der von Ihnen ausgewählten Titel wiederholt abgespielt. Drücken Sie zweimal die Taste  PLAY MODE. Der LCD-Bildschirm zeigt dann  „REP_ALBUM“ an. Es wird nun nur noch der aktuelle Ordner wiederholt  abgespielt. Drücken Sie dreimal die Taste  PLAY MODE. Der LCD-Bildschirm zeigt dann  „REP_ALL“ an. Es werden nun alle Dateien wiederholt abgespielt. Bei viermaligem Drücken der Taste  PLAY MODE wird das Wiederholen von ...
  • Seite 20: Bt-Betrieb

    sich die Funktionstaste in der Position BT/AUX befindet. Denken Sie daran,  das Verbindungskabel aus dem AUX-IN-Anschluss herauszuziehen, wenn Sie  wieder den BT-Modus verwenden möchten. BT-BETRIEB • Schieben Sie den Funktionsschalter auf die Position AUX/BT.  Schalten Sie das Gerät ein und befolgen Sie die unten aufgeführten Anweisungen, um sich über BT mit dem Gerät zu verbinden (ziehen Sie zunächst das Verbindungskabel aus dem AUX-IN-Anschluss). • Verbinden eines Smartphones oder eines anderen BT-fähigen Geräts mit dem CD-Player •...
  • Seite 21: Led-Lichteffekte

    HINWEISE: 1. Das Aktivieren der BT-Funktion kann bei unterschiedlichen Geräten  variieren. Lesen Sie zum Aktivieren der BT-Funktion den entsprechenden  Abschnitt der Bedienungsanleitung des jeweiligen Geräts durch. 2. Wenn Ihr BT-Gerät A2DP-Profile nicht unterstützt, wird Ihr CD-Player,  auch wenn er mit diesem Gerät verbunden ist, keine Musik wiedergeben  können. 3. Wenn Sie Ihren Computer via BT mit dem CD-Player verbinden, kann es vorkommen, dass Sie den CD-Player in den Optionen des  Computers als Ausgangslautsprecher einstellen müssen, damit die Musik  wiedergegeben werden kann. LED-LICHTEFFEKTE • Die LED-Lichteffekte im Lautsprecher und um den zentralen Bildschirm  des Geräts herum werden, basierend auf der wiedergegebenen Musikquelle, automatisch kreiert. ...
  • Seite 22: Fehlerbehebung

    FEHLERBEHEBUNG Problem Mögliche Ursache Lösung Geräusche oder verzerrter - Der Sender wurde nicht - Stellen Sie den Sender Ton bei der FM- richtig eingestellt. richtig ein. Wiedergabe -. Die Teleskopantenne  -. Fahren Sie die wurde nicht ausgefahren. Teleskopantenne aus. CD wird nicht abgespielt - Das Gerät befindet sich ...
  • Seite 23: Hinweise Zur Entsorgung

    HINWEISE ZUR ENTSORGUNG Befindet sich die linke Abbildung (durchgestrichene  Mülltonne auf Rädern) auf dem Produkt, gilt die  Europäische Richtlinie 2012/19/EU. Diese Produkte dürfen  nicht mit dem normalen Hausmüll entsorgt werden. Informieren Sie sich über die örtlichen Regelungen zur getrennten Sammlung elektrischer und elektronischer  Gerätschaften. Richten Sie sich nach den örtlichen Regelungen und entsorgen Sie Altgeräte nicht über den Hausmüll. Durch die regelkonforme Entsorgung  der Altgeräte werden Umwelt und die Gesundheit Ihrer Mitmenschen vor möglichen negativen Konsequenzen geschützt.
  • Seite 24 Dear Customer, Congratulations on purchasing this equipment. Please read this manual carefully and take care of the following hints on installation and use to  avoid technical damages. Any failure caused by ignoring the items and cautions mentioned in the operation and installation instructions are not covered by our warranty and any liability. CONTENTS Specifications 25 Safety Instructions 26...
  • Seite 25: Specifications

    SPECIFICATIONS Item number 10032059, 10032060 230 V / 50 Hz Power supply 230 V~ Power Adaptor 6 x 1,5 V (LR 14) Batteries CD-Player Supported audio format MP3 (MPEG 1 Audio Layer-3) FM Radio Tuning range 87,5 MHz - 108 MHz...
  • Seite 26: Safety Instructions

    SAFETY INSTRUCTIONS Follow the advice below for safe operations. ON PROTECTION AGAINST LASER ENERGY EXPOSURE • As the laser beam used in this compact disc player is harmful to the eyes, do not attempt to disassemble the casing. • Stop operation immediately if any liquid or solid object should fall into the cabinet.
  • Seite 27 normally. • Let it stand for 1 to 2 hours before turning the power on, or gradually heat the room up and dry the unit before use. BATTERY NOTES AND CARE • Danger of explosion if the battery is replaced incorrectly. Replace only with the same or equivalent type •...
  • Seite 28: Product Overview

    PRODUCT OVERVIEW...
  • Seite 29 Function Switch (OFF/DAB/FM/CD_USB/AUX BT) Volume Control Knob Play mode Button DAB/FM function Button Mp3 folder/MENU INFO Button Play/Pause  / SELECT  USB function Button DAB select/Scan Button Stop  Button, PAIR/PRESET Button Skip/Search/Backward/CHANNEL- Button Skip/Search Forward/CHANNEL+ Button CD Door Open 10 Bass Control Knob Light ON/OFF Switch 12 Left Speaker...
  • Seite 30: Power Sources

    POWER SOURCES This unit operates on AC 230V~ 50Hz or 6 pieces of 1.5V “C” (UM-2) batteries. Do not attempt to operate the radio on any other power source. You could cause damage to the unit and void your warranty. Please be sure the power outlet you plug this unit into is working and  receives constant (unswitched) power. A. BATTERY OPERATION 1. Remove the Battery Door. 2.
  • Seite 31 operate on AC Power only. 2. Slide the FUNCTION SWITCH to “CD/USB” for CD or USB play, “FM” for FM radio, “BT/AUX” for BT or AUX play and “OFF” for unit power off. IMPORTANT To use the power-management function (European models only) This unit is equipped with an automatic standby function. With this function, the unit enters standby mode automatically after about 15 minutes if there is no operation or audio signal output.
  • Seite 32: Dab+ Operation

    DAB+ OPERATION If the unit is connected to the mains power and then switched on from standby for the first time, the unit will automatically enter into the DAB  mode and perform auto scan function. During the scan the display will show “Scanning…” together with a slide bar that indicates the progress of the scan and the amount of stations that have been found so far.
  • Seite 33: Software Information

    PRUNE You may remove all unavailable stations from the list. 1. During DAB mode, press and hold down MENU button to display the menu. 2. Press the CHANNEL + or - buttons to select “Prune” and then press the SELECT button to confirm. 3. Press the CHANNEL + or - buttons to select <YES>, and then press the  SELECT button to delete the unavailable stations. 4.
  • Seite 34 modes. The information of each display mode is displayed on the lower segment of the display. SIGNAL STRENGTH The display will show a slide bar to indicate the signal strength, the stronger the signal, the longer the bar will be from left to right. PROGRAMME TYPE This describes the “style”...
  • Seite 35: Fm Operation

    FM OPERATION SWITCHING FROM DAB TO FM MODE To switch the unit to FM mode, press the DAB/FM button repeatedly to select FM mode The display will show the frequency. AUTO SCAN Press and hold SELECT  button until the tuner starts searching for a ...
  • Seite 36 number. Then press the SELECT button confirm. 3. The station will be stored in few seconds and the display will then show “Preset # Stored”. RECALLING A STORED STATION 4. Once you have saved a station to one of the preset buttons, you can recall it by pressing the PRESET button. The display will show “<Recall to P#>”...
  • Seite 37: Cd Operation

    CD OPERATION PLEASE READ THIS IMPORTANT INFORMATION: CD mechanisms used in devices like this are designed to read all  commercial CDs. It will also read self-compiled MP3,CD-R/CD-RW discs, but it may take up to 10 seconds for the actual playback to begin. If playback  does not start, it is likely due to the quality of the CD-R/RW disc and/or  the compatibility of the CD compilation software. The manufacturer is not responsible for the playback quality of CD-R/RW discs. Do not attach a label or seal to either side of the CD-R/RW disc. It may cause a malfunction.
  • Seite 38: Programme Setting

    playback will stop automatically. 4. Press the PLAY MODE button once more again, the “RANDOM” function  will turn off. PROGRAMME SETTING User can program up to 30 tracks in CD mode or 99 tracks in MP3 in any  desired order. Programme mode is activated while in STOP mode. 1. Press the PLAY MODE button to enter program mode. 2. Press the  or    buttons to select the track that you want to preset. 3. Press the PLAY MODE button to confirm the track. 4. Repeat steps 2-3 to program more tracks. Once it is completed, press  the PLAY/PAUSE BUTTON to start playback of the programmed tracks. PROGRAMME CANCEL To cancel the program, press the STOP button twice, or open the disk tray  and then close it again. USB OPERATION USB SLOT OPERATION DON’T have compact disc in CD compartment.
  • Seite 39: Aux In Operation

    on the display. It will play all files repeatedly. REPEAT  OFF: Press the  PLAY MODE button once more again, the repeat  function will turn off. NOTE: • The unit can only play MP3 file format in USB operation. • If your USB device is loaded with MP3’s but the display keeps showing  “NO” on the display, the format of your USB device might not be compatible with the unit. • This unit supports USB versions 1.1 and 2.0. • The unit can support USB devices with up to 32GB of memory. •...
  • Seite 40: Bt Operation

    BT OPERATION Press Slide the “FUNCTION” switch to AUX/BT position. to turn ON the unit and follow the directions below to connect via BT. (disconnect the AUX in cable). PAIRING (Linking) a BT ENABLED cell phone OR OTHER BT ENABLED DEVICE to the Roadie If the Roadie has never been paired with a BT device before. You need to ...
  • Seite 41: Led Light Show

    LED LIGHT SHOW •   T he LED light shows inside the speaker and around the center display  of the unit are created automatically based on the music source being played at the time • To turn on the LED light show, slide LIGHT switch to ON position. • To turn off the LED light show, slide LIGHT switch to OFF position. Note: If the brightness is glaring, turn on room lights or turn off LED light  show.
  • Seite 42: Troubleshooting

    TROUBLESHOOTING Symptom Possible Cause Solution Noise or sound - Station not tuned - Retune the DAB or FM distorted on DAB/FM properly for DAB or FM. broadcast station. broadcast. - DAB/FM telescopic - DAB/FM: Extend DAB or antenna is not extended. FM telescopic antenna CD player will not play Unit not in CD function...
  • Seite 43: Disposal Considerations

    DISPOSAL CONSIDERATIONS According to the European waste regulation 2012/19/EU this symbol on the product or on its packaging indicates  that this product may not be treated as household waste. Instead it should be taken to the appropriate collection  point for the recycling of electrical and electronic equipment. By ensuring this product is disposed of correctly, you will help prevent potential negative consequences for the environment and human health, which could otherwise be caused by inappropriate waste handling of this product.
  • Seite 44 Chère cliente, cher client, Toutes nos félicitations pour l’acquisition de ce nouvel appareil. Veuillez lire attentivement les instructions suivantes de branchement et d’utilisation afin d’éviter d’éventuels dommages. Le fabricant ne saurait être tenu pour  responsable des dommages dus au non-respect des consignes de sécurité et à la mauvaise utilisation de l’appareil SOMMAIRE Fiche Technique 46 Consignes de Sécurité...
  • Seite 45: Fiche Technique

    FICHE TECHNIQUE Numéro d'article 10032059, 10032060 230 V / 50 Hz Alimentation 230 V~ Adaptateur secteur 6 x 1,5 V (LR 14) Piles Lecteur CD Formats audio lus MP3 (MPEG 1 Audio Layer-3) Radio FM Plage de fréquences 87,5 MHz - 108 MHz DAB radio Plage de fréquences...
  • Seite 46: Consignes De Sécurité

    CONSIGNES DE SÉCURITÉ Protection contre les rayonnements • N'essayez pas de démonter le châssis de l'appareil car le rayonnement laser est dangereux pour les yeux. • Eteignez l'appareil immédiatement si des liquides ou des objets durs pénètrent à l'intérieur du châssis. •...
  • Seite 47 recommandés par le fabricant ou livrés avec l'appareil. Condensation • Lorsque vous déposez l'appareil dans une pièce chaude humide et chauffée, il peut se former des gouttes d'eau à l'intérieur de l'appareil ou  de la condensation. • Le fonctionnement de l'appareil peut être limité par la présence de la  condensation. • Dans ce cas, laissez l'appareil reposer pendant 1-2 heures avant de l'allumer ou bien réchauffez la pièce progressivement et laissez sécher  l'appareil avant de l'utiliser.
  • Seite 48: Aperçu De L'appareil

    APERÇU DE L'APPAREIL...
  • Seite 49 Sélecteur de fonctions FUNCTION (arrêt /DAB/FM/CD/USB/ AUX/BT) Réglage du volume Mode de lecture PLAY MODE, touche de fonction DAB/FM Dossier MP3 FOLDER+, touche MENU/INFO Lecture / Pause Touche de fonction USB, DAB touche de sélection/recherche Touche Stop / touche deconnexion PAIR/ touche mémorisation Titre précédent SKIP-/ recherche arrière Titre quivant SKIP+/ recherche avant...
  • Seite 50: Sources D'alimentation

    SOURCES D'ALIMENTATION Alimentation Cet appareil fonctionne avec une tension électrique de 230V~50Hz ou avec 6 piles de 1,5V de type „C“ (UM). N'essayez pas d'utiliser la radio avec une tension différente car vous risquez d'endommager l'appareil et de perdre la  garantie. Avant d'utiliser l'appareil, assurez-vous que la prise que vous allez utiliser est fonctionnelle et délivre une tension constante.
  • Seite 51 IMPORTANT Utilisation de la gestion d'énergie (disponible sur les modèles européens uniquement). Cet appareil dispose d'une fonction de mise en veille automatique. L'appareil passe automatiquement en veille au bout de 15 minutes ans utilisation et sans lecture de musique.
  • Seite 52: Radio Dab

    RADIO DAB+ Lorsque cet appareil est branché pour la première fois sur le secteur et que vous l'allumez à partir du mode veille l'appareil passe automatiquement en mode DAB et effectue une recherche des stations. Pendant la recherche des  stations, l'écran LCD affiche le mot „recherche…“, une barre de progression  de la recherche et le nombre des stations découvertes jusqu'ici. Dès que la recherche de stations est terminée, l'appareil se place sur la première station automatiquement.
  • Seite 53 Réduire le nombre de stations A l'occasion, vous souhaiterez peut-être supprimer toutes les stations  indisponibles de la liste des stations. 1.   E n mode DAB, appuyez sur la touche MENU/INFO pour afficher le menu.  2. Appuyez sur les touches CHANNEL +/- pour choisir „réduire le nombre de stations“ et appuyez sur la touche SELECT pour confirmer. 3. Pour choisir „oui“, appuyez sur les touches CHANNEL +/- et appuyez sur la touche SELECT pour confirmer l'effacement de toutes les stations ...
  • Seite 54 affichée à l'écran. Appuyez sur la touche de sélection SELECT pour démarrer l'écoute de la station. DAB INFO MODI Lorsque vous appuyez sur la touche MENU/INFO, l'écran affiche tour à  tour les modes d'affichage suivants. Les informations de chaque mode  d'affichage sont indiquées dans le paragraphe inférieur de l'écran LCD. Programmation Le "style" ou le "genre" su programme diffusé est affiché ici. Ensemble L'écran indique le nom du multiplex et celui de la station que vous êtes  en train d'écouter. Un multiplex est une collection de différentes radios  Internet regroupées sous une même fréquence. Il y a des multiplexes  nationaux ou locaux. Les multiplexes locaux contiennent des stations parfois spécifiques d'une région. REMARQUE : DAB regroupe, plusieurs émetteurs de radio ensemble contrairement aux radios normales et les retransmet sur une seule fréquence.
  • Seite 55: Radio Fm

    RADIO FM Pour passer de DAB à FM Pour passer en mode FM, appuyez soit plusieurs fois sur touche DAB/FM pour sélectionner le mode FM-Modus. L'écran LCD affiche la fréquence. Recherche automatique de stations Appuyez sur la touche SELECT jusqu'à ce que l'appareil commence à rechercher une station. Les différentes fréquences sont alors examinées.  Recherche manuelle des stations Appuyez sur les touches CHANNEL +/- jusqu'à...
  • Seite 56 mémoire. pour confirmer, appuyez sur la toucheS LECT. 3. La station est mémorisée en quelques secondes et l'écran LCD indique „station mémorisée sur P# “. Appeler une radio mémorisée 1. Dès que vous avez attribué un emplacement mémoire à une station, vous pouvez l'appeler en appuyant sur la touche mémoire . L'écran LCD affiche „<sur P# lire>“ afficher.
  • Seite 57: Fonctionnement Des Cd

    FONCTIONNEMENT DES CD Les mécanismes de CD utilisés dans cet appareil sont conçus pour lire tous les CD du commerce. L'appareil peut aussi lire les CD MP3 et les CD-E/CD- RW, cela peut toutefois prendre jusqu'à 10 secondes avant que la lecture ne démarre effectivement. Si la lecture ne démarre toujours pas, il est probable ...
  • Seite 58 ALL“. Le CD répètera tous les titres. 3. Appuyez trois fois sur la touche PLAY MODE, l'écran LCD indique  „RANDOM“. La lecture aléatoire est activée. Tous les titres sont lus dans un ordre aléatoire. Une fois que tous les titres ont été lus une fois, la lecture s'arrête automatiquement. 4. Si vous appuyez une quatrième fois sur la touche PLAY MODE, vous  quittez la lecture aléatoire. Mode mémorisation Vous pouvez mémoriser jusqu'à...
  • Seite 59: Branchement Usb

    BRANCHEMENT USB Il n'y a pas de CD dans le lecteur CD. 1. Glissez l'interrupteur de fonction en position „CD/USB“. 2. Branchez la clé USB sur le port USB. 3. Le fonctionnement des touches lecture/pause, stop, saut de titre, répétition et mémorisation est le même qu'en mode CD/MP3. 4.
  • Seite 60: Fonctionnement Aux-In

    FONCTIONNEMENT AUX-IN Cet appareil dispose d'une prise AUX-IN sur laquelle vous pouvez brancher votre iPod, lecteur MP3 ou autre lecteur de musique numérique. 1. Reliez la prise casque de votre appareil externe à la prise AUX-IN au dos de l'appareil (le câble de connexion n'est pas fourni). 2.
  • Seite 61: Fonctionnement Bt

    FONCTIONNEMENT BT • Mettez l'interrupteur de fonction en position AUX/BT. Allumez l'appareil et suivez les indications ci-dessous pour vous connecter en BT avec l'appareil (débranchez d'abord le câble de connexion de la prise AUX- IN). • Connectez un smartphone ou un autre appareil compatible BT avec le lecteur CD •...
  • Seite 62: Effet Lumineux Led

    REMARQUES : 1. L'activation de la fonction BT peut varier selon les appareils. Pour activer la fonction BT, lisez le paragraphe correspondant du mode d'emploi de chaque appareil. 2. Si votre appareil BT ne supporte pas le profil A2DP, votre lecteur de CD  ne pourra lire aucune musique, même s'il est connecté avec cet appareil. 3. Lorsque vous connectez votre PC au lecteur de CD via BT, il se peut que vous deviez installer le lecteur de CD comme enceinte externe dans les options du PC pour pouvoir retransmettre la musique.
  • Seite 63: Résolution Des Problèmes

    RÉSOLUTION DES PROBLÈMES Problème Cause possible Solution Parasites ou sons décalés - Vous n'avez pas réglé de réglez convenablement la en écoutant la FM station. station. -Vous n'avez pas déployé - Déployez l'antenne l'antenne télescopique. télescopique. Le CD n'est pas lu - l'appareil ne se trouve -.
  • Seite 64: Conseils Pour Le Recyclage

    CONSEILS POUR LE RECYCLAGE Le pictogramme ci-contre apposé sur le produit signifie  que la directive européenne 2012/19/UE s‘applique (poubelle à roues barrée d’une croix). Ces produits ne peuvent être jetés dans les poubelles domestiques  courantes. Renseignez-vous concernant les règles appliquées pour la collecte d’appareils électriques et électroniques. Conformez-vous aux réglementations locales et ne jetez pas vos anciens produits avec les ordures ménagères.
  • Seite 65 Gentile Cliente, La ringraziamo per aver acquistato il dispositivo. La preghiamo di leggere attentamente le seguenti istruzioni per l’uso e di seguirle per evitare possibili danni tecnici. Non ci assumiamo alcuna responsabilità per danni scaturiti da una mancata osservazione delle avvertenze di sicurezza e da un uso improprio del dispositivo.
  • Seite 66: Dati Tecnici

    DATI TECNICI Numero articolo 10032059, 10032060 230 V / 50 Hz Alimentazione 230 V~ Dispositivo alimentato a corrente 6 x 1,5 V (LR 14) Pile Lettore CD Formato audio supportato MP3 (MPEG 1 Audio Layer-3) Radio FM Intervallo di frequenza...
  • Seite 67: Avvertenze Di Sicurezza

    AVVERTENZE DI SICUREZZA sicuro del dispositivo. Protezione dall’esposizione alle radiazioni • Non cercare di smontare l’alloggiamento del dispositivo, in quanto l’esposizione alle radiazioni del laser può essere dannosa per gli occhi. • Spegnere immediatamente il dispositivo, se sono finiti al suo interno  liquidi o oggetti duri. • Non toccare la lente e non colpirla: questo potrebbe danneggiare la lente, provocando il malfunzionamento del dispositivo.
  • Seite 68 posizionandolo in un luogo con ventilazione insufficiente, coprendolo  con un telo o posizionandolo su un tappeto. • Utilizzare il dispositivo solo in combinazione con un carrello, banco, stativo, supporto o tavolo consigliato dal produttore o incluso in consegna. Condensa • Se il dispositivo viene posizionato in una stanza umida e riscaldata, è possibile che al suo interno si formino gocce d’acqua o condensa.
  • Seite 69: Descrizione Del Prodotto

    DESCRIZIONE DEL PRODOTTO...
  • Seite 70 Cursore delle funzioni FUNCTION (OFF/DAB_FM/CD_USB/ AUX/BT) Manopola di regolazione del volume VOLUME Tasto funzione modalità di riproduzione PLAY MODE, DAB/ Tasto cartelle MP3 FOLDER+, MENU/INFO Taste Tasto funzione USB Riproduzione/Pausa, tasto DAB Ricerca/ Selezione Tasto stop / Tasto accoppiamento PAIR/ Tasto salvataggio Titolo precedente SKIP- / Ricerca all’indietro Titolo successivo SKIP+ / Ricerca in avanti Aprire / Chiudere il vano per CD...
  • Seite 71: Fonti Di Alimentazione

    FONTI DI ALIMENTAZIONE Alimentazione Questo dispositivo funziona con una tensione di 230V~50Hz o 6 pile tipo “C” da 1,5V (UM-). Non cercare di utilizzare la radio con una tensione diversa, in quanto il dispositivo potrebbe essere danneggiato e la garanzia perderebbe la sua validità.
  • Seite 72 IMPORTANTE Utilizzo della gestione energetica (possibile solo per modelli europei). Questo dispositivo è dotato di funzione standby automatica. Se per 15 minuti il dispositivo non viene utilizzato e non c’è musica in riproduzione, il dispositivo passa in modalità standby.
  • Seite 73: Dab+ Radio

    DAB+ RADIO Quando il dispositivo viene collegato alla rete elettrica per la prima volta e acceso in modalità standby, entra automaticamente in modalità DAB e avvia una ricerca automatica delle emittenti. Durante la ricerca, lo schermo LCD mostra “Ricerca…”, una barra con i progressi della ricerca e il numero di emittenti già...
  • Seite 74 Ridurre il numero di emittenti Possibilmente si desidera eliminare tutte le emittenti dell’elenco non disponibili. 1. In modalità DAB, premere il tasto MENU/INFO per mostrare il menù. 2. Premere i tasti  CHANNEL +/- per selezionare “Ridurre emittenti” e  premere poi (PLAY/PAUSE) per confermare SELECT . 3. Premere i tasti  CHANNEL +/-per selezionare “sì” e poi SELECT per confermare l’eliminazione di tutte le emittenti salvate in memoria, ma non disponibili.
  • Seite 75 l’ascolto dell’emittente. MODALITÀ D’INFORMAZIONE DAB Premendo il tasto MENU/INFO, si passa tra le seguenti modalità di visualizzazione. Le informazioni delle relative modalità di visualizzazione vengono mostrate nella porzione inferiore dello schermo LCD.
  • Seite 76: Radio Ouc

    Tipo di programma Qui viene indicato lo “Stile” o il “Genere” del programma in riproduzione. Ensemble Lo schermo mostra il nome del multiplex, che contiene l’emittente in ascolto. Un multiplex è un insieme di diverse emittenti, riunite e diffuse  su una frequenza. Vi sono multiplex locali e nazionali. I multiplex locali contengono emittenti specifiche per la regione. AVVERTENZA: a differenza ...
  • Seite 77 un’emittente. La ricerca avviene sulle diverse frequenze. Ricerca manuale delle emittenti Premere  CHANNEL +/- fino a quando si è raggiunta la frequenza  desiderata. Impostazioni di ricerca Questa è un’opzione di ricerca, con cui ricercare tutte le emittenti o solo quelle con segnale intenso. 1. Premere il tasto MENU/INFO e poi CHANNEL +/- per selezionare “Impostazioni di ricerca”.
  • Seite 78 Modalità di visualizzazione FM Premendo il tasto INFO, lo schermo passa tra le seguenti modalità di visualizzazione. Le informazioni vengono mostrate nella porzione inferiore dello schermo LCD. Radio Text Come in DAB, l’emittente può fornire informazioni durante l’ascolto sotto forma di testo scorrevole. Tipo di programma Qui viene indicato lo “Stile”...
  • Seite 79: Funzione Cd

    FUNZIONE CD Il meccanismo per la lettura dei CD di questo dispositivo è concepito per tutti i tipi di CD in commercio. Il dispositivo è anche in grado di riprodurre MP3 masterizzati individualmente e CD-E/CD-RW. Tuttavia, potrebbero essere necessari fino a 10 secondi, prima che la riproduzione effettiva abbia  inizio. Se la riproduzione non dovesse iniziare, probabilmente è a causa della qualità...
  • Seite 80: Connessione Usb

    2. Premere due volte il tasto PLAY MODE in modalità di riproduzione/ pausa. Sullo schermo LCD compare il “REP_ALL” e vengono ripetuti tutti i titoli. 3. Premere tre volte il tasto PLAY MODE in modalità di riproduzione/ pausa. Sullo schermo LCD compare “RANDOM” e tutti i titoli vengono ripetuti casualmente. Una volta che tutti i titoli sono stati ascoltati, la riproduzione si arresta automaticamente.
  • Seite 81: Funzione Aux-In

    Premere una volta il tasto PLAY MODE. Lo schermo LCD mostra “REP_  ONE”. Viene ripetuto solo il titolo selezionato. Premere due volte il tasto PLAY MODE. Lo schermo LCD mostra “REP_  ALBUM”. Viene ripetuta solo la cartella selezionata. Premere tre volte il tasto PLAY MODE. Lo schermo LCD mostra “REP_ ALL”.  Vengono ripetuti tutti i file. Premendo quattro volte PLAY MODE si arresta la ripetizione dei titoli. AVVERTENZA: • Il dispositivo può riprodurre file MP3 solo in modalità USB. • Se il ostro dispositivo USB contiene file MP3, ma lo schermo LCD del  dispositivo mostra costantemente “NO”, potrebbe essere dovuto al fatto, che il dispositivo USB non è compatibile con il lettore CD. •...
  • Seite 82: Funzione Bt

    FUNZIONE BT • Posizionare il l´interruttore delle funzioni su AUX/BT. Accendere il dispositivo e seguire i passaggi descritti di seguito per collegarsi al dispositivo tramite BT (per prima cosa, scollegare il cavo dall’ingresso AUX-IN). • Collegare uno smartphone o un altro dispositivo BT con il lettore CD •...
  • Seite 83: Effetti Luminosi Led

    EFFETTI LUMINOSI LED • Gli effetti luminosi LED negli altoparlanti e intorno allo schermo  centrale vengono creati automaticamente in base alla fonte musicale in riproduzione. • Posizionare il cursore delle luci su “ON” per attivare l’effetto luminoso.  • Posizionare il cursore delle luci su “OFF” per spegnere l’effetto  luminoso. AVVERTENZA: se la luce dovesse essere troppo abbagliante, accendere la luce nella stanza o disattivare l’effetto luminoso. PULIZA E MANUTENZIONE • Pulire il dispositivo con un panno umido (mai bagnato). Non utilizzare solventi o detergenti.
  • Seite 84: Correzione Degli Errori

    CORREZIONE DEGLI ERRORI Problema Possibile causa Soluzione Rumori o interferenze - L’emittente non è - Impostare correttamente durante l’ascolto della impostata correttamente. l’emittente. radio FM. - L’antenna telescopica - Estendere non è estesa completamente l’antenna. completamente. Il CD non viene letto. - Il dispositivo non si trova - Selezionare la modalità...
  • Seite 85: Avviso Di Smaltimento

    AVVISO DI SMALTIMENTO Se sul prodotto è presente la figura a sinistra (il bidone dei  rifiuti con le ruote), si applica la direttiva europea 2012/19/ UE. Questi prodotti non possono essere smaltiti con i rifiuti normali. Informarsi sulle disposizioni vigenti per la  raccolta di dispositivi elettrici ed elettronici. Attenersi alle disposizioni vigenti e non smaltire i vecchi dispositivi con i rifiuti domestici. Grazie al corretto smaltimento dei vecchi  dispositivi si tutela il pianeta e la salute delle persone da possibili conseguenze negative.
  • Seite 86 Estimado cliente: Le felicitamos por la adquisición de este producto. Lea atentamente el siguiente manual y siga cuidadosamente las instrucciones de uso con el fin de evitar posibles daños. La empresa no se responsabiliza de los daños  ocasionados por un uso indebido del producto o por haber desatendido las indicaciones de seguridad. ÍNDICE Datós técnicos 87 Indicaciones de seguridad 88...
  • Seite 87: Datós Técnicos

    DATÓS TÉCNICOS Número de artículo 10032059 10032060 Alimentación 230 V~ / 50 Hz Adaptador de corriente 6 x 1,5 V (LR 14) Pilas Reproductor de CD Formato de audio compatible MP3 (MPEG 1 Capa de audio 3) Radio FM Rango de frecuencia...
  • Seite 88: Indicaciones De Seguridad

    INDICACIONES DE SEGURIDAD Siga las siguientes indicaciones para utilizar el dispositivo de forma segura. Indicaciones sobre el láser integrado • No intente desmontar la carcasa del aparato, ya que la radiación del rayo láser es nociva para los ojos. • Apague inmediatamente el aparato si algún líquido u objeto sólido se filtra en su interior.
  • Seite 89 con un paño o al colocarlo en una alfombra. • Utilice el aparato solamente con los artículos recomendados por el fabricante o con el carrito, soporte, trípode o mesa suministrada en el envío. Condensación • Si el aparato está instalado en una estancia cálida y húmeda, es posible que se formen gotas de agua o condensación en su interior.
  • Seite 90: Vista General Del Aparato

    VISTA GENERAL DEL APARATO...
  • Seite 91 Interruptor de funciones FUNCTION (OFF/DAB_FM/CD_USB/ AUX/BT) Regulador de volumen VOLUME Modo de reproducción PLAY MODE, Botón de función DAB/ Carpeta MP3 FOLDER+, Botón MENU/INFO Reproducción/Pausa, Botón USB, Selección DAB/Botón de búsqueda Botón Stop/Botón de conexión PAIR/Botón de memoria Pista anterior SKIP-/Búsqueda hacia atrás Siguiente pista SKIP+/Búsqueda hacia delante Abrir/cerrar la unidad lectora de CD 10 Botón de control de bajos...
  • Seite 92: Puesta En Funcionamiento

    PUESTA EN FUNCIONAMIENTO Fuente de alimentación El aparato requiere una tensión de corriente de 230 V~50 Hz o 6 pilas 1,5 V de tipo «C» (UM-2). No conecte la radio a una tensión diferente, ya que puede dañar el aparato y comportar exención de garantía. Antes de utilizar  el aparato, asegúrese de que la toma de corriente que empleará funciona correctamente y emite la corriente sin interrupciones.
  • Seite 93 IMPORTANTE Utilice la función de gestión de energía (disponible solo en modelos europeos). Este aparato cuenta con la función automática Standby. El aparato entra en modo Standby automáticamente si no reproduce música ni es usado en un intervalo de 15 minutos.
  • Seite 94: Radio Dab

    RADIO DAB+ Al conectar el aparato por primera vez a la red eléctrica y encender el modo Standby, el aparato cambia automáticamente al modo DAB y empieza una búsqueda automática de emisoras. Durante la búsqueda de emisoras, la pantalla LCD muestra la palabra «Búsqueda...», una barra de estado y el número de emisoras encontradas hasta el momento.
  • Seite 95 Eliminar emisoras Puede eliminar de la lista de emisoras todas las emisoras no disponibles. 1. En el modo DAB, pulse el botón MENU/INFO para visualizar el menú. 2. Pulse los botones CHANNEL +/- para elegir «Eliminar emisora» y confirme pulsando SELECT . 3.
  • Seite 96 MODOS DE INFORMACIÓN DAB Pulse el botón MENU/INFO para navegar entre los siguientes modos. La información acerca de cada modo se indica en la parte inferior de la pantalla LCD. Tipo de programa Indica el «Estilo» o «Género» del programa elegido. Agrupación de emisoras La pantalla muestra el número de multiplex que contienen las emisoras que escucha.
  • Seite 97: Radio Fm

    Tasa de bits de audio La pantalla LCD muestra la tasa de bits de audio recibida. DLS (Dynamic Label Segment) DLS son mensajes que una emisora de radio puede mostrar en forma de texto en movimiento durante su transmisión. Contiene, sobre todo, información como detalles del programa, etc.
  • Seite 98 Pulse el botón MONO/STEREO para cambiar entre los modos estéreo y mono. Almacenar emisoras de radio Puede guardar hasta 20 emisoras favoritas en la lista de emisoras. Esta función le permite acceder rápida y fácilmente a su emisora favorita. 1. Mantenga pulsado el botón de memoria . La pantalla LCD indica «guardar en P#».
  • Seite 99 Frecuencia Indica la frecuencia de la emisora configurada, por ejemplo, «87,5 MHz». Formato de audio Se indica si la emisora de radio se recibe en modo estéreo o mono.
  • Seite 100: Reproducción De Cd

    REPRODUCCIÓN DE CD El mecanismo de CD utilizado en este aparato está diseñado para leer  todos los CDs convencionales. También puede leer los discos MP3, CD-R/ CD-RW grabados por el usuario, aunque puede tardar hasta 10 segun- dos en comenzar con la reproducción. Si la reproducción no se inicia, es posible que se deba a la calidad del CD o a la compatibilidad del CD con el software del aparato.
  • Seite 101: Conexión Usb

    3.   P ulse tres veces el botón PLAY MODE. La pantalla LCD indica  «RANDOM». Se ha activado la reproducción aleatoria. Todas las pistas se reproducirán en orden aleatorio. Después de reproducir todas las pistas, la reproducción se detendrá. 4. Pulse cuatro veces el botón PLAY MODE para desactivar la reproducción  aleatoria. Modo Programa Esta función le permite programar el orden de reproducción de hasta 30 pistas en caso de un CD y 99 pistas en caso de archivos MP3.
  • Seite 102: Entrada Auxiliar

    4. El funcionamiento de los botones Reproducción/Pausa, Stop, Saltar pista, Repetir o Guardar es el mismo que en el modo CD/MP3. Pulse una vez el botón PLAY MODE. Ahora, la pantalla LCD indica «REP_ ONE». Se repite la pista elegida. Pulse dos veces el botón PLAY MODE. Ahora, la pantalla LCD indica «REP_ ALBUM». Se repite la carpeta actual. Pulse tres veces el botón PLAY MODE. La pantalla LCD indica «REP_ALL».  Se repiten todas las pistas. Pulse cuatro veces el botón PLAY MODE para desactivar la función de ...
  • Seite 103: Modo Bt

    MODO BT • Desplace el interruptor de funciones a la posición «AUX/BT». Encienda el aparato y siga estas indicaciones para conectarse a un dispositivo vía BT (retire el cable de conexión de la entrada AUX). • Conectar el reproductor de CD a un teléfono inteligente u otro dispositivo vía BT.
  • Seite 104: Effectos De Luz Led

    IMPORTANTE: 1. La activación de la función BT es diferente en cada dispositivo. Lea cómo activar la función Bluetooth en las instrucciones del dispositivo correspondiente. 2.   S i su dispositivo BT no es compatible con el perfil A2DP, el reproductor  de CD no reproducirá la música, incluso si está conectado al dispositivo. 3.
  • Seite 105: Detección Y Resolución De Anomalías

    DETECCIÓN Y RESOLUCIÓN DE ANOMALÍAS Problema Posible causa Solución Ruido o sonido - La emisora no está bien - - Sintonice distorsionado durante la sintonizada. correctamente la emisora. reproducción FM: - La antena telescópica - Extienda la antena no está extendida. telescópica.
  • Seite 106: Indicationes Sobre La Retirada Del Aparato

    INDICATIONES SOBRE LA RETIRADA DEL APARATO Si el aparato lleva adherida la ilustración de la izquierda (el contenedor de basura tachado), entonces rige la directiva europea 2012/19/UE. Este producto no debe arrojarse a un contenedor de basura común. Infórmese sobre las leyes territoriales que regulan la recogida separada de aparatos eléctricos y electrónicos.

Diese Anleitung auch für:

10032060

Inhaltsverzeichnis