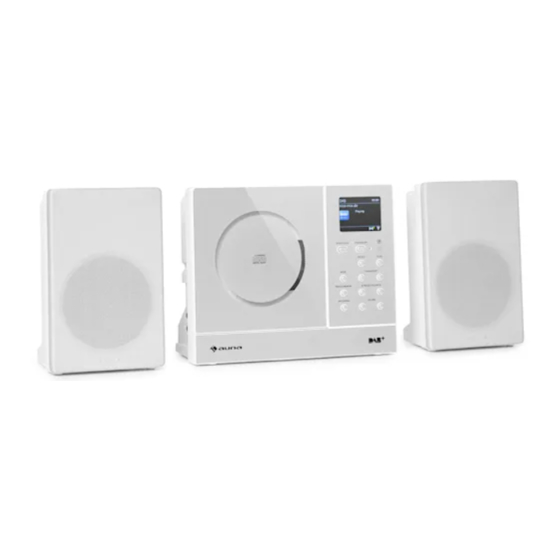
Herunterladen Inhalt Inhalt Diese Seite drucken
Inhaltsverzeichnis

Werbung

Verfügbare Sprachen
  • DE

Verfügbare Sprachen

  • DEUTSCH, seite 1

Werbung

Inhaltsverzeichnis
loading

Inhaltszusammenfassung für auna Connect Vertical

  • Seite 3 Sehr geehrter Kunde, wir gratulieren Ihnen zum Erwerb Ihres Gerä- tes. Lesen Sie die folgenden Hinweise sorgfäl- tig durch und befolgen Sie diese, um möglichen Schäden vorzubeugen. Für Schäden, die durch Missachtung der Hinweise und unsachgemäßen Gebrauch  entstehen,  übernehmen  wir  keine  Haf- tung. ...
  • Seite 4: Technische Daten

    TECHNISCHE DATEN Artikelnummer 10034996 10034997 Audio Ausgangsleistung 2 x 5 W RMS 0 - 35 °C Umgebungstemperatur Radiofrequenzen FM-Radio 87,5 MHz - 108 MHz DAB-Radio 174,928 - 239,200 MHz Abmessungen Gerät ca. 232 x 90 x 186 mm Lautsprecher ca. 120 x 80 x 186 mm Gewicht Gerät 0,98 kg...
  • Seite 5: Lasersicherheit

    WARNUNG CAUTION RISK OF ELECTRIC SHOCK DO NOT OPEN VORSICHT: DAS GEHÄUSE NICHT ÖFFNEN, UM EINEN STROMSCHLAG UND ERNSTE PERSONENVERLETZUNGEN ZU VERMEIDEN. IM INNEREN KEINE VOM KUNDEN ZU WARTENDEN KOMPONENTEN. WENDEN SIE SICH AUSSCHLIESSLICH AN QUALIFIZIERTE FACHLEUTE. WARNUNG: UM DIE GEFAHR EINES BRANDS ODER EINES STROMSCHLAGS ZU VERRINGERN, DAS GERÄT NICHT IN WASSER, REGEN ODER FEUCHTIGKEIT AUSZUSETZEN.
  • Seite 6: Sicherheitshinweise

    SICHERHEITSHINWEISE Allgemeine Sicherheitshinweise • Lesen Sie alle Hinweise genau durch, bevor Sie das Gerät verwenden und bewahren Sie die Bedienungsanleitung für den zukünftigen  gebrauch auf. • Verwenden Sie ausschließlich die Stromspannung, die auf dem Typenschild des Geräts angegeben ist. Vergewissern Sie sich, dass Ihre Steckdose geerdet ist. • Das Gerät sollte auf einer flachen, stabilen Fläche platziert werden und  darf keinen Vibrationen ausgesetzt werden •...
  • Seite 7 • Achten Sie darauf, dass der Netzstecker des Radios während eines  Gewitters nicht in der Steckdose steckt. • Das Gerät wird warm, wenn es über einen längeren Zeitraum verwendet wird. Das ist normal und weist nicht auf ein Problem des Geräts hin. Stromanschluss • Achten Sie darauf, dass das Gerät nicht auf dem Stromanschlusskabel  steht, da das Kabel durch das Gewicht des Geräts beschädigt und zu einem Sicherheitsrisiko werden könnte.
  • Seite 8: Geräteübersicht

    GERÄTEÜBERSICHT Vorderseite Lautsprecher CD-Fach Auswahltaste Öffnen/Schließen Standby/ An-/Ausschalten Leuchtanzeige Bildschirm Fernbedienungssensor Modustaste 10 Speichern Info-/Menütaste 12 Lautstärke senken/erhöhen 13 Nächster Ordner/ Speicherplatz 14 Vorheriger/Nächster Sender/Titel 15 Suche/ Wiedergabe/Pause Stromanschluss...
  • Seite 9 Rückseite 16 Kopfhöreranschluss 19 USB-Ladeanschluss (5V 17 LINE-IN-Anschluss 20 Audioausgang (analog) 18 FM-Antenne 21 Netzadapteranschluss Lieferumfang • Hauptgerät • 2 Lautsprecher • Kabelantenne • Netzadapter • Fernbedienung • Bedienungsanleitung...
  • Seite 10: Fernbedienung

    FERNBEDIENUNG...
  • Seite 11 Standby/ Ein/Aus 14 CD-Fach öffnen/ schließen Schlummertaste 15 Timer Uhrzeit 16 Suche Intro 17 Wiederholen Zufallswiedergabe 18 Information Modus 19 nächster Sender/ Titel Wiedergabe starten/pausieren 20 Stopp/ nach unten / nach oben 21 Speichern vorheriger Titel/Sender 22 Menü Auswahltaste 23 Speicherplatz/ Ordner 10 Equalizer 24 Zurück Lautstärke erhöhen/senken...
  • Seite 12 Umgang mit der Batterie • Unsachgemäße oder falsche Verwendung der Batterie kann Korrosion  oder ein Auslaufen der Batterie verursachen, was zu Feuer und Sach-/ oder Personenschäden führen könnte. • Verwenden Sie nur den in der Bedienungsanleitung angegebene Batterietyp • Entsorgen Sie gebrauchte Batterien nicht im Hausmüll. Entsorgen Sie diese gemäß den landesüblichen Richtlinien. •...
  • Seite 13: Aufstellung Und Verbindungsherstellung

    INBETRIEBNAHME UND BEDIENUNG Aufstellung und Verbindungsherstellung 1. Stellen Sie das Gerät auf eine stabile und ebene Oberfläche. 2. Positionieren Sie die Lautsprecher und wickeln Sie die Lautsprecherkabel  vollständig ab. 3. Schließen Sie das Kabel des rechten Lautsprechers an den rechten Lautsprecheranschluss an der rechten Seite des Geräts an. 4. Schließen Sie das Kabel des linken Lautsprechers an den rechten  Lautsprecheranschluss an der linken Seite des Geräts an. 5. Wickeln Sie die Antenne vollständig ab und ziehen Sie die Antenne  vollständig aus. 6. Wickeln Sie das Netzkabel vollständig ab. Verbinden Sie den Anschluss  am Ende des Netzkabels mit dem DC-IN-Anschluss auf der rechten Seite ...
  • Seite 14: Lautstärkeeinstellung

    INBETRIEBNAHME Gerät ein-/ausschalten 1. Drücken Sie zum Einschalten des Radios die Standby-Taste auf dem  Gerät oder auf der Fernbedienung. 2. Drücken Sie die Standby-Taste,  um das Gerät wieder in den Standby- Modus zu versetzen. Modus wählen Drücken Sie mehrfach die Taste MODE am Gerät oder auf der  Fernbedienung, um zwischen den Modi Internet-Radio, Podcasts, Spotify, DAB, FM, CD, USB, BT und AUX zu wechseln. Alternativ: 1. Halten Sie die INFO/MENU-Taste am Gerät gedrückt oder drücken Sie  die MENU-Taste auf der Fernbedienung, um auf das Menü zuzugreifen. 2.
  • Seite 15 auf der Fernbedienung. Drücken Sie die Taste MUTE erneut oder drücken  Sie die Taste VOL +/- auf der Fernbedienung oder drücken Sie die Tasten  VOLUME+/- am Gerät, um die Lautstärke wieder zu aktivieren . Erststart Wenn Sie das Gerät zum ersten Mal an die Steckdose anschließen, zeigt der  Bildschirm den Begrüßungsbildschirm an und schaltet anschließend in den Standby-Modus. Drücken Sie die Taste STANDBY/ON am Gerät oder die Taste  auf der Fernbedienung, um das Gerät einzuschalten. Drücken Sie die Tasten / am Gerät oder auf der Fernbedienung,   um die gewünschte Sprache auszuwählen, und drücken Sie dann die Taste  SELECT am Gerät oder auf der Fernbedienung zur Bestätigung. Daraufhin wird die Seite mit den Datenschutzrichtlinien angezeigt.
  • Seite 16 3. Auf dem Bildschirm wird „Network wizard scanning...“ angezeigt. Ihr  Gerät sucht nun nach vorhandenen WLAN-Verbindungen. Dies kann  einige Sekunden in Anspruch nehmen. Anschließend wird eine Liste  aller drahtlosen Netzwerke auf dem Bildschirm angezeigt. Drücken Sie  die Tasten / am Gerät oder auf der Fernbedienung, um das   gewünschte WLAN auszuwählen und drücken Sie die Taste SELECT am  Gerät oder auf der Fernbedienung zur Bestätigung. 4. Drücken Sie die Tasten / am Gerät oder auf der   Fernbedienung, um Push Button/Pin/ Skip WPS zu wählen, und drücken  Sie dann zur Bestätigung die SELECT-Taste am Gerät oder auf der Fernbedienung Verbindung mit der WPS-Taste auf Ihrem Router Die Verbindung über die WPS-Taste (Wi-Fi Protected Setup) auf Ihrem...
  • Seite 17: Systemeinstellungen

    SYSTEMEINSTELLUNGEN Halten Sie die Taste INFO/MENU am Gerät oder die Taste MENU auf der Fernbedienung gedrückt, um das Menü anzuzeigen. Drücken Sie  die Tasten / am Gerät oder auf der Fernbedienung, um die   Systemeinstellungen zu wählen, und drücken Sie dann zur Bestätigung die  Taste SELECT am Gerät oder auf der Fernbedienung. Equalizer Dieses Gerät unterstützt eine Vielzahl von Equalizern und Soundeffekten. Drücken Sie die Taste EQ, um im Menü zur Equalizereinstellung zu  gelangen. Alternativ können Sie während der Systemeinstellung  ...
  • Seite 18 SSID- wählen Die das gewünschte drahtlose Netzwerk aus.Suche- suchen Sie  nach verfügbaren Netzwerken. Manuelle  Netzwerk-Assistent Konfiguration- wählen Sie ein drahtloses  Netzwerk mit DHCP aktiviert/deaktiviert aus Wählen Sie auf dem Radio PBC aus und drücken Sie die PBC Taste auf dem Gerät  PBC-WLAN- aus, mit dem Sie sich verbinden möchten. Konfiguration Drücken Sie zum Fortfahren die Taste  ENTER. Zeigt die Einstellungen auf dem Gerät an. Ansichtseinstellungen Ein drahtloses Netzwerk mit DHCP aktiviert/ Manuelle Einstellungen deaktiviert .
  • Seite 19 Bestätigen die Taste SELECT. 3. Wiederholen Sie Schritt 2, um Monat/Jahr/Stunde/Minute einzustellen. 4. Die Datums- und Zeiteinstellung ist nun abgeschlossen. Aktualisierungen aus dem DAB/FM  Automatisches Update Netzwerk oder keine Aktualisierung. 12/24 Stunden Format Format einstellen Zeitzone auswählen. (Nur verfügbar, wenn die automatische Netzwerkaktualisierung  Zeitzone einstellen aktiviert ist.) Sommer-Winterzeit auswählen. Nur verfügbar, wenn die automatische Sommer-/Winterzeit Netzwerkaktualisierung aktiviert ist.)
  • Seite 20 1. Drücken Sie im Systemeinstellungsmodus  , um „Zurücksetzen auf    Werkseinstellungen“ auszuwählen und drücken Sie zum Bestätigen die  Taste SELECT. 2. Drücken Sie  , um „Ja“ auszuwählen und drücken Sie zum Bestätigen    die Taste SELECT oder wählen Sie „Nein“, um Abzubrechen. Hinweis: Wenn Sie das System aus Werkseinstellungen zurücksetzen  werden alle von Ihnen eingestellten Radiosender, Internet und voreingestellte DAB & FM Sender gelöscht. Software-Aktualisierung 1. Drücken Sie während des Systemeinstellungsmodus die  , um „Software Update“ auszuwählen und drücken Sie zum Bestätigen die ...
  • Seite 21 Timeout Ein/ 10 Sek/ 20 Sek/ 30 Sek/ 45  Sek/ 60 Sek/ 90 Sek/ 120 Sek/ 180  ON level ON level (Helligkeitsstufe  Hoch/ Mittel/ Niedrig wenn eingeschaltet) DIM level (Gedimmt) Mittel/ Niedrig...
  • Seite 22: Internetradio

    INTERNETRADIO Um Internet-Radio zu hören, muss Ihr Radio mit dem Internet verbunden sein. Versuchen Sie, Ihr Radio so nah wie möglich an Ihrem Router zu positionieren, um die besten Verbindungsgeschwindigkeiten zu erhalten.  Wenn der Internet-Radio-Modus ausgewählt ist, verbindet sich das Radio mit dem Internet-Radio-Portal von Frontier Silicon, um eine Liste von Sendern herunterzuladen.
  • Seite 23 Sie können Sender aus einer Liste verfügbarer Länder  Standort wählen. Wählen Sie einen Sender aus einer Liste der beliebtesten Beliebt Internet-Sender aus der ganzen Welt aus. Wählen Sie Sender aus verschiedenen Kategorien im Entdecken Menü aus: Herkunft, Genre oder Sprache. Mit der Taste BACK auf der Fernbedienung können Sie eine Menüebene  zurückgehen. Gespeicherte Sender (Presets) Diese Senderspeicher werden nur in Ihrem Radio gespeichert und sind nicht von anderen Radios zugänglich.
  • Seite 24 PODCASTS Um Podcasts zu hören, muss Ihr Radio mit dem Internet verbunden sein. Versuchen Sie, Ihr Radio so nah wie möglich an Ihrem Router zu positionieren, um die besten Verbindungsgeschwindigkeiten zu erhalten. Drücken Sie wiederholt die Taste MODE am Gerät oder auf der  Fernbedienung, um in den Podcasts-Modus zu wechseln. Wenn das Radio neu gestartet wird, wird automatisch der zuletzt gehörte Sender ausgewählt. Um zur Podcast-Liste zurückzukehren, drücken Sie die ...
  • Seite 25: Spotify Connect

    SPOTIFY CONNECT Dein neues Gerät hat Spotify Connect Verwende dein Smartphone, Tablet oder deinen Computer als Fernbedienung für Spotify. Auf spotify.com/connect erfährst du mehr. Lizenzen Die Spotify Software unterliegt Drittanbieter-Lizenzen, die Sie hier finden: https://www.spotify.com/connect/third-party-licenses Alle aufgeführten Marken sind Warenzeichen ihrer Unternehmen. Irrtümer und technische Änderungen sind vorbehalten. Es gelten unsere allgemeinen Liefer- und Zahlungsbedingungen.
  • Seite 26: Senderliste

    DAB-RADIO Drücken Sie wiederholt MODE am Gerät oder auf der Fernbedienung, um  DAB-Radio zu wählen. Das Gerät schaltet in den DAB-Modus und führt die automatische Suchfunktion aus. Während des Suchvorgangs zeigt der  Bildschirm „Scan...“ zusammen mit einem Balken, welcher den Fortschritt  des Suchvorgangs und die Anzahl der bisher gefundenen Sender anzeigt. Sobald der Scanvorgang abgeschlossen ist, wählt das Gerät den ersten alphanumerisch gefundenen Sender aus. Um die gefundenen Sender zu erkunden, drücken Sie die Tasten / ...
  • Seite 27 DAB-Anzeigemodi Jedes Mal, wenn Sie die INFO/MENU-Taste am Gerät oder die INFO- Taste auf der Fernbedienung drücken, wird das Display die folgenden  Anzeigeoptionen aufzeigen: DLS-Programmtyp-Ensemble/Frequenz- Signalfehler/-stärke-Übertragungsgeschwindigkeit/Codec/Sender-Datum. DLS (Dynamisches Label-Segment) Dies ist eine scrollende Nachricht, die in Echtzeit Informationen, z.B. Liedtitel, Nachrichtenschlagzeilen usw. liefert. Art der Sendung Dies beschreibt den „Stil“ oder das „Genre“ der Sendung, die ausgestrahlt wird.
  • Seite 28 Ungültige Sender entfernen (Prune Invalid) Sie können alle nicht verfügbaren Sender aus der Liste entfernen. 1. Drücken Sie im DAB-Modus die MENU-Taste und drücken Sie die Tasten  , zur Auswahl von Prune invalid und drücken Sie die SELECT-Taste    zur Bestätigung. 2. Drücken Sie die Tasten  , zur Auswahl von "YES" und drücken Sie die    Taste SELECT zur Bestätigung. Oder wählen Sie „NO“, um den Vorgang abzubrechen. DRC (Dynamikbereich-Komprimierung) Wenn Sie Musik mit hohem Dynamikumfang in einer geräuschvollen  Umgebung hören, empfiehlt es sich, den Audio-Dynamikbereich zu  komprimieren. 1. Drücken Sie im DAB-Modus die MENU-Taste und drücken Sie die Tasten  , zur Auswahl von DRC und drücken Sie die SELECT-Taste zur    Bestätigung.
  • Seite 29: Manuelle Einstellung

    FM-RADIO Um das Gerät in den FM-Modus zu versetzen, drücken Sie wiederholt MODE  am Gerät oder auf der Fernbedienung, um in den FM-Modus zu wechseln. Auf dem Bildschirm wird die Frequenz angezeigt. Radi o Automatischer Suchlauf Drücken Sie die Taste SCAN am Gerät oder auf der Fernbedienung, um mit  der Suche nach einem Sender zu beginnen. Sobald ein Sender gefunden wurde, wird der Suchlauf automatisch beendet. Bei einem Sender mit sehr schwachem Signal wird die Suche möglicherweise nicht beendet.
  • Seite 30: Such-Einstellung

    Such-Einstellung 1. Drücken Sie die MENU-Taste, um das FM-Menü aufzurufen. 2. Drücken Sie die Tasten , um die Scan-Einstellung zu wählen, und   drücken Sie dann zur Bestätigung die Taste SELECT. 3. Drücken Sie die Tasten   zur Auswahl von „YES“, um nur ein starkes    Signal zu empfangen, und drücken Sie dann die Taste SELECT zur  Bestätigung. Audio-Einstellung Drücken Sie die Taste MONO/ST. auf der Fernbedienung, um zwischen der  Stereo oder Mono auszuwählen. Alternativ, 1. Drücken Sie die MENU-Taste, um das Hauptmenü aufzurufen. 2. Drücken Sie die Tasten  , um die Audioeinstellung zu wählen, und ...
  • Seite 31 CD-PLAYER Kompatible Disktypen Disktyp Disk-Logo Medieninhalt CD-R (Aufnahme-CD) Audio CD-RW (Mehrfach Audio beschreibbare CD) Audio CD Audio (Kompaktdisk) Drücken Sie wiederholt MODE am Gerät oder auf der Fernbedienung, um  den CD-Modus zu wählen. Wiedergabe 1. Drücken Sie die Auswurfe-Taste ( ), um den CD-Fach-Deckel zu öffnen. 2. Legen Sie die CD mit dem Etikett nach außen in das CD-Fach, und  schließen Sie dann den CD-Fach-Deckel. Die CD wird automatisch  wiedergegeben. 3. Wenn keine CD eingelegt wurde oder die CD nicht gelesen werden kann,  erscheint in der Anzeige "No disk". 4. . Wenn die Wiedergabe gestoppt ist, wird die Gesamtzahl der Titel auf dem Bildschirm angezeigt. Drücken Sie dann die Taste  ...
  • Seite 32 Wiederholung der Wiedergabe 1. Drücken Sie die Taste REPEAT wiederholt, um einen Wiedergabemodus  zu wählen. Den aktuellen Titel wiederholen. Alle Dateien im aktuellen Ordner wiederholen.  (nur für Daten-CDs) Alle Titel wiederholen. 2. Drücken Sie die Taste REPEAT erneut, so dass die Wiederholen-Funktion  ausgeschaltet wird. Zufallswiedergabe Alle Titel können in einer zufälligen Reihenfolge wiedergegeben werden. 1. Drücken Sie auf der Fernbedienung RANDOM. In der Anzeige erscheint  . Alle Titel werden in zufälliger Reihenfolge wiedergegeben. 2. Mit zum nächsten Titel in der Zufallswiedergabe springen. ...
  • Seite 33 BT-Audiomodus auszuwählen. 2. Wenn das Gerät nicht mit einem Bluetooth-Gerät gepaart ist, blinkt auf  dem Bildschirm „BT“ auf. 3. Aktivieren Sie Ihr BT-Gerät und wählen Sie den Suchmodus. 4. In der Liste Ihrer BT-Geräte wird „Connect Vertical“ angezeigt. 5. Wählen Sie „Connect Vertical“ und geben Sie ggf. „0000“ als Passwort ein. 6. Um die BT-Funktion zu deaktivieren, wechseln Sie zu einer anderen  Funktion am Gerät oder deaktivieren Sie die Funktion auf Ihrem mobilen  BT-Gerät aus.
  • Seite 34 • Drücken Sie die Taste /  am Gerät oder auf der   Fernbedienung, um Musik abzuspielen/zu unterbrechen oder • Drücken Sie die Tasten /  auf dem Gerät oder der Fernbedienung, um zum vorherigen/nächsten Titel zu springen. Hinweise • Die Reichweite zwischen dem mobilen BT-Gerät und der Einheit beträgt etwa 8 Meter. •...
  • Seite 35: Aux-Betrieb

    • Sollte ein zusätzliches Smartphone oder Tablet, auf dem die App installiert ist im Netzwerk angemeldet werden und die App öffnen, wird  die ursprüngliche Verbindung abgebrochen und das Radio verbindet sich mit dem neu hinzugekommenen Gerät. AUX-BETRIEB An der linken Seite des Geräts befindet sich eine LINE IN-Buchse. Über  diese Buchse können analoge Audio-Tonsignale von anderen Quellen in das  Gerät eingespeist werden. 1. Schließen Sie den Eingang über ein AUX-Kabel (nicht im Lieferumfang enthalten) mit LINE IN-Buchse an ein anderes Audiogerät an. 2.
  • Seite 36 Einschlaffunktion aktiviert. Auf dem Bildschirm wird ein Mondymbol   angezeigt. Auch die verbleibende Zeit bis zum Ausschalten wird neben dem Symbol auf dem Bildschirm angezeigt. 3. Wenn der Timer auf Null herunterzählt hat, schaltet das Gerät automatisch in den Standby-Modus. Um die Einschlaffunktion zu  deaktivieren, während der Timer noch abwärts zählt, wiederholen Sie  Schritt 1 - 3, um „SLEEP OFF“ zu wählen. 4. Drücken Sie die Taste SLEEP einmal, um den Status des Sleep-Timers auf  dem Bildschirm anzuzeigen, wenn er eingeschaltet ist.
  • Seite 37: Reinigung Und Pflege

    Wecker deaktivieren 1. Drücken Sie die TIMER-Taste auf der Fernbedienung, auf dem Bildschirm  erscheint „Alarm (1 oder 2): Ein [hh:mm]“. 2. Drücken Sie die Tasten  , um die Alarmnummer (1 oder 2) zu wählen,   und drücken Sie dann die Taste SELECT, um die Einstellung des Timers  zu starten. 3. Drücken Sie die Tasten  , um „Enable“ zu wählen, und drücken Sie    dann die Taste SELECT zur Bestätigung. 4. Wählen Sie mit den Tasten  die Option „Aus“ und drücken Sie dann   ...
  • Seite 38 Chal-Tec GmbH Wallstr. 15 10179 Berlin www.chal-tec.com Die Spotify-Software unterliegt Drittanbieter-Lizenzen, die Sie hier finden: https://www.spotify.com/connect/third-party-licenses Alle aufgeführten Marken sind Warenzeichen der jeweiligen Unternehmen. Fehler und Auslassungen ausgenommen und technischen Änderungen unterliegend. Unsere allgemeinen Geschäftsbedingungen finden Anwendung.
  • Seite 39: Konformitätserklärung

    HINWEISE ZUR ENTSORGUNG Befindet sich die linke Abbildung (durchgestrichene  Mülltonne auf Rädern) auf dem Produkt, gilt die  Europäische Richtlinie 2012/19/EU. Diese Produkte  dürfen nicht mit dem normalen Hausmüll entsorgt werden. Informieren Sie sich über die örtlichen Regelungen zur getrennten Sammlung elektrischer  und elektronischer Gerätschaften. Richten Sie sich  nach den örtlichen Regelungen und entsorgen Sie Altgeräte nicht über den Hausmüll. Durch die regelkonforme Entsorgung der Altgeräte werden  Umwelt und die Gesundheit Ihrer Mitmenschen vor möglichen negativen Konsequenzen geschützt.
  • Seite 41 Dear Customer, Congratulations on purchasing this equipment. Please  read  this  manual  carefully  and  take  care  of the following hints on installation and use to avoid technical damages. Any failure caused by ignoring the items and cautions mentioned in the operation and installation instructions are not covered by our warranty and any liability.
  • Seite 42: Technical Data

    TECHNICAL DATA Item number 10034996 10034997 Audio Speaker RMS Power 2 x 5 W RMS 0 - 35 °C Working Environment Temperature Radio frequencies FM radio 87.5 MHz - 108 MHz DAB radio 174.928 - 239.200 MHz Dimensions Unit ca. 232 x 90 x 186 mm Speakers ca.
  • Seite 43 WARNUNG CAUTION RISK OF ELECTRIC SHOCK DO NOT OPEN CAUTION: TO REDUCE THE RISK OF ELECTRIC SHOCK AND SERIOUS PERSONAL INJURY, DO NOT REMOVE ANY COVER. NO USER-SERVICABLE PARTS INSIDE. REFER SERVICING TO QUALIFIED SERVICE PERSONNEL ONLY WARNING. TO REDUCE THE RISK OF FIRE OR ELECTRICAL SHOCK, DO NOT EXPOSE THIS PRODUCT TO WATER, RAIN OR MOISTURE The lightning flash with arrowhead symbol, within an ...
  • Seite 44: Safety Instructions

    SAFETY INSTRUCTIONS Read all the instructions carefully before using the unit and keep them for future reference. • Check that the voltage marked on the rating label matches your mains  voltage. • The unit must be placed on a flat stable surface and should not be  subjected to vibrations. • Do not place the unit on sloped or unstable surfaces as the unit may fall off or tip over.
  • Seite 45: Service & Maintenance

    Interference • Do not place the unit on or near appliances which may cause electromagnetic interference. If you do, it may adversely affect the  operating performance of the unit, and cause a distorted sound. Supervision • Children should be supervised to ensure that they do not play with the unit.
  • Seite 46: Unit Description

    UNIT DESCRIPTION Front Speaker CD tray Select button Open/close button Standby/on button Indicator Display Remote control sensor Mode button 10 Preset/Memory button Info/Menu button 12 Volume –/+ button 13 Preset/Folder buttons 14 Tuning/Skip buttons 15 SCAN button...
  • Seite 47 Back 16 Eearphone socket 19 USB 5V DC 1A charging port 17 LINE IN socket 20 SPEAKER (L/R) sockets 18 FM antenna socket 21 DC input socket Included • Main unit • 2 Speakers • Aerial • Mains adapter • Remote • Instruction manual...
  • Seite 48: Remote Control

    REMOTE CONTROL...
  • Seite 49 STANDBY button 14 Open/Close button SLEEP button 15 TIMER button CLOCK button 16 SCAN button INTRO button 17 REPEAT button RANDOM button 18 INFO button MODE button 19 NEXT button PLAY PAUSE / UP button 20 STOP/ DOWN button PREVIOUS button 21 PRESET button SELECT button 22 MENU button...
  • Seite 50 Handling the battery • Improper or incorrect use of batteries may cause corrosion or battery leakage, which could cause fire, personal injury or damage to property. • Only use the battery type indicated in this manual. • Do not dispose of the used battery as domestic waste. Dispose of it in accordance with local regulations.
  • Seite 51 ASSEMBLY AND CONNECTIONS 1. Place the main unit on a flat level surface. 2. Position the speakers and fully unwind the speaker wires. 3. Connect the right speaker cord to the R speaker socket on the right side  of the main unit 4. Connect the left speaker cord to the L speaker socket on the right side of  the main unit. 5. Fully unwind and extend the DAB/FM antenna wire. 6. Unwind the mains adapter cable to its full length. Connect the end of the cable to the DC IN socket on right side of the unit and then connect the ...
  • Seite 52 START Powering ON/OFF When you first connect the unit to the mains socket, the unit will be in  Standby mode after showing the welcome screen 1. Press the STANDBY/ON button on unit or the on the remote control to switch the unit on. 2. Press the STANDBY/ON button on unit or the q button on remote control to switch the unit back to standby mode.
  • Seite 53 Adjusting the Volume • Press the VOLUME+/- buttons on the unit or press VOL +/- on the remote control to adjust the volume. • If you wish to turn the sound off, press MUTE button on the remote  control. Press MUTE button again or press VOL +/- on the remote control or Press the VOLUME+/- buttons on the unit to resume normal listening.
  • Seite 54 3. The display will show “Network wizard scanning….”. Your radio will  now scan for your wireless network, this may take a few seconds then  a list of all the wireless networks will appear on the screen. Press the  / buttons on unit or buttons on remote control to select   your wireless network, then press the SELECT button on unit or remote  control to confirm. 4. Press the / buttons on unit or buttons on remote control to   select Push Button/Pin/ Skip WPS, then press the SELECT button on unit  or remote control to confirm. Connecting using the WPS button on your router Connecting using the WPS (Wi-Fi Protected Setup) button on your router is a quick and easy way to connect your radio without having to type in a ...
  • Seite 55: System Settings

    SYSTEM SETTINGS Press and hold INFO/MENU button on unit or MENU button on remote control to display the menu. Press the / buttons on unit or   buttons on remote control to select System settings and then press the SELECT button on unit or remote control to confirm.
  • Seite 56 SSID – select the desire wireless network. Rescan – Scan for available networks. Network wizard Manual config – select wireless network  with DHCP enable/disable. Press the WPS button on the modem device that you wish to connect with. Press the PBC Wlan setup SELECT button on unit or remote control to continue. Display the setting on the unit. View settings Select DHCP enable/disable.
  • Seite 57 Update from DAB / FM / Network / No  Auto update update 12 / 24 hour format. Set format Select a time zone. (Only available when Set timezone Auto update from Network is on.) Select daylight savings. (Only available Daylight savings when Auto update from Network is on.) Hint: The default auto time update setting is “Update from Network”. If  you would like to manual set the time, it is recommended to turn the Auto  update function off. Inactive Standby Use the Inactive Standby to turn off the unit after a certain time in play  mode. 1. During System settings mode, press the buttons to select Inactive ...
  • Seite 58: Backlight

    Software update 1. During System settings mode, press buttons to select Software   update and then press SELECT button to confirm. 2. Press  buttons to select Auto-check setting or Check now, and then    press SELECT button to confirm. Note: Before downloading software, ensure that the radio is plugged into a stable mains power connection. Interrupting the mains supply during software download can lead to functional disturbances and/or damage to the unit! Setup Wizard...
  • Seite 59 INTERNETRADIO To listen to internet radio your radio must be connected to the internet. Try to position your radio as close as possible to your router to get the best connection speeds. When Internet Radio mode is selected, the radio connects with the Frontier Silicon Internet radio portal to download a list of stations.
  • Seite 60 Select station from a list of the most popular internet stations from around the world. Select stations from various categories in the menu: Origin, Genre or Language. Press BACK button on remote control can move back a menu level. Preset Stations The preset Internet radio stations are stored in the radio and cannot be accessed from other radios.
  • Seite 61 PODCASTS To listen to Podcasts your radio must be connected to the internet. Try to position your radio as close as possible to your router to get the best connection speeds. Press MODE repeatedly on the unit or on the remote to switch to Podcasts mode.
  • Seite 62: Spotify Connect

    SPOTIFY CONNECT Your new device has Spotify Connect built in Use your phone, tablet or computer as a remote control for Spotify. Go to spotify.com/connect to learn how. Licenses The Spotify Software is subject to third party licenses found here: https://www.spotify.com/connect/third-party-licenses All listed brands are trademarks of their companies. Errors and omissions ...
  • Seite 63: Dab Operation

    DAB OPERATION Press MODE on the unit or remote control repeatedly to select DAB radio. The unit will enter into the DAB mode and perform auto scan function. During the scan the display will show “Scanning… ” together with a slide bar that indicates the progress of the scan and the amount of stations that have been found so far. Once the scan has finished, the unit will select the first alpha numerically found station. To explore the found stations, press the / ...
  • Seite 64 DAB Display Modes Every time you press INFO/MENU button on unit or press INFO button on remote control, the display will show the following display modes: DLS – Programme Type – Ensemble/Frequency – Signal error/Strength –  Bit rate/Codec/Channels - Date. DLS (Dynamic Label Segment) This is a scrolling message giving real-time information, e.g. song titles, news headlines, etc.
  • Seite 65 DRC (Dynamic Range Compression) If you are listening to music with high dynamic range in a noisy environment, you may wish to compress the audio dynamic range. 1. During DAB mode, press MENU button and press buttons to select  ...
  • Seite 66 FM-RADIO To switch the unit to FM mode, press MODE repeatedly on the device or on the remote to switch to FM mode. The display will show the frequency. Radi o Auto scan To switch the unit to FM mode, press MODE repeatedly on the device or on the remote to switch to FM mode.
  • Seite 67 Scan setting 1. Press MENU button to access FM menu. 2. Press buttons to select Scan setting and then press SELECT button   to confirm. 3. Press  buttons to select [ Yes ] to receive strong signal only and    then press SELECT button to confirm. Audio setting Press MONO/ST. button on remote control to toggle between the Stereo or Mono selection.
  • Seite 68 CD OPERATION Compatible disc types Disc Types Disc Logo Recorded CD-R Audio (CD Recordable) CD-RW Audio (CD Rewritable) Audio CD Audio (Compact Disc Digital Audio) Press MODE repeatedly on the unit or on the remote to select CD mode. Playback 1.
  • Seite 69: Programm Erstellen

    Repeat Playback 1. Press the REPEAT button on remote control repeatedly to choose a function. It will play the current track repeatedly It will play all files in the current folder  repeatedly (for data CDs only) It will play all tracks repeatedly 2. Press the REPEAT button on remote control once more again, the REPEAT function will turn off. Random Playback All tracks on the disc can be played in a random order. 1. Press RANDOM button on the remote control. The  .
  • Seite 70: Usb Operation

    3. Activate your BT device and select the search mode. 4. “Connect Vertical” will appear on your BT device list. 5. Select “Connect Vertical” and enter “0000” for the password if necessary. 6. To disconnect the BT function, switch to another function on the unit or disable the function from your BT device.
  • Seite 71 Notes • The operational range between the unit and the device is approximately 8 metres. • For better signal reception, remove any obstacles between the unit and the BT device. • This unit supports A2DP (Advanced Audio Distribution Profile) and  AVRCP (Audio Video remote Control Profile) functions. This can only be  paired with one BT device at one time. •...
  • Seite 72: Aux Operation

    AUX OPERATION There is a “LINE IN” socket located at the left side of the unit. Analogue  audio sound signals from other sources can be input to the unit through this socket. 1. Connect the input to another audio device via an AUX cable (not included) with “LINE IN” socket. 2. Press MODE repeatedly on the unit or on the remote to select AUX in mode.
  • Seite 73: Setting The Alarm

    SETTING THE ALARM 1. Press TIMER button on the remote control, the display shows “Alarm (1 or 2): Off [hh:mm]”.. Alternatively, Press the MENU button on the remote to display the function main menu. Press buttons to select Main menu, and then press SELECT button to ...
  • Seite 74: Maintenance And Care

    MAINTENANCE AND CARE Handling Discs • Do not touch the playback side of the disc. • Do not attach paper or tape to the disc. Cleaning Discs • Fingerprints and dust on the disc cause sound deterioration. Wipe the disc from the centre outwards with a cloth. Always keep the disc clean. • If you cannot wipe off the dust with a soft cloth, wipe the disc lightly  with a slightly moistened cloth and finish with a dry cloth. • Do not use any type of solvent such as thinner, benzine, commercially available cleaners or antistatic spray.
  • Seite 75 Chal-Tec GmbH Wallstr. 15 10179 Berlin, Germany www.chal-tec.com The Spotify software is subject to third party licenses found here: https://www.spotiy.com/connect/third-party-licenses All listed brands are trademarks of their companies. Errors and omissions excepted, and subject to technical change. Our general terms of delivery and payment are applied.
  • Seite 76: Disposal Considerations

    DISPOSAL CONSIDERATIONS According to the European waste regulation 2012/19/ EU this symbol on the product or on its packaging  indicates that this product may not be treated as household waste. Instead it should be taken to the  appropriate collection point for the recycling of electrical and electronic equipment. By ensuring this product is disposed of correctly, you will help prevent potential negative consequences for the environment and human health, which could otherwise be caused by inappropriate waste handling of this product.
  • Seite 77 Chère cliente, cher client, Toutes nos félicitations pour l’acquisition de ce nouvel appareil. Veuillez lire attentivement et re- specter les instructions de ce mode d’emploi afin  d’éviter d’éventuels dommages. Nous ne saurions être tenus pour responsables des dommages dus au non-respect des consignes et à la mauvaise utilisation de l’appareil.
  • Seite 78: Fiche Technique

    FICHE TECHNIQUE Numéro d'article 10034996 10034997 Audio Puissance de sortie 2 x 5 W RMS 0 - 35 °C Température ambiante Fréquences radio FM-Radio 87,5 MHz - 108 MHz DAB-Radio 174,928 - 239,200 MHz Dimensions Appareil ca. 232 x 90 x 186 mm Enceintes ca.
  • Seite 79 WARNUNG CAUTION RISK OF ELECTRIC SHOCK DO NOT OPEN ATTENTION : POUR RÉDUIRE LES RISQUES DE CHOCS ÉLECTRIQUES, NE DÉMIONTEZ AUCUN CACHE. L'APPAREIL NE CONTIEN AUCUNE PIÈCE À ENTRETENIR. ADRESSEZ-VOUS UNIQUEMENT À DES PERSONNELS QUALIFIÉS POUR LA MAINTENANCE. MISE EN GARDE : POUR RÉDUIRE LE RISQUE D'INCENDIE ET DE CHOC ÉLECTRIQUE, NE PLONGEZ PAS L'APPAREIL DANS L'EAU ET NE L'EXPOSEZ PAS À...
  • Seite 80 CONSIGNES DE SÉCURITÉE Instructions générales de sécurité • Lisez attentivement toutes les instructions avant d'utiliser l'appareil et conservez le manuel pour pouvoir vous y référer ultérieurement. Utilisez uniquement la tension indiquée sur la plaque signalétique du produit. Assurez-vous que votre prise de courant est mise à la terre. •...
  • Seite 81 Connexion électrique • Assurez-vous que l'appareil ne se trouve pas sur le câble d'alimentation, car le câble pourrait être endommagé par le poids de l'appareil et devenir un risque pour la sécurité. • Si le cordon d'alimentation du produit est endommagé, il doit être remplacé...
  • Seite 82 GERÄTEÜBERSICHT Vorderseite Enceintes Lecteur CD Touche de sélection Ouverture/fermeture Veille / marche/ arrêt Voyant lumineux Ecran Capteur de la télécommande Touche de mode 10 Mémoriser Touche Info / Menu 12 Réduire / augmenter le volume 13 Dossier suivant / emplacement mémoire suivant 14 Station / titre précédent / suivant 15 Recherche / lecture /pause alimentation secteur...
  • Seite 83 Rückseite 16 Prise casque 20 Sortie audio (analogique) 17 Connecteur LINE-IN 21 Connexion de l'adaptateur électrique 18 Antenne FM 19 Port de chargement USB (5V Contenu de l'emballage • Unité principale • 2 enceintes • Câble d'antenne • Adaptateur secteur •...
  • Seite 84 TÉLÉCOMMANDE...
  • Seite 85 Veille / marche /arrêt 14 Ouverture / fermeture du lecteur CD Touche snooze 15 Minuterie Horloge 16 Recherche Intro 17 Répétition Lecture aléatoire 18 Information Mode 19 Station / titre suivant Démarrer la lecture / mettre en pause / vers le haut 20 Stop / vers le bas Titre / station précédent 21 Mémoriser...
  • Seite 86 Manipulation des piles • Une utilisation incorrecte des piles peut provoquer une corrosion ou une fuite, ce qui peut entraîner un incendie et des dommages matériels ou des blessures. • Utilisez uniquement le type de pile spécifié dans le mode d'emploi. • Ne jetez pas les piles usagées avec les ordures ménagères. Jetez-les conformément à...
  • Seite 87: Mise En Marche Et Utilisation

    MISE EN MARCHE ET UTILISATION Installation et connexion 1. Placez l'appareil sur une surface stable et de niveau. 2. Positionnez les enceintes et déroulez complètement leurs câbles. 3. Connectez le câble de l'enceinte droite au connecteur d'enceinte droit sur le côté droit de l'appareil. 4.
  • Seite 88: Mise En Marche

    MISE EN MARCHE Pour allumer / éteindre l'appareil 1. Pour allumer la radio, appuyez sur le bouton de veille de l'appareil ou de la télécommande. 2. Appuyez sur le bouton veille pour remettre l'appareil en mode veille. Choix du mode Appuyez plusieurs fois sur le bouton MODE de l'appareil ou de la télécommande pour basculer entre les modes radio Internet, podcasts, Spotify, DAB, FM, CD, USB, BT et AUX.
  • Seite 89: Premier Démarrage

    l'appareil pour réactiver le son. Premier démarrage Lorsque vous branchez l'appareil pour la première fois, l'écran d'accueil s'affiche, puis l'appareil passe en mode veille. Appuyez sur la touche STANDBY / ON de l'appareil ou sur la touche de la télécommande pour allumer l'appareil. Appuyez sur les touches / de l'appareil ou sur les touches ...
  • Seite 90 3.   L 'écran affiche "Network wizard scanning...". Votre appareil va  maintenant rechercher les connexions Wifi existantes. Cela peut prendre  quelques secondes. Une liste de tous les réseaux sans fil s'affiche alors  à l'écran. Appuyez sur les touches / de l'appareil ou sur les touches  de la télécommande pour choisir votre Wifi et confirmez en    appuyant sur la touche SELECT de l'appareil ou de la télécommande. 4. Appuyez sur les touches / de l'appareil ou sur les touches de la ...
  • Seite 91: Paramètres Système

    PARAMÈTRES SYSTÈME Maintenez la touche INFO/MENU de l'appareil ou la touche MENU de la télécommande pour afficher le menu. Appuyez sur les touches / de l'appareil ou sur les touches de la télécommande pour choisir les   paramètres système puis confirmez en appuyant sur la touche SELECT de  l'appareil ou de la télécommande. Egaliseur Cet appareil prend en charge une variété d'égaliseurs et d'effets sonores. Appuyez sur le bouton EQ pour entrer dans le menu de réglage de l'égaliseur.
  • Seite 92 SSID - Sélectionnez le réseau sans fil  souhaité. Recherche - recherchez les réseaux Assistant réseau disponibles. Configuration manuelle - sélectionnez un  réseau sans fil avec DHCP activé / désactivé Sélectionnez PBC sur la radio et appuyez sur la touche PBC de l'appareil auquel vous Configuration PBC-Wifi souhaitez vous connecter. Appuyez sur la touche ENTER pour continuer. Affiche les paramètres sur l'appareil. Paramètres d'affichage Un réseau sans fil avec DHCP activé / ...
  • Seite 93 Mises à jour à partir du réseau DAB / FM ou Mise à jour aucune mise à jour. automatique Format 12/24 h Format Sélectionnez le fuseau horaire. (Disponible Réglage du fuseau uniquement si la mise à jour automatique horaire par le réseau est activée.) Sélectionnez l'heure d'été-hiver.
  • Seite 94: Rétroéclairage

    1. En mode paramètres système, appuyez sur , choisissez   "Réinitialisation aux paramètres d'usine" et confirmez en appuyant sur la  touche SELECT. 2. Appuyez sur , et choisissez "oui" puis conformez en appuyant sur la   touche SELECT ou bien choisissez "non" pour annuler. Remarque :si vous réinitialisez le système aux paramètres d'usine, toutes les stations de radio, Internet et les stations DAB et FM préréglées que vous avez définies seront supprimées.
  • Seite 95 Timeout Activé / 10 Sek/ 20 Sek/ 30 Sek/ 45    sec/ 60 Sek/ 90 Sek/ 120 Sek/ 180  ON level (luminosité quand Elevé/ moyen/ faible l'appareil est allumé) DIM level (éclairage tamisé) Moyen / faible...
  • Seite 96 RADIO INTERNET Pour écouter la radio Internet, votre radio doit être connectée à Internet. Essayez de placer votre radio aussi près que possible de votre routeur pour une meilleure vitesse de connexion. Lorsque le mode radio Internet est sélectionné, la radio se connecte au portail Radio Internet Frontier Silicon pour télécharger une liste de stations.
  • Seite 97 Vous pouvez revenir en arrière d'un niveau de menu à l'aide de la touche RETOUR de la télécommande. Stations mémorisées (Presets) Ces stations ne sont stockées que sur votre radio et ne sont pas accessibles par d'autres radios. 1. En mode ON, maintenez la touche PRESET / MEMORY de l'appareil ou la touche PRESET de la télécommande jusqu'à ce que l'écran affiche "Save ...
  • Seite 98 PODCASTS Pour écouter des podcasts, votre radio doit être connectée à Internet. Placez votre radio aussi près que possible de votre routeur pour une meilleure vitesse de connexion. Appuyez plusieurs fois sur la touche MODE de l'appareil ou de la télécommande pour passer en mode podcasts. Au redémarrage de la radio, la dernière station écoutée est automatiquement sélectionnée.
  • Seite 99: Spotify Connect

    SPOTIFY CONNECT Votre nouvel appareil a Spotify Connect Utilisez votre smartphone, tablette ou ordinateur comme télécommande pour Spotify. Apprenez-en plus sur spotify.com/connect. Licences Le logiciel Spotify est soumis aux droits d'utilisateurs tiers consultables sur la page suivante: https://www.spotify.com/connect/third-party-licenses Toutes les marques citées sont des marques déposées des sociétés respectives. Sauf erreurs et omissions et sujet à modifications techniques. ...
  • Seite 100 RADIO DAB Appuyez plusieurs fois sur MODE sur l'appareil ou sur la télécommande pour sélectionner la radio DAB. L'appareil passe en mode DAB et exécute la fonction de recherche automatique. Pendant le processus de recherche, l'écran affiche "Scan ..." avec une barre qui montre la progression de la  recherche et le nombre de stations trouvées. Dès que le processus de scan est terminé, l'appareil sélectionne la première station trouvée dans l'ordre alphanumérique.
  • Seite 101 Modes d'affichage en DAB Chaque fois que vous appuyez sur la touche INFO / MENU de l'appareil ou sur la touche INFO de la télécommande, l'écran affiche les options  d'affichage suivantes : Type de programme DLS ensemble / erreur de signal  de fréquence / vitesse de transmission de la force / codec / date de la station. DLS (segment de label dynamique) Il s'agit d'un message défilant qui fournit des informations en temps réel, ...
  • Seite 102 Suppression des stations non valides (Prune Invalid) Vous pouvez supprimer toutes les stations indisponibles de la liste. 1. En mode DAB, appuyez sur la touche MENU et appuyez sur les touches pour sélectionner Prune invalid puis appuyez sur SELECT pour ...
  • Seite 103 RADIO FM Pour mettre l'appareil en mode FM, appuyez plusieurs fois sur MODE sur l'appareil ou sur la télécommande pour passer en mode FM. La fréquence s'affiche à l'écran. Radi o Recherche automatique Appuyez sur la touche SCAN de l'appareil ou de la télécommande pour lancer la recherche d'une station.
  • Seite 104 Paramètres de recherche 1. Appuyez sur la touche MENU pour accéder au menu FM. 2. Appuyez sur les touches , pour sélectionner le paramètre de scan,   puis appuyez sur SELECT pour confirmer. 3. Appuyez sur les touches et sélectionnez "OUI" pour recevoir  ...
  • Seite 105 LECTEUR CD Types de disques compatibles Type de disque Logo du disque Type de contenu CD-R (CD Audio enregistrable) CD-RW (CD Audio réenregistrable) Audio CD (compact Audio disc audio) Appuyez plusieurs fois sur MODE sur l'appareil ou sur la télécommande pour sélectionner le mode CD.
  • Seite 106 Répétition de la lecture 1. Appuyez plusieurs fois sur la touche REPEAT pour sélectionner un mode de lecture. Pour répéter le titre en cours. Pour répéter tous les fichiers du dossier actuel.  (uniquement pour les CD de données) Pour répéter tous les titres. 2. Appuyez à nouveau sur la touche REPEAT pour désactiver la fonction de répétition.
  • Seite 107 3. Activez votre appareil BT et sélectionnez le mode de recherche. 4.   " Connect Vertical" s'affiche dans la liste de vos appareils BT. 5. Sélectionnez "Connect Vertical" et entrez "0000" comme mot de passe si nécessaire. 6. Pour désactiver la fonction BT, passez à une autre fonction sur l'appareil ou désactivez la fonction sur votre appareil BT mobile.
  • Seite 108 • Appuyez sur les touches /  de l'appareil ou de la télécommande pour passer au titre précédent ou suivant. Remarques • La portée entre l'appareil BT mobile et cet appareil est d'environ 8 mètres. • Pour une meilleure réception du signal, supprimez tous les obstacles entre l'appareil et l'appareil BT.
  • Seite 109: Fonction Arrêt Automatique

    UTILISATION D'AUX Une prise LINE IN se trouve sur le côté gauche de l'appareil. Les signaux audio analogiques provenant d'autres sources peuvent être transmis à l'appareil par cette prise. 1. Connectez l'entrée à un autre appareil audio à l'aide d'un câble AUX (non inclus) avec la prise LINE IN.
  • Seite 110 4.   A ppuyez une fois sur la touche SLEEP pour afficher l'état de la minuterie  d'arrêt automatique à l'écran lorsqu'elle est activée. ALARME 1.   A ppuyez sur la touche TIMER de la télécommande, l'écran affiche  "Alarme (1 ou 2) : Désactivée [hh:mm]". Autre méthode, Appuyez sur la touche MENU de la télécommande pour afficher le menu  de fonctions principal. Appuyez sur les touches , pour choisir le menu   principal et confirmez ensuite en appuyant sur la touche SELECT. Avec les  touches choisissez l'option Alarme puis appuyez sur la touche SELECT ...
  • Seite 111: Nettoyage Et Entretien

    Désactivation de l'alarme 1. Appuyez sur la touche TIMER de la télécommande, "Alarm (1 ou 2) : On [hh: mm]" apparaît sur l'écran. 2. Appuyez sur les touches pour choisir le numéro de l'alarme (1 ou   2), puis appuyez sur la touche SELECT pour commencer le réglage de la minuterie.
  • Seite 112 Chal-Tec GmbH Wallstr. 15 10179 Berlin www.chal-tec.com Le logiciel Spotify est soumis aux droits d'utilisateurs tiers consultables sur la page suivante : https://www.spotify.com/connect/third-party-licenses Toutes les marques citées sont des marques déposées des sociétés respectives. Sauf erreurs et omissions et sujet à modifications techniques. Nos conditions générales sont applicables.
  • Seite 113: Informations Sur Le Recyclage

    INFORMATIONS SUR LE RECYCLAGE Vous trouverez sur le produit l’image ci-contre (une poubelle sur roues, barrée d‘une croix), ce qui indique que le produit se trouve soumis à la directive européenne 2012/19/UE. Renseignez-vous sur les dispositions en vigueur dans votre région concernant la collecte séparée des appareils électriques et électroniques.
  • Seite 115 Estimado cliente: Le felicitamos por la adquisición de este produc- to. Lea atentamente el siguiente manual y siga cuidadosamente las instrucciones de uso con el fin de evitar posibles daños. La empresa no se  responsabiliza de los daños ocasionados por un  uso indebido del producto o por haber desatendi- do las indicaciones de seguridad. CONTENIDO Datos técnicos 116 Indicaciones de seguridad 118...
  • Seite 116: Datos Técnicos

    DATOS TÉCNICOS Número de artículo 10034996 10034997 Audio Potencia de salida 2 x 5 W RMS 0 - 35 °C Temperatura ambiente Frecuencias radio Radio FM 87,5 MHz - 108 MHz Radio DAB 174,928 - 239,200 MHz Dimensiones Aparato ca. 232 x 90 x 186 mm Altavoces ca.
  • Seite 117: Seguridad Láser

    ADVERTENCIA CAUTION RISK OF ELECTRIC SHOCK DO NOT OPEN ATENCIÓN: NO ABRIR LA CARCASA PARA EVITAR UNA DESCARGA ELÉCTRICA Y LESIONES PERSONALES GRAVES. EN EL INTERIOR NO EXISTE NINGÚN COMPONENTE QUE EL CLIENTE PUEDA REPARAR. CONTACTE EXCLUSIVAMENTE CON UN SERVICIO TÉCNICO CUALIFICADO.
  • Seite 118: Indicaciones De Seguridad

    INDICACIONES DE SEGURIDAD Advertencias generales de seguridad • Lea atentamente estas indicaciones antes de utilizar el aparato por primera vez y conserve este manual para consultas posteriores. • Utilice exclusivamente la tensión que aparece especificada en la placa  técnica del aparato. Asegúrese de que la toma de corriente cuente con toma de tierra.
  • Seite 119 problema. Toma para suministro eléctrico • Asegúrese de que el aparato no se coloque sobre el cable de alimentación, pues el cable podría dañarse por soportar el peso y  representar un riesgo para la seguridad. • Si el cable de conexión del aparato se daña, deberá ser sustituido por  el fabricante, el servicio de atención al cliente o cualquier otra persona autorizada para evitar daños. Averías •...
  • Seite 120: Visión General Del Aparato

    VISIÓN GENERAL DEL APARATO Parte delantera Altavoz Compartimento para CD Botón de selección Abrir/cerrar Encender/apagar/standby Indicador luminoso Monitor Sensor del mando a distancia Botón de modo 10 Guardar Botón info/menú 12 Reducir/aumentar volumen 13 Siguiente carpeta/espacio de memoria 14 Pista/emisora anterior/siguiente 15 Búsqueda/reproducción/pausa, toma para suministro eléctrico...
  • Seite 121 Rückseite 16 Conector para auriculares 19 Puerto de carga USB (5V 17 Conector LINE-IN 20 Salida de audio (analógica) 18 Antena de FM 21 Conexión del adaptador de corriente Partes suministradas • Aparato • 2 Altavoces • Antena de cable •...
  • Seite 122: Mando A Distancia

    MANDO A DISTANCIA...
  • Seite 123 Standby/on/off 14 Abrir/cerrar compartimento de CD Botón de posposición 15 Temporizador Hora 16 Buscar Intro 17 Repetir Reproducción aleatoria 18 Información Modo 19 Emisora/pista siguiente Iniciar/pausar reproducción/ hacia arriba 20 Detener/abajo Pista/emisora anterior 21 Guardar Botón de selección 22 Menú 10 Ecualizador 23 Espacio de memoria/carpeta Reducir/aumentar volumen...
  • Seite 124 Manejo de las pilas • Un uso inadecuado o incorrecto de la pila puede provocar corrosión o vertidos de esta, lo cual podría producir un incendio o daños  personales/materiales. • Utilice el tipo de pila indicado en este manual de instrucciones • No deseche las pilas usadas como residuo doméstico. Deséchelas de acuerdo con las disposiciones vigentes en su país.
  • Seite 125: Puesta En Marcha Y Uso

    PUESTA EN MARCHA Y USO Colocación y establecimiento de la conexión 1. Coloque el aparato en una superficie estable y plana. 2. Coloque los altavoces y desenrolle completamente el cable de estos. 3. Conecte el cable del altavoz derecho a la toma para el altavoz derecho situado en la parte derecha del aparato. 4.
  • Seite 126: Puesta En Funcionamiento

    PUESTA EN FUNCIONAMIENTO Apagar/encender aparato 1. Para encender la radio, pulse el botón standby en el aparato o en el mando a distancia. 2. Para pasar el dispositivo de nuevo al modo standby, pulse de nuevo el botón Standby. Seleccionar modo Pulse varias veces el botón MODE del aparato o del mando a distancia para cambiar entre los modos radio de internet, podcasts, Spotify, DAB, FM, CD, USB, BT y AUX.
  • Seite 127 del mando a distancia o los botones VOLUME+/- del aparato para activar el sonido. Primera puesta en marcha Si conecta el aparato a una toma de corriente por primera vez, la pantalla muestra el saludo de bienvenida y a continuación pasa al modo standby. Pulse el botón STANDBY/ON del aparato o el botón del mando a distancia para encender el aparato.
  • Seite 128 3. En pantalla aparece "Netword wizard scanning...". Su aparato está  buscando conexiones de red WiFi existentes. La búsqueda puede durar unos segundos. A continuación, se mostrará una lista de todas las  redes inalámbricas en pantalla. Pulse los botones / del aparato o del mando a distancia para seleccionar la red WiFi deseada y, a   continuación, pulse el botón SELECT para confirmar, bien en el aparato o  en el mando a distancia. 4. Pulse los botones / del aparato o bien los botones del mando ...
  • Seite 129: Ajustes Del Sistema

    AJUSTES DEL SISTEMA Mantenga pulsado el botón INFO/MENU en el aparato o bien el botón MENU del mando a distancia para acceder al menú. Pulse los botones / del aparato o del mando a distancia para seleccionar los ajustes  ...
  • Seite 130 SSID- seleccione la red inalámbrica que  desee. Búsqueda - busque redes disponibles. Asistente de red Configuración manual - seleccione una red  inalámbrica con DHCP activado/desactivado  Seleccione en la radio PBC y pulse el botón Configuración PBC- PBC en el aparato con que desea conectarla. WLAN Para continuar, pulse el botón ENTER. Muestra la configuración en el aparato. Ajustes de vista Una red inalámbrica con DHCP activado/ Configuración manual desactivado.
  • Seite 131 Actualización de la red DAB/FM o sin Actualización actualización. automática Seleccionar formato Formato 12/24 horas Seleccionar franja horaria. (Solo disponible Configurar franja si la actualización de red automática está  horaria activada). Seleccionar horario de invierno/verano. Horario verano/ (Solo disponible si la actualización de red invierno automática está activada). Nota: La actualización horaria automática predeterminada es "actualización ...
  • Seite 132 1. Pulse en modo ajustes del sistema para seleccionar "Restablecer   los valores de fábrica"  y pulse el botón SELECT para confirmar la  selección. 2. Pulse  para seleccionar "Sí" y pulse el botón SELECT para confirmar    o seleccione "No" para cancelar. Nota: Si restablece el sistema a los valores de fábrica, todas las emisoras  de radio que ha sintonizado, las emisoras de internet y las emisoras DAB y FM se perderán. Actualización de software 1.
  • Seite 133 Tiempo de espera Activado/ 10 seg/ 20 seg/ 30 seg / 45 seg/ 60 seg/ 90 seg/ 120 seg/ 180 seg On level (nivel de brillo con Alto/medio/bajo pantalla encendida) DIM level (atenuación) Medio/bajo...
  • Seite 134: Radio Internet

    RADIO INTERNET Para escuchar la radio de internet, su radio debe estar conectada a internet. Intente colocar su radio tan cerca como sea posible de su router para obtener la mejor velocidad de conexión. Si ha elegido el modo de radio de internet, la radio se conecta al portal de radio internet de Frontier Silicon para descargarse una lista de emisoras.
  • Seite 135 Con el botón BACK del mando a distancia puede regresar al nivel anterior del menú. Emisoras guardadas (presets) Esta memoria de emisoras solamente se guardará en su radio y no estará accesible a otras radios. 1. Mantenga pulsado el botón PRESET/MEMORY en el aparato o el botón PRESET en el mando a distancia hasta que la pantalla muestre "Save to Preset"...
  • Seite 136 PODCASTS Para escuchar podcast, su radio debe estar conectada a internet. Intente colocar su radio tan cerca como sea posible de su router para obtener la mejor velocidad de conexión. Pulse MODE varias veces en el aparato o en el mando a distancia para cambiar al modo de podcast. Si se reinicia la radio, se selecciona automáticamente la última emisora ...
  • Seite 137: Spotify Connect

    SPOTIFY CONNECT Su nuevo dispositivo tiene Spotify Connect Utilice su smartphone, tablet u otro ordenador como mando a distancia para Spotify. Más información en spotify.com/connect. Licencias El software de Spotify está sujeto a derechos de uso de otros proveedores,  disponibles en la siguiente página: https://www.spotify.com/connect/third- party-licenses. Todas las marcas indicadas son marcas registradas de la empresa correspondiente. Quedan excluidos errores y omisiones, el producto está sujeto a modificaciones técnicas. Se aplican nuestros términos y ...
  • Seite 138: Radio Dab

    RADIO DAB Pulse varias veces MODE en el aparato o en el mando a distancia para seleccionar la radio DAB. El aparato cambia al modo DAB y se inicia la función de búsqueda automática. Durante el proceso de búsqueda, la  pantalla muestra "Scan..." junto con una barra que indica el progreso del proceso de búsqueda y el número de las emisoras encontradas hasta el momento. En cuanto haya finalizado el proceso de análisis, el aparato ...
  • Seite 139 Modo de visualización DAB Cada vez que pulsa el botón INFO/MENU en el aparato o pulse el botón INFO del mando a distancia, la pantalla muestra los siguientes modos de visualización: DLS-tipo de programa-ensemble/frecuencia - error en la señal/ fortaleza y velocidad de transmisión/ códec/ emisora-fecha. DLS segmento de etiqueta dinámico Se trata de un mensaje corrido que muestra información en tiempo real, como el título de la pista, titulares de noticias, etc.
  • Seite 140 Eliminar emisora no válida (Prune invalid) Puede eliminar todas las emisoras no disponibles de la lista. 1. En modo DAB, pulse el botón MENU y los botones para   seleccionar Prune Invalid y, a continuación, pulse el botón SELECT para confirmar.
  • Seite 141 RADIO FM Para cambiar el aparato al modo FM, pulse varias veces MODE en el aparato o en el mando a distancia y acceder al modo FM. En la pantalla se muestra la frecuencia. Radi o Búsqueda automática de emisoras Pulse el botón SCAN en el aparato o en el mando a distancia para iniciar la búsqueda de una emisora.
  • Seite 142 Configuración de búsqueda 1. Pulse el botón MENU para acceder al menú FM. 2. Pulse los botones para seleccionar la sintonización de búsqueda y,   a continuación, pulse SELECT para confirmar. 3. Pulse los botones para seleccionar "YES" para elegir solo emisoras   con señal fuerte y, a continuación, pulse el botón SELECT para confirmar.
  • Seite 143 REPRODUCTOR DE CD Tipos de discos compatibles Tipo de disco Logo del disco Contenido de medios CD-R (CD grabado) Audio CD-RW (CD de Audio grabación múltiple) CD de audio (Disco Audio compacto) Pulse varias veces MODE en el aparato o en el mando a distancia para seleccionar el modo CD.
  • Seite 144 Repetición de la reproducción 1. Pulse el botón REPEAT para elegir un modo de reproducción. Repetir la pista actual. Repetir todos los archivos de la carpeta actual (solo para CD de datos) Repetir todas las pistas. 2. Pulse el botón REPEAT de nuevo para desactivar la función de repetición. Reproducción aleatoria Todas las pistas se reproducirán en orden aleatorio.
  • Seite 145 MODO USB 1. En la parte trasera del aparato se encuentra una toma USB. Cuando el aparato USB esté conectado al aparato, pulse varias veces el botón MODE del aparato o del mando a distancia para seleccionar el modo USB. 2.
  • Seite 146 • Pulse el botón /  en el aparato o en el mando a distancia para   reproducir/interrumpir o • Pulse el botón /  en el aparato o en el mando a distancia para saltar a la pista anterior/siguiente. Observaciones •...
  • Seite 147: Funcionamiento Aux

    FUNCIONAMIENTO AUX En la parte izquierda del aparato existe una toma LINE IN. Con esta toma puede reproducir señales de audio de otras fuentes a través del aparato. 1. Conecte la entrada mediante un cable AUX (no incluido en el envío) a la toma LINE IN de otro dispositivo de audio. 2.
  • Seite 148 DESPERTADOR 1. Pulse el botón del temporizador en el mando a distancia y en pantalla aparece "Alarma (1 o 2): Off [hh:mm]". Como alternativa: Pulse el botón MENU del mando a distancia para mostrar el menú principal. Pulse los botones para seleccionar el menú principal y, a continuación, ...
  • Seite 149: Limpieza Y Cuidado

    Desactivar despertador 1. Pulse el botón del temporizador en el mando a distancia y en pantalla aparece "Alarma (1 o 2): on [hh:mm]". 2. Pulse los botones para seleccionar el número de alarma (1 o 2) y,   a continuación, pulse SELECT para comenzar con la configuración del  temporizador. 3. Pulse los botones para elegir "Enable" y, a continuación, pulse el ...
  • Seite 150 Chal-Tec GmbH Wallstr. 15 10179 Berlin www.chal-tec.com El software de Spotify está sujeto a derechos de uso de otros proveedores, disponibles en la siguiente página: https://www.spotify.com/connect/third-party-licenses Todas las marcas indicadas son marcas registradas de la empresa correspondiente. Quedan excluidos errores y omisiones, el producto está sujeto a modificaciones técnicas.
  • Seite 151: Retirada Del Aparato

    RETIRADA DEL APARATO Si el aparato lleva adherida la ilustración de la izquierda (el contenedor de basura tachado) entonces rige la normativa europea, directiva 2012/19/UE. Estos productos no pueden depositarse en los contenedores destinados a la basura común. Infórmese sobre las leyes territoriales que regulan la recogida separada de aparatos eléctricos y electrónicos.
  • Seite 153 Gentile Cliente, La ringraziamo per aver acquistato il dispositivo. La preghiamo di leggere attentamente le segu- enti istruzioni per l’uso e di seguirle per evitare possibili danni tecnici. Non ci assumiamo alcuna responsabilità per danni scaturiti da una mancata osservazione delle avvertenze di sicurezza e da un uso improprio del dispositivo.
  • Seite 154: Dati Tecnici

    DATI TECNICI Numero articolo 10034996 10034997 Audio Potenza di uscita 2 x 5 W RMS 0 - 35 °C Temperatura ambiente Frecuenze radio Radio FM 87,5 MHz - 108 MHz Radio DAB 174,928 - 239,200 MHz Dimensioni Dispositivo ca. 232 x 90 x 186 mm Altoparlanti ca.
  • Seite 155 AVVERTENZA CAUTION RISK OF ELECTRIC SHOCK DO NOT OPEN ATTENZIONE: PER RIDURRE IL RISCHIO DI FOLGORAZIONE E LESIONI A PERSONE, NON APRIRE L’ALLOGGIAMENTO. IL DISPOSITIVO NON CONTIENE COMPONENTI CHE NECESSITANO DI MANUTENZIONE DA PARTE DELL’UTENTE. PER RIPARAZIONI RIVOLGERSI A PERSONALE COMPETENTE E QUALIFICATO.
  • Seite 156: Avvertenze Di Sicurezza

    AVVERTENZE DI SICUREZZA Avvertenze generali di sicurezza • Leggere attentamente tutte le indicazioni prima di utilizzare il dispositivo e conservare il manuale per future consultazioni. • Utilizzare solo tensione corrispondente a quella indicata sulla targhetta del dispositivo. Assicurarsi che la presa elettrica utilizzata sia dotata di messa a terra.
  • Seite 157 la sicurezza. • Se il cavo di alimentazione è danneggiato, deve essere sostituito dal produttore, dal servizio di assistenza ai clienti o da una persona qualificata, in modo da evitare danni. Interferenze • La radio non deve essere posizionata vicino a dispositivo che causano interferenze elettromagnetiche. Se la radio viene posizionata vicino ad altri dispositivi, la qualità...
  • Seite 158: Descrizione Del Dispositivo

    DESCRIZIONE DEL DISPOSITIVO Parte frontale Altoparlanti Vano CD Tasto Selezione Aprire/Chiudere   S tandby/On/Off Indicazione luminosa Schermo Sensore del telecomando Tasto Modalità 10 Salvare Tasto Info/Menu 12 Alzare/abbassare il volume 13 Cartella successiva/posizione di salvataggio 14 Emittente/canzone precedente/successiva 15 Cerca/Play/Pausa...
  • Seite 159 Rückseite 16 Attacco cuffie 20 Uscita audio (analogica) 17 Connettore LINE-IN 21 Collegamento dell'adattatore di alimentazione 18 Antenna FM 19 Porta di carica USB (5V Volume di consegna • Dispositivo principale • 2 altoparlanti • Antenna a cavo • Adattatore • Telecomando •...
  • Seite 160 TELECOMANDO...
  • Seite 161   S tandby/On/Off 15 Timer Tasto Snooze 16 Cerca 17 Ripetizione Intro 18 Informazioni Riproduzione casuale 19 Emittente/canzone successiva Modalità 20 Stop/In basso Play/Pausa/In alto 21 Salvare Canzone/emittente precedente 22 Menu Tasto Selezione 23 Posizione di salvataggio/ Cartella 10 Equalizzatore 24 Indietro Alzare/abbassare il volume 25 Muto...
  • Seite 162 Come trattare le batterie • L’utilizzo errato o improprio della batteria può causare corrosione o perdite, con il conseguente rischio di incendi, danni a cose e danni a persone. • Utilizzare solo batterie del tipo indicato nel manuale. • Non smaltire le batterie usate nei rifiuti casalinghi. Smaltirle nel rispetto  delle normative nazionali.
  • Seite 163: Messa In Funzione E Utilizzo

    MESSA IN FUNZIONE E UTILIZZO Posizionamento e collegamento 1.   P osizionare il dispositivo su una superficie piana e stabile. 2. Posizionare gli altoparlanti e srotolare completamente i loro cavi. 3. Collegare il cavo dell’altoparlante destro alla connessione per altoparlanti destra sul lato destro del dispositivo. 4. Collegare il cavo dell’altoparlante sinistro alla connessione per altoparlanti destra sul lato sinistro del dispositivo.
  • Seite 164: Messa In Funzione

    MESSA IN FUNZIONE Accendere/Spegnere il dispositivo 1. Premere Standby su dispositivo o telecomando per accendere la radio. 2. Premere nuovamente Standby per passare in modalità standby. Selezionare la modalità Premere più volte MODE sul dispositivo o sul telecomando per scorrere tra le modalità...
  • Seite 165 selezionare la lingua e premere SELECT su dispositivo o telecomando per confermare. Compare ora la schermata con le linee guida per la protezione dei dati. Visitare la pagina web citata per risalire alle singole indicazioni della linea guida per la protezione dei dati. Premere ora SELECT su dispositivo o telecomando per confermare il passaggio successivo.
  • Seite 166: Impostazioni Di Sistema

    del router se non si è sicuri di quale sia il tasto WPS. 3. Confermare con SELECT su dispositivo o telecomando. Il dispositivo stabilisce una connessione con il router. Possono essere necessari alcuni secondi. Stabilire una connessione utilizzando la password del Wi-Fi Se il vostro router non dispone di un pulsante WPS, vi sarà...
  • Seite 167: Impostazioni Di Visualizzazione

    SSID – selezionare la rete senza filo  desiderata. Ricerca – cercare reti disponibili.  Assistente di rete Configurazione manuale – selezionare una  rete senza filo con DHCP attivato/disattivato. Selezionare PBC sulla radio e premere PBC Configurazione PBC- sul dispositivo con cui ci si vuole connettere. Wi-Fi Premere ENTER per procedere. Mostra le impostazioni sul dispositivo. Impostazioni di visualizzazione Una rete senza filo con DHCP attivato/ Impostazioni manuali disattivato.
  • Seite 168: Aggiornamento Automatico

    Aggiornamento da rete DAB/FM o nessun Aggiornamento aggiornamento. automatico Impostare il formato Formato orario 12/24 ore. Selezionare il fuso orario (disponibile solo Impostare il fuso se l’aggiornamento automatico dalla rete è orario attivo). Selezionare ora legale o solare (disponibile solo se l’aggiornamento automatico dalla Ora legale/solare rete è...
  • Seite 169 1. Nelle impostazioni di sistema, premere per selezionare “Resettare   alle impostazioni di sistema” e confermare con SELECT. 2. Premere per selezionare “Sì” e confermare con SELECT o   selezionare “No” per interrompere l’impostazione. Nota: quando si resetta il dispositivo alle impostazioni di fabbrica, tutte le emittenti impostate, radio e web e le emittenti predefinite DAB e FM ...
  • Seite 170 Timeout On/10 secondi/20 secondi/30 secondi/45 secondi/60 secondi/90 secondi/120 secondi/180 secondi On level (livello di luminosità se in Alto/Medio/Basso funzione) Dim level (livello di dimmeraggio) Medio/Basso...
  • Seite 171 RADIO INTERNET Per ascoltare la web radio, è necessario collegare la radio a Internet. Cercare di posizionare la radio più vicino possibile al router, in modo da ottenere le migliori velocità di connessione. Se si seleziona la modalità Internet Radio, la radio si connette con il portale web radio Frontier Silicon per scaricare una lista di emittenti.
  • Seite 172 del menu. Emittenti in memoria (Preset) Queste emittenti in memoria sono salvate solo nella vostra radio e non sono accessibili da altre radio. 1. In modalità ON, tenere premuto PRESET/MEMORY sul dispositivo o PRESET sul telecomando, fino a quando il display mostra “Save to  Preset” (salvare emittente). 2. Per salvare l’emittente attuale è possibile scegliere tra le 30 posizioni disponibili.
  • Seite 173 PODCASTS Per ascoltare podcast, è necessario collegare la radio a Internet. Cercare di posizionare la radio più vicino possibile al router, in modo da ottenere le migliori velocità di connessione. Premere più volte MODE su dispositivo o telecomando per selezionare la modalità Podcast. Quando si riavvia la radio, viene selezionata automaticamente l’ultima emittente ascoltata.
  • Seite 174 SPOTIFY CONNECT Il tuo nuovo dispositivo è dotato di Spotify Connect Utilizza smartphone, tablet o computer come telecomando per Spotify. Scopri di più alla pagina spotify.com/connect Licenze Il software Spotify è sottoposto a diritti utente di parti terze, consultabili alla pagina web seguente: https://www.spotiy.com/connect/third-party- licenses.
  • Seite 175 RADIO DAB Premere più volte MODE sul dispositivo o sul telecomando per selezionare Radio DAB. Il dispositivo passa in modalità DAB e inizia la funzione di ricerca automatica. Durante la ricerca, il display mostra “Scan…” e una barra  che indica il progresso e le emittenti trovate fino a quel momento. Terminata la ricerca, il dispositivo seleziona la prima emittente alfanumerica trovata. Per visualizzare le emittenti trovate, premere /  sul dispositivo sul telecomando e confermare con SELECT su dispositivo o ...
  • Seite 176 DLS (Dynamic Label Segment) Questo è un messaggio scorrevole che fornisce informazioni in tempo reale, come ad es. titolo del brano, notizie principali, ecc. Tipo di programma Descrive lo “Stile” o il “Genere” di programma trasmesso. Nome Ensemble/Frequenza Qui vengono mostrati il nome del multiplex che contiene l’emittente in ascolto e la frequenza.
  • Seite 177 Cancellare emittenti non valide (Prune Invalid) È possibile cancellare dalla lista tutte le emittenti non più disponibili: 1. Premere MENU in modalità DAB, premere per selezionare “Prune   Invalid” e confermare con SELECT. 2. Premere per selezionare “YES” e confermare con SELECT o ...
  • Seite 178 RADIO FM Per passare alla modalità FM, premere più volte MODE su telecomando o dispositivo. Il display mostra la frequenza. Radi o Ricerca automatica Premere SCAN su dispositivo o telecomando per iniziare la ricerca di un’emittente. Quando viene trovata un’emittente, la ricerca termina automaticamente.
  • Seite 179 dall’emittente. Impostazioni di ricerca 1. Premere MENU per raggiungere il menu FM. 2. Premere per selezionare “Impostazioni di ricerca” e confermare   con SELECT. 3. Premere per selezionare “YES” e mostrare solo le emittenti con   buona ricezione e confermare con SELECT. Impostazioni audio Premere MONO/ST.
  • Seite 180 LETTORE CD CD compatibili Tipo di CD Logo del CD Contenuto CD-R (CD di Audio registrazione) CD-RW (CD riscrivibile) Audio Audio CD (compact Audio disc) Premere MODE ripetutamente su dispositivo o telecomando per selezionare la modalità CD. Riproduzione 1. Premere il tasto di espulsione ( ) per aprire il coperchio del vano CD. 2.
  • Seite 181 Riproduzione ripetuta 1. Premere REPEAT più volte per selezionare una modalità di riproduzione. Ripetere il titolo attuale. Ripetere tutti i file nella cartella attuale (solo  per CD con file). Ripetere tutti i titoli. 2. Premere di nuovo REPEAT per spegnere la funzione di ripetizione. Riproduzione casuale Tutti i titoli possono essere riprodotti in ordine casuale. 1.
  • Seite 182: Funzione Usb

    4. Nella lista delle connessioni BT disponibili del dispositivo BT compare “Connect Vertical”. 5. Selezionare “Connect Vertical” e, se richiesto, inserire la password 0000. 6. Per disattivare la funzione BT della radio, passare a un’altra funzione o disattivare il BT sul dispositivo esterno.
  • Seite 183 interrompere la musica. • Premere /  su dispositivo o telecomando per passare al titolo precedente/successivo. Note: • La portata tra radio e dispositivo esterno è di circa 8 metri. • Rimuovere tutti gli ostacoli tra radio e dispositivo BT, in modo da garantire una migliore ricezione.
  • Seite 184: Modalità Sonno

    FUNCIONAMIENTO AUX Sul lato sinistro del dispositivo si trova un ingresso LINE-IN. Con questa connessione è possibile trasmettere al dispositivo segnali audio analogici da altre fonti. 1. Collegare un cavo AUX (non incluso in consegna) all’ingresso e alla connessione LINE-IN di un altro dispositivo audio. 2.
  • Seite 185 SVEGLIA 1.   P remere TIMER sul telecomando e lo schermo mostra “Alarm (1 o 2): Off  [hh:mm]”. In alternativa: Premere MENU sul telecomando per mostrare il menu principale delle funzioni. Premere per selezionare il menu principale e confermare   con SELECT. Selezionare l’opzione sveglie con e premere SELECT per  ...
  • Seite 186: Pulizia E Manutenzione

    Disattivare la sveglia 1. Premere TIMER sul telecomando e lo schermo mostra “Alarm (1 o 2): On [hh:mm]”. 2. Premere per selezionare Sveglia 1 o 2 e iniziare l’impostazione del   timer con SELECT. 3. Selezionare “Enable” con e confermare con SELECT. ...
  • Seite 187 Chal-Tec GmbH Wallstr. 15 10179 Berlin www.chal-tec.com Il software Spotify è sottoposto ai diritti di utilizzo di parti terze, che possono essere visionati alla pagina web seguente: https://www.spotiy.com/connect/third-party-licenses Tutti i marchi indicati sono marchi registrati delle rispettive aziende. Esclusi errori e omissioni e soggetto a modifiche tecniche. Si applicano le nostre condizioni contrattuali.
  • Seite 188: Smaltimento

    SMALTIMENTO Se sul prodotto è presente la figura a sinistra (il  bidone dei rifiuti con le ruote), si applica la direttiva  europea 2012/19/UE. Questi prodotti non possono essere smaltiti con i rifiuti normali. Informarsi sulle  disposizioni vigenti per la raccolta di dispositivi elettrici ed elettronici. Attenersi alle disposizioni vigenti e non smaltire i vecchi dispositivi con i rifiuti  domestici. Grazie al corretto smaltimento dei vecchi dispositivi si tutela il pianeta e la salute delle persone da possibili conseguenze negative.

Diese Anleitung auch für:

1003499610034997

Inhaltsverzeichnis