Herunterladen Inhalt Inhalt Diese Seite drucken

Werbung

Verfügbare Sprachen

Verfügbare Sprachen

Werbung

Inhaltsverzeichnis
loading

Inhaltszusammenfassung für auna 10032755

  • Seite 3: Inhaltsverzeichnis

    Sehr geehrter Kunde, wir gratulieren Ihnen zum Erwerb Ihres Gerä- tes. Lesen Sie die folgenden Hinweise sorgfäl- tig durch und befolgen Sie diese, um möglichen Schäden vorzubeugen. Für Schäden, die durch Missachtung der Hinweise und unsachgemäßen Gebrauch entstehen, übernehmen wir keine Haf- tung.
  • Seite 4: Technische Daten

    TECHNISCHE DATEN Artikelnummer 10032755 10032756 100-240V ~ 50/60 Hz , 1 A Stromversorgung Netzgerät USB-Ausgang , 1 A Audio Ausgangsleistung 2 x 5 W RMS UKW-Radio Frequenzbereich 87,5 MHz - 108 MHz Frequenzgang 20 Hz - 20 Khz Frequenzbereich 174-240 MHz...
  • Seite 5: Sicherheitshinweise

    SICHERHEITSHINWEISE Allgemeine Sicherheitshinweise • Lesen Sie alle Hinweise genau durch, bevor Sie das Gerät verwenden und bewahren Sie die Bedienungsanleitung für den zukünftigen gebrauch auf. • Verwenden Sie ausschließlich die Stromspannung, die auf dem Typenschild des Geräts angegeben ist. Vergewissern Sie sich, dass Ihre Steckdose geerdet ist.
  • Seite 6 • Achten Sie darauf, dass der Netzstecker des Radios während eines Gewitters nicht in der Steckdose steckt. • Das Gerät wird warm, wenn es über einen längeren Zeitraum verwendet wird. Das ist normal und weist nicht auf ein Problem des Geräts hin. Stromanschluss •...
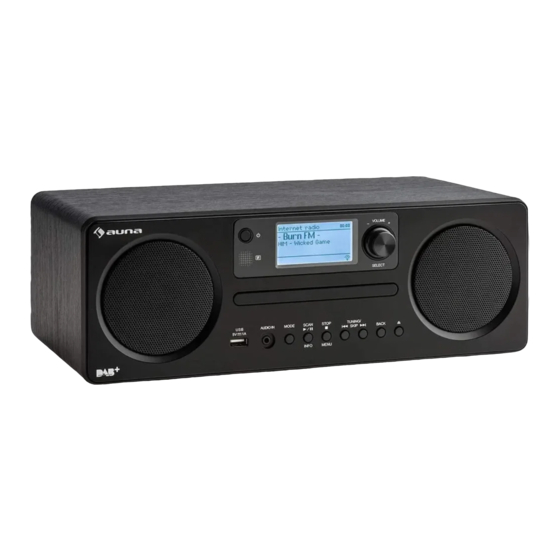
  • Seite 7: Geräteübersicht

    GERÄTEÜBERSICHT SELECT SCAN TUNING/ MODE STOP SKIP BACK INFO MENU IR-Sensor Betriebsart Ein/Standby Scan/Wiedergabe/Info CD-Lade 10 STOP/Menü Display Sendersuche/Titel zurück Lautstärke +/- 12 Sendersuche/Titel vor USB-Ladeanschluss (5 V/1 A) 13 ZURÜCK Audioeingang 14 CD-Lade öffenen/schließen Stromanschluss Stabantenne...
  • Seite 8: Fernbedienung

    FERNBEDIENUNG...
  • Seite 9 Ein/Standby 19 Uhr Zahlentasten 20 Timer Wiederholung 21 Anspielen von Titeln Menü 22 Zufallswiedergabe Mono/Stereo 23 Zurück Sendersuche zurück 24 EQ Pfeiltaste hoch 25 Sendersuche vor Lautstärke - 26 Lautstärke Pfeiltaste runter 27 Enigabe / Bestätigen 10 Verzeichnis 28 Verzeichnis + CD/USB 29 Internet 12 FM / DAB...
  • Seite 10 Batterie der Fernbedienung auswechseln Drücken Sie die Batteriefachabdeckung nach unten und ziehen Sie den Batteriehalter heraus. Legen Sie eine LR6-Batterie (AA) in den Batteriehalter der Fernbedienung ein (nicht im Lieferumfang enthalten) und achten Sie beim Einlegen darauf, dass die „+“ und „-“ Polaritätsmarkierungen auf Batterie um im Batteriehalter übereinstimmen.
  • Seite 11: Anschluss

    ANSCHLUSS Das Gerät ans Stromnetz anschließen Wickeln Sie das Stromkabel des Geräts vollständig und in seiner vollen Länge ab. Verbinden Sie das Stromkabel auf der Seite des Adapters mit dem Stromanschluss des Geräts und stecken Sie den Netzstecker am anderen Ende des Kabels in die Steckdose. Das Gerät ist jetzt ans Stromnetz angeschlossen und kann verwendet werden.
  • Seite 12: Inbetriebnahme

    INBETRIEBNAHME Gerät an-/ausschalten Wenn Sie das Gerät zum ersten Mal eingeschaltet haben, wird das Display „Welcome to Internet Radio“ (Willkommen beim Internet Radio) anzeigen und Sie durch den Setup-Assistenten führen. 1. Drücken Sie zum Einschalten des Radios die Standby-Taste auf dem Gerät oder auf der Fernbedienung.
  • Seite 13: Systemeinstellungen

    SYSTEMEINSTELLUNGEN Drücken Sie die Taste MENU um das Menü anzuzeigen, drücken Sie PRESET ∧/∨ , um die System Einstellungen auszuwählen und drücken Sie zum Bestätigen die Taste SELECT oder ENTER auf der Fernbedienung. Equalizer Dieses Gerät unterstützt eine Vielzahl von Equalizern und Soundeffekten. Drücken Sie die Taste EQ, um im Menü...
  • Seite 14 SSID- wählen Die das gewünschte drahtlose Netzwerk aus.Suche- suchen Sie nach verfügbaren Netzwerken. Manuelle Netzwerk-Assistent Konfiguration- wählen Sie ein drahtloses Netzwerk mit DHCP aktiviert/deaktiviert aus Wählen Sie auf dem Radio PBC aus und drücken Sie die PBC Taste auf dem Gerät PBC-WLAN- aus, mit dem Sie sich verbinden möchten.
  • Seite 15 Aktualisierungen aus dem DAB/FM Automatisches Netzwerk oder keine Aktualisierung. Aktualisieren Format einstellen 12/24 Stunden Format Zeitzone auswählen. (Nur verfügbar, wenn die automatische Netzwerkaktualisierung Zeitzone einstellen aktiviert ist.) Sommer-Winterzeit auswählen. Nur verfügbar, wenn die automatische Sommer-/Winterzeit Netzwerkaktualisierung aktiviert ist.) Hinweis: Die voreingestellte automatische Zeitaktualisierung ist „Aktualisierung vom Netzwerk“.
  • Seite 16 ∧/∨ 1. Drücken Sie im Systemeinstellungsmodus PRESET , um „Zurücksetzen auf Werkseinstellungen“ auszuwählen und drücken Sie zum Bestätigen die Taste SELECT oder ENTER auf der Fernbedienung oder ENTER auf der Fernbedienung. ∧/∨ 2. Drücken Sie PRESET , um „Ja“ auszuwählen und drücken Sie zum Bestätigen die Taste SELECT oder ENTER auf der Fernbedienung oder wählen Sie „Nein“, um Abzubrechen.
  • Seite 17: Multiroom

    MULTIROOM Das Gerät kann Teil einer Multiroom Gerätegruppe sein. Die Gerätegruppe kann über dasselbe Wi-Fi Netzwerk kontrolliert werden, entweder mit einer UNDOK App, die auf einem intelligenten Gerät läuft, oder indem man in der Menüleiste des Geräts „Multiroom“ auswählt. Beim Multiroom können mehrere Geräte als Gruppe angeordnet werden, wobei ein Gerät als Server und die anderen Geräte als Clients fungieren.
  • Seite 18: Internet-Radio

    INTERNET-RADIO Dieses Gerät kann tausende Radiosender und Podcasts aus der ganzen Internet Welt über die Internetbreitbandverbindung abspielen. Wenn Sie den radio Internet-Radio-Modus ausgewählt haben, verbindet sich das Radio mit dem Frontier Silicon Internet-Radio-Portal um eine Senderliste herunterzuladen. Wenn ein Sender einmal ausgewählt wurde, wird das Radio sich direkt mit diesem Sender verbinden.
  • Seite 19 Favoriten werden im Internet-Radio-Portal gespeichert und sind auf allen Internet Radios, die mit dem gleichen Account verwendet werden verfügbar. Damit Sie die Favoriten verwenden können, müssen Sie das Radio zunächst im Internet-Radio-Portal registrieren. Zum Registrieren gehen Sie zunächst auf die Homepage des Portals (www.wifiradio-frontier.com).
  • Seite 20 Wählen Sie Podcasts aus den folgenden Kategorien im Podcastmenü aus: Ort, Genre. Sie können durch die Eingabe von Schlüsselwörtern Podcasts auch nach bestimmten Episoden eines Podcasts suchen. Auch wenn das Internet-Radio-Portal tausende von Sendern enthält, kann es vorkommen, dass Sie einen Sender hören wollen, der dort nicht gelistet ist.
  • Seite 21 erfolgt für Internet Radio, DAB und FM nach dem gleichen Schema.
  • Seite 22: Spotify Premium

    SPOTIFY PREMIUM Begrüße mit uns Spotify Premium Mit Spotify Premium kannst du dir Millionen von Songs ohne Werbung anhören. Deine Lieblingskünstler, die aktuellsten Hits und neue Entdeckungen – nur für dich! Einfach auf ‘Play’ drücken und du hörst jeden Song, der dir gefällt, bei höchster Soundqualität. Schau dir unsere Premium- Abonnement Angebote auf spotify.com/premium an.
  • Seite 23: Bedienung Des Musikplayers

    Wiedergabe, DAB, FM und Bluetooth) und den gewünschten Modus auf Ihrem Tablet oder Smartphone auswählen. Bevor Sie die UNDOK App nutzen, sollten Sie sicherstellen, dass das Smartphone/Tablet mit dem gleichen W-LAN Netzwerk wie Ihr Gerät verbunden ist. Starten Sie die App. Die App startet sich und beginnt im Netzwerk nach dem Gerät zu suchen.
  • Seite 24: Taste Funktion

    „freigegebene Dateien“ auszuwählen und drücken Sie die Taste SELECT, um nach allen verfügbaren freigegebenen Ordnern oder Dateien zu suchen. 2. Das Display wird Ihnen alle verfügbaren freigegebenen Ordner im ∧/∨ Netzwerk anzeigen. Drücken Sie PRESET , um den Computer auszuwählen, mit dem Sie das Gerät verbinden möchten. 3.
  • Seite 25: Usb-Wiedergabe

    USB-WIEDERGABE Wenn ein USB-Speichermedium am Gerät angeschlossen ist, erscheint in der Anzeige "USB disk attached - open folder?". Die SELECT-Taste drücken radio und mit YES bestätigen. ODER ∧/∨ Im Musikplayer-Modus PRESET drücken, um die USB-Wiedergabe auszuwählen und zur Auswahl SELECT drücken. Scan Stations: 0 ∧/∨...
  • Seite 26: Senderliste

    DAB-RADIO Drücken Sie mehrfach die MODE Taste, um „DAB Radio“ auszuwählen. Das Gerät wird in den DAB-Modus wechseln und die automatische Suchfunktion starten. Während der Suche wird das Display „Suche…“ und einen Balken, der den Fortschritt und die bisher gefundenen Sender angibt, anzeigen. (F.7) Wenn die Suche beendet ist, wird das Gerät den ersten alphanumerisch gefundenen Sender auswählen.
  • Seite 27: Fm-Radio

    DAB Anzeigeoptionen Jedes Mal, wenn Sie die Taste INFO auf der Fernbedienung oder auf Ihrem Gerät drücken, wird das Display die folgenden Anzeigeoptionen aufzeigen: DLS-Programmtyp-Ensemble/Frequenz-Signalfehler/-stärke- radio Übertragungsgeschwindigkeit/Codec/Sender-Datum. Löschen nicht länger verfügbarer Sender Sie haben die Möglichkeit, nicht länger verfügbare Sender zu löschen. 1.
  • Seite 28: Cd-Betrieb

    CD-BETRIEB Kompatible Disktypen Disktyp Disk-Logo Medieninhalt CD-R (Aufnahme-CD) Audio CD-RW (Mehrfach Audio beschreibbare CD) Audio CD Audio (Kompaktdisk) Am Gerät wiederholt MODE drücken (oder CD/USB auf der Fernbedienung), um die CD-Wiedergabe zu aktivieren. Wiedergabe 1. Drücken Sie die Auswurfe-Taste ( ), um die CD-Lade zu öffnen. 2.
  • Seite 29 Wiederholung der Wiedergabe 1. Drücken Sie die Taste REPEAT wiederholt, um einen Wiedergabemodus zu wählen. Den aktuellen Titel wiederholen. Alle Dateien im aktuellen Ordner wiederholen. (nur für Daten-CDs) Alle Titel wiederholen. 2. Drücken Sie die Taste REPEAT erneut, so dass die Wiederholen-Funktion ausgeschaltet wird.
  • Seite 30: Bt-Verbindung

    BT-VERBINDUNG Dieses Gerät verfügt über eine BT-funktion und kann ein Signal im Radius von 8 Metern empfangen. Das Radio mit einem BT-Gerät verbinden, um Musik zu hören: 1. Drücken Sie zur Auswahl des BT-Modus mehrfach die Taste MODE. 2. Wenn das Radio nicht mit einem BT-Gerät verbunden ist, wird in der rechten Ecke des Displays das BT-Symbol aufblinken.
  • Seite 31: Wiedergabe Über Aux

    WIEDERGABE ÜBER AUX Auf der Rückseite des Gerätes befindet sich ein Audioeingang, über den analoge Audiosignale von anderen Quellen eingespeist werden können. 1. Schließen Sie über ein AUX-Kabel (nicht im Lieferumfang enthalten) ein anderes Audiogerät am AUX-Eingang an. 2. Wiederholt die MODE-Taste drücken, bis der AUX-Modus aktiv ist. 3.
  • Seite 32: Weckfunktion

    WECKFUNKTION 1. Drücken Sie auf Ihrer Fernbedienung die Taste ALARM, das Display zeigt dann „Alarm (1 oder 2): Aus[hh:mm]“ an. ∧/∨ 2. Drücken Sie PRESET , um Wecker Nummer 1 oder 2 auszuwählen und drücken Sie SELECT um die Einstellung der folgenden Parameter vorzunehmen.
  • Seite 34 Chal-Tec GmbH Wallstr. 15 10179 Berlin www.chal-tec.com Die Spotify-Software unterliegt den Nutzungsrechten von Drittanbietern, die auf folgender Seite eingesehen werden können: https://www.spotiy.com/connect/third-party-licenses Alle aufgeführten Marken sind Warenzeichen der jeweiligen Unternehmen. Fehler und Auslassungen ausgenommen und technischen Änderungen unterliegend. Unsere allgemeinen Geschäftsbedingungen finden Anwendung.
  • Seite 35: Hinweise Zur Entsorgung

    HINWEISE ZUR ENTSORGUNG Befindet sich die linke Abbildung (durchgestrichene Mülltonne auf Rädern) auf dem Produkt, gilt die Europäische Richtlinie 2012/19/EU. Diese Produkte dürfen nicht mit dem normalen Hausmüll entsorgt werden. Informieren Sie sich über die örtlichen Regelungen zur getrennten Sammlung elektrischer und elektronischer Gerätschaften.
  • Seite 36 Dear Customer, Congratulations on purchasing this equipment. Please read this manual carefully and take care of the following hints on installation and use to avoid technical damages. Any failure caused by ignoring the items and cautions mentioned in the operation and installation instructions are not covered by our warranty and any liability.
  • Seite 37: Technical Data

    TECHNICAL DATA Item number 10032755 10032756 100-240V ~ 50/60 Hz , 1 A Mains Adaptor USB jack , 1 A 2 x 5 W RMS Audio output FM Radio Frequency range 87,5 MHz - 108 MHz Compact Disc Frequency Response...
  • Seite 38: Safety Instructions

    SAFETY INSTRUCTIONS Read all the instructions carefully before using the unit and keep them for future reference. • Check that the voltage marked on the rating label matches your mains voltage. • The unit must be placed on a flat stable surface and should not be subjected to vibrations.
  • Seite 39: Service & Maintenance

    Interference • Do not place the unit on or near appliances which may cause electromagnetic interference. If you do, it may adversely affect the operating performance of the unit, and cause a distorted sound. Supervision • Children should be supervised to ensure that they do not play with the unit.
  • Seite 40: Product Overview

    PRODUCT OVERVIEW SELECT SCAN TUNING/ MODE STOP SKIP BACK INFO MENU Remote Control Sensor MODE Button STANDBY Button SCAN/ /INFO Button Disc tray 10 STOP /MENU Button Display TUNING/SKIP Button VOLUME +/– Dial/ SELECT 12 TUNING/SKIP Button Button 13 BACK Button USB 5V 1A Charging Port 14 Open/Close Disk Tray Button AUDIO IN Socket...
  • Seite 41: Remote Control

    REMOTE CONTROL...
  • Seite 42 ON/STANDBY button 20 TIMER button Number buttons 21 INTRO button REPEAT button 22 RANDOM button MENU button 23 BACK button MONO/ST. button 24 EQ button TUNING button 25 TUNING button PRESET button 26 VOLUME+ button VOLUME - button 27 ENTER button PRESET button 28 FOLDER+ button 10 FOLDER - button...
  • Seite 43 Battery replacement for the remote control Press down on the compartment cover, and slide the cover off to open the compartment. Place the LR6 (AA) battery in the remote control according to the polarity markings (“+” and “-”) inside the compartment and on the battery.
  • Seite 44: Connections

    CONNECTIONS Connecting to the mains supply Unwind the mains adapter cable to its full length. Connect the mains adapter to the mains socket. The unit is now connected and ready to use.. Connecting the unit to any other power source may cause damage to the unit.
  • Seite 45: Getting Started

    GETTING STARTED Powering ON/OFF When you first connect the unit to the mains socket, the unit will be in STANDBY mode after showing “Welcome to Internet Radio STARTING….” 1. Press the Standbybutton on the unit or remote control to switch the unit 2.
  • Seite 46: System Settings

    SYSTEM SETTINGS ∧/∨ Press the MENU button to display the menu, press the PRESET buttons to select System settings and then press the SELECT button to confirm. Equalizer This system supports a variety of equalizers and sound effects. Press the EQ button to access the Equaliser menu Alternatively: ∧/∨...
  • Seite 47 SSID – select the desire wireless network. Rescan – Scan for available networks. Network wizard Manual config – select wireless network with DHCP enable/disable. Select PBC on the unit and press the PBC button on the modem device that you PBC Wlan setup wish to connect with.
  • Seite 48 Update from DAB / FM / Network or No Auto update update. Set format 12 / 24 hour format. Select a time zone. (Only available when Set timezone Auto update from Network is on.) Select daylight savings. (Only available Daylight savings when Auto update from Network is on.) The default auto time update setting is “Update from Network”.
  • Seite 49 Software update ∧/∨ 1. During System settings mode, press the PRESET buttons to select Software update and then press the SELECT button to confirm. 2. Press the / buttons to select Auto-check setting or Check now, and then press the SELECT button toconfirm. Before downloading software, ensure that the radio is plugged into a stable mains power connection.
  • Seite 50: Multi-Room

    MULTI-ROOM The device can form part of a Multi-room group. The group can be controlled over the same Wi-Fi network with UNDOK app running on a smart device or using the device’s Multi-room menu. For Multi-room, several devices can be set up as a group with a device acting as the server and other devices acting as clients.
  • Seite 51: Internet-Radio

    INTERNET-RADIO This radio can play thousands of radio stations and podcasts from all over the world via a broadband internet connection. When Internet Radio mode Internet is selected, the radio connects with the Frontier Silicon Internet radio portal radio to download a list of stations. Once a station is selected, the radio will connect directly to that station.
  • Seite 52 Select stations from various categories in the menu: Location, Genre, Popular Stations, New Stations. You can also search stations using various keywords. Stations The name and a description of your selected station will show on the display. Press the INFO button repeatedly to view further information for the station.Information displayed cycles through name/ description, genre/location, reliability,bitrate/codec/ sampling rate, playback buffer and current date.
  • Seite 53 Recalling a Stored Station 1. To select a preset, press the MEMORY button, and then press the ∧/∨ PRESET buttons to select one of the listed preset stations. 2. Press the SELECT button to confirm the selection. Operation of Preset and Recall stations are same for Internet Radio, DAB and FM.
  • Seite 54: Spotify Premium

    SPOTIFY PREMIUM Say hello to Spotify Premium Spotify Premium lets you listen to millions of songs ad-free – the artists you love, the latest hits and discoveries just for you. Simply hit play to hear any song you like, at the highest sound quality. Check out our current Premium offers at spotify.com/premium.
  • Seite 55: Music Player Operation

    the app may ask you to enter the PIN. Default PIN is 1234. For details of changing the PIN for security, please refer to System Settings section: Network - NetRemote PIN Setup. Note: Once the smartphone or tablet has already accessed the device, they will automatically connect on next time when you open the app again.
  • Seite 56 Repeat Mode ∧/∨ During Music Player mode, press the PRESET buttons to select Repeat play and press the SELECT button repeatedly to turn repeat play on/off. Shuffle Mode ∧/∨ During Music Player mode, press the PRESET buttons to select Shuffle play and press the SELECT button repeatedly to turn shuffle play on/off.
  • Seite 57: Usb Operation

    USB OPERATION When a USB device is connected to the unit, the display shows “USB disk USB playback attached – Open folder?” (F.5), press the SELECT button to confirm YES. USB disk attached - Alternatively: Open folder? ∧/∨ During Music Player mode, press the PRESET buttons to select USB playback and press the SELECT button to confirm.
  • Seite 58: Dab

    Press the MODE button repeatedly to select “DAB radio”. The unit will enter DAB mode and perform the auto scan function. During the scan the display will show “Scanning… ” together with a slide bar that indicates the progress radio of the scan and the amount of stations that have been found so far.
  • Seite 59 Prune Invalid You may remove all unavailable stations from the list. ∧/∨ 1. During DAB mode, press the MENU button and press the PRESET buttons to select Prune invalid and then press the SELECT button to confirm. ∧/∨ 2. Press the PRESET buttons to select YES and press the SELECT button to confirm, or select NO to cancel.
  • Seite 60: Fm Operation

    FM OPERATION Switching from DAB to FM Mode radio To switch the unit to FM mode, press the MODE button repeatedly to switch to FM mode. The display will show the frequency. Auto Scan Press and hold the TUNINGbuttons to start searching for a station.. The search may not stop at a station with a very week signal..
  • Seite 61: Cd Operation

    CD OPERATION Compatible disc types Disc type Disk-Logo Medieninhalt CD-Recordable Audio CD-RW Audio (CD Rewritable) Audio CD (Compact Audio Disc Digital Audio) Press MODE repeatedly on the unit or press CD/USB repeatedly on the remote control to select CD mode. Playback 1.
  • Seite 62 Repeat playback 1. Press the REPEAT button repeatedly to choose a function. It will play the current track repeatedly. It will play all les in the current folder repeatedly (for data CDs only). Alle Titel wiederholen. 2. Press the REPEAT button once more again, the REPEAT function will turn off.
  • Seite 63: Bt Operation

    BT OPERATION The unit has a BT function that can receive a signal within 8 metres. Pairing the unit with a BT device to listen to music: 1. Press the MODE button repeatedly to select BT mode. 2. If the unit is not paired with any BT device, the right hand corner will show a flash the BT symbol.
  • Seite 64: Aux Operation

    AUX OPERATION There is an “AUDIO IN” socket located at the rear of the unit. Analogue audio sound signals from other sources can be input to the unit through this socket. 1. Connect the input to another audio device via an AUX cable (not included) with an “AUDIO IN”...
  • Seite 65: Setting The Alarm

    SETTING THE ALARM 1. Press the ALARM button on the remote control, the display shows “Alarm (1 or 2): Off [hh:mm]”. ∧/∨ 2. Press the PRESET buttons to select the Alarm number (1 or 2) and then press the SELECT button to start thesetting of the following parameters.
  • Seite 67 Chal-Tec GmbH Wallstr. 15 10179 Berlin, Germany www.chal-tec.com The Spotify software is subject to third party licenses found here: https://www.spotiy.com/connect/third-party-licenses All listed brands are trademarks of their companies. Errors and omissions excepted, and subject to technical change. Our general terms of delivery and payment are applied.
  • Seite 68: Disposal Considerations

    DISPOSAL CONSIDERATIONS According to the European waste regulation 2012/19/EU this symbol on the product or on its packaging indicates that this product may not be treated as household waste. Instead it should be taken to the appropriate collection point for the recycling of electrical and electronic equipment.
  • Seite 69 Chère cliente, cher client, Toutes nos félicitations pour l’acquisition de ce nouvel appareil. Veuillez lire attentivement les ins- tructions suivantes de branchement et d’utilisation afin d’éviter d’éventuels dommages. Le fabricant ne saurait être tenu pour responsable des dom- mages dus au non-respect des consignes de sé- curité...
  • Seite 70: Fiche Technique

    FICHE TECHNIQUE Numéro d'article 10032755 10032756 100-240V ~ 50/60 Hz , 1 A Alimentation de l'adaptateur Sortie USB , 1 A Audio Puissance de sortie 2 x 5 W RMS Radio FM Plage de fréquences 87,5 MHz - 108 MHz Plage de fréquences...
  • Seite 71: Consignes De Sécurité

    CONSIGNES DE SÉCURITÉ Consignes générales de sécurité • Lisez attentivement toutes les instructions avant d'utiliser l'appareil et conservez le mode d'emploi pour vous y référer ultérieurement. • N'utilisez que la tension indiquée sur la plaque signalétique de l'appareil. Assurez-vous que votre prise de courant est mise à la terre. •...
  • Seite 72 Branchement sur le secteur • Veillez à ne pas poser l'appareil sur son câble d'alimentation, car le poids de l'appareil pourrait endommager le câble et constituer un risque pour la sécurité. • Si le câble secteur est endommagé, il doit être remplacé par le service client du fabricant ou une autre personne qualifiée afin d'éviter tout dommage.
  • Seite 73: Aperçu De L'appareil

    APERÇU DE L'APPAREIL SELECT SCAN TUNING/ MODE STOP SKIP BACK INFO MENU Scan/lecture/Info Capteur IR Marche/veille 10 STOP/Menu Tiroir à CD Recherche de stations /titre précédent Écran 12 Recherche de stations /titre Volume +/- suivant Port de charge USB (5 V/1 A) 13 RETOUR Entrée Audio 14 ouvrir/fermer le tiroir à...
  • Seite 74: Télécommande

    TÉLÉCOMMANDE...
  • Seite 75 Marche/veille 19 Heure Touches numériques 20 Minuterie Répétition 21 Lecture de titres Menu 22 Lecture aléatoire Mono/Stéréo 23 Retour Recherche de station retour 24 Egaliseur Touche fléchée haut 25 recherche de stations avant Volume - 26 Volume + Touche fléchée bas 27 Saisie / Confirmer 10 Répertoire - 28 Répertoire +...
  • Seite 76 Remplacement de la pile de la télécommande Appuyez sur le couvercle du compartiment à pile et sortez le support de pile. Insérez une pile LR6 (non incluse) dans le support de la télécommande et veillez à respecter les marques de polarité «+» et «-» sur la pile lorsque vous l'insérez dans son logement.
  • Seite 77: Branchement

    BRANCHEMENT Branchement de l'appareil au secteur Déroulez complètement le câble d'alimentation de l'appareil. Branchez le câble sur le côté de l'adaptateur à la prise de l'appareil et branchez la fiche à l'autre extrémité du câble dans la prise de secteur. L'appareil est maintenant connecté...
  • Seite 78: Mise En Service

    MISE EN SERVICE Allumer/éteindre l'appareil Lorsque vous allumez l'appareil pour la première fois, l'écran affiche "Welcome to Internet Radio" et vous guide à travers l'assistant d'installation. 1. Appuyez sur le bouton veille de l'appareil ou de la télécommande pour allumer la radio. 2.
  • Seite 79: Paramètres Système

    PARAMÈTRES SYSTÈME Appuyez sur le bouton MENU pour afficher le menu, appuyez sur PRESET ∧/∨ , pour sélectionner les paramètres système et appuyez sur le bouton SELECT ou ENTER sur télécommande ou ENTER sur télécommande pour confirmer. Egaliseur Cet appareil prend en charge une variété d'égaliseurs et d'effets sonores.
  • Seite 80 SSID - choisissez le réseau sans fil désiré. Assistant réseau Recherche – recherchez les réseaux disponibles. Confi-guration manuelle – Configuration PBC-Wifi choisissez un réseau sans fil avec DHCP activé/désactivé Sur la radio, sélectionnez PBC et appuyez sur la touche PBC de l'appareil auquel vous Paramètres d'affichage voulez vous connecter.
  • Seite 81 Actualisations par le réseau DAB/FM ou pas Actualisation automa- d'actualisation. tique Réglage du format Format horaire 12/24 Choix du fuseau horaire. (disponible seule- ment si l'actualisation automatique par le Fuseau horaire réseau est activée.) Choix de l'heure d'été ou d'hiver. (disponible Heure d'été/heure seulement si l'actualisation automatique par d'hiver...
  • Seite 82 annuler. Remarque : Si vous restaurez les paramètres d'usine, toutes les stations de radio, Internet et les stations DAB et FM préréglées que vous avez définies seront supprimées. ∧/∨ Software Update ∧/∨ 1. Dans les paramètres système, appuyez sur la touche PRESET pour sélectionner "Software Update"...
  • Seite 83: Multiroom

    MULTIROOM L'appareil peut faire partie d'un groupe de périphériques multiroom. Le Inter groupe d'appareils peut être contrôlé sur le même réseau Wi-Fi, soit avec une application UNDOK exécutée sur un appareil intelligent, soit en sélectionnant «multiroom» dans la barre de menus de l'appareil. Avec multiroom, plusieurs périphériques peuvent être regroupés, un périphérique agissant en tant que serveur et les autres périphériques en tant que clients.
  • Seite 84: Internet-Radio

    INTERNET-RADIO Cet appareil peut lire des milliers de stations de radio et de podcasts du monde entier via la connexion Internet haut débit. Si vous avez sélectionné le mode Radio Internet, la radio se connecte au portail Frontier Silicon Internet Radio pour télécharger une liste de stations. Lorsqu'une station est sélectionnée, la radio se connecte directement à...
  • Seite 85 Les favoris sont stockés sur le portail radio Internet et sont disponibles sur toutes les radios Internet utilisées avec le même compte. Pour pouvoir utiliser les favoris, vous devez d'abord enregistrer la radio sur le portail radio Internet. Pour vous inscrire, rendez-vous d'abord sur la page d'accueil du portail (www.wifiradio-frontier.com).
  • Seite 86 Même si le portail de la radio Internet contient des milliers de stations, vous pouvez avoir envie d'écouter une station qui n'y figure pas. Vous pouvez Mes stations ajouter vos propres stations via le portail (www. ajoutées wifiradio-frontier.com). Ces stations que vous avez ajoutées sont accessibles via "Liste des stations>...
  • Seite 87: Spotify Premium

    SPOTIFY PREMIUM Découvrez Spotify Premium. Avec Spotify Premium, vous pouvez écouter des millions de titres sans pub. Les artistes que vous aimez, les derniers hits et de nouvelles découvertes rien que pour vous. Écoutez en un clic les titres de votre choix et profitez d’une qualité...
  • Seite 88: Utilisation Du Lecteur De Musique

    musique, DAB, FM et Bluetooth) et sélectionner le mode désiré sur votre tablette ou smartphone. Avant d'utiliser l'application UNDOK, assurez-vous que votre smartphone/ tablette est connecté au même réseau Wi-Fi que votre appareil. Lancez l'application. L'application démarre et recherche le périphérique sur le réseau.
  • Seite 89: Mode Répétition

    ∧/∨ Appuyez sur PRESET pour sélectionner l'ordinateur auquel vous souhaitez connecter l'appareil. 3. L'appareil recherchera tous les fichiers partagés disponibles sur l'ordinateur. ∧/∨ 4. Appuyez sur PRESET pour sélectionner les fichiers souhaités et appuyez sur SELECT ou ENTER sur télécommande pour confirmer. 5.
  • Seite 90: Usb-Wiedergabe

    USB-WIEDERGABE ∧/∨ Si un périphérique de stockage USB est connecté à l'appareil, l'écran affiche "USB disk attached - open folder?". Appuyez sur la touche SELECT ou ENTER sur télécommande et confirmez avec YES. OU BIEN ∧/∨ En mode lecteur de musique, appuyez sur les touches pour surligner la lecture par USB et confirmez en appuyant sur SELECT ou ENTER sur télécommande.
  • Seite 91: Dab-Radio

    DAB-RADIO Appuyez plusieurs fois sur la touche MODE pour sélectionner "Radio DAB". L'appareil passe en mode DAB et lance la recherche automatique. Pendant la recherche, l'écran affiche "Recherche ..." et une barre indiquant la progression et les stations trouvées jusqu'à présent. (F.7) Lorsque la recherche est terminée, l'appareil sélectionne la première station trouvée de manière alphanumérique.
  • Seite 92 ∧/∨ Options d'affichage DAB Chaque fois que vous appuyez sur la touche INFO de la télécommande ou de l'appareil, l'écran affichera les options d'affichage suivantes : Type de programme DLS- Ensemble / signal d'erreur de fréquence / force et taux de radio transmission / codec / Date de la station.
  • Seite 93: Radio Fm

    RADIO FM Passer de DAB à FM Pour passer du mode DAB au mode FM, appuyez plusieurs fois sur le bouton MODE jusqu'à ce que FM s'affiche. L'écran vous affichera la fréquence. Recherche automatique Appuyez sur les boutons TUNING et maintenez-les enfoncés pour commencer à...
  • Seite 94: Utilisation Du Cd

    choisissez "non" pour laisser l'appareil choisir lui-même entre mono et stéréo. 5. Confirmez votre choix par un appui sur la touche SELECT ou ENTER sur télécommande. radio UTILISATION DU CD Disques compatibles Type de disque Logo sur le disque Type de contenu CD-R (CD Audio enregistrable)
  • Seite 95 Répéter la lecture 1. Appuyez sur la touche REPEAT plusieurs fois pour choisir un mode de répétition. Répéter le titre en cours. Répéter la lecture de tous les titres du dossier en cours. (uniquement pour les CD de données) Répéter tous les titres. 2.
  • Seite 96: Connexion Bt

    CONNEXION BT Cet appareil possède une fonction BT et peut recevoir un signal dans un rayon de 8 mètres. Connecter la radio à un appareil BT pour écouter de la musique : 1. Appuyez plusieurs fois sur MODE pour sélectionner le mode BT. 2.
  • Seite 97: Lecture Par La Prise Aux

    LECTURE PAR LA PRISE AUX À l'arrière de l'appareil se trouve une entrée audio qui peut être utilisée pour l'entrée de signaux audio analogiques provenant d'autres sources. 1. Connectez un périphérique audio à l'entrée AUX via un câble AUX (non fourni).
  • Seite 98: Fonction Réveil

    FONCTION RÉVEIL ∧/∨ 1. Appuyez sur la touche ALARM de la télécommande pour que l'écran affiche "Alarme (1 ou 2): désactivée [hh:mm]". ∧/∨ 2. Appuyez sur les touches , pour choisir le réveil numéro 1 ou 2 et appuyez sur SELECT ou ENTER sur télécommande pour procéder au réglage des paramètres suivants.
  • Seite 100 Chal-Tec GmbH Wallstr. 15 10179 Berlin www.chal-tec.com Le logiciel Spotify est soumis aux droits d'utilisation de tiers, que vous pouvez consulter sur la page suivante : https://www.spotiy.com/connect/third-party-licenses Toutes les marques sont des marques déposées des sociétés respectives. Nos termes et conditions s'appliquent à l'exception des erreurs et omissions et sous réserve des modifications techniques.
  • Seite 101: Conseils Pour Le Recyclage

    CONSEILS POUR LE RECYCLAGE Le pictogramme ci-contre apposé sur le produit signifie que la directive européenne 2012/19/UE s‘applique (poubelle à roues barrée d’une croix). Ces produits ne peuvent être jetés dans les poubelles domestiques courantes. Renseignez-vous concernant les règles appliquées pour la collecte d’appareils électriques et électroniques.

Diese Anleitung auch für:

10032756

Inhaltsverzeichnis