Nice RO1070 Installierungs-Und Gebrauchsanleitungen Und Hinweise
Sliding gate opener
Inhaltsverzeichnis
Verfügbare Sprachen
Verfügbare Sprachen
Quicklinks
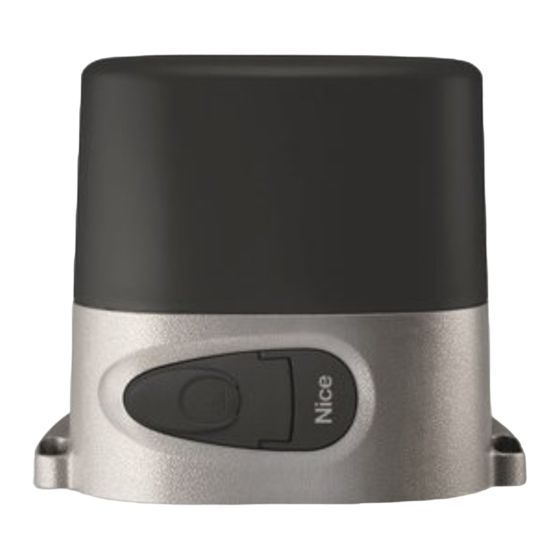
RO1070
Sliding Gate Opener
0682
Instructions and warnings for installation and use
Istruzioni ed avvertenze per l'installazione e l'uso
Instructions et avertissements pour l'installation et l'utilisation
Instrucciones y advertencias para la instalación y el uso
Installierungs-und Gebrauchsanleitungen und Hinweise
Instrukcje i ostrzeżenia do instalacji i użytkowania
Aanwijzingen en aanbevelingen voor installatie en gebruik
Inhaltsverzeichnis

Verwandte Anleitungen für Nice RO1070


Inhaltszusammenfassung für Nice RO1070
- Seite 1 RO1070 Sliding Gate Opener 0682 Instructions and warnings for installation and use Istruzioni ed avvertenze per l’installazione e l’uso Instructions et avertissements pour l’installation et l’utilisation Instrucciones y advertencias para la instalación y el uso Installierungs-und Gebrauchsanleitungen und Hinweise Instrukcje i ostrzeżenia do instalacji i użytkowania...
-
Seite 35: Allgemeine Hinweise Und Vorsichtsmassnahmen Zur Sicherheit
• Während der Installierung und Anwendung vermeiden, dass feste oder flüssige Substanzen in die Steuerung oder in andere offene Vorrichtungen gelangen können; eventuell wendet man sich an den NICE – Kundenser- 3.1 - Prüfungen vor der Installierung vice, da die Anwendung unter diesen Bedingungen Gefahren hervorrufen Vor der Installierung muss die Unversehrtheit des Produkts sowie die Eig- könnte. - Seite 36 Tors” und “3.3 – Produktanwendungslimits” ausführen. Die Abb. 2 zeigt ein Beispiel einer Automatisierungsanlage, die mit Be - • Einen oder mehrere Kabelkanäle vorsehen. standteilen von Nice ausgeführt wurde. Diese Bestandteile werden gemäß dem üblichen und gewöhnlichen Schema angebracht. Befestigung der Fundamentplatte In Bezug auf die Abb.
- Seite 37 te auf das Fundament in die korrekte Position zu legen und sie mit für Bestandteile der Steuerung (Abb. 12): Beton geeigneten Schrauben zu befestigen (Abb. 4). a - Klemmenbrett für Antenne b) Wenn das Betonfundament noch nicht vorliegt: Die Platte muss mit den b - Dip-Switch zur Auswahl der Funktionen 2 in der Platte vorliegenden Verankerungsbeinen befestigt werden (Abb.
-
Seite 38: Einstellung Der Parameter
04.Den Anschluss der Endschalter prüfen: Den Hebel des Endanschlags den: Die vom Torflügel ausgeübte Kraft während einer Bewegung muss bewegen und prüfen, ob der jeweilige Endschalter eingreift, wobei die gemessen und mit den von den örtlich geltenden Vorschriften verglichen Led an der Steuerung abgeschaltet wird. werden. -
Seite 39: Programmierung Des Funkempfängers
erfasst, wird automatisch eine Schließbewegung begonnen, vor der eine Vorwarnung von 5 Sekunden erfolgt. PROGRAMMIERUNG DES FUNKEMPFÄNGERS Switch 3 Wenn in der Betriebsart “Wohnblock” ein “Schrittbetriebsbefehl” übertra- • Installierung einer externen Antenne gen und eine Öffnungsbewegung erfolgt, kann diese durch keine andere Wenn die mitgelieferte Antenne sich in einer ungünstigen Position befindet Befehlsübertragung “Schrittbetrieb”... - Seite 40 drücken und gedrückt halten, bis die Led am Empfänger einmal von – nach zirka 4 Sekunden leuchtet die grüne Led auf; insgesamt 3 Mal grün blinkt, wodurch die erfolgte Speicherung ange- – nach zirka 4 Sekunden erlischt die grüne Led; zeigt wird.
-
Seite 41: Entsorgung Des Produkts
Konformitätserklärung, eine Kopie der Gebrauchsanleitung und des Wartungsplans der Automatisierung; TECHNISCHE PRODUKTEIGENSCHAFTEN 2 Am Tor ein Schild mit den folgenden Daten anbringen: Automatisie- rungstyp, Name und Adresse des Herstellers (Verantwortlicher der “Inbetriebnahme”), Seriennummer, Baujahr und “EG”-Prüfzeichen; Netzspeisung 230 Vac 50 Hz 3 Die Konformitätserklärung ausfüllen und dem Eigentümer der Automati- Motor asynchroner Einphasenmotor... -
Seite 42: Hinweise Und Vorsichtsmassnahmen
DEN ANTRIEB VON HAND SPERREN ODER ENTRIEGELN GEBRAUCHSANLEITUNG Der Antrieb ist mit einem mechanischen System ausgestattet, der das Öff- (an den Anwender der Automatisierung nen und Schließen des Tors von Hand ermöglicht. auszuhändigen) Diese manuellen Vorgänge müssen im Falle eines Stromausfalls oder bei Betriebsstörungen ausgeführt werden. -
Seite 62: Eg-Konformitätserklärung
Uwaga: Zawartość niniejszej deklaracji odpowiada oświadczeniom znajdującym Dokuments, das im Firmensitz von Nice S.p.a. hinterlegt ist, und insbesondere der się w dokumencie urzędowym, złożonym w siedzibie firmy Nice S.p.a., a w szcze- vor dem Druck dieses Handbuchs zuletzt überarbeiteten Version. Der hier vorlie- gólności w ostatniej korekcie dostępnej przed wydrukowaniem tej instrukcji. - Seite 64 90 mm 290 mm 195 mm...
- Seite 68 Fax. +33.(0)4.42.62.42.50 info@uk.niceforyou.com info@es.niceforyou.com Sarmeola di Rubano PD Italia infomarseille@fr.niceforyou.com Ph. +39.049.89.78.93.2 Nice Australia Fax +39.049.89.73.85.2 Nice Polska Nice France Rhône Alpes Wetherill Park Australia infopd@niceforyou.com Decines Charpieu France Pruszków Polska Ph. +61.(0)2.96.04.25.70 Ph. +33.(0)4.78.26.56.53 Ph. +48.(022).759.40.00 Fax +61.(0)2.96.04.25.73 Nice Roma Fax +33.(0)4.78.26.57.53...