Herunterladen Inhalt Inhalt Diese Seite drucken
Klarstein 10030823 Handbuch
Vorschau ausblenden Andere Handbücher für 10030823:

Werbung

Verfügbare Sprachen
  • DE

Verfügbare Sprachen

  • DEUTSCH, seite 1
Dunstabzugshaube
10030822 10030823

Werbung

Inhaltsverzeichnis
loading

Inhaltszusammenfassung für Klarstein 10030823

  • Seite 1 Dunstabzugshaube 10030822 10030823...
  • Seite 2: Inhaltsverzeichnis

    Fehlersuche und Fehlerbehebung 8 Hinweise zur Entsorgung 9 Konformitätserklärung 9 Technische Daten Artikelnummer 10030822, 10030823 Stromversorgung 220-240 V ~ 50-60 Hz Sicherheitshinweise • Ziehen Sie den Stecker aus der Steckdose, bevor Sie das Gerät installieren, reinigen oder warten. • Installieren Sie das Gerät genau wie in der Anleitung beschrieben.
  • Seite 3 • Bringen Sie das Gerät nicht über einem Hochtemperaturgrill an. • Lassen Sie Pfannen mit heißem Öl oder Fett nie unbeaufsichtigt, da sich das Öl entzünden könnte. • Arbeiten Sie unter der Abzugshaube nicht mit offenem Feuer. • Falls das Gerät kaputt ist, benutzen Sie es nicht weiter. •...
  • Seite 4: Installation

    Installation 1. Die Decke, an der das Gerät hängt muss mindestens 40 kg Gewicht tragen können und muss mindestens 30 mm dick sein. Bohren Sie ein 170 mm großes Loch in die Decke. 2. Bohren Sie, wie auf Abbildung 2 dargestellt, 12 Löcher in die Decke und befestigen Sie die Aufhängung mit 6*40 mm Schrauben.
  • Seite 5 6. Halten Sie die Abzugshaube hoch und befestigen Sie sie mit 16 M4*10 Schrauben (siehe Bild 6). 7. Befestigen Sie den Abluftschlauch am Luftauslass (siehe Bild 7). 8. Versichern Sie sich, dass alles richtig sitzt, entfernen Sie die Haken am externen Schornstein, um die Instal- lation abzuschließen (siehe Bild 8).
  • Seite 6: Einbau Eines Aktivkohlefilters

    Einbau eines Aktivkohlefilters Hinweis: Der Aktivkohlefilter ist NICHT im Lieferumfang enthalten und muss separat gekauft werden! Aktivkohlefilter werden verwendet, um Gerüche zu binden. Normalerweise sollte der Aktivkohlefilter nach drei oder sechs Monaten gewechselt werden, je nachdem wie häufig sie kochen. Installieren Sie den Aktivkohlefil- ters ist wie folgt: 1.
  • Seite 7: Tasten Und Funktionen

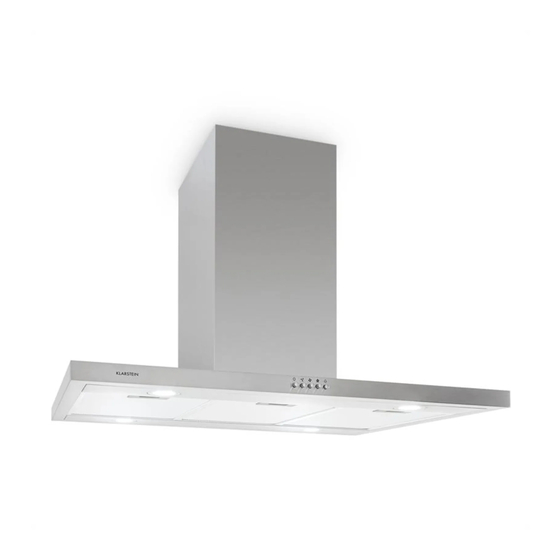
    Tasten und Funktionen Modell 10030823 1 Stop: Der Motor hält an. 2 Niedrige Geschwindigkeit: Der Summer ertönt 1x und der Motor läuft langsam. 3 Mittlere Geschwindigkeit: Der Summer ertönt 1x und der Motor läuft schneller. 4 Hohe Geschwindigkeit: Der Summer ertönt 1x und der Motor läuft schnell.
  • Seite 8: Reinigung Und Pflege

    Reinigung und Pflege So reinigen Sie den Fettfilter Das Filtergewebe besteht aus High-Density-Edelstahl. Bitte verwenden Sie keine ätzenden Reinigungsmittel. Um die Effizienz der Abzugshaube zu erhalten, ist es wichtig dass der Filter regelmäßig gereinigt wird. Bitte beachten Sie die folgenden Hinweise zur Reinigung. Methode 1: Weichen Sie den Filter für 3 bis 5 Minuten in 40-50 °C warmes Seifenlauge ein.
  • Seite 9: Hinweise Zur Entsorgung

    Hinweise zur Entsorgung Befindet sich die linke Abbildung (durchgestrichene Mülltonne auf Rädern) auf dem Pro- dukt, gilt die Europäische Richtlinie 2012/19/EU. Diese Produkte dürfen nicht mit dem nor- malen Hausmüll entsorgt werden. Informieren Sie sich über die örtlichen Regelungen zur getrennten Sammlung elektrischer und elektronischer Gerätschaften.
  • Seite 10: Technical Data

    Hints on Disposal 17 Declaration of Conformity 17 Technical Data Item number 10030822, 10030823 Power supply 220-240 V ~ 50-60 Hz Safety Instructions • Important! Always switch off the electricity supply at the mains during installation and maintenance such as light bulb replacement.
  • Seite 11 • Do not install above a cooker with a high level grill. • Do not leave frying pans unattended during use because overheated fats or oils might catch fire. • Never leave naked flames under the cooker hood. • If the cooker hood is damaged, do not attempt to use. •...
  • Seite 12: Installation

    Installation 1. The ceiling must bear at least 40kgs weight, and the thickness of the ceiling must be more than 30 mm, see pic 2. Drill 1*170mm round hole in the ceiling. 2. According to the hanging board, drill 12 holes in the ceiling, see pic 2. 12 ST6*40 mm big flat screws will be used to fix the hanging board on the ceiling, and then 8 M4*10 screws and a M4 nut with gasket will be used to connect the angle iron into the hanging board, see pic 1.
  • Seite 13 6. Hold up the hood, 16 M4*10 big flat screws will be used to connect the hood body into angle iron, see pic 6. 7. Put the extendable pipe on the outlet,see pic.7. 8. After ensuring everything is ok, put down the hook and the external chimney, then the installation is com- plete, see pic 8.
  • Seite 14: Installation Of Activated Carbon Filter

    Installation of Activated Carbon Filter Note: The activated carbon filter is NOT included in the scope of delivery and must be purchased separately! Activated carbon filter can be used to trap odors. Normally the activated carbon filter should be changed at three or six months according to your cooking habit.
  • Seite 15: Buttons And Functions

    Buttons and Functions Model 10030823 1 Push Stop button, and the motor will stop. 2 Push the Low button, the buzzer will buzz once, and the motor runs at low speed. 3 Push the Mid button, the buzzer will buzz once, and the motor runs at mid speed.
  • Seite 16: Cleaning And Care

    Cleaning and Care The cleaning of the filter mesh The filter mesh is made of high-density stainless steel. Please do not use the corrosive detergent on it. Main- taining the cleanliness of the filter is important to keep the cooker hood operating effectively. Please follow the guide lines as stated below.
  • Seite 17: Hints On Disposal

    Hints on Disposal According to the European waste regulation 2002/96/EC this symbol on the product or on its packaging indicates that this product may not be treated as household waste. Instead it should be taken to the appropriate collection point for the recycling of electrical and electronic equipment.
  • Seite 18: Datos Técnicos

    Indicaciones sobre la retirada del aparato 22 Declaración de conformidad 25 Datos técnicos Número de artículo 10030822, 10030823 Fuente de alimentación 220-240 V ~ 50-60 Hz Indicaciones de seguridad • Desenchufe el cable de alimentación de la toma de corriente antes de instalar, limpiar o realizar obras de mantenimiento en el aparato.
  • Seite 19 • No instale el aparato encima de una parrilla de grandes temperaturas. • No deje la sartén con aceite o grasa caliente desatendida, ya que el aceite podría incendiarse. • No trabaje con fuego abierto debajo de la campa extractora. •...
  • Seite 20: Instalación

    Instalación 1. El techo en el que se instalará la campana debe poder soportar al menos 40 kg y tener un mínimo de 30 mm de grosor. Taladre un orificio de 170 mm de grosor en el techo. 2. Haga 12 orificios en el techo, como se describe en la imagen 2, y fije el elemento de suspensión con los tornillos de 6*40 mm.
  • Seite 21 6. Levante la campana y fíjela con los tornillos 16 M4*10 (véase imagen 6). 7. Fije el tubo de aire de salida en la salida de aire (véase imagen 7). 8. Asegúrese de que todo encaje perfectamente y retire los ganchos de la chimenea externa para terminar la instalación (véase imagen 8).
  • Seite 22: Montaje Del Filtro De Carbón Activo

    Montaje del filtro de carbón activo Advertencia: el filtro de carbón activo NO está incluido en el envío y debe adquirirse por separado. Los filtros de carbón activo se utilizan para neutralizar los malos olores. Normalmente, el filtro de carbón activo debe cambiarse cada tres o seis meses en función de la frecuencia con la que utilice la campana.
  • Seite 23: Botones Y Funciones

    Botones y funciones Modelo 10030823 1 Stop: el motor se para. 2 Velocidad baja: el zumbido suena una vez y el motor funciona lentamente. 3 Velocidad mediana: el zumbido suena una vez y el motor funciona más rápido. 4 Velocidad alta: el zumbido suena una vez y el motor funciona rápidamente.
  • Seite 24: Mantenimiento Y Cuidado

    Mantenimiento y cuidado Limpieza del filtro de grasa La malla del filtro está hecha de acero inoxidable de alta densidad. No utilice productos de limpieza corrosivos. Es importante limpiar el filtro con regularidad para mantener la eficacia de la campana extractora. Tenga en cuenta las siguientes recomendaciones a la hora de limpiar.
  • Seite 25: Indicaciones Sobre La Retirada Del Aparato

    Indicaciones sobre la retirada del aparato Si el aparato lleva adherida la ilustración de la izquierda (el contenedor de basura tachado) entonces rige la normativa europea, directiva 2012/12/CE. Este producto no debe arrojarse a un contenedor de basura común. Infórmese sobre las leyes territoriales que regulan la recogida separada de aparatos eléctricos y electrónicos.
  • Seite 26: Fiche Technique

    Information sur le recyclage 33 Déclaration de conformité 33 Fiche technique Numéro d’ a rticle 10030822, 10030823 Alimentation électrique 220-240 V ~ 50-60 Hz Consignes de sécurité • Débrancher l’ a ppareil avant de l’installer, de le nettoyer ou de l’ e ntretenir.
  • Seite 27 • Ne pas installer l’ a ppareil au-dessus d’un grill à haute température. • Ne jamais laisser une poêle avec de l’huile de la graisse chaude sans surveillance, car l’huile peut prendre feu. • Ne pas cuisiner sous la hotte avec des flammes nues. •...
  • Seite 28: Installation

    Installation 1. Le plafond auquel est suspendu l’ a ppareil doit pouvoir supporter au moins 40 kg de charge et doit être d’une épaisseur de 30 mm au minimum. Percer un trou d’un diamètre de 170 mm dans le plafond. 2.
  • Seite 29 6. Maintenir la hotte aspirante en hauteur et la fixer avec 16 vis M4/10 (cf. image 6) 7. Fixer le tuyau d’ é vacuation à la sortie d’ a ir (cf. image 7) 8. S’ a ssurer que toutes les pièces sont correctement en place, retirer les crochets au niveau de la cheminée extérieure pour terminer l’installation (cf.
  • Seite 30: Montage D'un Filtre À Charbon Actif

    Montage d’un filtre à charbon actif Remarque : le filtre à charbon actif n’est PAS fourni et doit être acheté séparément ! Les filtres à charbon actif sont utilisés pour capturer les odeurs. En principe, le filtre à charbon actif doit être changé...
  • Seite 31: Touches Et Fonctions

    Touches et fonctions Modèle 10030823 1 Stop : le moteur s’ a rrête. 2 Vitesse faible : le signal sonore retentit 1x et le moteur fonctionne lentement. 3 Vitesse moyenne : le signal sonore retentit 1x et le moteur fonctionne plus rapidement.
  • Seite 32: Nettoyage Et Entretien

    Nettoyage et entretien Nettoyage du filtre à graisse Le tissu filtrant est composé d’ a cier inoxydable de forte densité. Prière de ne pas utiliser de produit d’ e ntretien décapant. Pour une efficacité optimale de la hotte aspirante, il est important que le filtre soit régulièrement nettoyé.
  • Seite 33: Information Sur Le Recyclage

    Information sur le recyclage Vous trouverez sur le produit l’image ci-contre (une poubelle sur roues, barrée d‘une croix), ce qui indique que le produit se trouve soumis à la directive européenne 2012/19/UE. Renseignez-vous sur les dispositions en vigueur dans votre région concernant la collecte séparée des appareils électriques et électroniques.
  • Seite 34: Dati Tecnici

    Individuazione e correzione degli errori 40 Disposizione 41 Dichiarazione di conformità 41 Dati tecnici Numero articolo 10030822, 10030823 Alimentatore 220-240 V ~ 50-60 Hz Precauzioni • Staccare la spina dalla presa di corrente, prima di installare il dispositivo, pulirlo o effettuare la manutenzione.
  • Seite 35 • Assicurarsi che ci sia un apporto sufficiente di aria, se si utilizza la cappa contemporaneamente ad un piano di cottura a gas o ad un fornello a combustibili liquidi. • Non posizionare il dispositivo su una griglia ad alta temperatura. •...
  • Seite 36: Installazione

    Installazione 1. Il coperchio, a cui è appeso il dispositivo, deve avere una portata di almeno 40 kg ed essere largo almeno 30 mm. Fare un foro di 170 mm all’interno del coperchio. 2. Fare 12 fori all’interno del coperchio, come illustrato nella figura 2, e fissare la sospensione con viti da 6*40 mm.
  • Seite 37 6. Tenere ferma la cappa e fissarla con viti 16 M4*10 (figura 6). 7. Fissare il tubo di scarico per l’uscita dell’ a ria (figura 7). 8. Assicurarsi che sia tutto a posto, rimuovere i ganci nello scarico esterno per completare l’installazione. (figura 8).
  • Seite 38: Installare Il Filtro A Carboni Attivi

    Installare il filtro a carboni attivi Nota: il filtro a carboni attivi NON è incluso nella consegna e deve essere acquistato separatamente! I filtri a carboni attivi vengono utilizzati per eliminare gli odori. Normalmente è necessario cambiare il filtro a carboni attivi dopo tre o sei mesi in base alla frequenza di utilizzo della cappa aspirante. Installare il filtro a carboni attivi nel seguente modo: 1.
  • Seite 39: Pulsanti E Funzioni

    Pulsanti e funzioni Modello 10030823 1 Stop: Il motore si arresta. 2 Bassa velocità: Il cicalino funziona a 1x e il motore gira lentamente. 3 Velocità media: Il cicalino funziona a 1x e il motore gira più velocemente. 4 Alta velocità: Il cicalino funziona a 1x e il motore gira velocemente.
  • Seite 40: Pulizia E Manutenzione

    Pulizia e manutenzione Come pulire il filtro del grasso Il tessuto filtrante è realizzato in acciaio inossidabile ad alta densità. Si prega di non utilizzare detergenti cor- rosivi. Per mantenere l’ e fficienza della cappa, è importante pulire il filtro regolarmente. Seguire le seguenti istruzioni per la pulizia.
  • Seite 41: Disposizione

    Disposizione Se sul prodotto è presente la figura a sinistra (il cassonetto mobile sbarrato), si applica la direttiva europea 2002/96/CE. Questi prodotti non possono essere smaltiti con i normali rifiuti domestici. Informarsi sulle disposizioni vigenti sulla raccolta separata di dispositivi elettrici e elettronici.

Diese Anleitung auch für:

10030822

Inhaltsverzeichnis