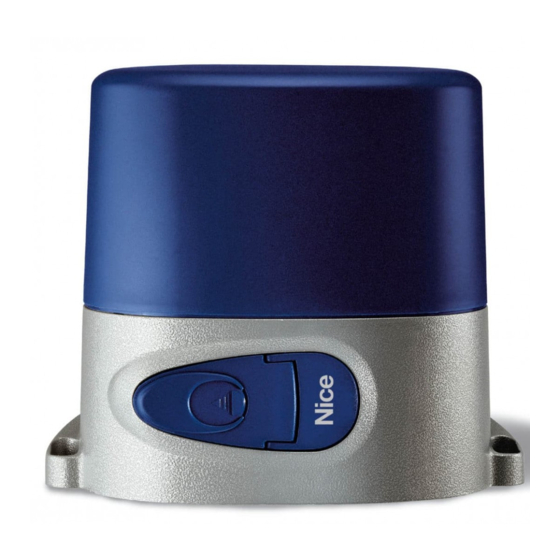
Herunterladen Inhalt Inhalt Diese Seite drucken
Inhaltsverzeichnis

Werbung

Verfügbare Sprachen
  • DE

Verfügbare Sprachen

  • DEUTSCH, seite 52
R O B O
I
MANUALE
ISTRU ZIO NI
E CATALOGO
RICAMBI
Motoriduttore
elettromeccanico
per cancelli
scorrevoli
QUESTO LIBRETTO È DESTINATO SOLO ALL'INSTALLATORE.
L'installazione dovrà essere effettuata solamente da per so na le professionalmente qualifi cato in conformità a quanto previsto
dalla legge n° 46 del 5 marzo 1990 e successive mo di fi che ed integrazioni e nel pieno rispetto delle norme UNI 8612.
GB
INSTRUCTIONS
LIVRET
MANUAL
D'INSTRUCTIONS
AND SPARE
ET CATALOGUE
PARTS
DES
CATALOGUE
RECHANGES
Electromechanical
Mototréducteur
gearmotor for
électromécanique
sliding gates
pour portails
coulissants
F
D
ANLEITUNGSHEFT
UND
ERSATZTEIL-
KATALOG
Elektromechanischer
Antrieb für
Gleittore
V. 010
E
MANUAL DE
INSTRUCCIONES
Y CATÁLOGO
DE RECAMBIOS
Motorreductor
electromecánico
para cancelas
correderas

Werbung

Inhaltsverzeichnis
loading

Inhaltszusammenfassung für Nice ROBO RO 300

  • Seite 1 V. 010 R O B O INSTRUCTIONS LIVRET MANUALE ANLEITUNGSHEFT MANUAL DE MANUAL D’INSTRUCTIONS ISTRU ZIO NI INSTRUCCIONES AND SPARE ET CATALOGUE E CATALOGO ERSATZTEIL- Y CATÁLOGO PARTS RICAMBI KATALOG DE RECAMBIOS CATALOGUE RECHANGES Motorreductor Motoriduttore Electromechanical Elektromechanischer Mototréducteur electromecánico elettromeccanico gearmotor for Antrieb für...
  • Seite 2 ROBO MODELLI E CARATTERISTICHE MODELS AND CHARACTERISTICS MODÈLES ET CARACTÉRISTIQUES MODELLE UND EIGENSCHAFTEN MODELOS Y CARACTERÍSTICAS Con centrale, 300 Kg. With central unit, 300 kg Avec centrale, 300 kg, Mit Steuereinheit, Con central, 300 Kg. RO 300 frizione elettronica. electronic clutch embrayage électronique.
  • Seite 3 ROBO VERIFICHE E CHECKING CONTROLES Y C O N T R Ô L E S PRÜFUNGEN AND PRELIMINARY PRELIMINARES PRE LI MI NA RI PRÉLIMINAIRES UND VORBEREITEN PROCEDURES DE ARBEITEN A) Lesen A) Leer atentamente las A) Leggere at ten ta men te A) Read the instructions A) Lire attentivement les le istruzioni.
  • Seite 4 ROBO DIMENSIONI D' INGOMBRO - DIMENSIONS - DIMENSIONS D’ENCOMBREMENT - RAUMBEDARF - DIMENSIONES FIG. 1 MANOVRA MANUALE - MANUAL OPERATION - MANOEUVRE MANUELLE - MANUELLE HANDHABUNG - MANIOBRA MANUAL FIG. 2 FIG. 3 1) Die Abdeckung des 1) Hacer deslizar hacia 1) Fare scorrere al l'in die tro 1) Slide the key cover back.
  • Seite 5 ROBO FISSAGGIO PIASTRA DI BASE Rispettando le misure d'in gom bro (Fig. 1), fi ssare a terra la piastra di base me dian te 4 robusti tasselli ad espansione (Fig. 4) oppure annegarla nel calcestruzzo. Prevedere una o più guaine per il passaggio dei cavi elet tri ci (Fig. 4). N.B.
  • Seite 6: Fissaggio Motoriduttore

    ROBO FISSAGGIO MOTORIDUTTORE Togliere il coperchio svitando le viti (Fig. 5). Appoggiare il motoriduttore sulla piastra. Inserire le due viti a brugola (Fig. 6). Posizionare il motoriduttore in funzionamento manuale. Predisporre la cremagliera. Appoggiare sul l'in gra nag gio il primo elemento di cremagliera (Fig. 7) e bloc car lo con viti e distanziarli al cancello, facendo scorrere l'anta.
  • Seite 7: Fijación Del Motorreductor

    ROBO FIXATION MOTORÉDUCTEUR Enlever le couvercle en dévissant les vis (Fig. 5). Poser le motoréducteur sur la plaque. Introduire les deux vis avec hexagone en creux (Fig. 6) Positionner le motoréducteur en fonctionnement manuel. Préparer la crémaillère. Poser sur l’engrenage le premier élément de la crémaillère (Fig. 7) et le bloquer avec des vis et des entretoises au portail en faisant coulisser celui-ci.
  • Seite 8 ROBO REGOLAZIONE DELLA FRIZIONE MECCANICA RO1020 Agire con cacciavite sulla vite (Fig. 10). Attenzione, il motoriduttore viene fornito con la frizione re go la ta al mas si mo; oc cor re che ini zial men te si di mi nu i sca la coppia. Per aumentare la coppia ruotare in senso orario.
  • Seite 9 ROBO REGOLAZIONE DELLA FRIZIONE ELETTRICA RO1010 La regolazione della coppia è affi data al trasformatore incorporato. Vi sono 5 posizioni con in di ca zio ni 30% ÷ 100% (Fig. 11). ADJUSTING THE ELECTRIC CLUTCH RO1010 The incorporated transformer regulates the torque. There are 5 positions marked 30% - 100%.
  • Seite 10 ROBO CATALOGO RICAMBI SPARE PARTS CATALOGUE CATALOGUE DES RECHANGES ERSATZTEILKATALOG CATÁLOGO DE RECAMBIOS Per i ricambi N° 26 - 36 - 37 - 39 - 25 - 31 - 5 - 32, spe ci fi ca re il modello di "ROBO". For parts no.
  • Seite 11 ROBO Pos. Code Descrizione Description Description Beschreibung Descripción BMAM 4567 Ancoraggio motore. Motor anchoring Ancrage moteur Motorverankerung Anclaje motor. BMBM 4567 Base motore alluminio Aluminium motor base Base moteur aluminium Grundgestell Motor Al. Base motor aluminio. BMFP 4567 Flangia esterna di prot. External protection flange Flasque externe de protection Externer Schutzflansch...
  • Seite 12 (send copy of the page enclosed with the actuator to be repaired) Difetto segnalato / Defect ................................................................Parte riservata alla NICE spa per comunicazioni al cliente Space reserved for NICE spa to communicate with the Clients Data registrazione ........Data riparazione....... N. Riparazione ......Date of registration Repair date Repair number Parti sostituite ...............................
  • Seite 13 control unit robo, thor, otto Instructions and warnings for the fitter Istruzioni ed avvertenze per l’installatore Instructions et recommandations pour l’installateur Anweisungen und Hinweise für den Installateur Instrucciones y advertencias para el instalador Instrukcje i uwagi dla instalatora Aanwijzingen en aanbevelingen voor de installateur...
  • Seite 14 robo,th...
  • Seite 15 or,otto...
  • Seite 16: Inhaltsverzeichnis

    control unit gearmotors robo, thor, otto Table of contents: page page Description of the product Programmable functions Description of functions Installation Typical system layout Using 2 control units on opposed leafs Electrical connections 2.2.1 Electrical diagram Accessories 2.2.2 Description of connections 2.2.3 Phototest Maintenance...
  • Seite 17: Description Of The Product

    Description of the product: The control unit features input status Led’s located near such inputs, This gate and door automation unit controls the ROBO, OTTO and while another Led near the microprocessor indicates that the internal THOR gearmotors with single-phase alternating current. The control unit varies depending on the type of gearmotor to control, logic works correctly.
  • Seite 18: Installation

    5) Pair of “Photo 2” photocells In particular, please note that: • All the photocells produced by NICE feature the synchronism system which eliminates the problem of interference between two pairs of photocells (please consult the photocell instructions for further details). •...
  • Seite 19: Electrical Diagram

    2.2.1) Electrical diagram 2.2.2) Description of connections A brief description of the possible control unit output connections follows. Terminals Functions Description Power input = Mains power line Flashing light = Output for connecting flashing light to mains voltage (max. 40W) 24 Vac = 24Vac output to 24Vac services (Photo, Radio, etc.) Max.
  • Seite 20: Phototest

    7 and synchronised operation. 8 of the “PIU” board. The maximum current that the “PIU” board can use on the “Phototest” output is 100mA (2 pairs of nice If a “Phototest” input is not used (e.g.: Photo2) but the “phototest” photocells) function is required, jumper the unused input as shown in fig.
  • Seite 21: Checking Connections

    2.2.4) Checking connections but with one basic difference: the safety devices are ignored in The following operations entail working on live circuits; most of the closing manoeuvre which is normally the most dangerous, these run on extra-low safety voltage so they are not dangerous but and they will trigger in the opening manoeuvre causing the gate some are contain mains voltage which means they are HIGHLY to close against the obstacle with disastrous results!
  • Seite 22: Testing

    4) Testing After the above checks and adjustments, the system can now be tested. The automation system must be tested by qualified and expert personnel who must establish what tests to perform according to the relative risk. Testing is the most important part of the whole installation phase. Each single component, e.g. the gearmotor, emergency stop, photocells, etc., may require a specific test phase;...
  • Seite 23: Operating Modes

    5) Operating modes In the manual operating mode, the “Open” input enables the opening Both in the opening or closing phases, movement will be brought to manoeuvre and the “Close” input enables the closing manoeuvre. an abrupt halt by means of “Stop”. The “Step-by-Step”...
  • Seite 24: Description Of Functions

    6.1) Description of functions Here is a brief description of the functions that can be added by moving the relative Dip-Switch to “ON”. Switch 1-2: Off-Off = “Manual” movement (man present) On-Off = “Semiautomatic” movement Off-On = “Automatic” movement (automatic closing) On-On = “Automatic + Always Closes”...
  • Seite 25: Using 2 Control Units On Opposed Leafs

    Switch 9: = Brake At the end of the movement a motor brake procedure is performed, initially slight and then more incisive in order to stop the gate rapidly but without jolts. Switch 10: ROBO - THOR OTTO Without the PIU board fitted: Without the PIU board fitted: •...
  • Seite 26: Accessories

    “RADIO” Card The control unit features a connector for plugging in a radio card, produced by Nice, which activates the “Step-by-Step” input and allows the control unit to be remote-controlled with a transmitter. 9) Maintenance The control unit, being electronic, needs no particular maintenance.
  • Seite 27: What To Do If

    11) What to do if .… This section will help fitters to solve some of the most common The manoeuvre does not start problems that may arise during installation. • Check that the Led’s of the “Stop” (FCA + FCC), “Photo” and “Photo2”, if installed, safety device are on and that the relative No LED is on: command Led that is activated (“Step-By-Step”, “Open”...
  • Seite 28 centrale comando motoriduttori robo, thor, otto Indice: pag. pag. Descrizione del prodotto Funzioni programmabili Descrizione delle funzioni Installazione Impianto tipico Utilizzo di 2 centrali su ante contrapposte Collegamenti elettrici 2.2.1 Schema elettrico Accessori Opzionali 2.2.2 Descrizione dei collegamenti 2.2.3 Fototest Manutenzione 2.2.4 Verifica dei collegamenti...
  • Seite 29: Descrizione Del Prodotto

    Descrizione del prodotto: Questa centrale per l’automazione di cancelli e porte automatiche, Dei Led posti vicino agli ingressi ne segnalano lo stato; un ulteriore permette di comandare i motoriduttori ROBO, THOR, OTTO, in Led presente vicino al microprocessore, segnala il corretto corrente alternata monofase.
  • Seite 30: Installazione

    5) Coppia fotocellule “Foto 2” In particolare ricordiamo che: • Tutte le fotocellule prodotte da Nice dispongono del sistema di sincronismo che permette di eliminare il problema dell’interferenza tra due coppie di fotocellule (per altri particolari vedere le istruzioni delle fotocellule) •...
  • Seite 31: Schema Elettrico

    2.2.1) Schema elettrico 2.2.2) Descrizione dei collegamenti Riportiamo una breve descrizione dei possibili collegamenti della centrale verso l’esterno. Morsetti Funzione Descrizione Alimentazione = Linea di alimentazione da rete Lampeggiante = Uscita per collegamento del lampeggiante a tensione di rete ( Max. 40W) 24 Vac = Alimentazione servizi 24Vac (Foto, Radio, ecc.) Max 200mA Comune...
  • Seite 32: Fototest

    7 e 8 della scheda PIU. La corrente massima utilizzabile sull’uscita “Fototest” della scheda PIU è di Nel caso un ingresso sottoposto a “Fototest” non venga utilizzato 100mA (2 coppie di fotocellule Nice) (Esempio “Foto2”) e si desideri comunque la funzione fototest •...
  • Seite 33: Verifica Dei Collegamenti

    2.2.4) Verifica dei collegamenti funzionare regolarmente, infatti il ciclo “Apre” è simile al ciclo Le prossime operazioni vi porteranno ad agire su circuiti sotto “Chiude”, con la fondamentale differenza che i dispositivi di tensione. La maggior parte dei circuiti sono sottoposti a bassissima sicurezza verranno ignorati nella manovra di “Chiude”, che tensione di sicurezza e quindi non pericolosa, alcune parti sono normalmente è...
  • Seite 34: Collaudo

    4) Collaudo Terminate le verifiche e le regolazioni è possibile passare al collaudo dell’impianto. Il collaudo dell’automazione deve essere eseguito da personale qualificato ed esperto che dovrà farsi carico di stabilire le prove previste in funzione del rischio presente. Il collaudo è la parte più importante di tutta la realizzazione dell’automazione. Ogni singolo componente, ad esempio motoriduttore, arresto di emergenza, fotocellule ecc.
  • Seite 35: Modi Di Funzionamento

    5) Modi di funzionamento Nel funzionamento in modo manuale, l’ingresso “Apre” consente il iniziato il movimento provoca uno “Stop”. movimento in apertura, l’ingresso “Chiude” consente il movimento in Sia in apertura che in chiusura un intervento su “Alt” provoca un chiusura.
  • Seite 36: Descrizione Delle Funzioni

    6.1) Descrizione delle funzioni Riportiamo ora una breve descrizione delle funzioni che si possono inserire portando in “On” il relativo Dip-Switch Switch 1-2: Off-Off = Movimento “Manuale” (uomo presente) On-Off = Movimento “Semiautomatico” Off-On = Movimento “Automatico” (chiusura automatica) On-On = Movimento “Automatico”...
  • Seite 37: Utilizzo Di 2 Centrali Su Ante Contrapposte

    Switch 9: = Freno Al termine del movimento viene eseguita una procedura di freno al motore, inizialmente blanda poi più incisiva in modo da fermare il cancello velocemente ma senza scossoni. Switch 10: ROBO e THOR OTTO Senza scheda PIU inserita: Senza scheda PIU inserita: •...
  • Seite 38: Accessori Opzionali

    Scheda RADIO Nelle centrale è predisposto un connettore per l’inserimento di una scheda radio, Nice, che permette di agire sull’ingresso di “Passo-Pas- so” e comandare in questo modo la centrale a distanza tramite un trasmettitore.
  • Seite 39: Cosa Fare Se

    11) Cosa fare se…. Questa vuole essere una guida per aiutare l’installatore a risolvere La manovra non parte alcuni dei più comuni problemi che si possono presentare durante • Verificare che i Led delle sicurezze “Alt” (FCA + FCC) , “Foto”, ed l’installazione.
  • Seite 40 armoire de commande opérateurs robo, thor, otto Table des matières: page page Description du produit Fonctions programmables Description des fonctions Installation Installation typique Utilisation de 2 centrales sur battants Connexions électriques antagoniques 2.2.1 Schéma électrique 2.2.2 Description des connexions Accessoires en option 2.2.3 Photo-test 2.2.4...
  • Seite 41: Description Du Produit

    Description du produit: L’armoire contient des diodes électroluminescentes (Led) placées à proximité des entrées qui en signalent l’état, une Led supplémentaire Cette armoire de commande pour l’automatisation de portails et se trouve près du microprocesseur et signale le fonctionnement portes automatiques, permet de commander les opérateurs ROBO, correct de la logique interne.
  • Seite 42: Installation

    5) Paire de photocellules “Photo 2” En particulier, nous rappelons que: • Toutes les photocellules produites par Nice disposent du système de synchronisme qui permet d’éliminer le problème de l’interférence entre deux paires de photocellules (pour plus de détails, voir les instructions des photocellules) •...
  • Seite 43: Schéma Électrique

    2.2.1) Schéma électrique 2.2.2) Description des connexions Nous donnons ci-après une brève description des connexions possibles de l’armoire de commande vers l’extérieur. Bornes Fonctions Description Alimentation = Ligne d’alimentation de secteur Clignotant = Sortie pour connexion du clignotant à tension de secteur ( Max. 40W) 24 Vca = Alimentation services 24 Vca (Photo, Radio, etc.) Max.
  • Seite 44: Photo-Test

    “Photo-test” de la carte Si une entrée soumise à “Photo-test” n’est pas utilisée (Exemple “PIU” est de 100 mA (2 paires de photocellules Nice) Photo2) et qu’on désire quand même la fonction “Photo-test” il faut •...
  • Seite 45: Vérification Des Connexions

    2.2.4) Vérification des connexions apparence; en effet, le cycle “Ouvre” est semblable au cycle Les prochaines opérations vous porteront à agir sur des circuits sous “Ferme” à la différence fondamentale que les dispositifs de tension, la plupart des circuits sont soumis à très basse tension de sécurité...
  • Seite 46: Essai De Fonctionnement

    4) Essai de fonctionnement Après avoir terminé les contrôles et les réglages, il est possible de passer à l’essai de fonctionnement de l’installation. L’essai de fonctionnement de l’automatisme doit être effectué par du personnel qualifié et expérimenté qui devra se charger d’établir les essais prévus en fonction du risque présent.
  • Seite 47: Modes De Fonctionnement

    5) Modes de fonctionnement Dans le fonctionnement en mode manuel, l’entrée “Ouvre” permet le fermeture. Une deuxième impulsion sur “Pas-à-Pas” ou sur la même mouvement en ouverture, l’entrée “Ferme” permet le mouvement en entrée qui a commencé le mouvement provoque un “Stop”. fermeture.
  • Seite 48: Description Des Fonctions

    6.1) Description des fonctions Nous reportons maintenant une brève description des fonctions qui peuvent s’activer en portant sur “On” le Dip-Switch correspondant Switch 1-2: Off-Off = Mouvement “Manuel” (homme présent) On-Off = Mouvement “Semi-automatique” Off-On = Mouvement “Automatique” (fermeture automatique) On-On = Mouvement “Automatique + Ferme Toujours”...
  • Seite 49 Switch 9: = Frein À la fin du mouvement, l’automatisme prévoit dans ce cas une procédure de freinage du moteur, d’abord légère puis plus forte de manière à arrêter le portail rapidement mais sans secousses. Switch 10: ROBO - THOR OTTO Sans carte PIU branchée: Sans carte PIU branchée:...
  • Seite 50: Accessoires En Option

    Carte “RADIO” L’armoire comprend un connecteur pour brancher une carte radio, produite par Nice, qui permet d’agir sur l’entrée de “Pas-à-Pas” et com- mander de cette manière l’armoire à distance avec un émetteur.
  • Seite 51: Que Faire Si

    11) Que faire si …. Ce chapitre est un guide visant à aider l’installateur à résoudre La manœuvre ne démarre pas quelques uns des problèmes les plus courants qui peuvent se • Vérifier que les Led des sécurités “Halte” (FCA + FCC), “Photo”, présenter durant l’installation.
  • Seite 52 Steuerung toröffner robo, thor, otto Inhalt: Beschreibung des Produktes Programmierbare Funktionen Beschreibung der Funktionen Installation Typische Anlage Verwendung von 2 Steuerungen an Elektrische Anschlüsse entgegengesetzten Torflügeln 2.2.1 Schaltplan 2.2.2 Beschreibung der Anschlüsse Sonderzubehör 2.2.3 Photozellentest 2.2.4 Überprüfung der Anschlüsse Wartung Einstellungen Entsorgung Prüfung...
  • Seite 53: Beschreibung Des Produktes

    Beschreibung des Produktes: An der Steuerung, neben den Eingängen, befinden sich Leds, die ihren Zustand anzeigen; eine zuzügliche Led in der Nähe des Mit dieser Steuerung für die Automatisierung von Toren und Türen Mikroprozessors meldet den korrekten Betrieb der internen Logik. können die Toröffner ROBO, OTTO, THOR in einphasigem Wechselstrom betrieben werden.
  • Seite 54: Installation

    5) Photozellenpaar “Photo 2” Insbesondere erinnern wir daran, dass: • alle von NICE hergestellten Photozellen über das Synchro-System verfügen, mit dem Probleme wie Interferenzen zwischen zwei Photozellenpaaren beseitigt werden (für weitere Details siehe Anweisungen der Photozellen) • das Photozellenpaar “Photo” in Öffnung keine Wirkung hat, wogegen es in Schließung eine Umkehrung verursacht.
  • Seite 55: Schaltplan

    2.2.1) Schaltplan 2.2.2) Beschreibung der Anschlüsse Es folgt eine kurze Beschreibung der möglichen Anschlüsse der Steuerung nach außen. Klemmen Funktionen Beschreibung Speisung = Netzspannungsversorgung Blinkleuchte = Ausgang für Anschluss der Blinkleuchte mit Netzspannung ( max. 40W) 24 Vac = Spannungsversorgung Nebeneinrichtungen 24 Vac (Photo, Radio, usw.) max 200mA Gemein = Gemeiner Leiter für alle Eingänge = Kontrolllampe Tor geöffnet 24 Vac max.
  • Seite 56 überschneiden. In der Anleitung der Photozellen die Versorgung unterbrochen wird. Der verwendbare Höchststrom am Anweisungen für den synchronisierten Betrieb nachlesen. Ausgang “Photozellentest” der Karte PIU ist 100mA (2 Nice Photozellenpaare). Sollte ein “Photozellentesteingang” nicht benützt werden (z.B. Photo2) •...
  • Seite 57: Überprüfung Der Anschlüsse

    2.2.4) Überprüfung der Anschlüsse dem Zyklus “ZU” ähnlich ist, jedoch mit dem grundlegenden Bei Durchführung der nachfolgenden Arbeiten werden Sie an Unterschied, dass Sicherheitsvorrichtungen beim Kreisläufen arbeiten, die unter Spannung stehen; die meisten Teile der Schließvorgang, der gewöhnlich der gefährlichste ist, ignoriert Kreisläufe stehen unter Niedrigstspannung und sind daher ungefährlich;...
  • Seite 58: Prüfung

    4) Prüfung Nachdem die Überprüfungen und Einstellungen beendet sind, kann man auf die Prüfung der Anlage übergehen. Die Automatisierung muss von erfahrenem Fachpersonal geprüft werden, das die vorzusehenden Tests je nach vorhandenem Risiko festzulegen hat. Die Prüfung ist das Wichtigste bei der Durchführung der ganzen Automatisierung. Jedes einzelne Teil wie Motor, Notstop, Photozellen usw. kann eine spezielle Prüfung erfordern, daher wird empfohlen, sich an die Verfahren in den jeweiligen Anleitungen zu halten.
  • Seite 59: Betriebsarten

    5) Betriebsarten Beim manuellen Betrieb ermöglicht der Eingang “Öffnet” die die Bewegung begonnen hat, verursacht ein “Stop”. Öffnungsbewegung und der Eingang “Schließt” die Schließbewegung. Der Eingriff auf “Stop” verursacht sowohl in Öffnung als auch in Der “Schrittbetrieb” ermöglicht die Bewegung abwechselnd in Schließung das sofortige Anhalten der Bewegung.
  • Seite 60: Beschreibung Der Funktionen

    6.1) Beschreibung der Funktionen Wir geben nun eine kurze Beschreibung der Funktionen, die eingeschaltet werden können, indem der entsprechende Dip-Switch auf “On” gestellt wird. Switch 1-2: Off-Off = “Manuelle” Bewegung, bzw. Totmannbetrieb On-Off = “Halbautomatische” Bewegung Off-On = “Automatische” Bewegung, bzw. Automatische Schließung On-On = “Automatische + Schließt Immer”...
  • Seite 61: Verwendung Von 2 Steuerungen An Entgegengesetzten Torflügeln

    Switch 9: = Bremse Am Ende der Bewegung wird ein Bremsvorgang am Motor ausgeführt, anfänglich nur schwach, dann kräftiger, so dass das Tor schnell, aber nicht ruckartig angehalten wird. Switch 10: ROBO e THOR OTTO Ohne Karte PIU: Ohne Karte PIU: •...
  • Seite 62: Sonderzubehör

    (Dip-Switch10=ON), so wird es dieser Karte RADIO An der Steuerung befindet sich ein Verbinder für das Einstecken einer von Nice hergestellten Radiokarte, über die der Eingang SCHRTT- BETRIEB betätigt werden kann, wodurch die Steuerung über einen Sender ferngesteuert wird.
  • Seite 63: Was Tun, Wenn

    11) Was tun, wenn …. Diese Punkte sollen dem Installateur bei der Lösung einiger der Keine Bewegung häufigsten Probleme, die bei der Installation auftreten können, • Prüfen, ob die Leds der Sicherheitsvorrichtungen “Stop” (FCA + behilflich sein. FCC), “Photo” und eventuell “Photo2” aktiviert sind und ob die LED der Betriebsart (“Schrittbetrieb”, “Öffnet”...
  • Seite 64 central de mando motorreductores robo, thor, otto Indice: pág. pág. Descripción del producto Funciones programables Descripción de las funciones Instalación Instalación típica Empleo de dos centrales en hojas Conexiones eléctricas contrapuestas 2.2.1 Esquema eléctrico 2.2.2 Descripción de las conexiones Accesorios opcionales 2.2.3 Fototest 2.2.4...
  • Seite 65: Descripción Del Producto

    Descripción del producto En la central hay leds situados cerca de las entradas que indican el estado; otro led, colocado cerca del microprocesador, indica que la Esta central para la automatización de cancelas o puertas lógica interior funciona correctamente. automáticas permite accionar los actuadores ROBO, OTTO, THOR de corriente alterna monofásica.
  • Seite 66: Instalación

    5) Par de fotocélulas “Fotocélula 2” Recordamos en particular que: • Todas las fotocélulas fabricadas por NICE disponen del sistema de Sincronismo, que permite eliminar el problema de la interferencia entre dos pares de fotocélulas (para mayores aclaraciones véanse las instrucciones de las fotocélulas). •...
  • Seite 67: Esquema Eléctrico

    2.2.1) Esquema eléctrico 2.2.2) Descripción de las conexiones Damos una descripción breve de las posibles conexiones de la central hacia el exterior. Bornes Funciones Descripción Alimentación = Línea de alimentación de red Luz intermitente = Salida para la conexión de la luz intermitente con tensión de red (máx. 40W) 24 Vca = Alimentación de los equipos auxiliares 24 Vca (Fotocélula, Radio, etc.) Máx 200mA Común...
  • Seite 68: Fototest

    Si una entrada sujeta a “Fototest” no se utilizara (ejemplo salida “Fototest” de la tarjeta “PIU” es 100mA (2 pares de “Fotocélula2”) e igualmente desea la función fototest, hay que fotocélulas Nice). conectar con un conector puente la entrada no utilizada, como •...
  • Seite 69: Control De Las Conexiones

    2.2.4) Control de las conexiones aparentemente podría funcionar regularmente; en efecto, el ciclo “Abrir” es parecido al ciclo “Cerrar” con la diferencia fundamental de que los dispositivos de seguridad son ignorados en la Las siguientes operaciones se efectúan con los circuitos bajo maniobra de cierre, la cual es generalmente más peligrosa, y se tensión;...
  • Seite 70: Ensayo

    4) Ensayo Finalizados los controles y regulaciones es posible efectuar el ensayo de la instalación. El ensayo de la automatización tiene que ser efectuado por personal cualificado y experto que deberá establecer los ensayos previstos de acuerdo con el riesgo presente. El ensayo es la parte más importante de toda la etapa de realización de la automatización.
  • Seite 71: Modos De Funcionamiento

    5) Modos de funcionamiento En el funcionamiento en modo manual la entrada “Abrir” permite el o sobre la misma entrada que ha comenzado el movimiento, movimiento de apertura y la entrada “Cerrar” permite el movimiento provoca un Stop. de cierre. El “Paso a Paso” permite el movimiento de apertura y El accionamiento de “Stop”...
  • Seite 72: Descripción De Las Funciones

    6.1) Descripción de las funciones A continuación, damos una breve descripción de las funciones que se pueden introducir colocando en “On” el Dip-Switch correspondiente. Switch 1-2: Off-Off = Movimiento “Manual” (Pulsador de interrupción automática) On-Off = Movimiento “Semiautomático” Off-On = Movimiento “Automático” (cierre automático) On-On = Movimiento “Automático + Cerrar siempre”...
  • Seite 73: Empleo De Dos Centrales En Hojas Contrapuestas

    Switch 9: = Freno Al final del movimiento se ejecuta un procedimiento de freno en el motor: primero suave y luego más intenso, para detener la cancela rápidamente pero sin sacudidas. Switch 10: ROBO e THOR OTTO Sin tarjeta PIU conectada Sin tarjeta PIU conectada •...
  • Seite 74: Accesorios Opcionales

    Tarjeta RADIO En la central hay un conector para conectar una tarjeta radio, fabricada por Nice, que permite actuar sobre la entrada de “Paso a Paso” y así accionar la central a distancia con un transmisor.
  • Seite 75: Qué Hay Que Hacer Si

    11) Qué hay que hacer si… Esta guía pretende ayudar al instalador a resolver algunos de los La maniobra no arranca problemas más comunes que se le pueden presentar durante la • Controle que los Leds de los dispositivos de seguridad “Stop” instalación.
  • Seite 76 centrale sterownicze motoreduktory robo, thor, otto Spis: pag. pag. Opis produktu Funkcje z możliwością programowania Opis funkcji Instalowanie Urządzenie typowe Użytkowanie dwóch central Połączenia elektryczne przeciwstawnych 2.2.1 Schemat elektryczny 2.2.2 Opis połączeń Akcesoria dodatkowe 2.2.3 Fototest 2.2.4 Kontrola połączeń Czynności konserwacyjne Regulacje Zbyt Próby ostateczne...
  • Seite 77: Opis Produktu

    Opis produktu: W centrali, obok wejść, występują diody sygnalizujące ich stan, Centrala do automatyzacji bram i drzwi automatycznych, służy do jedna dioda obok mikroprocesora sygnalizuje funkcjonowanie napędu aktuatorów ROBO, OTTO, THOR. Jest zasilana wewnétrznej logiki. jednofazowym prądem przemiennym. W zależności od rodzaju napędzanego aktuatora, w centrali nastąpiły niektóre zmiany, jak np.: regulacja siły, Swiatełko Aby rozpoznać...
  • Seite 78: Instalowanie

    5) Para fotokomórek “Foto 2” W szczególności przypominamy, że: • Wszystkie fotokomórki wyprodukowane przez NICE posiadają system SYNCHRONIZACJI, który służy do eliminacji problemu interferencji pomiędzy dwoma parami fotokomórek (szczegółowe informacje zawarte są w instrukcjach fotokomórek). • Para fotokomórek “Foto” podczas otwierania nie powoduje żadnego efektu ale powoduje inwersje podczas zamykania.
  • Seite 79: Schemat Elektryczny

    2.2.1) Schemat elektryczny: ŚWIATŁO OSTRZ. C.A 2.2.2) Opis połączeń Przedstawiamy krótki opis możliwych połączeń z centrali na zewnątrz. Zaciski Funkcje Opis Zasilanie = Linia zasilania z sieci Lampa sygnalizacyjna = Wyjście do połączenia lampy sygn. do napięcia sieciowego ( Max. 40W) 24 Vpp = Zasilanie funkcji 24 Vpp (Foto, Radio, itp.) Max 200mA Wspólny...
  • Seite 80: Fototest

    7 i 8 karty PIU. Maksymalne napięcie używane na wyjściu Fototest W przypadku gdy jedno wejście poddane funkcji Fototestu nie karty “PIU” to 100mA (2 pary fotokomórek NICE) bédzie używane (na przykład “Foto 2“) i gdy jednak chcemy •...
  • Seite 81: Kontrola Połączeń

    2.2.4) Kontrola połączeń skrzydło. Kontrola ta jest podstawową kontrolą. Gdy kierunek jest błędny, w niektórych przypadkach ( na przykład w systemie półautomatycznym) to automatyzm mógłby pozornie Następne czynności będą wykonywane na obwodach pod funkcjonować poprawnie. Cykl OTWIERA jest podobny do napięciem.
  • Seite 82: Próby Ostateczne

    4) Próby ostateczne Po zakończeniu kontroli i regulacji można przejść do prób ostatecznych urządzenia. Próby ostateczne automatyzacji, muszą być wykonane przez doświadczony i wykwalifikowany personel, ze wzglédu, że próby wykonywane będą w obecności niebezpieczeństwa. Próby są fazą najważniejszą w realizacji automatyzacji. Każdy pojedynczy element, na przykład silnik, zatrzymanie w alarmie, fotokomórki, itp.
  • Seite 83: Sposoby Funkcjonowania

    5) Sposoby funkcjonowania W funkcjonowaniu w sposobie ręcznym, wejście OTWIERA natychmiastowe zatrzymanie ruchu.. pozwala na ruch w otwieraniu, wejście ZAMYKA pozwala na Gdy w jednym wejściu zarządzenia zamiast impulsu zostanie ruch w zamykaniu . SKOK PO SKOKU pozwala na ruch utrzymany sygnał...
  • Seite 84: Opis Funkcji

    6.1) Opis funkcji Przedstawiamy krótki opis funkcji, które można dodać ustawiając Dip-Switch na ON: Switch 1-2: Off-Off = Ruch “Ręczny” (obecny operator) On-Off = Ruch “Półautomatyczny” Off-On = Ruch “Automatyczny” (zamykanie automatyczne) On-On = Ruch “Automatyczny+ Zamyka Zawsze” W funkcjonowaniu “Ręcznym” ruch wykonywany jest tylko przy obecności zarządzenia (przycisk przyciśnięty). W “Półautomatycznym” wystarczy jeden impuls zarządzający i zostanie wykonany cały ruch, aż...
  • Seite 85: Użytkowanie Dwóch Central Przeciwstawnych

    Switch 9: = Hamulec Po zakończeniu ruchu zostanie wykonana procedura hamowania silnika. Na początku delikatna później decydująca tak aby zatrzymać bramę szybko ale bez wstrząsów. Switch 10: ROBO - THOR OTTO Bez założonej karty PIU: Bez założonej karty PIU: • Światełko ostrzegawcze C.A z proporcjonalnym świeceniem •...
  • Seite 86: Akcesoria Dodatkowe

    ON) to wyjście służy do wykonania testu fotokomórek na początku ruchu. Karta RADIO W centrali przygotowane jest łącze na włożenie karty radiowej, wyprodukowanej przez Nice. Karta ta służy do interwencji na wejściu SKOK PO SKOKU i zarządzania centralą na odległość poprzez nadajnik. 9) Czynności konserwacyjne Centrala, jako część...
  • Seite 87: Co Robić Gdy

    11) Co robić gdy..Jest to instrukcja, która ma pomóc instalatorowi w rozwiązaniu Ruch rozpoczyna się niektórych najczęściej spotykanych problemów wynikających w • Sprawdzić czy diody zabezpieczeń: Alt (FCA + FCC), FOTO, i fazie instalowania: ewentualnie Foto2 świecą się i czy Dioda zarządzająca, która zostanie uaktywniona (Skok Po Skoku, Otwiera lub Zamyka) Nie świeci się...
  • Seite 88 besturingseenheid reductiemotors robo, thor, otto Inhoudsopgave: pag. pag. Beschrijving van het product Programmeerbare functies Beschrijving van de functies Installatie Voorbeeld van een installatie Toepassing van 2 besturingseenheden op in Elektrische aansluitingen tegenovergestelde richting werkende vleugels 25 2.2.1 Elektrisch schema 2.2.2 Beschrijving van de aansluitingen Apart leverbare accessoires 2.2.3...
  • Seite 89: Beschrijving Van Het Product

    1) Beschrijving van het product: De status van de ingangen wordt door speciale ledlampjes bij de Met deze besturingseenheid voor het automatiseren van automati- ingangen aangegeven; een ander ledlampje bij de microprocessor sche poorten en deuren kunnen de éénfasewisselstroomreductie- geeft aan dat de interne logica correct functioneert. motoren ROBO, THOR, OTTO aangestuurd worden.
  • Seite 90: Installatie

    Met name herinneren wij u aan het volgende: • Alle door Nice geproduceerde fotocellen beschikken over een synchronisatiesysteem waarmee het mogelijk is het probleem van interfe- rentie tussen twee stellen fotocellen op te lossen (zie voor verdere bijzonderheden de aanwijzingen voor de fotocellen).
  • Seite 91: Elektrisch Schema

    2.2.1) Elektrisch schema SLUIT SLUIT OPEN OPEN STOP Stroomvoorziening via elektriciteitsnet 2.2.2) Beschrijving van de aansluitingen Hier volgte een beknopte beschrijving van mogelijke aansluitingen van de besturingseenheid naar buiten. Klemmetjes Functie Beschrijving Stroomvoorziening = Toevoerlijn van het elektriciteitsnet Knipperlicht = Uitgang voor aanslsuiting van het knipperlicht op de netspanning (Max. 40W) 24 Vac = Stroomvoorziening neveninrichtingen 24Vac (Foto, Radio, etc.) Max 200mA Gemeenschappelijk...
  • Seite 92: Fototest

    De maximaal beschikbare stroom op de uitgang "Fototest" op de Indien een ingang die aan de "Fototest" onderworpen is, niet wordt kaart PIU is 100mA (2 stel fotocellen Nice). gebruikt (Voorbeeld "Foto2") en u toch de functie fototest wilt, dient •...
  • Seite 93: Controle Van De Aansluitingen

    2.2.4) Controle van de aansluitingen het automatisme regelmatig functioneert; de cyclus ”open” is Bij het uitvoeren van onderstaande handelingen werkt u met immers gelijk aan de cyclus “Sluit” met dat fundamentele verschil onder spanning staande circuits. Op het merendeel van de circuits echter dat de veiligheidsinrichtingen genegeerd zullen worden bij de staat laagspanning en daar bestaat dus geen gevaar, maar op som- sluitmanoeuvre - die normaal gesproken de gevaarlijkste is - en bij...
  • Seite 94: Eindtest

    4) Eindtest Nadat u een en ander gecontroleerd en afgesteld hebt, kunt u tot de eindtest van de installatie overgaan. De eindtest van de automatisering moet door vakbekwaam en deskundig personeel uitgevoerd worden, dat ook bepa- len moet welke tests in functie van de bestaande gevaren noodzakelijk zijn. De eindtest is de belangrijkste fase bij de aanleg van de automatisering.
  • Seite 95: Manier Van Functioneren

    5) Manier van functioneren Bij werking in de handbediende modus vindt er via de ingang “Open” een “Stop”. Zowel bij opening als bij sluiting zorgt “Stop” er altijd voor een openingsmanoeuvre plaats en via de ingang ”Sluit” een sluit- dat de manoeuvre onmiddellijk wordt onderbroken en dat de poort manoeuvre.
  • Seite 96: Beschrijving Van De Functies

    6.1) Beschrijving van de functies Hieronder geven wij een beknopte beschrijving van de functies die ingeschakeld kunnen worden door de desbetreffende dipschakelaar op "On" te zetten. Schakelaar 1-2: Off-Off = "Handbediende" manoeuvre (er is iemand aanwezig) On-Off = "Semi-automatische" manoeuvre Off-On = "Automatische"...
  • Seite 97 Schakelaar 9: = Rem Aan het einde van de manoeuvre wordt er een remprocedure op de motor uitgevoerd, aanvankelijk lichtjes, maar dan steeds duidelijker om de poort snel maar zonder schokken te laten stoppen. Schakelaar 10: ROBO en THOR OTTO Zonder ingeplugde kaart PIU: Zonder ingeplugde kaart PIU: •...
  • Seite 98: Apart Leverbare Accessoires

    RADIO-kaart De besturingseenheid beschikt over een insteeksleuf voor het insteken van een Nice-radiokaart, waardoor het mogelijk is de ingang "Stap- voor-stap" te gebruiken en zo de besturingseenheid via een zender op afstand te bedienen. 9) Onderhoud...
  • Seite 99: Wat Te Doen Als

    11) Wat te doen als… Dit is bedoeld als een richtlijn voor de installateur om hem te helpen De manoeuvre gaat niet van start bij het oplossen van de problemen die zich tijdens de installatie kun- • Controleer dat de ledlampjes van de beveiligingen "Stop" (FCA + nen voordoen.
  • Seite 100 Shanghai Tel. +39.06.72.67.17.61 Tel. +33.(0)4.42.62.42.52 info@es.niceforyou.com Tel. +86.21.575.701.45/46 Fax +39.06.72.67.55.20 Fax +33.(0)4.42.62.42.50 Fax +86.21.575.701.44 inforoma@niceforyou.com info@cn.niceforyou.com www.niceforyou.com Nice Gate is the doors and gate automation division of Nice Nice Screen is the rolling shutters and awnings automation division of Nice...

Inhaltsverzeichnis