Herunterladen Inhalt Inhalt Diese Seite drucken

Werbung

Verfügbare Sprachen

Verfügbare Sprachen

Gebruiks-
Notice
Benutzer-
User manual
aanwijzing
d'utilisation
information
Afwasauto-
Dishwasher
Lave-vaisselle
Geschirrspüler
maat
VA6111MT

Werbung

Inhaltsverzeichnis

Fehlerbehebung

loading

Inhaltszusammenfassung für Atag VA6111MT

  • Seite 1 Gebruiks- Notice Benutzer- User manual aanwijzing d'utilisation information Afwasauto- Dishwasher Lave-vaisselle Geschirrspüler maat VA6111MT...
  • Seite 2: Inhaltsverzeichnis

    Inhoud Veiligheidsinformatie Dagelijks gebruik Beschrijving van het product Aanwijzingen en tips Bedieningspaneel Onderhoud en reiniging Programma’s Probleemoplossing Opties Technische informatie Voor het eerste gebruik Milieubescherming Wijzigingen voorbehouden. Veiligheidsinformatie Lees zorgvuldig de meegeleverde instruc- Aansluiting aan de waterleiding ties voor installatie en gebruik van het appa- •...
  • Seite 3 • Gebruik geen meerwegstekkers en ver- • Verwijder de borden pas uit het apparaat lengsnoeren. als het programma is voltooid. Er kan • Zorg dat u de hoofdstekker en kabel niet vaatwasmiddel op de borden zitten. beschadigt. Neem contact op met de Waarschuwing! Gevaar voor service-afdeling of een elektromonteur elektrische schokken, brand of...
  • Seite 4: Beschrijving Van Het Product

    Beschrijving van het product Bovenste sproeiarm Glansmiddeldoseerbakje Onderste sproeiarm Afwasmiddeldoseerbakje Filters Bestekmand Typeplaatje Onderrek Zoutreservoir Bovenkorf Waterhardheidsknop Bedieningspaneel Aan/uit-toets Multitab-toets Display Uitgestelde start-toets Programmatoets (omhoog) Indicatielampjes Programmatoets (omlaag) Functie-toetsen Indicatielamp- Omschrijving Zoutindicatielampje. Dit indicatielampje is uit als het programma werkt.
  • Seite 5: Programma's

    Indicatielamp- Omschrijving Glansmiddelindicatielampje. Dit indicatielampje is uit als het programma werkt. Einde-indicatielampje. Programma’s Mate van ver- Programma Duur Energie Water Programma vuiling fasen (min) (kWh) Type lading Alles Voorspoelen 90 - 140 1.1 - 1.8 12 - 23 Serviesgoed, Afwassen 45°C of bestek en pan- 70°C Spoelingen...
  • Seite 6: Opties

    Opties Schakel de opties in of uit, voordat u 4. Start het kortste programma met een een programma start. U kunt de opties spoelfase, zonder vaatwasmiddel en niet inschakelen of uitschakelen als er zonder servies. een programma bezig is. 5. Stel de waterontharder af op de water- hardheid in uw omgeving.
  • Seite 7 Activeer de multitabfunctie als u ge- combineerde afwastabletten gebruikt. De waterontharder instellen Waterontharder Waterhardheid afstelling Duitse Franse mmol/l Clarke- Handmatig Elek- graden graden graden tro- (°dH) (°fH) nisch 51 - 70 91 - 125 9,1 - 12,5 64 - 88 43 - 50 76 - 90 7,6 - 9,0...
  • Seite 8: Dagelijks Gebruik

    Het zoutreservoir vullen 1. Draai de dop linksom om het zoutre- servoir te openen. 2. Doe een liter water in het zoutreservoir (alleen de eerste keer). 3. Vul het zoutreservoir met regenereer- zout. 4. Verwijder het zout rond de opening van het zoutreservoir.
  • Seite 9 • Vul het zoutreservoir als het zoutindi- 3. Ruim de korven in. catielampje brandt. 4. Voeg vaatwasmiddel toe. • Vul het glansmiddeldoseerbakje als 5. U dient het juiste programma in te stel- het indicatielampje van het glansmid- len en te starten voor het type lading en del brandt.
  • Seite 10: Aanwijzingen En Tips

    3. Sluit de deur van het apparaat. Het af- Controleer of er afwasmiddel in het af- tellen start. wasmiddeldoseerbakje aanwezig is • Als u de deur opent, dan toont het voordat u een nieuw programma start. display het aftellen van de uitgestelde aan het einde van het programma start die afloopt in stappen van 1 uur.
  • Seite 11: Onderhoud En Reiniging

    • Zorg ervoor dat serviesgoed en bestek • Vaatwastabletten worden bij korte pro- niet in elkaar schuiven. Meng lepels met gramma's niet helemaal opgelost. Wij be- ander bestek. velen u aan de tabletten alleen bij lange • Zorg er voor dat glazen andere glazen programma's te gebruiken, om restjes af- niet aanraken wasmiddel op uw serviesgoed te voorko-...
  • Seite 12: Probleemoplossing

    2. Haal om het filter (A) te demonteren, (A1) en (A2) uit elkaar. 3. Verwijder het filter (B). 4. Reinig de filters met water. 5. Zet het filter (B) terug in de startpositie. Zorg ervoor dat ze goed worden ge- monteerd onder de twee geleiders (C).
  • Seite 13 Storing Mogelijke oplossing Zorg ervoor dat de druk van het water niet te hoog is. Neem, indien nodig, contact op met het lokale water- schap. Controleer of de waterkraan niet verstopt is. Zorg ervoor dat het filter in de toevoerslang niet verstopt Zorg ervoor dat de toevoerslang niet is geknikt of gebo- gen.
  • Seite 14: Technische Informatie

    Technische informatie Afmeting Breedte / hoogte / diepte (mm) 596 / 818 - 898 / 555 Aansluiting op het elektrici- Zie het typeplaatje. teitsnet Voltage 220 - 240 V Tijd 50 Hz Waterdruk Min. / max. (bar / MPa) (0.5 / 0.05 ) / (8 / 0.8 ) max.
  • Seite 15: Safety Information

    Contents Safety information Daily use Product description Hints and tips Control panel Care and cleaning Programmes Troubleshooting Options Technical information Before first use Environment concerns Subject to change without notice. Safety information Before the installation and use of the appli- •...
  • Seite 16 • Connect the mains plug to the mains Warning! Risk of electrical shock, fire socket only at the end of the installation. or burns. Make sure that there is access to the • Do not put flammable products or items mains plug after the installation.
  • Seite 17: Product Description

    Product description Upper spray arm Rinse aid dispenser Lower spray arm Detergent dispenser Filters Cutlery basket Rating plate Lower basket Salt container Upper basket Water hardness dial Control panel On/off button Multitab button Display Delay button Programme button (up) Indicators Programme button (down) Function buttons Indicators...
  • Seite 18: Programmes

    Indicators Description Rinse aid indicator. This indicator is off while the programme operates. End indicator. Programmes Degree of soil Programme Duration Energy Water Programme Type of load phases (min) (kWh) Prewash 90 - 140 1.1 - 1.8 12 - 23 Crockery, cut- Wash 45 °C or 70 °C lery, pots and...
  • Seite 19: Before First Use

    If one or more options are set, make 5. Adjust the water softener to the water sure that the related indicators are on hardness in your area. before the programme starts. 6. Adjust the released quantity of rinse aid. Acoustic signals Multitab function The acoustic signals operate in these con- Activate this function only when you use the...
  • Seite 20 Adjusting the water softener Water softener Water hardness adjustment German French mmol/l Clarke Manual Elec- degrees degrees degrees tronic (°dH) (°fH) 51 - 70 91 - 125 9.1 - 12.5 64 - 88 43 - 50 76 - 90 7.6 - 9.0 53 - 63 37 - 42 65 - 75...
  • Seite 21: Daily Use

    Filling the salt container 1. Turn the cap counterclockwise and open the salt container. 2. Put 1 litre of water in the salt container (only for the first time). 3. Fill the salt container with dishwasher salt. 4. Remove the salt around the opening of the salt container.
  • Seite 22 is in setting mode, refer to ’SETTING 3. Load the baskets. AND STARTING A PROGRAMME’. 4. Add the detergent. • If the salt indicator is on, fill the salt 5. Set and start the correct programme for container. the type of load and the degree of soil. •...
  • Seite 23: Hints And Tips

    start that decreases with steps of 1 At the end of the programme hours. When the programme is completed, an in- • When the countdown is completed, the termittent acoustic signal operates and the programme starts. display shows 0. 1. Press the on/off button to deactivate the Opening the door while the appliance appliance.
  • Seite 24: Care And Cleaning

    • Put the light items in the upper basket. recommend that you use the tablets with Make sure that they do not move. long programmes. • Make sure that the spray arms can move Do not use more than the correct freely before you start a programme.
  • Seite 25: Troubleshooting

    6. Assemble the filter (A) and put it into position in filter (B). Turn it clockwise until it locks. An incorrect position of the filters can cause bad washing results and dam- age to the appliance. Cleaning the spray arms Only use neutral detergents.
  • Seite 26: Technical Information

    After the checks are completed, activate activate the rinse aid dispenser and use the appliance. The programme continues rinse aid together with the combi deter- from the point of interruption. gent tablets. If the problem occurs again, contact the Refer to ‘HINTS AND TIPS’ for other Service.
  • Seite 27: Environment Concerns

    Environment concerns caused by inappropriate waste handling of The symbol on the product or on its this product. For more detailed information packaging indicates that this product may about recycling of this product, please not be treated as household waste. Instead contact your local council, your household it should be taken to the appropriate waste disposal service or the shop where...
  • Seite 28: Consignes De Sécurité

    Sommaire Consignes de sécurité Conseils Description de l'appareil Entretien et nettoyage Bandeau de commande En cas d'anomalie de fonctionnement Programmes Caracteristiques techniques Options En matière de protection de Avant la première utilisation l'environnement Utilisation quotidienne Sous réserve de modifications. Consignes de sécurité Avant d'installer et d'utiliser cet appareil, li- •...
  • Seite 29 dent à celles de votre réseau. Si ce n'est • Les produits de lavage pour lave-vaisselle pas le cas, contactez un électricien. sont dangereux. Suivez les consignes de • Utilisez toujours une prise de courant de sécurité figurant sur l'emballage du pro- sécurité...
  • Seite 30: Description De L'appareil

    Description de l'appareil Bras d'aspersion supérieur Distributeur de liquide de rinçage Bras d'aspersion inférieur Distributeur de produit de lavage Filtres Panier à couverts Plaque signalétique Panier inférieur Réservoir de sel régénérant Panier supérieur Sélecteur de dureté de l'eau Bandeau de commande Touche Marche/Arrêt Touche «...
  • Seite 31: Programmes

    Voyants Description Voyant du réservoir de liquide de rinçage. Ce voyant est éteint pendant le dérou- lement du programme. Voyant de fin. Programmes Degré de sa- Phases du Durée Consom- Programme lissure programme (min) mation Type de char- électri- (kWh) Tous Prélavage 90 - 140...
  • Seite 32: Options

    Informations pour les instituts de test Pour toute information relative aux performances de test, envoyez un courrier électroni- que à l'adresse : info.test@dishwasher-production.com Notez le numéro du produit (PNC) situé sur la plaque signalétique. Options Activez ou désactivez les options avant et du sel régénérant, effectuez ces de démarrer un programme.
  • Seite 33: Avant La Première Utilisation

    4. Appuyez sur la touche de fonction (C) activés pour modifier le réglage. désactivés 5. Éteignez l'appareil pour confirmer. Avant la première utilisation 1. Assurez-vous que le niveau réglé pour 4. Ouvrez le robinet d'eau. l'adoucisseur d'eau correspond à la du- 5.
  • Seite 34 Réglage électronique • Le voyant de la touche de fonction (A) continue de clignoter. 1. Appuyez sur la touche Marche/Arrêt • Les signaux sonores retentissent, par pour allumer l'appareil. Assurez-vous exemple cinq signaux sonores inter- que l'appareil est en mode Programma- mittents = niveau 5.
  • Seite 35: Utilisation Quotidienne

    Remplissage du distributeur de liquide de rinçage 1. Appuyez sur le bouton d'ouverture (D) pour ouvrir le couvercle (C). 2. Remplissez le distributeur de liquide de rinçage (A), sans dépasser le repère « max ». 3. Si le liquide de rinçage déborde, épon- gez-le avec un chiffon absorbant pour éviter tout excès de mousse.
  • Seite 36 Utilisation du produit de lavage 1. Appuyez sur le bouton d'ouverture (B) pour ouvrir le couvercle (C). 2. Versez le produit de lavage dans le compartiment (A). 3. Si le programme comporte une phase de prélavage, versez une petite quanti- té...
  • Seite 37: Conseils

    Ouverture de la porte au cours du À la fin du programme fonctionnement de l'appareil Lorsque le programme est terminé, un si- Si vous ouvrez la porte, l'appareil s'arrête. gnal sonore intermittent retentit et 0 s'affi- Lorsque vous refermez la porte, l'appareil che.
  • Seite 38: Entretien Et Nettoyage

    ni se chevaucher. Mélangez les cuillères • Les tablettes de détergent ne se dissol- avec d'autres couverts. vent pas complètement durant les pro- • Vérifiez que les verres ne se touchent pas grammes courts. Pour éviter que des ré- pour éviter qu'ils ne se brisent. sidus de produit de lavage ne se dépo- •...
  • Seite 39: En Cas D'anomalie De Fonctionnement

    2. Pour démonter le filtre (A), détachez (A1) et (A2). 3. Retirez le filtre (B). 4. Lavez les filtres à l'eau courante. 5. Replacez le filtre (B) dans sa position initiale. Vérifiez qu'il est correctement placé sous les deux guides (C). 6.
  • Seite 40 Problème Solution possible L'appareil ne se remplit pas d'eau. Assurez-vous que le robinet d'eau est ouvert. Assurez-vous que la pression de l'arrivée d'eau n'est pas trop basse. Pour obtenir cette information, contac- tez votre compagnie des eaux. Assurez-vous que le robinet d'eau n'est pas obstrué. Assurez-vous que le filtre du tuyau d'arrivée d'eau n'est pas obstrué.
  • Seite 41: Caracteristiques Techniques

    6. Ajustez la quantité de liquide de rinçage 7. Remplissez le distributeur de liquide de libérée. rinçage. Caracteristiques techniques Dimensions Largeur / Hauteur / Profondeur 596 / 818 - 898 / 555 (mm) Branchement électrique Reportez-vous à la plaque signalétique. Tension 220 - 240 V Fréquence...
  • Seite 42: Sicherheitshinweise

    Inhalt Sicherheitshinweise Täglicher Gebrauch Gerätebeschreibung Tipps und Hinweise Bedienfeld Reinigung und Pflege Programme Fehlersuche Optionen Technische Daten Vor der ersten Inbetriebnahme Umwelttipps Änderungen vorbehalten. Sicherheitshinweise Lesen Sie die mitgelieferte Anleitung sorg- • Halten Sie sich an die mitgelieferte Mon- fältig vor der Montage und dem ersten Ge- tageanleitung.
  • Seite 43 • Stellen Sie sicher, dass die elektrischen • Geschirrspüler-Reinigungsmittel sind ge- Daten auf dem Typenschild den Daten fährlich. Beachten Sie die Sicherheitsan- Ihrer Stromversorgung entsprechen. weisungen auf der Reinigungsmittelver- Wenden Sie sich andernfalls an einen packung. Elektriker. • Trinken Sie nicht das Wasser aus dem •...
  • Seite 44: Gerätebeschreibung

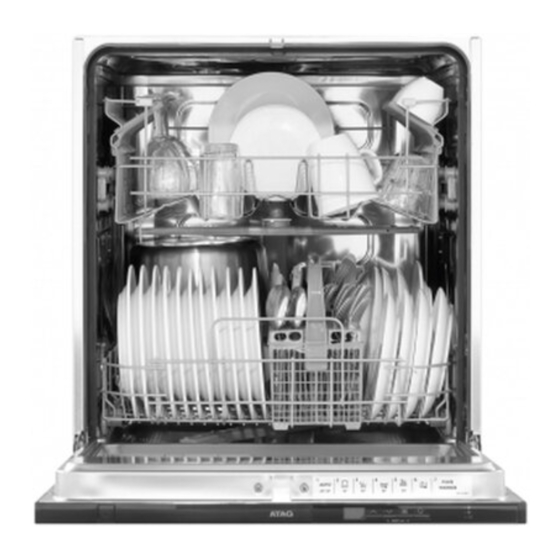
    Gerätebeschreibung Oberer Sprüharm Klarspülmittel-Dosierer Unterer Sprüharm Reinigungsmittelbehälter Filter Besteckkorb Typenschild Unterkorb Salzbehälter Oberkorb Wasserhärtestufen-Wähler Bedienfeld Taste „Ein/Aus“ Taste „Multitab“ Display Taste „Zeitvorwahl“ Programmtaste (nach oben) Kontrolllampen Programmtaste (nach unten) Funktionstasten Kontrolllam- Beschreibung Kontrolllampe „Salz“. Diese Kontrolllampe erlischt während des Programmbet- riebs.
  • Seite 45: Programme

    Kontrolllam- Beschreibung Kontrolllampe „Klarspülmittel“. Diese Kontrolllampe erlischt während des Pro- grammbetriebs. Kontrolllampe „Programmende“. Programme Verschmut- Programm- Dauer Energie Wasser Programm zungsgrad phasen (Min.) (kWh) Beladung Alle Vorspülen 90 - 140 1.1 - 1.8 12 - 23 Geschirr, Be- Hauptspülgang 45 °C steck, Töpfe oder 70 °C und Pfannen...
  • Seite 46: Optionen

    Informationen für Prüfinstitute Möchten Sie Informationen zum Leistungstest erhalten, schicken Sie eine E-Mail an: info.test@dishwasher-production.com Notieren Sie die Produktnummer (PNC), die Sie auf dem Typenschild finden. Optionen Schalten Sie die Optionen vor dem 2. Stellen Sie den Wasserenthärter auf die Programmstart ein oder aus.
  • Seite 47: Vor Der Ersten Inbetriebnahme

    5. Schalten Sie das Gerät zur Bestätigung aus. Vor der ersten Inbetriebnahme 1. Prüfen Sie, ob der Wasserenthärter ent- 4. Drehen Sie den Wasserhahn auf. sprechend der Wasserhärte in Ihrem 5. Möglicherweise haben sich im Gerät Gebiet eingestellt ist. Passen Sie die Rückstände angesammelt.
  • Seite 48 Elektronische Einstellung • Die Kontrolllampe der Funktionstaste (A) blinkt weiter. 1. Drücken Sie die Taste „Ein/Aus“, um • Der Signalton ist in Betrieb, z. B. fünf das Gerät einzuschalten. Stellen Sie si- aufeinander folgende Signaltöne = cher, dass sich das Gerät im Einstellmo- Wasserhärte 5.
  • Seite 49: Täglicher Gebrauch

    Befüllen des Klarspülmittel-Dosierers 1. Drücken Sie die Entriegelungstaste (D), um den Deckel (C) zu öffnen. 2. Füllen Sie den Klarspülmittel-Dosierer (A) nicht über die Marke „max“ hinaus. 3. Wischen Sie verschüttetes Klarspülmit- tel mit einem saugfähigen Tuch auf, um zu große Schaumbildung zu vermei- den.
  • Seite 50 Verwendung des Reinigungsmittels 1. Drücken Sie die Entriegelungstaste (B), um den Deckel (C) zu öffnen. 2. Füllen Sie das Reinigungsmittel in den Behälter (A). 3. Wenn das Programm einen Vorspül- gang hat, füllen Sie eine kleine Menge Reinigungsmittel in das Fach (D). 4.
  • Seite 51: Tipps Und Hinweise

    Öffnen der Tür während eines 1. Drücken Sie die Taste „Ein/Aus“, um laufenden Programms das Gerät auszuschalten. 2. Schließen Sie den Wasserhahn. Wenn Sie die Tür öffnen, unterbricht das Gerät das Programm. Wenn Sie die Tür • Wenn Sie das Gerät nicht innerhalb wieder schließen, läuft das Programm ab von 3 Minuten nach Ende eines Pro- dem Zeitpunkt der Unterbrechung weiter.
  • Seite 52: Reinigung Und Pflege

    • Um eingebrannte Essensreste einfach zu dere Zusätze. Achten Sie darauf, dass beseitigen, weichen Sie diese ein, bevor die Tabletten der Wasserhärte in Ihrer Sie das Kochgeschirr in das Gerät stel- Region entsprechen. Beachten Sie die len. Anweisungen auf der Reinigungsmittel- •...
  • Seite 53: Fehlersuche

    2. Um den Filter (A) auseinanderzubauen, ziehen Sie (A1) und (A2) auseinander. 3. Nehmen Sie den Filter (B) heraus. 4. Reinigen Sie die Filter mit Wasser. 5. Setzen Sie den Filter (B) wieder in der ursprünglichen Position ein. Vergewis- sern Sie sich, dass er korrekt unter den beiden Führungen (C) sitzt.
  • Seite 54 Problem Mögliche Abhilfe Überprüfen Sie, ob der Wasserdruck nicht zu niedrig ist. Um diese Information zu erhalten, wenden Sie sich an Ihren Wasserversorger. Überprüfen Sie, ob der Wasserhahn nicht verstopft ist. Überprüfen Sie, ob der Filter im Zulaufschlauch nicht verstopft ist. Überprüfen Sie, ob der Zulaufschlauch nicht einge- klemmt oder geknickt ist.
  • Seite 55: Technische Daten

    Technische Daten Abmessungen Breite / Höhe / Tiefe (mm) 596 / 818 - 898 / 555 Elektrischer Anschluss Siehe Typenschild. Spannung 220 - 240 V Frequenz 50 Hz Wasserdruck Min. / max. (bar / MPa) (0.5 / 0.05 ) / (8 / 0.8 ) max.
  • Seite 56 Nederland Home Product Service (ATAG) Postbus 249 6920 AE DUIVEN tel: 0900 - 5550001 fax: 026 - 8821444 België ATAG België NV 9420 Erpe-Mere tel: 053 - 806208 fax: 053 - 806057 Postbus 1033 • 6920 BA Duiven • Nederland...

Inhaltsverzeichnis