Herunterladen Inhalt Inhalt Diese Seite drucken
Auriol H13726 Bedienungs- Und Sicherheitshinweise

Auriol H13726 Bedienungs- Und Sicherheitshinweise

Premium-wetterstation
Inhaltsverzeichnis

Werbung

Verfügbare Sprachen
  • DE

Verfügbare Sprachen

  • DEUTSCH, seite 83
ESTACIÓN METEOROLÓGICA / STAZIONE
METEOROLOGICA RADIOCONTROLLATA PREMIUM
ESTACIÓN METEOROLÓGICA
Instrucciones de utilización y de seguridad
ESTAÇÃO METEOROLÓGICA PREMIUM
Instruções de utilização e de segurança
PREMIUM-WETTERSTATION
Bedienungs- und Sicherheitshinweise
IAN 114435
STAZIONE METEOROLOGICA
RADIOCONTROLLATA PREMIUM
Indicazioni per l'uso e per la sicurezza
PREMIUM WEATHER STATION
Operation and Safety Notes

Werbung

Inhaltsverzeichnis
loading

Inhaltszusammenfassung für Auriol H13726

  • Seite 1 ESTACIÓN METEOROLÓGICA / STAZIONE METEOROLOGICA RADIOCONTROLLATA PREMIUM ESTACIÓN METEOROLÓGICA STAZIONE METEOROLOGICA RADIOCONTROLLATA PREMIUM Instrucciones de utilización y de seguridad Indicazioni per l’uso e per la sicurezza ESTAÇÃO METEOROLÓGICA PREMIUM PREMIUM WEATHER STATION Instruções de utilização e de segurança Operation and Safety Notes PREMIUM-WETTERSTATION Bedienungs- und Sicherheitshinweise IAN 114435...
  • Seite 2 Instrucciones de utilización y de seguridad Página IT / MT Indicazioni per l’uso e per la sicurezza Pagina 24 Instruções de utilização e de segurança Página 44 GB / MT Operation and Safety Notes Page DE / AT / CH Bedienungs- und Sicherheitshinweise Seite...
  • Seite 3: Inhaltsverzeichnis

    Índice Información general ......................Página 4 Utilización conforme al uso prescrito ................... Página 4 Datos técnicos ........................Página 4 Advertencias de seguridad ....................Página 5 Volumen de suministro ......................Página 6 Explicación de términos ......................Página 6 Funciones ..........................Página 7 Puesta en marcha ........................
  • Seite 4: Información General

    Informción general / Utilización conforme al uso prescrito / Datos técnicos Estación meteorológica 3. Datos técnicos Intervalo de medición: 1. Información general Temperatura ambiente: de 0,0 °C a +50,0 °C, Resolución: 0,1 °C ¡ATENCIÓN! ¡LEER LAS INSTRUCCIONES ANTES de 32,0 °F a 122,0 °F, DE USARLO! ¡CONSERVAR LAS INSTRUCCIONES Resolución: 0,1 °F DE USO EN UN LUGAR SEGURO! ¡ESTE ARTÍ-...
  • Seite 5: Advertencias De Seguridad

    J sabilidad propia, que el producto: Estación meteo- N o sumerja nunca la estación meteorológica ni el rológica, N.º de modelo: H13726, Versión: 07 / 2015, sensor exterior en agua ni en ningún otro líquido. J referido en esta declaración, cumple con las normas / T enga en cuenta las indicaciones de limpieza y documentos normativos de la directiva 1999 / 5 / EC.
  • Seite 6: Volumen De Suministro

    Volumen de suministro / Explicación de términos 5. Volumen de suministro 1 estación meteorológica con soporte 1 anemómetro con sensor de temperatura y de humedad del aire integrado 1 pluviómetro con criba de hojas 6 tornillos adecuados para tacos de ø 5 mm 6 taco de ø...
  • Seite 7: Funciones

    Explicación de términos / Funciones / Puesta en marcha Pluviómetro: Dado que sólo se puede calcular la sensación de frío con temperaturas cercanas o inferiores al límite – Transmite la cantidad de lluvia a la estación me- de 0 °C, cuando las temperaturas son más altas se teorológica a través de una frecuencia de reemplaza casi siempre por la temperatura de bo- 434 MHz...
  • Seite 8 Puesta en marcha 0.5 x 3 ø 5 mm 5 mm Colgador 10 mm Montaje de la estación meteorológica en la pared: 1. Marque los agujeros (distancia horizontal 11,3 cm) a taladrar para la estación meteoroló- gica y el sensor exterior y, antes de taladrar los agujeros (ø...
  • Seite 9: Colocar Y Cambiar Las Pilas

    Puesta en marcha / Colocar y cambiar las pilas Fije el anemómetro, tal y como se muestra más aba- El pluviómetro puede sencillamente colocarse o jo, con las llaves Allen, las arandelas, los tornillos bien fijarse con los tornillos suministrados. de sujeción y las tuercas adjuntas.
  • Seite 10 Colocar y cambiar las pilas obturación esté colocado correctamente en su – Quite la cubierta del compartimento de las pilas. – Coloque las pilas (2 x 1,5 V tipo AA) teniendo entalladura en el compartimento para las pilas. en cuenta la polaridad. Preste atención a que Sólo así...
  • Seite 11: Vista General Del Aparato

    Colocar y cambiar las pilas / Vista general del aparato Botón Pulsar 1 vez Mantener Conector hembra para adaptador de pulsador 6 V de DC (el adaptador no está incluido en el volumen de suministro) aprox. 3 segundos WIND Velocidad media del viento (AVERAGE) y rá- fagas de viento...
  • Seite 12 Vista general del aparato Botón Pulsar 1 vez Mantener Botón Pulsar 1 vez Mantener pulsador pulsador aprox. aprox. 3 segundos 3 segundos MEMORY Indicación de los Buscar la señal valores mín. y del DCF-77 máx. guardados ZONE Cambiar entre la Configurar la automáticamente hora local y la...
  • Seite 13: Preparación Del Anemómetro Y Del Pluviómetro, Y Registro En La Estación Meteorológica

    Preparación del anemómetro y del pluviómetro ... / Configuración inicial de ... 11. Preparación del anemómetro 11.3 Registro automático del ane- y del pluviómetro, y registro mómetro y del pluviómetro en la estación meteorológica en la estación meteorológica 11.1 Calibración del anemómetro Después de haber instalado las pilas en el anemó- metro y en el pluviómetro, ponga las pilas a la esta- El anemómetro debe ser calibrado antes de la...
  • Seite 14: Formato De 12/24 Horas

    Configuración inicial de la estación meteorológica Formato de 12/24 horas: lla. Con el botón ▲y el botón ▼ puede ajustar el Pulse en el indicador de hora durante aprox. 3 segun- formato de la fecha. dos el botón CLOCK para ir al modo de ajuste. En la pantalla parpadea 24 h.
  • Seite 15: Ajuste De La Zona Horaria

    Configuración inicial de la estación meteorológica / Función de alarma Con el botón ZONE vuelve otra vez a la indicación ¡ATENCIÓN! de la hora. Si durante el ajuste de la zona horaria no se pulsa ningún botón de ajuste durante 60 segun- Los indicadores de tiempo y de fecha se transmiten dos, la estación meteorológica vuelve al indicador en Europa central mediante las señales de radio lla-...
  • Seite 16: Desconexión De La Señal De Alarma

    Función de alarma / Configuración de la unidad ... / Adaptación de la ... Función de silenciado de la alarma a in- tervalos: Con el botón SNOOZE / LIGHT puede interrumpir la señal de alarma durante aprox. 10 minutos. Du- rante ese tiempo parpadea encima de la indica- ción de hora.
  • Seite 17: Configuración De La Unidad Para La Velocidad Del Viento

    ... / Configuración de la unidad ... / Configuración de la ... / Configuración ... Mantenga pulsado el botón WIND ALARM durante aprox. 3 segundos, hasta que se genere un sonido de confirmación y el valor parpadee. 16. Configuración de la unidad para la velocidad del viento Pulse el botón ▲...
  • Seite 18: Activar Y Desactivar La Alarma De Viento Y La Alarma De Sensación De Frío

    … / Activar y desactivar … / Configuración de la … / Configuración de la unidad… 19. Activar y desactivar la alarma de viento y la alarma de sensación de frío Pulse el botón WIND AL para activar y desactivar Mantenga pulsado el botón WIND ALARM durante la alarma de viento y la alarma de la sensación de aprox.
  • Seite 19: Indicadores

    Configuración de la unidad de medición de la lluvia / Indicadores muestren alternativamente. En ese caso aparece pulse el botón C / F que se encuentra en la parte posterior de la estación meteorológica. Cada vez que además en la pantalla. pulse el botón cambia la unidad de la indicación en la pantalla.
  • Seite 20: Alarma De Heladas

    Indicadores – Cantidad de lluvia total 1 día antes: cantidad – Cantidad de lluvia diaria de lluvia 0,0 mm con – Cantidad de lluvia semanal indicador de barra – Cantidad de lluvia mensual en –1 Se indica el valor actual. Debajo aparece en un diagrama la evolución correspondiente de las últi- mas 6 unidades.
  • Seite 21: Velocidad Del Viento

    Indicadores / Mantenimiento 22.8 Velocidad del viento atmosférica y tiene un fiabilidad de hasta el 75 %. El comportamiento meteorológico nunca es prede- La estación meteorológica indica la velocidad media cible al 100 % y no se puede responsabilizar al del viento (AVERAGE) de los últimos 2 minutos y la fabricante por daños a causa de predicciones velocidad máxima para las ráfagas de viento (GUST)
  • Seite 22: Criba De Hojas Del Pluviómetro

    Mantenimiento / Solución de problemas en caso … / Limpieza / Eliminación Cambie las pilas en cuanto aparezca en el indi- gún obstáculo entre el sensor externo y la estación cador. Si las pilas están flojas o agotadas, no se base.
  • Seite 23 Eliminación Eliminación del embalaje: Elimine todo el material de embalaje respetando el medio ambiente.
  • Seite 24 Indice Informazioni generali ......................Pagina 25 Uso conforme ........................Pagina 25 Dati tecnici ...........................Pagina 25 Indicazioni relative alla sicurezza ..................Pagina 26 Dotazione ..........................Pagina 27 Definizioni ..........................Pagina 27 Funzioni ..........................Pagina 28 Messa in funzione .......................Pagina 28 Inserimento e sostituzione delle batterie ................Pagina 30 Presentazione dell’apparecchio ..................Pagina 32 Preparazione dell’anemometro e dell’udometro e registrazione sulla stazione meteo ..Pagina 33 11.1...
  • Seite 25: Informazioni Generali

    Informazioni generali / Uso conforme /Dati tecnici Stazione meteorologica 3. Dati tecnici radiocontrollata premium Campo di misurazione: Temperatura ambiente: da 0,0 °C a +50,0 °C, 1. Informazioni generali risoluzione: 0,1 °C da 32,0 °F a 122,0 °F, ATTENZIONE! PRIMA DELL’UTILIZZO LEGGERE risoluzione: 0,1 °F LE ISTRUZIONI PER L’USO! CONSERVARE CON Temperatura esterna:...
  • Seite 26: Indicazioni Relative Alla Sicurezza

    · Modello sensore esterno in acqua o altri liquidi. J n° H13726, Versione: 07 / 2015, alla quale si O sservare le indicazioni per la pulizia e per la riferisce la presente dichiarazione, è conforme alle conservazione di queste istruzioni.
  • Seite 27: Dotazione

    Dotazione /Definizioni 5. Dotazione 1 stazione meteo con piedino d’appoggio 1 anemometro con sensore di temperatura e umidità dell’aria. 1 udometro con filtro foglie 6 viti per tasselli ø 5 mm 6 tasselli, ø 5 mm 4 viti a esagono incassato M6 ivi incluse 4 dadi e 8 rosette.
  • Seite 28: Funzioni

    Definizioni / Funzioni / Messa in funzione Udometro: Il raffreddamento da vento può essere misurato solo a temperature vicine o inferiori al limite di 0° C. Per- – Trasmette la quantità di pioggia caduta alla sta- tanto, in caso di temperature superiori, questo valo- zione meteo sulla frequenza 434 MHz re viene sostituito solitamente dall’indice di calore –...
  • Seite 29 Messa in funzione 0.5 x 3 Montaggio dell’anemometro: Scegliere un posto adatto alla collocazione dell’a- ø 5 mm 5 mm nemometro. – Collocare l’anemometro all’aperto. – Per una corretta rilevazione della forza e della 10 mm direzione del vento, quest’ultimo deve poter agire sull’anemometro da tutte le direzioni.
  • Seite 30: Messa In Funzione / Inserimento E Sostituzione Delle Batterie

    Messa in funzione / Inserimento e sostituzione delle batterie 9. Inserimento e sostituzione delle batterie Banderuola Palo Inserire le batterie prima nel sensore esterno (anemometro / udometro) e suc- cessivamente nella stazione meteorologica. Stazione meteo: Ruota – Aprire nel senso della freccia il portabatterie che Vite a esagono incassato eolica Rondella...
  • Seite 31 Inserimento e sostituzione delle batterie Vite di fissaggio Udometro: – Con il cacciavite a croce, allentare le 2 viti di fissaggio poste alle estremità dell’alloggiamento dell’udometro. – Sollevare con cura l’alloggiamento dalla base dell’apparecchio. – Per aprire il portabatterie, allentare le 4 viti con testa a croce poste sul coperchio dello stesso.
  • Seite 32: Presentazione Dell'apparecchio

    Presentazione dell’apparecchio 10. Presentazione Tasto Premere 1 Premere dell’apparecchio volta per circa 3 Stazione meteo: HEAT INDEX Cambio di visualizzazione Previsioni meteorologiche e Visualizzazione della temperatura tra temperatura pressione atmosferica e umidità dell’aria interne / esterne percepita (Heat DEW POINT Index) e punto di rugiada (Dew Point)
  • Seite 33: Preparazione Dell'anemometro E Dell'udometro E Registrazione Sulla Stazione Meteo

    Presentazione dell’apparecchio / Preparazione dell’anemometro e … Anemometro: Tasto Premere 1 Premere volta per circa 3 Alloggiamento con termome- Banderuola con tro integrato e igrometro bussola integrata ▲ Impostazioni Passa rapida- successive mente alle im- postazioni suc- cessive ▼ Impostazioni Torna rapida- precedenti mente alle im-...
  • Seite 34: Preparazione Dell'udometro

    Preparazione dell’anemometro … / Impostazioni di base della stazione meteo 11.4 Registrazione manuale – Il LED del segnale di emissione si accende bre- dell’anemometro e dell’udo- vemente. L’anemometro è ora calibrato. metro sulla stazione meteo Nord Dopo ogni sostituzione di batteria nell’anemometro Palo e nell’udometro è...
  • Seite 35: Adattamento Del Dcf

    Impostazioni di base della stazione meteo Ore: Mese: Premendo nuovamente il tasto CLOCK si passa Premendo nuovamente il tasto CLOCK, si passa all’impostazione delle ore. Sul display lampeggia- all’impostazione del mese. Sul display lampeggia il no le ore. Con il tasto ▲ ed il tasto ▼ è possibile im- mese.
  • Seite 36: Impostazione Del Fuso Orario

    Impostazioni di base della stazione meteo / Funzione sveglia coforte sul Meno e trasmette con un raggio di trasmis- Il tasto ZONE permette di visualizzare il fuso orario sione di circa 1500 km. Se la stazione meteo riceve selezionato. Accanto all’ora compare ZONE. Con una questo segnale, non è...
  • Seite 37: Impostazione Dell'unità Di Misura Della Pressione Atmosferica

    Funzione sveglia / Impostazione … / Regolazione della pressione atmosferica Con il tasto ▲ ed il tasto ▼ è possibile impostare le ore. Premendo nuovamente il tasto ALARM si passa all’impostazione dei minuti; i minuti lampeggiano. Il segnale di sveglia torna quindi a suonare per circa 2 minuti.
  • Seite 38: Impostazione Dell'unità Di Misura Per La Velocità Del Vento

    Impostazione dell’unità … / Impostazione … / Impostazione dell’allarme … 16. Impostazione dell’unità ALARM; sulla sinistra verrà visualizzata la velocità di misura per la velocità del vento del vento È possibile visualizzare la velocità del vento in 5 diverse unità di misura. –...
  • Seite 39: Attivazione E Disattivazione Dell'allarme Vento E Dell'allarme Wind Chill

    ... / Attivazione … / Impostazione dell’unità … / Impostazione dell’unità di misura Premere il tasto ▲ o ▼ per impostare il valore deside- rato. Alarme de vento ligado Confermare l’immissione con il tasto WIND ALARM; sulla sinistra verrà visualizzata la temperatura Wind Chill Alarme de índice de frio ligado Alarme de vento e de índice...
  • Seite 40: Visualizzazioni

    Visualizzazioni 22. Visualizzazioni Retroilluminazione: 22.5 Quantità di pioggia caduta Per attivare la retroilluminazione, premere il tasto SNOOZE / LIGHT. La retroilluminazione si spegne automaticamente dopo circa 10 secondi. La stazione meteo è dotata di una memoria automa- tica per la registrazione della quantità di pioggia caduta.
  • Seite 41: Allarme Ghiaccio / Gelo

    Visualizzazioni Sulla base di uno schema analogo è possibile visua- È possibile visualizzare i dettagli dello storico. lizzare lo storico delle quantità settimanali e mensili. Esempio: Per la quantità totale (TOTAL) non è disponibile al- Premere il tasto RAIN / CLEAR fino alla visualizza- cuno storico! zione della quantità...
  • Seite 42: Variazione Della Pressione Atmosferica

    Visualizzazioni / Manutenzione 22.9 Variazione della pressione 22.12 Tendenza del tempo atmosferica Accanto alle previsioni del tempo è visualizzata anche La stazione meteo indica le variazioni della pressione la tendenza del tempo. Tre frecce indicano rispetti- atmosferica delle ultime 6 ore. vamente tempo in miglioramento, stabile e in peggio- ramento.
  • Seite 43: Filtro Foglie Dell'udometro

    Manutenzione / Ricerca errori in caso di risultati della ... / Pulizia / Smaltimento 23.2 Filtro foglie dell’udometro Se la stazione non dovesse funzionare correttamen- te, rimuova temporaneamente le batterie e le reinse- Rimuovere regolarmente fogliame ed altri corpi depo- risca dopo alcuni minuti.
  • Seite 44 Índice Informações gerais ......................Página 45 Utilização de acordo com as especificações ..............Página 45 Dados técnicos ........................Página 45 Indicações de segurança ....................Página 46 Volume de entrega ......................Página 47 Definições ..........................Página 47 Funções ..........................Página 48 Colocação em funcionamento ...................Página 48 Colocação e substituição das pilhas .................Página 50 Vista geral do aparelho ......................Página 51 Preparação do anemómetro e do pluviómetro, bem como registo na estação meteorológica ..............Página 53...
  • Seite 45: Informações Gerais

    Informações gerais / Utilização de acordo ... / Dados técnicos Estação meteorológica premium 3. Dados técnicos Gama de medição: 1. Informações gerais Temperatura interior: 0,0 °C até +50,0 °C, Resolução: 0,1 °C ATENÇÃO! ANTES DA UTILIZAÇÃO, LEIA O 32,0 °F até 122,0 °F, MANUAL DE INSTRUÇÕES! MANTER AFASTA- Resolução: 0,1 °F DO DAS CRIANÇAS.
  • Seite 46: Indicações De Segurança

    Estação meteoro- líquido. J lógica premium · Modelo n.º: H13726, Versão: E m caso de não utilização durante um longo 07 / 2015, ao qual se refere a presente declara- período de tempo, retire as pilhas do aparelho.
  • Seite 47: Volume De Entrega

    Volume de entrega / Definições 5. Volume de entrega 1 estação meteorológica com pé de apoio 1 anemómetro com sensor de temperatura e humidade integrado 1 pluviómetro com filtro de folhas 6 parafusos adequados para buchas ø 5 mm 6 buchas ø 5 mm 4 Parafusos sextavados internos M6 inclusive 4 porcas e 8 arruelas planas 2 braçadeiras de fixação para anemómetro...
  • Seite 48: Funções

    Definições / Funções / Colocação em funcionamento pelo índice de calor (Heat Index) no caso de tem- – Colocação ou montagem, de preferência, num peraturas mais elevadas. local não protegido da chuva. 7. Funções CUIDADO! Estação meteorológica: Respeite as seguintes indicações de segu- rança do anemómetro e do pluviómetro: –...
  • Seite 49 Colocação em funcionamento Montagem da estação meteorológica na – O cata-vento e a roda eólica não podem estar parede: bloqueados, para que seja possível efectuar 1. Marque os furos (distância na horizontal 11,3 cm) correctamente as medições. para a estação meteorológica e, antes de os –...
  • Seite 50: Colocação E Substituição Das Pilhas

    Colocação em funcionamento / Colocação e substituição das pilhas se acumule por baixo do pluviómetro. A água deve poder escoar livremente. – O pluviómetro tem de ser colocado dentro do al- cance da transmissão via rádio. Os muros e as paredes reduzem o alcance radioeléctrico.
  • Seite 51: Vista Geral Do Aparelho

    Colocação e substituição das pilhas / Vista geral do aparelho Pluviómetro: – Com uma chave de fendas solte os 2 parafusos de fixação opostos da caixa do pluviómetro. – Levante o aparelho cuidadosamente da base do aparelho. Conector para adaptador DC de 6 V –...
  • Seite 52 Vista geral do aparelho Teclas do lado da frente Tecla Premir 1 x Premir durante Tecla Premir 1 x Premir aprox. 3 s. durante RAIN Indicação da aprox. 3 s. HISTORY precipitação RAIN / CLEAR Quantidade de Eliminação dos actual e dos(as) precipitação dados últimos(as) 6...
  • Seite 53: Preparação Do Anemómetro E Do Pluviómetro, Bem Como Registo Na Estação Meteorológica

    Vista geral do aparelho / Preparação do anemómetro e do pluviómetro ... Pluviómetro: Tecla Premir 1 x Premir durante Filtro de folhas aprox. 3 s. WIND UNIT Configuração da unidade da velocidade do vento (Beaufort, mi / h, m / s, km / h ou nós) RAIN UNIT Configuração...
  • Seite 54: Preparar O Pluviómetro

    Preparação do ... / Configurações básicas da estação meteorológica 11.2 Preparar o pluviómetro medição do anemómetro e do pluviómetro a piscar no visor. O processo pode demorar até 4 minutos. – Coloque as pilhas no pluviómetro (para tal, consulte Pluviómetro no ponto 9. Colocação e 12.
  • Seite 55: Configuração Dcf

    Configurações básicas da estação meteorológica Minutos: Premindo outra vez a tecla CLOCK consegue proceder à configuração dos minutos. Os minutos aparecem a piscar no visor. Com a tecla ▲ e a tecla ▼ pode configurar os minutos. Premindo outra vez a tecla CLOCK consegue voltar à...
  • Seite 56: Configuração Do Fuso Horário

    Configurações básicas da estação meteorológica / Função de alarme 12.3 Configuração do fuso horário Definir -1 hora: Atlântico, Grã-Bretanha, Irlanda, Islândia, Portugal Enquanto se encontra na indicação da hora, pode alternar entre a hora local e o fuso horário seleccio- Definir 0 horas: nado.
  • Seite 57: Ajustar A Unidade Da Pressão Atmosférica

    … / Ajustar a unidade da ... / Adaptação da pressão ... / Ajuste da unidade ... 14. Ajustar a unidade da pressão atmosférica Prima a tecla PRESSURE para mudar entre as unidades Desactivar a função de alarme: hPa (hectopascais), mb (milibares) e inHg (altura da Prima duas vezes a tecla ALARM na indicação da coluna de mercúrio em polegadas).
  • Seite 58: Ajustar O Alarme De Vento

    Ajuste da unidade … / Ajustar o alarme de vento / Ajustar o alarme Wind Chill … Para tal, prima a tecla WIND UNIT, na parte posterior definido é emitido um som de aviso durante aprox. da estação meteorológica, para mudar entre as dife- 1 minuto.
  • Seite 59: Ligar E Desligar O Alarme De Vento E O Alarme De Índice De Frio

    ... / Ligar e ... / Ajuste da unidade ... / Ajustar a unidade ... / Indicações 20. Ajuste da unidade para a O alarme de índice de frio está agora activado. medição da pluviosidade Com a tecla WIND AL pode voltar a desactivar o alarme de índice de frio.
  • Seite 60: Fuso Horário

    Indicações 22.2 Fuso horário Diagrama: Unidade em polegadas Unidade em millímetros Através da tecla ZONE consegue visualizar o fuso horário seleccionado. Aparece ZONE ao lado da hora. Ao premir novamente a tecla ZONE volta ou- tra vez à sua hora local. 22.3 Temperatura e humidade Decorrer dos(as) últimos(as) dias/semanas/meses desde a data actual (0) até...
  • Seite 61: Alarme De Gelo / Geada

    Indicações 22.7 Direcção do vento Prima a tecla RAIN HISTORY para ver os detalhes. Premindo uma vez a tecla, salta para o dia seguinte. A seguir é mostrada uma representação dos últimos O anemómetro mostra automaticamente a direcção dois dias: média do vento nos últimos 2 minutos.
  • Seite 62: Valores Mínimos E Máximos

    … / Manutenção / Eliminação de erros em caso de falha nos resultados de medição 22.10 Valores mínimos e máximos Se for indicada a tempe- Utilizando a tecla MEMORY consegue visualizar ratura interior, a indica- os valores máximos e mínimos memorizados. ção do estado de carga das pilhas diz respeito à...
  • Seite 63: Limpeza

    Eliminação de erros em caso de falha nos resultados … / Limpeza / Eliminar 26. Eliminar da estação meteorológica e do sensor exterior, o que pode levar a resultados de medição imprecisos. Por isso, mantenha a máxima distância possível en- Eliminar os aparelhos: tre a estação meteorológica e o sensor exterior e Nunca elimine os aparelhos junto com o...
  • Seite 64 Table of contents General information ......................Page Intended use ........................Page Technical data ........................Page Safety information .......................Page Scope of delivery ........................Page Definition of terms ........................Page Functions ..........................Page Commissioning ........................Page Inserting and replacing batteries ..................Page Device overview ........................Page Preparing the wind gauge and rain gauge and registering on the weather station ..Page 11.1 Calibrating the wind gauge ....................Page 11.2...
  • Seite 65: General Information

    General information / Intended use / Technical data Premium weather station –4.0 °F to +140.0 °F Resolution: 0.1 °F Air humidity: 20 to 99 % 1. General information Resolution 1 % Air pressure: 850 mb to 1050 mb ATTENTION! READ OPERATING INSTRUCTIONS 850 hPa to 1050 hPa BEFORE USE! KEEP OPERATING INSTRUCTIONS 25.1 inHg to 31 inHg...
  • Seite 66: Safety Information

    D-74167 Neckarsulm, declares that the article J Premium weather station · model number: H13726, D o not immerse the weather station or the Version: 07 / 2015, fulfills the basic requirement external sensor in water or other liquids.
  • Seite 67: Definition Of Terms

    Scope of delivery / Definition of terms / Functions 6. Definition of terms Dew Point: The dew point (Dew Point) refers to the point at which the air releases water vapour in the form of fog and / or condensate. Example: if the air is cooled down constantly and the air humidity stays the same, the relative air hu- midity increases to 100 %.
  • Seite 68: Commissioning

    Functions /Commissioning instructions are easier to understand if you are hold- – Wind speed with wind alarm – Dew point display (Dew Point) ing the devices in your hand while reading them. – Ice/frost alert – Precipitation display Setting up the weather station: –...
  • Seite 69 Commissioning The wind gauge must be positioned horizontally to guarantee accurate measurements. Vane Mast Wind Hexagonal socket head bolt wheel Washer Hanger Mounting clamp Washer Setting up the rain gauge: Choose a suitable location for the rain gauge. – The rain gauge must be positioned outdoors. The device must not be impaired by objects and obstructions.
  • Seite 70: Inserting And Replacing Batteries

    Inserting and replacing batteries 9. Inserting and replacing batteries Put the batteries first into the outdoor sensor (wind gauge / rain gauge), then into the weather station. Weather station: – Open the battery compartment on the rear of the weather station in the direction of the arrow. –...
  • Seite 71: Device Overview

    Inserting and replacing batteries / Device overview 10. Device overview Weather Station: Temperature display and air Weather forecast and air pressure humidity indoors / outdoors Fastening screw Wind speed, wind direction Time and alarm and rainfall quantity Buttons – front side Button Press once Press for ap-...
  • Seite 72 Device overview Button Press once Press for ap- Button Press once Press for ap- prox. 3 sec. prox. 3 sec. CLOCK Switch display Set date and WIND UNIT Set the wind between local time speed unit time, date and (Beaufort, mph, day of the week m / s, km / h or knots)
  • Seite 73: Preparing The Wind Gauge And Rain Gauge And Registering On The Weather Station

    Device overview / Preparing the wind gauge and rain gauge and registring ... Rain gauge: – Remove the transport protection which holds Leaf filter the rain rocker. Battery Rain rocker compartment 11. Preparing the wind gauge and rain gauge and registering on the weather station 11.3 Automatic wind gauge and 11.1 Calibrating the wind gauge...
  • Seite 74: Weather Station Basic Settings

    Weather station basic settings 12. Weather station basic settings year: Press the CLOCK button a second time to set the 12.1 Setting year. The year now appears on the display. Use ▲ and ▼ to set the year. – 12 / 24 hour format –...
  • Seite 75: Dcf-77 Synchronisation

    Weather station basic settings 12.2 DCF-77 synchronisation This functions sets the time and date automatically. Press to activate the synchronisation for radio-con- trolled DCF-77 time information. Press and the symbol appears on the display. When the transmission signal is received, a symbol appears.
  • Seite 76: Alarm Function

    … / Alarm function / Setting the air pressure unit / Air pressure adjustment Set +1 Hr.: Press the ALARM button again to reactivate the alarm Bulgaria, Estonia, Finland, Greece, Latvia, Lithuania, function. Press the CLOCK button to return to the Moldova, Romania, Turkey, Ukraine, Cyprus time display.
  • Seite 77: Setting The Wind Speed Unit

    ... / Setting the wind ... / Setting the Wind Alarm / Setting the Wind Chill Alarm the current air pressure value, e.g. from the newspaper Hold the WIND ALARM button down for approx. or Internet. 3 seconds until a confirmation tone sounds and the Hold the PRESSURE button down for approx.
  • Seite 78: Switching The Wind Alarm And The Wind Chill Alarm On And Off

    ... / Switching the Wind ... / Setting the rain ... / Setting the temperature ... / Display Hold the WIND ALARM button down for approx. 3 seconds until a confirmation tone sounds and the value flashes. Wind Alarm on Wind Chill Alarm on Use ▲...
  • Seite 79: Date And Time

    Display 22.1 Date and time displayed in different chronicles either as a digital value or in diagram form: Press the CLOCK button to switch between the time, date and day of the week. If no button has been Digital value: pressed for a period of approximately 20 seconds, the time display appears automatically.
  • Seite 80: Ice / Frost Alarm

    Display 22.6 Ice / frost alarm a diagram is shown containing the rainfall quantity for the current day and the past 6 days. As soon as the outdoor temperature falls below 4 °C, the frost alarm symbol appears on the display. This warns of possible ground frost.
  • Seite 81: Air Pressure Change

    Display / Maintenance 22.9 Air pressure change 22.12 Weather trend The weather station shows the changes in air pressure The weather trend is also shown in addition to the over the last 6 hours. weather forecast. There is an arrow for increasing, stable and decreasing.
  • Seite 82: Rain Gauge Leaf Filter

    Maintenance / Troubleshooting errors in the … / Cleaning / Disposal 23.2 Rain gauge leaf filter If your weather station is not working correctly, please remove the batteries for a short while and Remove foliage and any other objects which collect then replace them.
  • Seite 83 Inhaltsverzeichnis Allgemeine Information .......................Seite Bestimmungsgemäße Verwendung ..................Seite Technische Daten ........................Seite Sicherheitshinweise ......................Seite Lieferumfang ........................Seite Begriffserklärungen ......................Seite Funktionen ..........................Seite Inbetriebnahme........................Seite Batterien einlegen und wechseln ..................Seite Geräteübersicht ........................Seite Vorbereiten des Windmessers und des Regenmessers sowie Anmelden an die Wetterstation ....................Seite 11.1 Windmesser kalibrieren ......................Seite 11.2 Regenmesser vorbereiten ....................Seite 11.3...
  • Seite 84: Allgemeine Information

    Allgemeine Information / Bestimmungsgemäße Verwendung / Technische Daten Premium-Wetterstation 3. Technische Daten Messbereich: 1. Allgemeine Information Raumtemperatur: 0,0 °C bis +50,0 °C, Auflösung: 0,1 °C ACHTUNG! VOR GEBRAUCH DIE BEDIENUNGS- 32,0 °F bis 122,0 °F, ANLEITUNG LESEN! BEDIENUNGSANLEITUNG Auflösung: 0,1 °F SORGFÄLTIG AUFBEWAHREN! DIESER ARTIKEL Außentemperatur: –20,0 °C bis +60,0 °C...
  • Seite 85: Sicherheitshinweise

    A uf die richtige Polarität achten. J wortung, dass das Produkt: Premium-Wetterstation, D ie Batterien regelmäßig auf Auslaufen über- Model-Nr.: H13726, Version: 07 / 2015, auf das prüfen. J sich diese Erklärung bezieht, mit den Normen / B ei längerer Nichtbenutzung Batterien aus dem normativen Dokumenten der 1999 / 5 / EC Gerät nehmen.
  • Seite 86: Lieferumfang

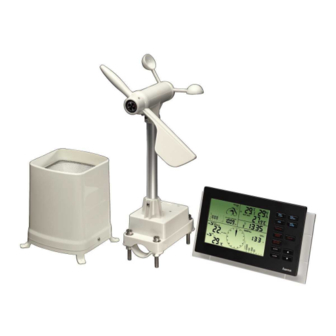
    Lieferumfang / Begriffserklärungen 5. Lieferumfang 1 Wetterstation mit Aufstellfuß 1 Windmesser mit integriertem Temperatur- und Luftfeuchtigkeitssensor 1 Regenmesser mit Laubsieb 6 Schrauben passend zu ø 5 mm Dübel 6 Dübel ø 5 mm 4 Innensechskantschrauben M6 inklusive 4 Muttern und 8 Unterlegscheiben 2 Befestigungsschellen für Windmesser 6.
  • Seite 87: Funktionen

    Begrifsserklärungen / Funktionen / Inbetriebnahme Da man die Windkühle nur bei Temperaturen nahe – Aufstellen bzw. Montage idealerweise an oder unterhalb der 0 °C-Grenze berechnen kann, einem Platz, der nicht vor Regen geschützt ist wird sie bei höheren Temperaturen meist durch den Hitzeindex (Heat Index) ersetzt.
  • Seite 88: Aufhänger

    Inbetriebnahme Wandmontage Wetterstation: messer einwirken können, damit die korrekte 1. Markieren Sie die Bohrlöcher (Abstand waage- Windstärke und Windrichtung gemessen werden recht ca.11,3 cm) für die Wetterstation und achten kann. Sie vor dem Bohren der Bohrlöcher (ø 5 mm) – Die Windfahne und das Windrad dürfen nicht darauf, dass beim Bohren keine elektrischen blockiert sein, damit die Messungen richtig Leitungen oder Wasserleitungsrohre o.Ä.
  • Seite 89: Batterien Einlegen Und Wechseln

    Inbetriebnahme / Batterien einlegen und wechseln – Der Regenfall muss ungehindert auf den Regen- messer einwirken können, damit eine genaue Regenmessung erfolgen kann. – Achten Sie darauf, dass das Regenwasser sich nicht unter dem Regenmesser sammelt. Es muss ungehindert abfließen können. –...
  • Seite 90: Geräteübersicht

    Batterien einlegen und wechseln / Geräteübersicht Regenmesser: – Lösen Sie mit einem Schlitzschraubendreher die 2 gegenüberliegenden Befestigungsschrauben vom Gehäuse des Regenmessers. – Heben Sie das Gehäuse vorsichtig von der Gerätebasis ab. – Zum Öffnen des Batteriefaches lösen Sie die 4 Kreuzschlitzschrauben an der Batteriefachab- deckung.
  • Seite 91 Geräteübersicht Tasten Vorderseite Taste 1x drücken ca. 3 Sek. drücken Taste 1x drücken ca. 3 Sek. MEMORY Anzeige der drücken automatisch RAIN / CLEAR Niederschlags- Löschen der gespeicherten menge Tag / Daten Min. und Woche / Max.-Werte Monat / von Temperatur, Gesamt Luftfeuchtigkeit, WIND...
  • Seite 92: Vorbereiten Des Windmessers Und Des Regenmessers Sowie Anmelden An Die Wetterstation

    Geräteübersicht / Vorbereiten des Windmessers und des Regenmessers ... 11. Vorbereiten des Windmessers Taste 1x drücken ca. 3 Sek. und des Regenmessers sowie drücken Anmelden an die Wetterstation ZONE Wechseln zwi- Weltzeit einstel- schen lokaler 11.1 Windmesser kalibrieren Zeit und Weltzeit C / F Umschalten von Sowohl bei der ersten Inbetriebnahme als auch bei...
  • Seite 93: Automatisches Anmelden Des Windmessers Und Des Regenmessers An Die Wetterstation

    Vorbereiten des Windmessers und ... / Wetterstation Grundeinstellungen 11.3 Automatisches Anmelden des 12 / 24 Stundenformat: Windmessers und des Regen- Drücken Sie in der Uhrzeitanzeige für ca. 3 Sekunden messers an die Wetterstation die CLOCK-Taste, um in den Einstellungsmodus zu gelangen.
  • Seite 94: Dcf-77 Angleichung

    Wetterstation Grundeinstellungen Datumsformat: auf dem Display. Wird das Funksignal empfangen, Durch einen weiteren Druck auf die CLOCK-Taste erscheint ein animiertes -Symbol. Falls keine Funk- kommen Sie zur Monatsformat-Einstellung. Es blinken wellen erscheinen, haben Sie an diesem Ort keinen jetzt die die Buchstaben D (D = Day = Tag) und M DCF-77 Empfang.
  • Seite 95: Wetterstation Grundeinstellungen / Alarmfunktion

    Wetterstation Grundeinstellungen / Alarmfunktion Set +1 Std.: Bulgarien, Estland, Finnland, Griechenland, Lettland, Litauen, Moldawien, Rumänien, Türkei, Ukraine, Zypern Alle weiteren Zeitzonen entnehmen Sie bitte Ihrem Atlas oder dem Internet. Mit der ▲-Taste und der ▼- Taste können Sie die Zeitzone einstellen. Sie können eine Zeitzone von 13.
  • Seite 96: Luftdruckeinheit Einstellen

    … / Luftdruckeinheit … / Luftdruckanpassung / Einstellen der … / Windalarm … ist voreingestellt. Sie können den Luftdruck an Ihrem aktuellen Standort anpassen. Besorgen Sie sich zuerst Durch weiteres Drücken der ALARM-Taste können den aktuellen Luftdruckwert z.B. aus der Tageszeitung Sie die Alarmfunktion wieder aktivieren.
  • Seite 97: Windalarm Einstellen / Wind Chill Alarm Einstellen

    Windalarm einstellen / Wind Chill Alarm einstellen Halten Sie dann die WIND ALARM-Taste für ca. Halten Sie dann die WIND ALARM-Taste für ca. 3 Sekunden gedrückt, bis ein Bestätigungston 3 Sekunden gedrückt, bis ein Bestätigungston kommt und der Wert blinkt. kommt und der Wert blinkt.
  • Seite 98: Windalarm Und Wind Chill Alarm Ein- Und Ausschalten

    Windalarm und Wind Chill … / Einstellen der Einheit … / Einstellen … / Anzeigen 19. Windalarm und Wind Chill Alarm ein- und ausschalten Drücken Sie die WIND AL - Taste, um Windalarm und Wind Chill Alarm ein- und auszuschalten. Ist 22.
  • Seite 99: Heat Index Und Dew Point Anzeigen

    Anzeigen – wöchentliche Regenmenge – monatliche Regenmenge 22.4 Heat Index und Dew Point Es wird der aktuelle Wert angezeigt. Darunter steht anzeigen in einem Diagramm die dazugehörige Historie der letzten 6 Einheiten. Drücken Sie die HEAT INDEX / DEW POINT-Taste, um zwischen Heat Index und Dew Point zu wechseln.
  • Seite 100: Eis- / Frostalarm

    Anzeigen 2 Tage früher: Regen- menge 156,7 mm mit Balkenanzeige bei –2 22.9 Luftdruckänderungen Die Wetterstation zeigt die Luftdruckänderungen Nach dem gleichen Schema können Sie die Historie der letzten 6 Stunden an. für Wochen- und Monatsmenge anzeigen lassen. Einheit in inHg Einheit in hPa (mb) Für die Gesamtmenge (TOTAL) gibt es keine Historie! 22.6 Eis- / Frostalarm...
  • Seite 101: Wettertendenz

    Anzeigen / Wartung / Fehlerbehebung bei Störung der Messergebnisse 22.12 Wettertendenz 23.2 Regenmesser Laubsieb Neben der Wettervorhersage wird auch die Wetter- Entfernen Sie regelmäßig Laub und andere Gegen- tendenz angezeigt. Es gibt für steigend, gleich blei- stände die sich im Laubsieb des Regenmessers an- bend und fallend je einen Pfeil.
  • Seite 102: Reinigen

    Fehlerbehebung bei Störung der Messergebnisse / Reinigen / Entsorgen Außensensors. Tauschen Sie diese gegen neue aus. Wenn die Wetterstation nicht richtig arbeitet, entfernen Sie die Batterien für einen kurzen Moment und setzen Sie sie anschließend erneut ein. 25. Reinigen Reinigen Sie die Geräte nur mit einem feuchten Tuch.
  • Seite 103 OWIM GmbH & Co. KG Stiftsbergstraße 1 D-74167 Neckarsulm Model-No.: H13726 Version: 07 / 2015 Estado de las informaciones · Versione delle informazioni · Estado das informações · Last Information Update · Stand der Informationen: 06 / 2015 · Ident.-No.: H13726062015-ES / IT...

Inhaltsverzeichnis