Herunterladen Inhalt Inhalt Diese Seite drucken
Klarstein 10030415 Bedienungsanleitung

Klarstein 10030415 Bedienungsanleitung

Standventilator
Vorschau ausblenden Andere Handbücher für 10030415:

Werbung

Verfügbare Sprachen
  • DE

Verfügbare Sprachen

  • DEUTSCH, seite 1
Standventilator
10030415

Werbung

Inhaltsverzeichnis
loading

Inhaltszusammenfassung für Klarstein 10030415

  • Seite 1 Standventilator 10030415...
  • Seite 2: Inhaltsverzeichnis

    Inbetriebnahme und Bedienung 4 Reinigung und Pflege 6 Hinweise zur Entsorgung 7 Konformitätserklärung 7 Technische Daten Artikelnummer 10030415 Stromversorgung 220-240 V ~ 50-60 Hz Leistung 65 W Sicherheitshinweise • Reparaturen dürfen nur von Fachpersonal ausgeführt werden. Nehmen Sie das Gerät nicht auseinander, Sie gefährden damit Ihre Sicherheit.
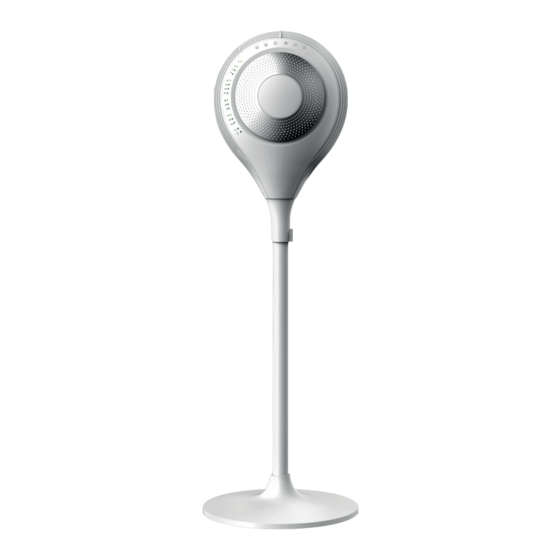
  • Seite 3: Geräteübersicht

    Geräteübersicht 1 Rechter Lufteinlass 2 LED Kontrollleuchte 3 Rechte Seitenblende 4 Bedienfeld 5 Hinteres Gehäuse 6 Netzkabel 7 Unterstützungs-Mutter 8 Linker Lufteinlass 9 Dekorative Abdeckung 10 Linke Seitenblende 11 Vorderes Gehäuse 12 Körper-Sensor 13 Fernbedienungs-Sensor 14 Schwenk-Basis 15 Fernbedienung 16 Fernbedienugs-Halter 17 Ständer 18 Basis 19 Gewicht...
  • Seite 4: Inbetriebnahme Und Bedienung

    Display und Kontrollleuchten 7 Ein/Aus/Standby 8 Natürlicher Modus 9 Schlaf-Modus 10 Öko-Modus 11 Timer 12 Hohe Geschwindigkeit 13 Mittlere Geschwindigkeit 14 Niedrige Geschwindigkeit 15 Schwenkwinkel horizontal 16 Schwenken vertikal Inbetriebnahme und Bedienung Aufbau 1. Legen Sie sich alle teile zurecht. 2.
  • Seite 5 Bedienung Das Gerät ist mit einem Bedienfeld ausgestattet, über dessen tasten sich die einzelnen Funktionen steuern las- sen. HINWEIS: Wenn die den Stecker einstecken ertönt ein Piepton und alle Symbole leuchten für 2 Sekunden auf und gehen dann automatisch wieder aus. Das Gerät befindet sich dann im Standby-Modus. Standby-Modus Im Standby-Modus sind die Tasten gesperrt.
  • Seite 6: Reinigung Und Pflege

    Modus Das Gerät startet im Normal-Modus. Drücken Sie auf die Modus-Taste, um zwischen den folgenden Modi zu wechseln: Normal > Natürlich > Schlaf > Öko. Die entsprechende Kontrollleuchte geht an. Alle Modi bis auf den Normal-Modus haben einen eigene Kontrollleuchte auf dem Display. Funktionen und optionale Einstellungen der einzelnen Modi Normal Hohe Geschwindigkeit...
  • Seite 7: Hinweise Zur Entsorgung

    Reinigung der Oberfläche • Achten Sie darauf, dass kein Wasser oder Wasserdampf ins Gerät eindringt. • Benutzen Sie keine Scheuer- oder Lösemittel. • Ziehen Sie vor der Reinigung den Stecker aus der Steckdose. Gerät verstauen • Ziehen Sie den Stecker aus der Steckdose und verpacken Sie das Gerät, damit es nicht einstaubt. •...
  • Seite 8: Technical Data

    Use and Operation 10 Cleaning and Care 12 Hints on Disposal 13 Declaration of Conformity 13 Technical Data Item number 10030415 Power supply 220-240 V ~ 50-60 Hz Power consumtion 65 W Safety Instructions • In the event of appliance failing to operate, all repairs must be undertaken by service center. Do not touch the power cord with wet hands.
  • Seite 9: Product Description

    Product Description 1 Right Wind Inlet 2 LED Indicator Light 3 Right Side Panel 4 Touch Control Panel 5 Back Housing 6 Power Cord 7 Nut Support 8 Left Wind Inlet 9 Decoration Cover 10 Left Side Panel 11 Front Housing 12 Body Sensor 13 Remote Control Receiver 14 Oscillation Base...
  • Seite 10: Use And Operation

    Display and Indicator Lights 7 On/Off/Standby 8 Natural Mode 9 Sleep Mode 10 ECO Mode 11 Timer 12 HI Speed 13 MED Speed 14 LOW Speed 15 Horizontal Oscillation 16 Vertikal Oscillation Use and Operation Installation 1. Take out parts for assembling. 2.
  • Seite 11 Operation Touch screen control technic has been used in this unit, all of unit’ s function can be operated by touch the display window signs slightly. NOTE: When plug in, the machine shows proper insert on the condition that all LED lights turn on for 2 seconds and BIBI sounds;...
  • Seite 12: Cleaning And Care

    Mode The initial wind mode remains on “Normal” , press MODE button to switch between “ Normal” – “Natural” – “ Sleeping” – “ ECO”, the LED indicator changes accordingly. All mode have its accordingly LED indicator on the panel, but the Normal mode. Running conditions for different modes Normal HI Speed...
  • Seite 13: Hints On Disposal

    Unit surface cleaning • Do not allow water and steam to drip on . • Do not use corrosive detergent or solvent cleaning • Always unplug the fan before cleaning. Product storage • Unplugged and packed to prevent dust from entering the body if not use for a long time. •...
  • Seite 14: Datos Técnicos

    Puesta en marcha y uso 16 Limpieza y cuidado 18 Indicaciones para la retirada del aparato 19 Declaración de conformidad 19 Datos técnicos Número de artículo 10030415 Suministro eléctrico 220-240 V ~ 50-60 Hz Potencia 65 W Indicaciones de seguridad •...
  • Seite 15: Descripción Del Aparato

    Descripción del aparato 1 Entrada de aire derecha 2 Indicador luminoso LED 3 Panel lateral derecho 4 Panel de control 5 Carcasa trasera 6 Cable de alimentación 7 Tuerca de soporte 8 Entrada de aire izquierda 9 Cubierta decorativa 10 Panel lateral izquierdo 11 Estructura delantera 12 Sensor corporal 13 Sensor del mando a distancia...
  • Seite 16: Puesta En Marcha Y Uso

    Display e indicadores luminosos 7 On/off/Standby 8 Modo natural 9 Modo noche 10 Modo Eco 11 Temporizador 12 Velocidad alta 13 Velocidad media 14 Velocidad baja 15 Grado de oscilación horizontal 16 Oscilación vertical Puesta en marcha y uso Montaje 1.
  • Seite 17 Utilización El aparato está equipado con un panel de control con el que podrá controlar cada una las funciones. ADVER- TENCIA: cuando conecte el enchufe, el aparato emitirá un pitido y todos los símbolos se iluminan durante 2 segundos y a continuación se apagan automáticamente. El aparato se encuentra entonces en modo standby. Modo standby En el modo standby los botones están bloqueados.
  • Seite 18: Limpieza Y Cuidado

    Modo El aparato se inicia en modo normal. Pulse el botón de Modo para elegir entre los siguientes modos: normal > natural > modo noche > eco. La luz correspondiente se enciende. Todos los modos excepto el modo normal cuentan con su propio indicador luminoso en el display. Funciones y ajustes opciones de cada uno de los modos Normal Velocidad alta...
  • Seite 19: Indicaciones Para La Retirada Del Aparato

    Limpieza de la superficie • Asegúrese de que no se filtre agua ni vapor de agua al interior del aparato. • No utilice productos abrasivos. • Desconecte el enchufe antes de limpiar el aparato. Guardar el aparato • Desconecte el enchufe y embale el aparato para evitar que se llene de polvo. •...
  • Seite 20: Fiche Technique

    Mise en marche et utilisation 22 Nettoyage et entretien 24 Information sur le recyclage 25 Déclaration de conformité 25 Fiche technique Numéro d’ a rticle 10030415 Alimentation électrique 220-240 V ~ 50-60 Hz Puissance 65 W Consignes de sécurité • Les réparations doivent être effectuées uniquement par un personnel spécialisé. Ne pas démonter l’ a ppareil pour ne pas mettre se mettre en danger.
  • Seite 21: Aperçu De L' A Ppareil

    Aperçu de l’ a ppareil 1 Entrée d’ a ir de droite 2 Voyant lumineux LED 3 Cache latéral de droite 4 Panneau de commande 5 Boîtier arrière 6 Cordon d’ a limentation 7 Écrou de soutien 8 Entrée d’ a ir de gauche 9 Cache décoratif 10 Cache latéral de droite 11 Boîtier avant...
  • Seite 22: Mise En Marche Et Utilisation

    Affichage et témoins lumineux 7 Marche / arrêt / veille 8 Mode naturel 9 Mode sommeil 10 Mode éco 11 Minuteur 12 Vitesse élevée 13 Vitesse moyenne 14 Vitesse basse 15 Degré d’ o scillation horizontale 16 Degré d’ o scillation verticale Mise en marche et utilisation Montage 1.
  • Seite 23 Utilisation L’ a ppareil est équipé d’un panneau de commande dont les touches permettent de sélectionner chaque fonc- tion. REMARQUE : lorsque l’ a ppareil vient d’ ê tre branché, un bip retentit et tous les symboles s’ a llument pen- dant 2 secondes puis s’...
  • Seite 24: Nettoyage Et Entretien

    Mode L’ a ppareil démarre en mode normal. Appuyer sur la touche mode pour passer d’un mode à l’ a utre : Normal > Naturel > Sommeil > Éco. Le témoin lumineux s’ a llume. Tous les modes ont un témoin lumineux spécifique à l’...
  • Seite 25: Information Sur Le Recyclage

    Nettoyage en surface • Veiller à éviter toute infiltration d’ e au ou de vapeur d’ e au dans l’ a ppareil. • Ne pas utiliser de produit abrasif ou de solvant. • Débrancher la fiche de la prise avant de nettoyer l’ a ppareil. Rangement de l’appareil •...
  • Seite 26: Dati Tecnici

    Messa in funzione e utilizzo 28 Pulizia e manutenzione 30 Smaltimento 31 Dichiarazione di conformità 31 Dati tecnici Numero articolo 10030415 Alimentazione 220-240 V ~ 50-60 Hz Potenza 65 W Avvertenze di sicurezza • Le riparazioni devono essere eseguite esclusivamente da un tecnico competente. Non smontare il disposi- tivo: pericolo di lesioni.
  • Seite 27: Descrizione Del Prodotto

    Descrizione del prodotto 1 Ingresso aria destro 2 Spia luminosa a LED 3 Pannello laterale destro 4 Pannello dei comandi 5 Alloggiamento posteriore 6 Cavo di alimentazione 7 Dado di supporto 8 Ingresso aria sinistro 9 Coperchio decorativo 10 Pannello laterale sinistro 11 Alloggiamento anteriore 12 Sensore corpo 13 Sensore telecomando...
  • Seite 28: Messa In Funzione E Utilizzo

    Display e spie luminose 7 On / Off / Standby 8 Modalità naturale 9 Modalità notturna 10 Modalità eco 11 Timer 12 Velocità alta 13 Velocità media 14 Velocità bassa 15 Oscillazione orizzontale 16 Oscillazione verticale Messa in funzione e utilizzo Montaggio 1.
  • Seite 29 Utilizzo Il dispositivo è dotato di un pannello dei comandi i cui tasti regolano le diverse funzioni. NOTA: appena si inse- risce la spina nella presa, il dispositivo emette un segnale acustico e tutti i simboli si accendono per 2 secondi e si spengono di nuovo automaticamente.
  • Seite 30: Pulizia E Manutenzione

    Modalità All’ a ccensione il dispositivo si trova in modalità normale. Premere il tasto Modus per selezionare una modalità: normale > naturale > notturna > eco. La spia luminosa corrispondente si accende. Tutte le modalità, ad eccezi- one della modalità normale, dispongono di una spia corrispondente sul display. Funzioni e impostazioni opzionali delle singole modalità...
  • Seite 31: Smaltimento

    Pulizia delle superfici • Prestare attenzione che l’ a cqua o il vapore acqueo non penetrino nel dispositivo. • Non utilizzare prodotti abrasivi o solventi. • Staccare sempre la spina dalla presa prima di qualsiasi operazione di pulizia. Conservare il dispositivo •...

Inhaltsverzeichnis