Herunterladen Inhalt Inhalt Diese Seite drucken

Werbung

Verfügbare Sprachen
  • DE

Verfügbare Sprachen

  • DEUTSCH, seite 1
SUMMERJAM
Standventilator
Stand Fan
Ventilador de pie
Ventilateur sur pied
Ventilatore verticale
10031451 10031452 10031453
www.klarstein.com

Werbung

Inhaltsverzeichnis
loading

Inhaltszusammenfassung für Klarstein SUMMERJAM

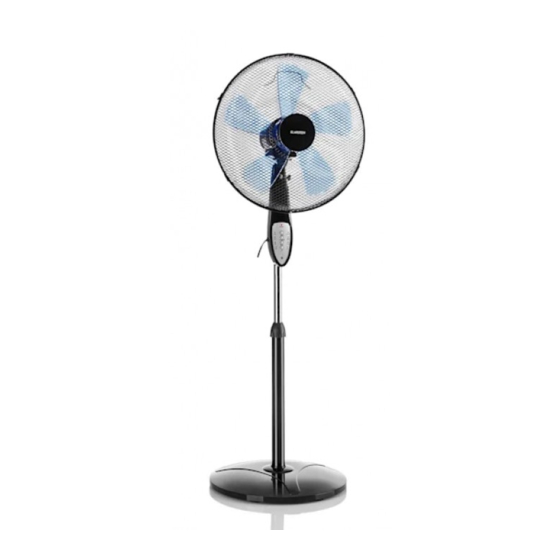
  • Seite 1 SUMMERJAM Standventilator Stand Fan Ventilador de pie Ventilateur sur pied Ventilatore verticale 10031451 10031452 10031453 www.klarstein.com...
  • Seite 3: Inhaltsverzeichnis

    Sehr geehrter Kunde, wir gratulieren Ihnen zum Erwerb Ihres Gerätes. Lesen Sie die folgenden Hinweise sorgfältig durch und befolgen Sie diese, um möglichen Schäden vorzubeugen. Für Schäden, die durch Missachtung der Hinweise und unsachgemäßen Gebrauch entstehen, übernehmen wir keine Haftung. Scannen Sie den folgenden QR-Code, um Zugriff auf die aktuellste Bedienungsanleitung und weitere Informationen rund um das Produkt zu erhalten.
  • Seite 4: Sicherheitshinweise

    SICHERHEITSHINWEISE • Kinder könnten sich an den Verpackungsmaterialien und Altgeräten verletzen. Entsorgen Sie das Verpackungsmaterial daher umgehend. • Kinder ab 8 Jahren, psychisch, sensorisch und körperlich eingeschränkte Menschen dürfen das Gerät nur benutzen, wenn sie vorher von einer für sie verantwortlichen Aufsichtsperson ausführlich mit den Funktionen und den Sicherheitsvorkehrungen vertraut gemacht wurden und die damit verbundenen Risiken verstehen.
  • Seite 5: Geräteübersicht

    • Achten Sie darauf, dass das Netzkabel nicht über scharfe Kanten oder Oberflächen verläuft. Hängen Sie das Gerät nicht an der Decke oder Wand auf, außer es ist für diesen Betrieb ausgelegt. • Lassen Sie um das Gerät herum genug Platz zu Wänden, Möbeln oder anderen Geräten, um die bestmögliche Leistung zu erzielen.
  • Seite 6: Zusammenbau

    ZUSAMMENBAU Basis zusammenbauen Lösen Sie die Schraube (16), die unten am Außenrohr (14) befestigt ist. Schieben Sie das Innenrohr (12) in das Außenrohr und befestigen Sie die Rohre mit der Schraube an der Basis. Setzen Sie das Motorgehäuse (8) auf das Innenrohr und befestigen Sie es mit den mitgelieferten Schrauben.
  • Seite 7 Betriebsanzeige TIMER-Taste EIN (ON) und SWING-Kontrollleuchte Geschwindigkeit (SPEED) Geschwindigkeitsanzeige Hoch (high) SWING-Taste Mittel (mid) Niedrig (low) TIMER-Anzeige AUS-Taste (OFF) 0.5h / 1h / 2h / 4h Inbetriebnahme und Bedienung Schließen Sie das Gerät an eine Steckdose an. Die Betriebsanzeige (A) geht an. Schalten Sie das Gerät ein, indem Sie die Taste ON/SPEED (F) am Bedienfeld drücken.
  • Seite 8: Reinigung Und Pflege

    REINIGUNG UND PFLEGE • Ziehen Sie immer den Stecker aus der Steckdose, bevor Sie das Gerät reinigen. Tauchen Sie Stecker, Netzkabel oder das gesamte Gerät nie komplett in Wasser oder andere Flüssigkeiten. • Benutzen Sie zur Reinigung kein Spülmittel, Gas, Benzin oder andere Lösungsmittel, um das Gerät nicht zu beschädigen.
  • Seite 9: Technical Data

    Dear Customer, Congratulations on purchasing this device. Please read the following instructions carefully and follow them to prevent possible damages. We assume no liability for damage caused by disregard of the instructions and improper use. Scan the QR code to get access to the latest user manual and more product information.
  • Seite 10: Safety Instructions

    SAFETY INSTRUCTIONS • Packaging materials (plastic bags, polystyrene, staples etc.) Must be kept out of the reach of children as they could be hazardous. • Children over the age of 8 and persons with reduced physical, sensory or mental capabilities or those with a lack of experience and knowledge may only use the device if they are instructed on how to do so by a person responsible for their safety, or if they are supervised and understand the hazards associated with the use of the device.
  • Seite 11: Product Overview

    • Do not hang the fan on the wall or ceiling unless this type of installation is provided and explained in this manual. • Place the device at a proper distance from the objects or surrounding walls making sure that its functioning will not cause accidental damages. •...
  • Seite 12 ASSEMBLING Assembling the base Loosen the screw (16) attached to the bottom of the outer tube (14). Slide the inner tube (12) into the outer tube and secure the tubes to the base with the screw. Place the motor housing (8) on the inner tube and secure it with the screws provided. Make sure the motor is firmly seated on the inner tube.
  • Seite 13 Operating indicator TIMER key SWING indicator light ON (ON) and speed (SPEED) Speed indicator High (high) SWING button Medium (mid) Low (low) TIMER display OFF button (OFF) 0.5h / 1h / 2h / 4h Commissioning and Operation Connect the device to a power outlet. The power indicator (A) turns on. Switch on the unit by pressing the ON/SPEED key (F) on the control panel.
  • Seite 14: Cleaning And Care

    CLEANING AND CARE • Always unplug the unit before moving or servicing. • Do not immerse the power cord, plug and the whole unit into water or rinse under the tap. • Do not use detergent, gasoline, benzene, thinner, or other solvents to clean the unit to avoid damage of the appliance.
  • Seite 15: Datos Técnicos

    Estimado cliente: Le felicitamos por la adquisición de este producto. Lea atentamente el siguiente manual y siga cuidadosamente las instrucciones de uso con el fin de evitar posibles daños. La empresa no se responsabiliza de los daños ocasionados por un uso indebido del producto o por haber desatendido las indicaciones de seguridad.
  • Seite 16: Indicaciones De Seguridad

    INDICACIONES DE SEGURIDAD • Los niños podrían provocarse lesiones con el material de embalaje y los artículos viejos. Por ello, deseche el material de embalaje inmediatamente. • Los niños mayores de 8 años y las personas con discapacidad física, sensorial o psíquica, o con falta de experiencia y conocimientos pueden utilizar el aparato si han sido previamente instruidos por su tutor o supervisor sobre el funcionamiento del mismo y conocen las funciones, las indicaciones de...
  • Seite 17: Visión General Del Aparato

    • No cuelgue el aparato del techo o de una pared a menos que se haya concebido para ese tipo de instalación. • Deje suficiente espacio alrededor del aparato con respecto a paredes, mobiliario u otros objetos para obtener el mejor rendimiento posible. •...
  • Seite 18 MONTAJE Montaje de la base Suelte el tornillo (16) que está fijado al tubo exterior (14). Deslice el tubo interior (12) en el interior del tubo ex- terior y fije ambas piezas a la base con el tornillo. Coloque la carcasa del motor (8) sobre el tubo interior y fíjela con los tornillos incluidos.
  • Seite 19 Indicador de funcionamiento Botón TIMER Indicador luminoso SWING ON y velocidad Indicador de velocidad Alta (high) Botón SWING Media (mid) Baja (low) Indicador TIMER Botón OFF 0.5h/1h/2h/4h Puesta en marcha y uso Conecte el aparato a una toma de corriente. El indicador de funcionamiento (A) se enciende.
  • Seite 20: Limpieza Y Cuidado

    LIMPIEZA Y CUIDADO • Desenchufe el aparato antes de limpiarlo. • Nunca sumerja el aparato, el cable de alimentación ni el enchufe en agua ni en ningún otro líquido. • No utilice detergentes, gas, gasolina u otros productos de limpieza para limpiar el aparato.
  • Seite 21: Fiche Technique

    Chère cliente, cher client, Toutes nos félicitations pour l’acquisition de ce nouvel appareil. Veuillez lire attentivement et respecter les instructions de ce mode d’emploi afin d’éviter d’éventuels dommages. Le fabricant ne saurait être tenu pour responsable des dommages dus au non-respect des consignes de sécurité et à la mauvaise utilisation de l’appareil.
  • Seite 22: Consignes De Sécurité

    CONSIGNES DE SÉCURITÉ • Les matériaux d‘emballage et les vieux appareils peuvent blesser les enfants. Jetez le matériel d‘emballage immédiatement. • Les enfants âgés de plus de 8 ans et les personnes ayant des capacités physiques, sensorielles ou mentales réduites ou dénués d‘expérience et de connaissances ne doivent utiliser l‘appareil que si la personne responsable de leur sécurité...
  • Seite 23: Aperçu De L'appareil

    • Ne suspendez pas l‘appareil au plafond ou au mur sauf s‘il est conçu pour cette utilisation. • Laissez suffisamment d‘espace entre l‘appareil et les murs, meubles ou tout autre équipement afin d‘obtenir les meilleures performances possibles. • N‘utilisez pas l‘appareil à proximité de cuisinières à gaz ou d‘appareils de chauffage au gaz.
  • Seite 24 MONTAGE Montage de la base Dévisser la vis (16) fixée en bas du tube extérieur (14). Introduire le tube intérieur (12) dans le tube extérieur et fixer les tubes au socle avec la vis. Placer le boîtier du moteur (8) sur le tube intérieur et le fixer avec les vis fournies. S’assurer que le moteur est bien fixé...
  • Seite 25 Témoin de fonctionnement Touche TIMER MARCHE (ON) et Témoin lumineux SWING vitesse (SPEED) Voyant de vitesse Haut (high) Touche SWING Moyen (mid) Bas (low) Voyant TIMER Touche d’arrêt (OFF 0,5 h / 1 h / 2 h / 4 h Mise en marche et utilisation Brancher l’appareil à...
  • Seite 26: Nettoyage Et Entretien

    NETTOYAGE ET ENTRETIEN • Toujours débrancher l’appareil avant de le nettoyer. • Ne jamais plonger entièrement la fiche d’alimentation, le cordon d’alimentation ou l’appareil dans l’eau ou tout autre liquide. • Ne pas utiliser de liquide vaisselle, de gaz, d’essence ou tout autre solvant pour nettoyer l’appareil, afin de ne pas l’endommager.
  • Seite 27 Gentile cliente, La ringraziamo per aver acquistato il dispositivo. La preghiamo di leggere attentamente le seguenti istruzioni per l’uso e di seguirle per evitare possibili danni tecnici. Non ci assumiamo alcuna responsabilità per danni scaturiti da una mancata osservazione delle avvertenze di sicurezza e da un uso improprio del dispositivo.
  • Seite 28: Avvertenze Di Sicurezza

    AVVERTENZE DI SICUREZZA • I bambini possono ferirsi con materiali d’imballaggio e vecchi dispositivi. Smaltire immediatamente tutti i materiali d’imballaggio. • Questo dispositivo può essere utilizzato dai bambini maggiori di 8 anni e dalle persone con limitate capacità fisiche, sensoriali o mentali o da persone con esperienza e conoscenze insufficienti, solo se sono stati informati sulle funzioni del dispositivo e sono consapevoli dei rischi e dei pericoli connessi.
  • Seite 29: Descrizione Del Dispositivo

    • Non appendere il dispositivo alla parete o al soffitto, a meno che non sia adatto a questo tipo di utilizzo. • Lasciare abbastanza spazio libero tra il dispositivo e pareti, mobili o altri dispositivo, in modo da ottenere le migliori prestazioni possibili. •...
  • Seite 30 ASSEMBLAGGIO Assemblare la base Svitare la vite (16) che si trova in basso sul tubo esterno (14). Inserire il tubo interno (12) nel tubo esterno e fissare i tubi alla base utilizzando la vite. Mettere l´alloggiamento del motore (8) sul tubo interno e fissarlo utilizzando le viti incluse nella consegna.
  • Seite 31 Spia di alimentazione Tasto TIMER Accensione (ON) e velocità Spia SWING (SPEED) Spia velocità Elevata (high) Tasto SWING Centrale (mid) Bassa (low) Spia TIMER Tasto spegnimento (OFF) 0.5h / 1h / 2h / 4h Messa in funzione e utilizzo Collegare il dispositivo ad una presa. La spia di alimentazione (A) si accende. Accendere il dispositivo premendo il tasto ON/SPEED (F) sul pannello dei comandi.
  • Seite 32: Pulizia E Manutenzione

    PULIZIA E MANUTENZIONE • Disinserire sempre la spina dalla presa di corrente prima di eseguire la pulizia del dispositivo. • Non immergere la spina, il cavo di alimentazione o l’intero dispositivo in acqua o altri liquidi. • Per la pulizia non utilizzare prodotti detergenti, gas, benzine o altri solventi che possono danneggiare il dispositivo.

Diese Anleitung auch für:

100314511003145210031453

Inhaltsverzeichnis