Herunterladen Inhalt Inhalt Diese Seite drucken

Werbung

Verfügbare Sprachen
  • DE

Verfügbare Sprachen

  • DEUTSCH, seite 1
DC2000
Bedienungsanleitung
User's Manual
Manuel de l'utilisateur
Manuale utente
Manual de instrucciones
Handleiding
Please read carefully before using this equipment.
DEUTSCH
ENGLISH
FRANÇAIS
ITALIANO
ESPAÑOL
NEDERLANDS

Werbung

Inhaltsverzeichnis
loading

Inhaltszusammenfassung für switel DC2000

  • Seite 1 DC2000 Bedienungsanleitung User‘s Manual Manuel de l‘utilisateur Manuale utente Manual de instrucciones Handleiding DEUTSCH ENGLISH FRANÇAIS ITALIANO ESPAÑOL NEDERLANDS Please read carefully before using this equipment.
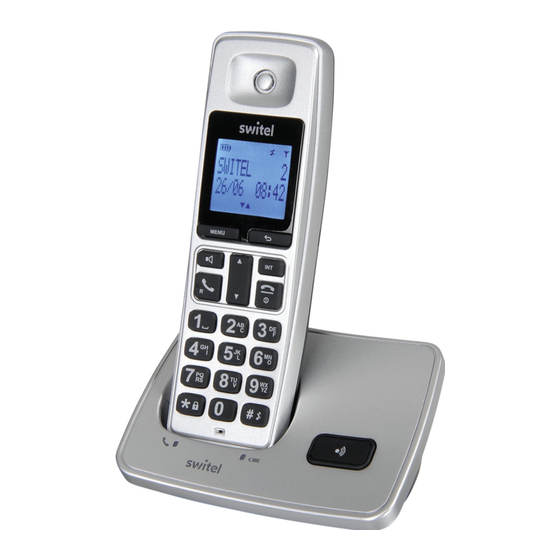
  • Seite 2 Übersicht Hörer Display Zurück/Löschen/ Menü/OK MENU Stumm/Wahlwiederholung Freisprechen Intern Navigationstaste =Anrufliste Auflegetaste = Telefonbuch Anruftaste/R-Taste Tastensperre Tonruf aus Ruftaste Paging Betriebsanzeige/ Ladeanzeige Leitung belegt...
  • Seite 3: Installation

    Installation Verpackungsinhalt 1 Basisstation 1 Mobilteil 2 NiMH-Akkus, 1,2 V, 300 mAh 1 Steckernetzgerät 1 Telefonkabel 1 Bedienungsanleitung Anschluss Basisstation Akkus einlegen Drücken Schieben Entfernen Sie den Akkufachdeckel und legen Sie die Akkus in das Akkufach. Beachten Sie die korrekte Polarität! Schließen Sie das Akkufach wieder. Mobilteil laden Vor der ersten Inbetriebnahme laden Sie bitte das Mobilteil für mindestens 16 Stunden auf.
  • Seite 4: Bedienung

    Bedienung Tastenfunktionen * eingeben. Im Ruhezustand drücken und halten um Tasten- sperre ein-/auszuschalten. Während eines Gesprächs drücken und halten um zwischen Tonwahl und Pulswahl umzuschalten. Im Ruhezustand drücken und gedrückt halten um den Tonruf ein-/auszuschalten. Bei Texteingabe drücken und halten um zwi- schen „ABC“...
  • Seite 5: Namen/Rufnummern Eingeben

    Displaysymbole Verbindungsanzeige. Blinkt, wenn Mobilteil außer Reichweite. Freisprechen (Lautsprecher) ist eingeschaltet. Neue Einträge in der Anrufliste. Akkuladezustand: = voll / = fast leer. Zusätzlich ein Warnton jede Minute während eines Gesprächs. Die Alarmfunktion ist programmiert und eingeschaltet. Leitung ist belegt. Blinkt bei eintreffenden Anrufen. Tonruf ist ausgeschaltet.
  • Seite 6 Menüstruktur TELEFONBUCH NUM.HINZUFÜ. EINTR ANZEIG ALLE LÖSCHEN KURZWAHL UHR/WECKER DATUM & ZEIT WECKER ALARMTON PERS. EINST. MOBIL. TÖNE MOBIL. NAME AUTO ANNAHME AUTO AUFLEG. SPRACHE RAUMÜBERW. BELEUCHTUNG ERW. EINST. FLASH-ZEIT WAHLVERFAHR. ANRUFSPERRE EASY CALL ANMELDEN ABMELDEN RÜCKSETZEN VORWAHL LÄNDERWAHL AUFSCHALTEN ECO MODUS ECO PLUS...
  • Seite 7: Datum Und Zeit Einstellen

    Erste Inbetriebnahme 1 Nach dem Einlegen der Akkus zeigt das Display “Willkommen” in verschie- denen Sprachen. , wählen Sie mit der Navigationstaste ▲/▼ das Land 2 Drücken Sie MENU aus und drücken Sie MENU 3 Drücken Sie zur Bestätigung noch einmal MENU Datum und Zeit einstellen 1 Drücken Sie...
  • Seite 8 Lauthören/Freisprechen 1 Drücken Sie während eines Gesprächs 2 Zum Ausschalten drücken Sie noch einmal. Wahlwiederholung 1 Drücken Sie , um die Wahlwiederholliste zu öffnen. 2 Wählen Sie einen Eintrag und drücken Sie die Gesprächstaste. Lautstärke einstellen 1 Drücken Sie während eines Gesprächs die Navigationstaste ▲/▼. Stummschaltung (Mikrofon aus) 1 Drücken Sie auf , um das Mikrofon auszuschalten.
  • Seite 9 Telefonbuch Neuen Eintrag anlegen 1 Drücken Sie , wählen Sie TELEFONBUCH und drücken Sie MENU MENU 2 Wählen Sie NUM.HINZUFÜ. und drücken Sie MENU 3 Geben Sie den Namen ein und drücken Sie MENU 4 Geben Sie die Rufnummer ein und drücken Sie MENU 5 Wählen Sie eine Gruppe für diesen Eintrag und drücken Sie MENU...
  • Seite 10 Anrufliste Einträge ansehen und anrufen 1 Drücken Sie ▲. 2 Wählen Sie einen Eintrag. 3 Drücken Sie die Gesprächstaste, um den Anrufer anzurufen. Einträge bearbeiten 1 Drücken Sie ▲. 2 Wählen Sie einen Eintrag aus und drücken Sie MENU Sie können den Eintrag ändern, im Telefonbuch speichern, löschen oder die komplette Liste löschen.
  • Seite 11: Persönliche Einstellungen

    5 Meldet sich der interne Partner nicht oder wollen Sie die Weiterleitung ab- brechen, drücken Sie noch einmal Hinweis: - Wenn einer der Teilnehmer die Konferenz verlässt, bleiben die anderen weiterhin verbunden. Alarm (Weckfunktion) Ein aktiver Alarm wird im Display durch das Symbol angezeigt. Weckzeit einstellen 1 Drücken Sie , wählen Sie UHR/WECKER und drücken Sie...
  • Seite 12 Displaysprache (PERS. EINST. -> SPRACHE) Auswahl der Sprache für die Displayanzeige. Raumüberwachung (PERS. EINST. -> RAUMÜBERW.) (nur bei mehreren geeigneten Mobilteilen an derselben Basis) Wenn eingeschaltet, kann dieses Mobilteil in den Raum gebracht werden, den Sie überwachen möchten. Nur das Mikrofon ist eingeschaltet. Niemand in diesem Raum kann Sie hören.
  • Seite 13 Die geforderte PIN ist im Auslieferungszustand „0000“. Easy Call kann erst eingeschaltet werden, wenn eine Rufnummer program- miert ist. Zum Ausschalten des Easy Call drücken Sie die Auflegetaste und schalten Sie die Funktion aus. Basis auswählen (ERW. EINST. -> ANMELDEN -> BASIS-WAHL) Ist das Mobilteil an mehreren Basistationen angemeldet, können Sie die aktive Basis auswählen.
  • Seite 14: Weiteres Mobilteil Anmelden

    1 Drücken Sie die Ruftaste an der Basisstation für ca. 3 s. 2 Führen Sie nun an dem neuen Mobilteil die notwendigen Schritte zur An- meldung durch (s. entsprechende Bedienungsanleitung). Beispiel DC2000: Drücken Sie , wählen Sie ERW. EINST. und drücken Sie...
  • Seite 15: Sicherheitshinweise

    Anhang Sicherheitshinweise • Lesen Sie die Anweisungen in diesem Handbuch sorgfältig durch. Bewah- ren Sie es für zukünftigen Gebrauch auf. • Lesen und befolgen Sie alle Warn- und Gebrauchsanweisungen am Gerät selbst. • Verwenden Sie nur die mitgelieferten Netzteile, da andere Netzteile die Ge- räte beschädigen können.
  • Seite 16: Konformitätserklärung

    Dieses Gerät erfüllt die Anforderungen der EU−Richtlinie: 2014/53/EU. Die Konformität mit der o. a. Richtlinie wird durch das CE−Zeichen auf dem Gerät bestätigt. Für die komplette Konformitätserklärung nutzen Sie bitte den kostenlosen Download von unserer Website www.switel.com. Telgo AG, Route D’Agy 16, 1763 Granges-Paccot, Switzerland...
  • Seite 17: Technische Daten

    Herstellers beruhen. Sollte Ihr Gerät dennoch einen Defekt innerhalb der Ga- rantiezeit aufweisen, wenden Sie sich bitte unter Vorlage Ihrer Kaufquittung ausschließlich an das Geschäft, in dem Sie Ihr SWITEL-Gerät gekauft haben. Alle Gewährleistungsansprüche nach diesen Bestimmungen sind ausschließ- lich gegenüber Ihrem Fachhändler geltend zu machen.
  • Seite 18 At a glance Speaker Display Back/Delete/ Menu/OK MENU Mute/Redial Hands-free Internal Navigation key =Calls list End call key = Phonebook Talk key/Flash key Keypad lock Ringer off Find handset/ Paging Power indicator/ Charge indicator In use LED...
  • Seite 19 Set up your phone system Package contents 1 Base station 1 Cordless handset 2 NiMH-Akkus, 1,2 V, 300 mAh 1 Adapter 1 Line cord 1 User’s manual Connection the base station Installing the batteries Press down Slide Remove the battery compartment cover and insert the batteries into the battery compartment.
  • Seite 20: Using The Phone

    Using the phone Key functions To enter *. Press and hold to turn on/off keypad lock function. During a call, press and hold to toggle between tone dialing and pulse dialing. In standby mode, press and hold to turn the ringer on / off. When entering text, press and hold to toggle between "ABC"...
  • Seite 21: Display Icons

    Display icons Link indicator. Flashes when handset out of range. Indicates the handsfree function is enabled. New entries in the calls list. Battery charge level: = full / = nearly empty. In addition, a warning tone every minute during a conversation. Alarms set to ring at a specified time.
  • Seite 22 Menu structure map PHONEBOOK NEW ENTRY LIST ENTRY DELETE ALL DIRECT MEM CLOCK/ALARM DATE & TIME SET ALARM ALARM TONE PERSONAL SET HANDSET TONE HANDSET NAME AUTO PICK-UP AUTO HANG-UP LANGUAGE ROOM MONITOR BACKLIGHT ADVANCED SET RECALL TIME DIAL MODE CALL BARRING EASY CALL REGISTRATION...
  • Seite 23: First Commissioning

    First commissioning 1 After inserting the batteries, the display shows "Welcome" in different languages. , use the navigation keys ▲/▼ to select your country and 2 Press MENU press MENU 3 Press again to confirm. MENU Setting date and time 1 Press , select CLOCK/ALARM and press MENU...
  • Seite 24: Setting The Volume

    Hands-free 1 Press during a call. 2 To turn off the speakerphone, press again. Redial 1 Press to open the redial list. 2 Select an entry and press the Talk key. Setting the volume 1 Whilst in a call press the navigation keys ▲/▼. Mute (microphone off) 1 Press to mute the microphone.
  • Seite 25 Phonebook Storing a new entry 1 Press , select PHONEBOOK and press MENU MENU 2 Select NEW ENTRY and press MENU 3 Enter the name and press MENU 4 Enter the telephone number and press MENU 5 Select a group for this entry and press MENU Note: You can assign individual entries to specific groups of your choice.
  • Seite 26 Call log Viewing entries and calling 1 Press ▲. 2 Select an entry. 3 Press the Talk key to call the telephone number. Editing entries 1 Press ▲. 2 Select an entry and press MENU You can edit, save to phonebook or delete the entry or delete the entire list. Redial Viewing entries and calling 1 Press...
  • Seite 27: Personal Settings

    5 If the internal partner does not answer, or if you want to cancel the transfer, press again. Note: - If one of the participants leaves the conference, the others remain connected. Alarm An active alarm is indicated in the display by the symbol. Set alarm time 1 Press , select CLOCK/ALARM and press...
  • Seite 28: Advanced Settings

    Display language (PERSONAL SET -> LANGUAGE) Select the language for the display. Room monitor (PERSONAL SET -> ROOM MONITOR) (only with several suitable handsets at the same base) If set to on, this handset can be brought into the room you want to monitor. Only the microphone is switched on.
  • Seite 29 Select base (ADVANCED SET -> REGISTRATION -> SELECT BASE) If the handset is registered to several base stations, you can select the active base. Change PIN (ADVANCED SET -> PIN) The 4-digit PIN is used to register or deregister a handset and in some settings.
  • Seite 30: Registering A New Handset

    1 Press the paging button on the base station for approx. 3 seconds. 2 Now perform the necessary steps for the registration of the new handset (see respective user manual). Example DC2000: Press , select ADVANCED SET and press MENU...
  • Seite 31 Appendix Safety notes • Read the instructions in this handbook carefully. Be sure to save it for future reference. • Read and follow all warning and instruction labels on the equipment itself. • Be sure to use only the power supply in the package, and ensure that your power source matches the rating listed for it.
  • Seite 32 Conformity with the above mentioned directive is confirmed by the CE symbol on the device. To view the complete Declaration of Conformity, please refer to the free download available on our website www.switel.com. Telgo AG, Route D’Agy 16, 1763 Granges-Paccot, Switzerland...
  • Seite 33: Technical Data

    SWITEL equipment together with the purchase receipt. All rights to claims under the terms of guarantee in accordance with this agreement must be asserted exclusively with regard to your sales outlet.
  • Seite 34 Aperçu Écouteur Écran Retour / supprimer / Menu / OK MENU muet / recomposer Mains libres Touche interne Touche de navigation = Historique appels Touche Raccrocher = Répertoire Touche conversation / touche R Blocage clavier Désactivation sonnerie Touche Appel Paging Témoin de fonctionnement / Indicateur de charge ligne occupée...
  • Seite 35: Contenu De L'emballage

    Installation Contenu de l’emballage 1 station de base 1 combiné 2 piles NiMH, 1,2 V, 300 mAh 1 adaptateur secteur 2 câble téléphonique 1 mode d'emploi Raccorder la station de base Insérer les piles Appuyer Faire glisser Retirez le couvercle du compartiment à piles et insérez les piles. Respectez la polarité...
  • Seite 36 Utilisation Fonctions des touches (appareil de bureau) Saisir *. Appuyer et maintenir appuyée la touche pour activer ou désactiver le verrouillage des touches. Au cours d’un appel, maintenez la touche enfoncée pour basculer entre la numérotation vocale et la numérotation par impulsions. Appuyer et maintenir appuyée en mode repos afin d’activer ou de désactiver la numérotation vocale.
  • Seite 37: Symbole De L'écran

    Symbole de l’écran Indicateur de communication. Clignote lorsque le combiné est hors de portée. Le mode mains-libres (haut-parleur) est activé. Nouvelles entrées dans la liste des appels. Niveau de charge de la pile : = pleine / = presque vide. Bip d’avertissement toutes les minutes au cours d’un appel.
  • Seite 38 Structure du menu REPERTOIRE AJOUTER NUM. LISTE TOUT SUPPR. MEM. DIRECTE HORL./REVEIL DATE & HEURE REGLER REV. MELODIE REV. PERSONNALIS. SONNERIES NOM COMBINE DECROCH AUTO RACCROC AUTO LANGUE SURV.CHAMBRE ECLAIRAGE REG. AVANCES DUREE FLASH MODE NUM. BLOCAGE APPEL FACILE SOUSCRIPTION DESOUSCRIRE REINITIALIS.
  • Seite 39: Première Mise En Service

    Première mise en service 1 Lorsque les piles sont introduites, le message « Bienvenue » apparait à l’écran dans différentes langues. et sélectionnez avec la touche de navigation ▲/▼ 2 Appuyez sur MENU le pays, appuyez sur MENU 3 Validez en appuyant une nouvelle fois sur MENU 4 Si vous avez sélectionné...
  • Seite 40 Accepter la conversation 1 Appuyez sur la touche de conversation. 2 Pour terminer, appuyez sur la touche Raccrocher ou placez le combiné sur la station de base. Haut-parleur/Mains-libres 1 Au cours d’un appel, appuyez sur 2 Pour désactiver, appuyez une nouvelle fois sur Répétition du dernier numéro composé...
  • Seite 41 Répertoire Enregistrer une nouvelle entrée 1 Appuyez sur , sélectionnez REPERTOIRE et appuyez sur MENU MENU 2 Sélectionnez AJOUTER NUM. et appuyez sur MENU 3 Saisissez le nom et appuyez sur MENU 4 Saisissez le numéro et appuyez sur MENU 5 Sélectionnez un groupe pour cette entrée et appuyez sur MENU Remarque : vous pouvez affecter des entrées à...
  • Seite 42 Liste des appels Visualiser des entrées et appeler 1 Appuyez sur ▲. 2 Sélectionnez une entrée. 3 Appuyez sur la touche de conversation pour appeler l'appelant. Éditer des entrées 1 Appuyez sur ▲. 2 Sélectionnez une entrée et appuyez sur MENU Vous pouvez modifier, sauvegarder dans le répertoire, supprimer l’entrée ou supprimer la liste complète.
  • Seite 43: Réglages Personnalisés

    5 Si le partenaire interne ne répond pas ou vous souhaitez interrompre le transfert, appuyez encore une fois sur Avis important : - Lorsqu’un des participants quitte la conférence, les autres continuent d’être connectés. Alarme (fonction de réveil) Une alarme activée est indiquée sur l’écran par un symbole. Régler le réveil 1 Appuyez sur , sélectionnez HORL./REVEIL et appuyez sur...
  • Seite 44: Paramètres Avancés

    Langue affichage (PERSONNALIS. -> LANGUE) Sélection de la langue de l’affichage. Surveillance de pièce (PERSONNALIS. -> SURV.CHAMBRE) (uniquement si plusieurs combinés sont affectés à une même base) Lorsqu’il est allumé, vous pouvez déposer ce combiné dans la pièce que vous souhaitez surveiller. Seul le micro est activé. Personne ne peut vous entendre dans la pièce.
  • Seite 45 Easy Call ne peut être activé que dans la mesure où un numéro a été programmé. Pour désactiver la fonction Easy Call, appuyez sur la touche Raccrocher. Sélectionner la base (REG. AVANCES -> SOUSCRIPTION -> SELECT. BASE) Si le combiné est affecté à plusieurs bases, vous pouvez sélectionner la base active.
  • Seite 46: Supprimer Un Combiné

    1 Appuyez sur la touche d’appel à la station de base pendant env. 3 sec. 2 Suivez ensuite les étapes nécessaires pour enregistrer le nouveau combiné (voir la notice d’utilisation respective). Exemple DC2000 : Appuyez sur , sélectionnez REG. AVANCES et appuyez sur...
  • Seite 47: Indications De Sécurité

    Annexe Indications de sécurité • Lisez ce mode d’emploi entièrement avec soin et conservez-le bien. • Lisez et suivez tous les avertissements et le mode d'emploi sur l'appareil lui-même. • N’utilisez que les blocs d'alimentation livrés, car d'autres blocs d'alimentation peuvent endommager les appareils. •...
  • Seite 48 2014/53/EU. La conformité avec la directive citée ci-avant est confirmée par le marquage CE apposé sur cet appareil. Pour obtenir la déclaration de conformité complète, veuillez la télécharger gratuitement sur notre site internet : www.switel.com. Telgo AG, Route D’Agy 16, 1763 Granges-Paccot, Switzerland...
  • Seite 49: Caractéristiques Techniques

    Si votre appareil comporte cependant un défaut pendant la période de garantie, veuillez vous adresser exclusivement au magasin dans lequel vous avez acheté votre appareil SWITEL en présentant votre bon d’achat. Tous les droits de garantie basés sur ces dispositions ne peuvent être revendiqués qu’auprès de votre revendeur.
  • Seite 50 Panoramica Ricevitore Display Indietro/cancella/ Menù/OK MENU muto/richiama Vivavoce Interno Tasti di navigazione = Registro chiamate Tasto di fine chiamata = Rubrica telefonica Tasto chiamata/ Tasto R Blocco tasti Suoneria off Tasto chiamat Paging Indicatore di stato/ Indicatore di carica linea occupata...
  • Seite 51: Installazione

    Installazione Contenuto della confezione 1 stazione base 1 unità mobile 2 batterie ricaricabili NiMH, da 1,2 V, 300 mAh 1 alimentatore 1 cavo telefonico 1 istruzioni per l’uso Collegamento della stazione base Inserimento delle batterie ricaricabili Premere Spingere Rimuovere il coperchio del vano batteria e inserire le batterie nel vano. Osservare la corretta polarità.
  • Seite 52: Funzioni Dei Tasti

    Funzioni dei tasti Inserimento *. Premere e tenere premuto per attivare/ disattivare il blocco tastiera. Premere tenere premuto durante una conver - sazione per commutare tra selezione a toni e selezione a impulsi. In standby, premere e tenere premuto per accendere/spegnere la suoneriaQuando si inserisce il testo premere e tenere premuto.
  • Seite 53: Simboli Sul Display

    Simboli sul display Indicatore di collegamento Lampeggia quando l’unità portatile è fuori portata. Il vivavoce (altoparlante) è attivo. Nuove voci nel registro chiamate. Stato di carica della batteria: : = carica / = quasi scarica. Inoltre un tono di avviso ogni minuto durante la conversazione.
  • Seite 54 Struttura del menu RUBRICA AGG NUMERO LISTA ELIM. TUTTI MEM DIRETTA OROL/SVEGLIA DATA E ORA IMP. SVEGLIA TONI SVEGLIA PERSONALIZZA TONI RICEV. NOME RICEV. RIS CH. AUTO CHIUD.CH.AUT LINGUA MONIT.STANZA ILLUMINAZ. IMP AVANZATE AVVISO RICH. MODAL CHIAM FILTRO CHIAM CHIAM. FAC. REGISTRAZ SCOLLEGARE REIMPOSTA.
  • Seite 55: Prima Messa In Servizio

    Prima messa in servizio 1 Dopo aver inserito le batterie, il display mostra "Benvenuto" in diverse lingue. , selezionare il paese con il tasto di navigazione ▲/▼ e 2 Premere MENU premere MENU 3 Premere ancora una volta per confermare. MENU 4 Se avete scelto “SCHWEIZ”, la lingua del menù...
  • Seite 56 Accettazione di una chiamata 1 Premere brevemente il tasto di conversazione. 2 Per terminare la chiamata, premere il tasto di riaggancio oppure posizionare l’unità mobile sulla stazione fissa. Ascolto ad alta voce/vivavoce 1 Premere durante una conversazione 2 Per spegnere premere ancora una volta.
  • Seite 57 Rubrica Memorizzazione di un nuovo contatto 1 Premere , selezionare RUBRICA e premere MENU MENU 2 Selezionare AGG NUMERO e premere MENU 3 Inserire il nome e premere MENU 4 Inserire il numero telefonico e premere MENU 5 Selezionare un gruppo per tale contatto e premere MENU Avvertenza: È...
  • Seite 58 Registro chiamate Consultazione e chiamata di contatti 1 Premere ▲. 2 Selezionare un elenco. 3 Premere il tasto di conversazione per chiamare il chiamante. Modifica di contatti 1 Premere ▲. 2 Selezionare un contatto e premere MENU È possibile modificare, salvare nella rubrica o eliminare il contatto oppure eliminare l’intero elenco.
  • Seite 59: Impostazioni Personali

    5 Qualora il partner interno non risponda o si desideri interrompere l'inoltro, premere nuovamente Avvertenza: - Se uno dei partecipanti lascia la conferenza, gli altri continuano a restare connessi. Allarme (funzione sveglia) Un allarme attivo viene indicato sul display tramite il simbolo. Impostare l’ora della sveglia 1 Premere , selezionare OROL/SVEGLIA e premere...
  • Seite 60 Lingua display (PERSONALIZZA -> LINGUA) Selezione della lingua per l’indicatore del display. Monitoraggio stanza (PERSONALIZZA -> MONIT.STANZA) (solo con più unità portatili idonee nella stessa base) Quando è accesa, questa unità portatile può essere posizionata nella stanza che si desidera monitorare. È acceso solo il microfono. Nessuno nella stanza può...
  • Seite 61 Easy Call può essere attivato solo se è stato programmato un numero di chiamata. Per disattivare la funzione Easy Call, premere il tasto di fine chiamata e disattivare la funzione. Seleziona base (IMP AVANZATE -> REGISTRAZ -> SELEZ BASE) Se il portatile è registrato su diverse stazioni base, è possibile selezionare la base attiva.
  • Seite 62 è già collegata e ha il numero interno 1. 1 Premere il tasto chiamata della stazione fissa per ca. 3 sec. 2 Eseguire quindi sull’unità mobile i passaggi necessari per la registrazione (v. relative istruzioni per l’uso). Esempio DC2000: Premere , selezionare IMP AVANZATE e premere MENU...
  • Seite 63: Indicazioni Di Sicurezza

    Allegato Indicazioni di sicurezza • Leggere attentamente le istruzioni per l’uso e conservarle con cura. • Leggere e attenersi a tutte le istruzioni sulla sicurezza e per l'uso sull’apparecchio stesso. • Usare solo gli alimentatori in dotazione, poiché gli alimentatori diversi possono danneggiare l’apparecchio.
  • Seite 64 Quest'apparecchio corrisponde ai requisiti della direttiva UE: 2014/53/EU. La conformità con la direttiva sopra citata viene confermata con il simbolo CE sull'apparecchio. La dichiarazione di conformità completa la puo scaricare gratuitamente dal nostro sito web allo www.switel.com. Telgo AG, Route D’Agy 16, 1763 Granges-Paccot, Switzerland...
  • Seite 65: Dati Tecnici

    Se il Suo apparecchio dovesse evidenziare un difetto durante il periodo di garanzia, La preghiamo di rivolgersi al negozio in cui ha acquistato il Suo apparecchio SWITEL, presentando il Suo scontrino di acquisto. Tutti i diritti di garanzia secondo queste normative sono da far valere esclusivamente presso il rivenditore specializzato.
  • Seite 66: Descripción General

    Descripción general Auricular Pantalla Atrás/Eliminar/ Menú/OK MENU Silencio/Rellamada Manos libres Interno Tecla navegación = Acceso lista llamada Fin llamada = Agenda telefónica Tecla llamada/Tecla R Bloqueo teclado Apagar tono llamada Tecla llamada Sincronización Indicador funcionamiento / Indicador de carga Línea ocupada...
  • Seite 67: Instalación

    Instalación Contenido del paquete 1 Estación base 1 Terminal inalámbrico 3 Baterías NiMH, 1,2 V, 300 mAh 1 Adaptador de red 1 Cable telefónico 1 Manual de instrucciones Conectar la estación base Introducir baterías Presionar Deslizar Retire la tapa del compartimiento de baterías e inserte las baterías en el compartimiento de la batería.
  • Seite 68: Funciones De Las Teclas

    Manejo Funciones de las teclas * introducir. Mantener pulsada para activar o desactivar el bloqueo de teclado. Durante una conversación mantenga pulsada la tecla para cambiar entre marcación por tonos y marcación por pulsos. Presione y mantenga presionado en modo reposo para activar y desactivar el tono de llamada.
  • Seite 69: Símbolos De La Pantalla

    Símbolos de la pantalla Indicador de conexión. Parpadea cuando el teléfono inalámbrico está fuera de alcance. Manos libres (altavoz) está encendido. Nuevas entradas en la lista de llamadas. Estado de carga de la batería: = lleno / = casi vacio. Adicionalmente, un tono de advertencia cada minuto durante una conversación.
  • Seite 70 Estructura del menú AGENDA AÑADIR NÓM LISTA ELIM. TODO MEM. DIRECTA RELOY/ALARMA FECHA/HORA AJUST ALARMA TONO ALARMA AJUSTES PERS TONOS TELÉF. NOMBRE TELÉF CONTEST AUTO CUELGUE AUTO IDIOMA MONITOR HABI LUZ DE FONDO AJUSTE AVANZ TIPO RELLAM. MODO MARCAC. BLOQUEO LLAM LLAMADA RÁP REGISTRO NO REGISTRO...
  • Seite 71: Primera Puesta En Marcha

    Primera puesta en marcha 1 Después de insertar las pilas aparece en pantalla el mensaje “Bienvenido” en diferentes idiomas. , wseleccione con la tecla de navegación ▲/▼ el país y 2 Presione MENU presione MENU 3 Para confirmar vuelva a presionar MENU Configurar fecha y hora 1 Pulse...
  • Seite 72 Escuchar por altavoz/hablar por manos libres 1 Presione durante una llamada 2 Para apagar presione nuevamente Rellamada 1 Presione la tecla , para abrir la lista de rellamada. 2 Seleccione una entrada y pulse la tecla de conversación. Configurar volumen 1 Durante la conversación presione la tecla de navegación ▲/▼.
  • Seite 73 Agenda telefónica Crear entrada nueva 1 Presione , seleccione AGENDA y presione MENU MENU 2 Seleccione AÑADIR NÓM y presione MENU 3 Introduzca el nombre y presione MENU 4 Introduzca el número de llamada y presione MENU 5 Seleccione un grupo para dicha entrada y presione MENU Advertencia: Puede organizar diferentes entradas de determinados grupos de su elección.
  • Seite 74 Lista de llamadas Ver y llamar a las entradas 1 Presione ▲. 2 Seleccione una entrada. 3 Pulse la tecla de llamada para llamar a la persona que llama. Editar entradas 1 Presione ▲. 2 Seleccione una entrada y presione MENU Puede cambiar, guardar en la agenda telefónica y eliminar la entrada o eliminar la lista entera.
  • Seite 75: Ajustes Personales

    5 Si el interlocutor interno no contesta y desea cancelar la transferencia, presione una vez más Consejo: - Si uno de los participantes abandona la conferencia los demás seguirán conectados. Alarma (función despertador) Una alarma activa se indica en la pantalla mediante el símbolo. Ajustar alarmas 1 Pulse , seleccione RELOY/ALARMA y presione...
  • Seite 76: Ajustes Avanzados

    Idioma de la pantalla (AJUSTES PERS -> IDIOMA) Selección del idioma para las indicaciones de la pantalla. Monitoreo de habitaciones (AJUSTES PERS -> MONITOR HABI) (Únicamente con varios teléfonos inalámbricos apropiados conectados a la misma base) Cuando dicha función está activada, puede colocar este teléfono inalámbrico en la habitación que desee monitorear.
  • Seite 77 Easy Call (AJUSTE AVANZ -> LLAMADA RÁP) Al estar esta función activada solo se puede marcar un número almacenado específico presionando en el teléfono inalámbrico cualquier tecla (excepto la tecla de colgar). El PIN requerido que viene de forma preestablecida es "0000". El Easy Call únicamente se puede activar si se ha registrado antes un número de teléfono.
  • Seite 78 1 Presione la tecla de llamada en la estación base unos 3 seg. 2 Realice ahora en el nuevo terminal inalámbrico los pasos necesarios para su registro (vea las instrucciones pertinentes). Por ejemplo DC2000: Pulse , seleccione AJUSTE AVANZ y presione...
  • Seite 79: Consejos De Seguridad

    Anexo Consejos de seguridad • Lea atentamente este manual y consérvelo para cualquier consulta futura. • Lea y siga todas las indicaciones de advertencias y funcionamiento en el mismo dispositivo. • Utilice solamente los adaptadores de corriente que se le proporcionan, ya que otros adaptadores de corriente podrían dañar los aparatos.
  • Seite 80 La conformidad con la directiva mencionada anteriormente se confirma mediante el símbolo CE que aparece en el dispositivo. Para acceder a la declaración de conformidad completa, utilice la descarga gratuita de nuestro sitio web www.switel.com. Telgo AG, Route D’Agy 16, 1763 Granges-Paccot, Switzerland...
  • Seite 81: Especificaciones Técnicas

    0˚C a 40˚C / 80% de humedad Garantía Los dispositivos SWITEL se fabrican utilizando los últimos procesos de producción y prueba. El uso de materiales cuidadosamente seleccionados y la aplicación de avanzadas tecnologías aseguran un funcionamiento sin problemas y una larga vida.
  • Seite 82 Overzicht Hoorn Display Terug/Wissen/ Menu/OK MENU Demping/Nummerherhaling Handsfree Intern Navigatietoets = Oproeplijst Opleg-toets = Telefoonboek Bel-toets/R-toets Toetsenvergrendeling Beltoon uit Paging-toets Bedrijfsindicator / Batterij-indicator Lijn bezet...
  • Seite 83: Basisstation Aansluiten

    Installatie Inhoud 1 basisstation 1 handset 3 NiMH-batterijen 1,2 V/ 300 mAh 1 adapter 1 telefoonkabel 1 gebruikshandleiding Basisstation aansluiten Batterijen plaatsen Drukken Schuiven Verwijder het deksel van het batterijvak en leg de batterijen erin. Let op de polariteit! Sluit het batterijvak. Handset laden Laat voordat u de telefoon voor het eerst gebruikt, de handset minstens 16 laden.
  • Seite 84 Bediening Toetsenfuncties (handset) * invoeren. Ingedrukt houden om toetsenvergrendeling in of uit te schakelen. Tijdens en gesprek ingedrukt houden om te schakelen tussen toonkiezen en pulskiezen. In ruststand ingedrukt houden om de beltoon in- of uit te schakelen. Tijdens het invoeren van tekst, ingedrukt houden om tussen „ABC“...
  • Seite 85 Pictogrammen Verbindingspictogram. Knippert wanneer de handset buiten bereik is. Handsfree bellen (luidspreker) is ingeschakeld. Nieuwe nummers in de oproeplijst. Batterijpeil: = vol / = bijna leeg. Bovendien klinkt tijdens een gesprek elke minuut een akoestisch signaal. De wekker is geprogrammeerd en ingeschakeld. De lijn is bezet.
  • Seite 86 Menuoverzicht TELEFOONBOEK NR. TOEVOEGEN INVOER LIJST ALLES WISSEN DIRECT GEH. KLOK/ALARM DATUM&TIJD ALARM INST. ALARMMELODIE PERS.INSTEL. HANDSET TOON HANDSET NAAM AUTO ANTW. AUTO OPHANG. TAAL KAMERBEWAAK VERLICHTING GEAVANC. INST FLASH TIJD KIESMODUS GESPR. BLOK. SNEL BELLEN AANMELDEN AFMELDEN RESET TOEST. VOORKIES NR.
  • Seite 87: Eerste Inbedrijfname

    Eerste inbedrijfname 1 Nadat de batterijen zijn geplaatst, verschijnt in de display “Welkom” in verschillende talen. 2 Druk op , selecteer het land met behulp van de navigatietoetsen MENU ▲/▼ en druk op MENU 3 Druk opnieuw op ter bevestiging. MENU Datum en tijd instellen 1 Druk op...
  • Seite 88 Via luidspreker/handsfree bellen 1 Druk tijdens een gesprek op 2 Om de functie uit te schakelen, drukt u opnieuw op Nummerherhaling 1 Druk op , om de oproeplijst te openen. 2 Kies een nummer en druk op de gesprekstoets. Volume instellen 1 Druk tijdens een gesprek op de navigatietoetsen ▲/▼.
  • Seite 89 Telefoonboek Een nieuw contact aanmaken 1 Druk op , selecteer TELEFOONBOEK en druk op MENU MENU 2 Selecteer NR. TOEVOEGEN en druk op MENU 3 Voer de naam in en druk op MENU 4 Voer het telefoonnummer in en druk op MENU 5 Selecteer een groep voor dit contact en druk op MENU...
  • Seite 90: Gesprek Doorverbinden / Conferentie

    Oproeplijst Nummers weergeven en bellen 1 Druk op ▲. 2 Selecteer een nummer. 3 Druk op de gesprekstoets om de beller te bellen. Gegevens bewerken 1 Druk op ▲. 2 Selecteer een nummer en druk op MENU U kunt een nummer wijzigen, in het telefoonboek opslaan of wissen, of de hele lijst wissen.
  • Seite 91: Persoonlijke Instellingen

    5 Als uw interne gesprekspartner zich niet meldt of u wilt het doorverbinden stoppen, druk dan opnieuw op Opmerking: - Wanneer een deelnemer het conferentiegesprek verlaat, blijven de andere deelnemers verbonden. Wekker Een pictogram in de display geeft aan dat de wekker geactiveerd is. 1 Druk op , selecteer KLOK/ALARM en druk op MENU...
  • Seite 92 Displaytaal (PERS.INSTEL. -> TAAL) Selecteer de taal voor weergave in het display. Kamerbewaking (PERS.INSTEL. -> KAMERBEWAAK) (alleen als meerdere compatibele handsets op hetzelfde basisstation zijn aangemeld) Wanneer deze functie ingeschakeld is, dan kunt u de handset in een kamer plaatsen die u wilt bewaken. Alleen de microfoon is ingeschakeld. Niemand in de kamer kan u horen.
  • Seite 93 geprogrammeerd is. Om Easy Call uit te schakelen, drukt u op de oplegtoets en schakelt u de functie uit. Basis selecteren (GEAVANC. INST -> AANMELDEN -> BASIS SELECT) Als uw handset op meerdere basisstations aangemeld is, kunt u de actieve basis selecteren.
  • Seite 94: Handset Afmelden

    1 Houd de gesprekstoets op het basisstation ongeveer 3 sec. ingedrukt. 2 Voer nu op de nieuwe handset die nodige stappen uit om de handset te registeren (zie de desbetreffende handleiding). Voorbeeld DC2000: Druk op , selecteer GEAVANC. INST en druk op...
  • Seite 95 Bijlage Veiligheidsaanwijzingen • Lees de gebruikshandleiding zorgvuldig door en bewaar ze voor toekomstige naslag. • Lees en volg alle waarschuwingen en gebruiksinstructies op het toestel zelf. • Gebruik uitsluitend de meegeleverde adapter, want andere adapters kunnen de toestellen beschadigen. • Blokkeer de toegang tot de adapter niet met meubels of andere voorwerpen.
  • Seite 96 Dit apparaat voldoet aan de Europese richtlijn: 2014/53/EU. De conformiteit met bovengenaamde richtlijn wordt bevestigd door het CE- kenteken op het apparaat. De volledige conformiteitsverklaring kunt u gratis downloaden van onze website www.switel.com. Telgo AG, Route D’Agy 16, 1763 Granges-Paccot, Switzerland...
  • Seite 97: Technische Specificaties

    Indien uw apparaat toch een defect vertoont binnen de garantieperiode, neemt u uitsluitend contact op met de handelszaak waar u het SWITEL-apparaat hebt gekocht, op vertoon van uw aankoopbewijs. Alle garantieclaims volgens deze bepaling kunnen enkel geldig worden gemaakt bij uw handelaar.
  • Seite 98 In the case of technical questions, please use the service form on our website: http://www.switel.com/en/product-information-technical-support/ En cas des questions téchniques, veuillez, s'il vous plaît utiliser le formulaire de service sur notre site: http://www.switel.com/fr/support-technique/ Per supporto tecnico compilare il seguente modulo sul nostro sito: http://www.switel.com/en/product-information-technical-support/...

Inhaltsverzeichnis