switel DC691 Bedienungsanleitung
Inhaltsverzeichnis
Verfügbare Sprachen
Verfügbare Sprachen
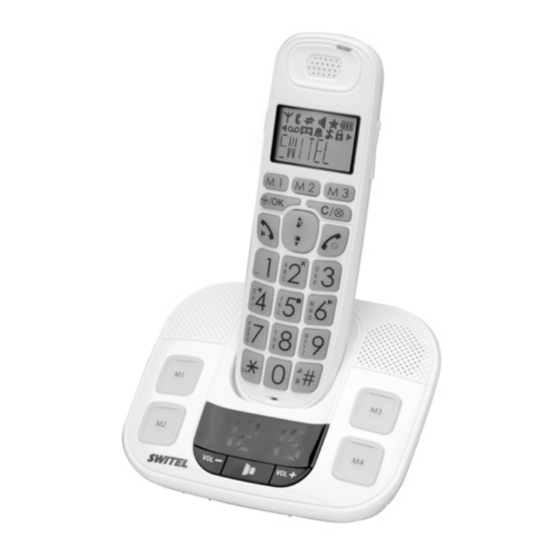
Schnurloses DECT−/GAP−Verstärker−Telefon mit XL−Tasten
Téléphone DECT/GAP sans fil, amplifié, avec touches XL
Telefono cordless con amplificatore DECT/GAP, tasti XL
Cordless DECT/GAP amplifier telephone with XL buttons
DC69x
Bedienungsanleitung
Mode d'emploi
Istruzioni per l'uso
Operating Instructions
Kapitel
Inhaltsverzeichnis

Verwandte Anleitungen für switel DC691


Inhaltszusammenfassung für switel DC691
- Seite 1 Schnurloses DECT−/GAP−Verstärker−Telefon mit XL−Tasten Téléphone DECT/GAP sans fil, amplifié, avec touches XL Telefono cordless con amplificatore DECT/GAP, tasti XL Cordless DECT/GAP amplifier telephone with XL buttons DC69x Bedienungsanleitung Mode d’emploi Istruzioni per l’uso Operating Instructions...
- Seite 2 Bedienungsanleitung ..Mode d’emploi ... . Istruzioni per l’uso ..Operating Instructions ..Declaration of Conformity .
-
Seite 3: Inhaltsverzeichnis
Inhaltsverzeichnis Sicherheitshinweise ....Telefon in Betrieb nehmen ... . Bedienelemente ....Einführende Informationen . -
Seite 4: Sicherheitshinweise
Sicherheitshinweise 1 Sicherheitshinweise Lesen Sie diese Bedienungsanleitung sorgfältig durch. Bestimmungsgemäße Verwendung Dieses Telefon ist geeignet zum Telefonieren innerhalb eines Telefonnetzes. Jede an- dere Verwendung gilt als nicht bestimmungsgemäß. Eigenmächtige Veränderungen oder Umbauten sind nicht zulässig. Öffnen Sie das Gerät in keinem Fall selbst und füh- ren Sie keine eigenen Reparaturversuche durch. -
Seite 5: Telefon In Betrieb Nehmen
Achtung: Lesen Sie vor der Inbetriebnahme unbedingt die Sicherheitshin- weise in Kapitel 1. Verpackungsinhalt prüfen Zum Lieferumfang gehören: DC69x−Modell Inhalt Basisstation mit Netzteil Ladestation mit Netzteil − Mobilteil Telefonanschlusskabel Akkus Bedienungsanleitung Unter www.switel.com erfahren Sie, ob dieses Telefon/Telefonset bereits erhältlich ist. -
Seite 6: Telefon In Betrieb Nehmen
Telefon in Betrieb nehmen Basisstation anschließen Achtung: Stellen Sie die Basisstation mit einem Mindestabstand von 1 m zu anderen elektronischen Geräten auf, da es sonst zu gegenseitigen Stö- rungen kommen kann. Schließen Sie die Basisstation wie auf der Skizze abgebildet an. Verwenden Sie aus Si- cherheitsgründen nur das mitgelieferte Netzteil sowie das beigefügte Telefonanschluss- kabel. - Seite 7 Telefon in Betrieb nehmen Akkus aufladen Stellen Sie das Mobilteil bei der ersten Inbetriebnahme für mindestens 14 Stunden in die Basisstation / Ladestation. Haben Sie das Mobilteil richtig in die Basisstation / Ladestation gestellt, ertönt ein Hin- weissignal. Das Mobilteil erwärmt sich beim Laden. Dies ist normal und ungefährlich. Laden Sie das Mobilteil nicht mit fremden Aufladegeräten.
-
Seite 8: Bedienelemente
Bedienelemente 3 Bedienelemente Die Tasten Ihres Telefons werden in dieser Bedienungsanleitung nachfolgend mit ver- einheitlichten umrandeten Symbolen dargestellt. Leichte Abweichungen der Tastensym- bole Ihres Telefons gegenüber den hier verwendeten Tastensymbolen sind daher mög- lich. Mobilteil Hörer LC−Display Pfeil−Taste oben / Pfeil−Taste unten Direktwahl−Tasten Löschen /... -
Seite 9: Einführende Informationen
Einführende Informationen Basisstation Paging−Taste Ladekontakte Direktwahl−Tasten Lautstärke + Gespräch−Taste / Auflegen−Taste / LED Lautstärke − 4 Einführende Informationen In diesem Kapitel finden Sie grundlegende Informationen zur Handhabung der Bedie- nungsanleitung und des Telefons. Darstellungsweise in der Bedienungsanleitung Darstellung Beschreibung Darstellung von Tasten Abgebildete Taste kurz drücken 2 Sek. - Seite 10 Einführende Informationen Symbole und Texte im Display des Mobilteils Symbol Beschreibung Konstant: Anzeige der Akkukapazität. Leer: Die Akkus müssen geladen werden. Durchlaufende Segmente: Die Akkus werden geladen . Seite 7. Sie führen ein Gespräch . Seite 18. Sie führen ein internes Gespräch . Seite 19. Es sind neue Anrufe in der Anrufliste .
- Seite 11 Einführende Informationen Navigation im Menü Alle Funktionen sind über unterschiedliche Menüs zu erreichen. Den Weg zur ge- wünschten Funktion entnehmen Sie der Menüstruktur . Seite 12. Hauptmenü öffnen G / H Gewünschtes Untermenü auswählen Untermenü öffnen G / H Gewünschte Funktion auswählen Funktion öffnen G / H Gewünschte Einstellung auswählen...
-
Seite 12: Menüstruktur
Menüstruktur 5 Menüstruktur Hauptmenü In das Hauptmenü gelangen Sie, wenn Sie die O−Taste drücken. Danach wählen Sie mit den Tasten G / H einen Eintrag aus und bestätigen Ihre Auswahl mit der O−Taste. Weitere Informationen zum Menü und zur Bedienung . Kapitel 4. TEL.BUCH NAME ë... - Seite 13 Menüstruktur BS EINST RUFTON MEL. 1 − 5 RT.LAUT. LAUTST 1 − 5, RUFT.AUS ë MT ABM. MT 1 − 5 PIN? WAHLVERF TONWAHL / IMPULSW FLASH−Z. KURZ / MITTEL / LANG AUFSCHALTEN ë PIN NEU? ë BESTAE.? ë PIN AEND ALTE PIN MT EINST RUFTON...
- Seite 14 Menüstruktur D.& ZEIT DAT.FORM TTMMJJ / MMTTJJ ZEITFORM 24 STD. / 12 STD. ë ZE.EINST ë DA.EINST ALARM ë SNOOZE CARE VOICE C VOICE 1 ANHOEREN ð ANS.AUFN EIN/AUS UHRZEIT ë TAEGLICH UHRZEIT ë EINMAL C VOICE 2 ANHOEREN ð ANS.AUFN EIN/AUS UHRZEIT ë...
-
Seite 15: Telefonbuch
Telefonbuch 6 Telefonbuch Im Telefonbuch können Sie 20 Rufnummern mit den dazugehörigen Namen speichern. Geben Sie bei allen Rufnummern immer die Vorwahl mit ein, damit auch eingehende Ortsgespräche einem Telefonbucheintrag zugeordnet werden können. Ist die Speicherkapazität erschöpft, zeigt das Display beim nächsten Speichern die Meldung TB VOLL . -
Seite 16: G / H Loeschen O Untermenü Auswählen Und Bestätigen
Telefonbuch G / H AENDERN O Untermenü auswählen und bestätigen ë, O Namen ändern und bestätigen ë, O Rufnummer ändern und bestätigen G / H Melodie ändern und bestätigen MEL. Telefonbucheinträge löschen Einen Eintrag löschen Hauptmenü öffnen G / H O Telefonbuch öffnen TEL.BUCH G / H O... -
Seite 17: Anrufliste
Anrufliste O G / H Untermenü auswählen und bestätigen ZIELWAHL G / H TASTE 2 − 9 O Taste auswählen und bestätigen O G / H LOESCHEN O Funktion auswählen und bestätigen oder O, G / H Funktion auswählen und bestätigen AENDERN G / H O Eintrag auswählen und bestätigen... -
Seite 18: Telefonieren
Telefonieren G / H NR.SPEI. , O Untermenü auswählen und bestätigen ë, O Namen eingeben (max. 12 Zeichen) und bestätigen ë, O Rufnummer ändern und bestätigen G / H Melodie auswählen und bestätigen MEL. Rufnummern aus der Anrufliste löschen Einzelne Rufnummer löschen G, G / H Anrufliste öffnen und Eintrag auswählen Menü... - Seite 19 Telefonieren H, G / H Wahlwiederholungsliste öffnen und Eintrag auswählen Verbindung herstellen Das Speichern und Löschen von Rufnummern ist identisch zur Bearbeitung von Ruf- nummern in der Anrufliste . Kapitel 7. Eingegangene Anrufe zurückrufen Ihr Telefon speichert 10 Rufnummern in einer Anrufliste. G, G / H Anrufliste öffnen und Eintrag auswählen Verbindung herstellen...
- Seite 20 Telefonieren Ggf. interne Rufnummer des gewünschten Mobilteils wählen Drücken Sie die Taste 9, um alle angemeldeten Mobilteile gleichzeitig zu rufen. MT2: A Internes Gespräch am anderen Mobilteil annehmen MT1 / MT2: B Internes Gespräch beenden Externe Gespräche intern weiterleiten O INTERN Während des externen Gesprächs Ggf.
- Seite 21 Telefonieren Sie können während eines Gesprächs über die Basis die Lautstärke in 5 Stufen anpas- sen. i / j Gewünschte Lautstärke auswählen Anzeige der Gesprächsdauer Während eines Gesprächs wird die Gesprächsdauer in Stunden, Minuten und Sekun- den angezeigt. Rufton ausschalten Sie können den Rufton des Mobilteils ausschalten 3 Sek.
-
Seite 22: Care Voice−Funktion
Care Voice−Funktion 9 Care Voice−Funktion Sie können 2 verschiedene Nachrichten aufzeichnen und diese zu bestimmten Uhrzei- ten abspielen lassen. Wenn die gewünschte Uhrzeit erreicht ist, wird die entsprechende Nachricht über den Lautsprecher der Basis automatisch wiedergegeben. Die Einstel- lung dieser Funktion können Sie auch via Fernprogrammierung vornehmen. Nachricht aufzeichnen Hauptmenü... - Seite 23 Care Voice−Funktion PIN ändern Hauptmenü öffnen G / H CARE VOICE OUntermenü öffnen G / H PIN AEN. Funktion auswählen und bestätigen O, ë O Alte PIN eingeben und bestätigen PIN ALT? O ë O Neue PIN eingeben und bestätigen PIN NEU? BESTAE.? O ë...
-
Seite 24: Erweitern Des Telefonsystems
Über den international genormten GAP −Standard ist die Kompatibilität von Mobilteilen und Basisstationen unterschiedlicher Hersteller geregelt. So ist es möglich, SWITEL− Geräte und Geräte anderer Hersteller zusammen in ein Telefonsystem zu integrieren. Es ist jedoch möglich, dass einige Funktionen nicht zur Verfügung stehen. -
Seite 25: Besondere Funktionen
Besondere Funktionen 11 Besondere Funktionen Wahlverfahren Sie können Ihr Telefon sowohl an den analogen Vermittlungsstellen (Impuls−Wahlver- fahren) als auch an den neuen digitalen Vermittlungsstellen (Ton−Wahlverfahren) betrei- ben. Das Wahlverfahren wird über das Menü eingestellt. Auf Seite 13 finden Sie die Po- sition im Menü. -
Seite 26: Falls Es Probleme Gibt
Falls es Probleme gibt Nach der Amtskennzahl erfolgt die Wahl der eigentlichen Rufnummer nach einer be- stimmten Zeit. Die Wahlpause kann auch bei der Eingabe von Rufnummern im Telefon- buch gespeichert werden. Rufnummernanzeige (CLIP Die Rufnummernanzeige ist ein Zusatzdienst Ihres Netzbetreibers. Fragen Sie Ihren Netzbetreiber nach weiteren Informationen. - Seite 27 Falls es Probleme gibt Fragen und Antworten Fragen Antworten Kein Telefongespräch möglich − Das Telefon ist nicht korrekt angeschlossen oder gestört. Verwenden Sie nur das mitgelie- ferte Telefonanschlusskabel. − Testen Sie mit einem anderen Telefon, ob Ihr Telefonanschluss in Ordnung ist. −...
-
Seite 28: Technische Eigenschaften
Konformität mit der o. a. Richtlinie wird durch das CE−Zeichen auf dem Gerät bestätigt. Für die komplette Konformitätserklärung nutzen Sie bitte den kostenlo- sen Download von unserer Website www.switel.com. DECT: Digital Enhanced Cordless Telecommunication = Standard für kabellose Te- lefone. -
Seite 29: Pflegehinweise / Garantie
Sollte Ihr Gerät dennoch einen Defekt innerhalb der Garantiezeit aufweisen, wenden Sie sich bitte unter Vorlage Ihrer Kaufquittung ausschließlich an das Geschäft, in dem Sie Ihr SWITEL − Gerät gekauft haben. Alle Gewährleistungsansprüche nach diesen Bestimmungen sind ausschließlich gegenüber Ihrem Fachhändler geltend zu machen. - Seite 30 Notizen Notizen...
- Seite 58 Notes Notes...
- Seite 86 Appunti Appunti...
- Seite 114 Wichtiger Hinweis Die Basisstation Ihres Telefons ist mit einem energieeffizienten Schaltnetz- teil (Input 100~240 V , Output 6 V , 450 mA) ausgestattet. Die Nulllast beträgt ca. 0,15 W. Die durchschnittliche Effizienz beträgt ca. 65 %. Die Leistungsaufnahme der Basisstation beträgt: −...
-
Seite 116: Declaration Of Conformity
Quest’apparecchiatura è conforme alla direttiva europea R&TTE. Per la dichiarazione di conformità completa si prega di voler usufruire del servizio gratuito di download dal nostro sito Internet www.switel.com. This equipment complies with the European R&TTE directive. To view the complete Declaration of Conformity, please refer to the free download available at our web site: www.switel.com.