Inhaltsverzeichnis
Werbung
Verfügbare Sprachen
Verfügbare Sprachen
Werbung
Kapitel
Inhaltsverzeichnis

Verwandte Anleitungen für AKG HT 4000


Inhaltszusammenfassung für AKG HT 4000
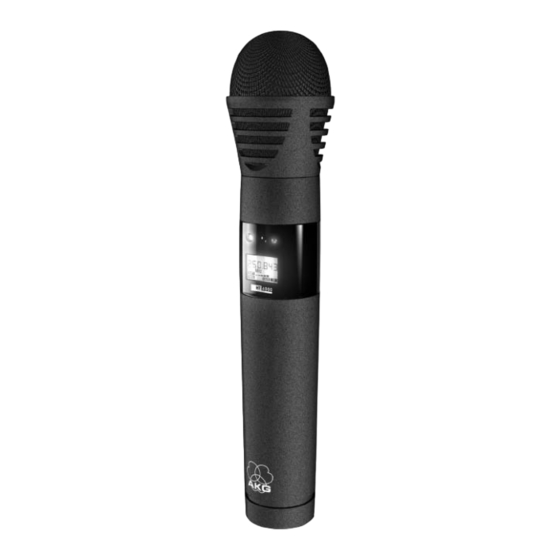
- Seite 1 FCC ID: E9MHT4000 WMS4000 HT 4000 wireless microphone system handheld transmitter Bedienungsanleitung ... . S. 2 Bitte vor Inbetriebnahme des Gerätes lesen! User Instructions ....p. 14...
-
Seite 2: Inhaltsverzeichnis
2 Beschreibung 2.1 Einleitung Vielen Dank, dass Sie sich für ein Produkt aus dem Hause AKG entschieden haben. Bitte lesen Sie die Bedienungsanleitung aufmerksam durch, bevor Sie das Gerät benützen, und bewahren Sie die Bedienungsanleitung sorgfältig auf, damit Sie jederzeit nachschlagen können. Wir wünschen Ihnen viel... -
Seite 3: Lieferumfang
Ladezustand der Batterien und die noch zur Verfügung stehende Spielzeit an. Der Handsender ist mit einer im Gehäuse integrierten Dipolantenne ausgestattet und kann entweder mit 2 handelsüblichen Batterien der Größe AA oder mit dem optionalen Akku BP 4000 von AKG betrieben werden. -
Seite 4: Austauschbare Mikrofonköpfe
ON). Die Kontroll-LED (1) wechselt auf grün. Der MUTE-Schalter ist in allen Betriebsarten aktiv. 5 Ladekontakte: Die versenkt angeordneten Ladekontakte ermöglichen Ihnen, den optionalen AKG- Akku BP 4000 mit Hilfe des ebenfalls optionalen Ladegeräts CU 4000 aufzuladen, ohne den Akku aus dem Batteriefach herausnehmen zu müssen. -
Seite 5: Inbetriebnahme
Batteriefach ein. Wenn Sie die Batterien falsch einlegen, wird der Sender nicht mit Strom versorgt. Anstelle der mitgelieferten Batterien können Sie auch den optionalen Akku BP 4000 von AKG einset- Hinweis: zen. Dieser passt nur in der richtigen Orientierung in das Batteriefach, kann also nicht falsch einge- legt werden. -
Seite 6: Einschalten Im Lock-Modus
3 Inbetriebnahme Der Sender befindet sich im SILENT-Modus. 2. Falls die Trägerfrequenz des Senders nicht genehmigt ist und/oder nicht mit der Empfängerfrequenz übereinstimmt, stellen Sie den Sender auf eine geeignete Trägerfrequenz ein (siehe Kapitel 3.6). 3.4.2 Einschalten im 1. Drücken Sie ca. 1,5 Sekunden lang die ON/OFF-Taste (3). LOCK-Modus 2. -
Seite 7: Preset-Menü
3 Inbetriebnahme Um den Wert um 25 kHz zu verringern, drehen Sie den Jog-Schalter kurz nach links. 3. Wenn Sie die gewünschte Frequenz eingestellt haben, drücken Sie kurz den Jog-Schalter. Am Display erscheint folgende Anzeige: 4a Wenn Sie die eingestellte Frequenz speichern wollen, drücken Sie kurz den Jog-Schalter. Die Einstellung wird gespeichert und am Display erscheint folgende Anzeige: 4b Wenn Sie die eingestellte Frequenz nicht speichern wollen, drehen Sie den Jog-Schalter kurz nach links oder rechts. - Seite 8 3 Inbetriebnahme 2. Drücken sie kurz den Jog-Schalter. Die Anzeige "NAME" und der Name des momentan eingestellten Presets beginnen zu blinken. Wenn kein Preset gespeichert ist, zeigt das Display "-- -- --". 3. Um das nächste Preset zu wählen, drehen Sie den Jog-Schalter kurz nach rechts. Um das vorige Preset zu wählen, drehen Sie den Jog-Schalter kurz nach links.
-
Seite 9: Mehrkanalanlagen
3 Inbetriebnahme 1. Achten Sie darauf, jeden Sendekanal (Sender + Empfänger) auf eine eigene Trägerfrequenz einzustellen. 3.7 Mehrkanalanlagen 2. Um möglichst rasch und einfach intermodulationsfreie Trägerfrequenzen zu finden, empfehlen wir, die Trägerfrequenzen im Preset-Menü innerhalb desselben Presets und derselben Frequenzgruppe aus- zuwählen. -
Seite 10: Manuelle Einstellung
3 Inbetriebnahme • Wenn Sie den eingestellten Wert speichern wollen, drücken Sie kurz den Jog-Schalter. Am Display erscheint der gespeicherte Wert in dB, die Anzeige "GAIN" blinkt. • Wenn Sie den eingestellten Wert nicht speichern wollen, drehen Sie den Jog-Schalter kurz nach links oder rechts. -
Seite 11: Setup- Und Silent-Modus
Wenn die Anzeige "BATT" zu blinken beginnt, anstelle der Balken ein Strich erscheint und die Kontroll- Siehe Fig. 5. LED auf rot wechselt, tauschen Sie so bald wie möglich die Batterien aus oder laden Sie den AKG-Akku BP 4000 auf. -
Seite 12: Besprechungsabstand Und Naheffekt
4 Betriebshinweise 4.6.1 Besprechungsabstand Grundsätzlich wird Ihre stimme umso voller und weicher wiedergegeben, je kürzer der Abstand zwischen und Naheffekt den Lippen und dem Mikrofon ist, während bei größerer Mikrofondistanz ein halligeres, entfernteres Siehe Fig. 6. Klangbild zustande kommt, da die Akustik des Raumes stärker zur Geltung kommt. Sie können daher Ihre Stimme aggressiv, neutral oder einschmeichelnd klingen lassen, indem Sie den Mikrofonabstand verändern. -
Seite 14: Fcc Statement
Shielded cables and I/O cords must be used for this equipment to comply with the relevant FCC regula- tions. Changes or modifications not expressly approved in writing by AKG Acoustics may void the user’s authority to operate this equipment. This device complies with Part 15 of the FCC Rules. Operation is subject to the following two conditions: (1) this device may not cause harmful interference, and (2) this device must accept any interference received, including interference that may cause undesired operation. -
Seite 15: Safety And Environment
HT 4000 have been specifically designed for vocal use. The HT 4000 operates in one subband up to 30 MHz wide within the 650 MHz to 862 MHz UHF carrier frequency band. Within the subband, you can either set the carrier frequency directly in 25-kHz incre- ments or select one of the Subchannels of the Preset Frequency Groups of your transmitter. -
Seite 16: Controls
The MUTE switch is active in all modes. 5 Charging contacts: The recessed charging contacts allow you to recharge the optional AKG BP 4000 battery pack on the optional CU 4000 charger without having to remove the battery pack from the transmitter. -
Seite 17: Setting Up
If you insert the batteries the wrong way, the transmitter will not be powered. Alternatively to the supplied dry batteries, you may use the optional BP 4000 battery pack from AKG. Note: The BP 4000 fits into the battery compartment in the correct orientation only, so you cannot insert it the wrong way. -
Seite 18: Powering Up In Lock Mode
3 Setting Up The transmitter is now in SILENT mode (see also section 4.2.3). 2. If the carrier frequency is not an allocated or coordinated one and/or different from the receiver fre- quency, set the transmitter to a suitable, legal frequency referring to section 3.6. 3.4.2 Powering Up 1. -
Seite 19: Preset Menu
3 Setting Up 3. Having set the desired frequency, push the jog switch briefly. This brings up the following screen: 4a If you want to save the selected frequency, push the jog switch briefly. Your setting will be saved in memory and the display will change as follows: 4b If you'd rather not save the selected frequency, briefly turn the jog switch to the left or right. - Seite 20 3 Setting Up 2. Push the jog switch briefly. The "NAME" label and the name of the currently active Preset will start flashing. If no Preset has been stored in memory, the 2nd line of the display shows "-- -- --". 3.
-
Seite 21: Multichannel Systems
3 Setting Up 1. Be sure to assign a separate carrier frequency to each wireless channel (transmitter and receiver). 3.7 Multichannel Systems 2. To find intermodulation-free carrier frequencies quickly and easily, we recommend selecting all required carrier frequencies from the same Frequency Group within the same Preset. If reception on the selected carrier frequency is disturbed, increase or decrease the carrier frequency Note: by at least 50 kHz or one or two Subchannels on each transmitter and receiver. -
Seite 22: Setting Gain Manually
3 Setting Up If you want to save the new setting, push the jog switch briefly. The display will show your new gain setting in dB and the "GAIN" label will be flashing. • If you'd rather not save your setting, turn the jog switch briefly to the left or right. The display will change to "Save-n". -
Seite 23: Setup And Silent Modes
4 Operating Notes Battery Screen: Battery capacity in hours and as bar graph. If the microphone is ON, the "MUTE" label is off. 2. To step through the above screens in reverse order, turn the jog switch briefly to the left. In SETUP and SILENT modes, the various setup menus described in sections 3.4 through 3.8 as well as 4.1.2 SETUP and SILENT the battery screen come up in the order shown below, followed by any error messages in the order of... -
Seite 24: Angle Of Incidence
4 Operating Notes Proximity effect is a more or less dramatic boost of low frequencies that occurs when you sing into the microphone from less than 2 inches. It gives more “body” to your voice and an intimate, bass-heavy sound. 4.6.2 Angle of Incidence Sing to one side of the microphone or above and across the microphone’s top. -
Seite 25: R&Tte-Tabelle
HT 4000 complies with the essential Direktiv 1999/5/EF. A AKG Acoustics GmbH declara que o produto requirements and other relevant provisions of HT 4000 cumpre os requisitos essenciais e as outras Härmed förklarar AKG Acoustics GmbH att produk- Directive 1999/5/EC. disposições relevantes da Directiva 1999/5/CE. - Seite 26 Ci riserviamo il diritto di effettuare modifiche tecniche. La empresa se reserva el derecho de introducir modificaciones técnicas sin previo aviso. Especificações sujeitas a mudanças sem aviso prévio. AKG Acoustics GmbH Lemböckgasse 21–25, P.O.B. 158, A-1230 Vienna/AUSTRIA, Tel: (43 1) 86 654-0*, Fax: (43 1) 86 654-7516, http://www.akg.com, e-mail: sales@akg.com...