Herunterladen Inhalt Inhalt Diese Seite drucken
IMG STAGE LINE QUAD FLOWER Bedienungsanleitung

IMG STAGE LINE QUAD FLOWER Bedienungsanleitung

Led-dmx-lichteffektgerät
Vorschau ausblenden Andere Handbücher für QUAD FLOWER:

Werbung

Verfügbare Sprachen
  • DE

Verfügbare Sprachen

  • DEUTSCH, seite 1
LED-DMX-LICHTEFFEKTGERÄT
LED DMX LIGHT EFFECT UNIT
JEU DE LUMIÈRE DMX À LED
S
UNITÀ DMX PER EFFETTI DI LUCE CON LED
"QUAD FLOWER"
LED-380RGBW
Best.-Nr. 38.4310
BEDIENUNGSANLEITUNG • INSTRUCTION MANUAL • MODE D'EMPLOI
ISTRUZIONI PER L'USO • MANUAL DE INSTRUCCIONES • INSTRUKCJA OBSŁUGI
VEILIGHEIDSVOORSCHRIFTEN • SIKKERHEDSOPLYSNINGER
SÄKERHETSFÖRESKRIFTER • TURVALLISUUDESTA

Werbung

Inhaltsverzeichnis
loading

Inhaltszusammenfassung für IMG STAGE LINE QUAD FLOWER

  • Seite 1 LED-DMX-LICHTEFFEKTGERÄT LED DMX LIGHT EFFECT UNIT JEU DE LUMIÈRE DMX À LED UNITÀ DMX PER EFFETTI DI LUCE CON LED “QUAD FLOWER” LED-380RGBW Best.-Nr. 38.4310 BEDIENUNGSANLEITUNG • INSTRUCTION MANUAL • MODE D’EMPLOI ISTRUZIONI PER L’USO • MANUAL DE INSTRUCCIONES • INSTRUKCJA OBSŁUGI VEILIGHEIDSVOORSCHRIFTEN •...
  • Seite 2 Before switching on … Wir wünschen Ihnen viel Spaß mit Ihrem neuen We wish you much pleasure with your new “img Gerät von „img Stage Line“. Bitte lesen Sie diese Stage Line” unit. Please read these operating Bedienungsanleitung vor dem Betrieb gründlich instructions carefully prior to operating the unit.
  • Seite 3 Œ 9 10 11 12 Ž ...
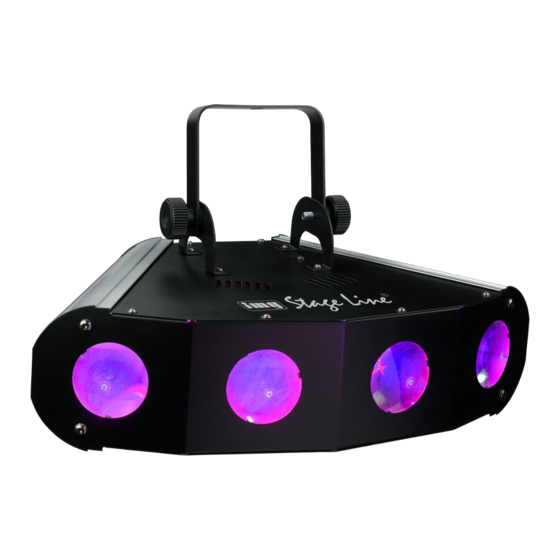
  • Seite 4: Übersicht Der Bedienelemente Und Anschlüsse

    Auf der ausklappbaren Seite 3 finden Sie alle be - Beachten Sie auch unbedingt die folgenden Punkte: schriebenen Bedienelemente und Anschlüsse. Verwenden Sie das Gerät nur im Innenbereich und schützen Sie es vor Tropf- und Spritzwasser, hoher Luftfeuchtigkeit und Hitze (zulässiger Ein- 1 Übersicht der Bedienelemente satztemperaturbereich 0 –...
  • Seite 5: Betrieb Ohne Steuergerät

    Für die hängende Montage das Gerät über den 6 Betrieb ohne Steuergerät Bügel (1) an geeigneter Stelle, z. B. an einer Tra- verse oder an einem Leuchtenstativ, festschrau- 6.1 Blackoutmodus, Musikmodus und ben. Zum Ausrichten des Gerätes die Feststell- schrauben (2) lösen. Die gewünschte Neigung des Automatikmodus Geräts einstellen und die Schrauben wieder fest Um das Gerät in den Blackout-, Musik- oder Auto-...
  • Seite 6: Dmx Steuerung

    5 im 7-Kanal-Modus die Kanäle 2 bis 7 DMX512-Protokoll (z. B. DMX-1440 oder DMX- den Adressen 6 bis 11 zugeordnet, Adresse 12 510USB von „img Stage Line“) verfügt das Licht - wäre dann die nächstmögliche freie Startadresse effektgerät über 7 DMX-Steuerka näle, es kann für das folgende DMX-gesteuerte Gerät.)
  • Seite 7: Technische Daten

    9 Technische Daten Stromversorgung: . . 230 V~/50 Hz Leistungsaufnahme: . 20 VA Leuchtmittel: ..224 superhelle LEDs (80 × Rot, 60 × Grün, 48 × Blau, 36 × Weiß) Einsatztemperatur: . . 0 – 40 °C Abmessungen: .
  • Seite 8: Operating Elements And Connections

    All operating elements and connections can be It is essential to observe the following items: found on the fold-out page 3. The unit is suitable for indoor use only. Protect it against dripping water and splash water, high air humidity and heat (admissible ambient tempera- 1 Operating Elements ture range 0 –...
  • Seite 9 5.1 Switching the display on /off 3 Applications To switch off the display (9), first press the button This LED light effect unit is suitable for applications FUNC (11) so many times until the display shows on stage, in discothèques, clubs and party rooms. .
  • Seite 10: Dmx Control

    Press the button MODE (10) so many times until protocol (e. g. DMX-1440 or DMX-510USB from the display (9) shows the last address adjusted, “img Stage Line”) the light effect unit is equipped e. g. . Then adjust the address with the button with 7 DMX control channels, however, it can also UP or DOWN (12).
  • Seite 11: Specifications

    9 Specifications Power supply: ..230 V~ / 50 Hz Power consumption: 20 VA Illuminant: ..224 super bright LEDs (80 × red, 60 × green, 48 × blue, 36 × white) Ambient temperature: 0 –...
  • Seite 12: Eléments Et Branchements

    Ouvrez le présent livret page 3, dépliable, de AVERTISSEMENT Lʼappareil est alimenté par une manière à visualiser les éléments et branche- tension dangereuse. Ne faites ments. jamais de modification sur lʼap- pareil. Une mauvaise manipula- tion pourrait générer une dé- 1 Eléments et branchements charge électrique.
  • Seite 13: Mise En Service

    4 Montage 6 Fonctionnement sans contrôleur Placez toujours lʼappareil de telle sorte que pen- 6.1 Mode Blackout, Musique et Automatique dant son fonctionnement, une circulation dʼair suffisante soit assurée. En aucun cas, les ouïes Pour commuter lʼappareil sur le mode Blackout, de ventilation sur le boîtier ne doivent être obtu- musique ou automatique, appuyez sur la touche rées (par exemple par des rideaux).
  • Seite 14: Gestion Dmx

    6 à 11, lʼadresse 12 cole DMX512 (par exemple DMX-1440 ou DMX- serait lʼadresse de démarrage libre immédiatement 510USB de “img Stage Line”), le jeu de lumière dis- suivante pour lʼappareil à gestion DMX suivant). pose de 7 canaux de commande DMX, il peut Appuyez sur la touche MODE (10) jusquʼà...
  • Seite 15: Caractéristiques Techniques

    9 Caractéristiques techniques Alimentation : ..230 V~/50 Hz Consommation : ..20 VA Lampes : ..224 LEDs très claires, (80 rouges, 60 vertes, 48 bleues, 36 blanches) Température fonc.
  • Seite 16: Elementi Di Comando E Collegamenti

    A pagina 3, se aperta completamente, vedrete Si devono osservare assolutamente anche i sempre gli elementi di comando e i collega- seguenti punti: menti descritti. Usare lʼapparecchio solo allʼinterno di locali e pro- teggerlo dallʼacqua gocciolante e dagli spruzzi 1 Elementi di comando e collegamenti dʼacqua, da alta umidità...
  • Seite 17: Messa In Funzione

    Per il montaggio sospeso avvitare lʼapparecchio per 6 Funzionamento senza mezzo della sua staffa di montaggio (1) in un punto unità di comando adatto, p. es. ad una traversa o a uno stativo per fari. Per orientare lʼapparecchio allentare le viti di bloc- caggio (2).
  • Seite 18: Comando Dmx

    DMX512 (p. es. DMX- start 5, nel modo a 7 canali, i canali 2 a 7 sono asse- 1440 o DMX-510USB di “img Stage Line“), lʼunità gnati agli indirizzi 6 a 11; lʼindirizzo 12 potrebbe per effetti di luce può essere comandata tramite essere il prossimo indirizzo di start possibile per 7 canali DMX di comando, ma può...
  • Seite 19: Dati Tecnici

    9 Dati tecnici Alimentazione: ..230 V~ / 50 Hz Potenza assorbita: . . 20 VA Lampadine: ..224 LED superluminosi (80 × rosso, 60 × verde, 48 × blu, 36 × bianco) Temperatura dʼesercizio: .
  • Seite 20: Elementos De Funcionamiento Y Conexiones

    Todos los elementos de funcionamiento y las ADVERTENCIA El aparato está alimentado con conexiones pueden encontrarse en la página 3 un voltaje peligroso. Deje el man- desplegable. tenimiento en manos del personal cualificado. El manejo inexperto o la modificación del aparato pue- 1 Elementos de Funcionamiento den provocar una descarga.
  • Seite 21: Montaje

    4 Montaje 6 Funcionamiento sin Controlador Coloque siempre el aparato de modo que exista 6.1 Modo Blackout, modo música una ventilación suficiente durante el funciona- miento. No cubra nunca las rejillas de ventilación y modo automático de la carcasa (p. ej. con cortinas). Para ajustar el aparato en el modo Blackout, modo La distancia mínima hasta el objeto iluminado música o modo automático, pulse el botón MODE...
  • Seite 22: Control Dmx

    DMX512 (p. ej. DMX-1440 o DMX- DMX). 510USB de “img Stage Line”), el juego de luces Pulse el botón MODE (10) hasta que en el visuali- está equipado con 7 canales de control DMX pero zador (9) se muestre la última dirección ajustada,...
  • Seite 23: Especificaciones

    9 Especificaciones Alimentación: ..230 V~ / 50 Hz Consumo: ..20 VA Iluminación: ..224 LEDs de gran brillo (80 × rojo, 60 × verde, 48 ×...
  • Seite 24: Elementy Operacyjne I Połączeniowe

    Proszę otworzyć instrukcję na stronie 3. Poka- Należy przestrzegać następujących zasad: zano tam rozkład opisanych elementów oraz Urządzenie jest przeznaczone tylko do użytku złączy. wewnątrz pomieszczeń. Należy chronić je przed działaniem wody, dużej wilgotności powietrza oraz wysokiej temperatury (dopuszczalny zakres 1 Elementy operacyjne 0 –...
  • Seite 25: Przygotowanie Urządzenia Do Pracy

    Urządzenie może być montowane z wykorzysta- 6 Praca bez kontrolera niem jego uchwytu (1) w odpowiednim miejscu np. na poziomej poprzeczce statywu oświetleniowego. 6.1 Tryb blackout, sterowanie muzyką Dla uzyskania żądanej pozycji, poluzować regula- tory (2) przy uchwycie montażowym. Ustawić oraz tryb automatyczny wybraną...
  • Seite 26: Sterowanie Dmx

    5, w trybie 7-kanałowym, kanałom 2 do łem DMX512 (np. DMX-1440 lub DMX-510USB 7 przypisane zostaną adresy 6 do 11. Następnemu marki “img Stage Line”). Efekt posiada 7 kanałów urządzeniu sterowanemu kontrolerem, można sterujących DMX, ale może być przełączone na wówczas przypisać...
  • Seite 27: Kanały Dmx

    9 Specyfikacja Zasilanie: ..230 V~ / 50 Hz Pobór mocy: ..20 VA Źródło światła: ..224 diody o dużej jasności (80 ×...
  • Seite 28 Læs nedenstående sikkerhedsoplysninger grundigt igennem Lees aandachtig de onderstaande veiligheidsvoorschriften, før ibrugtagning af enheden. Bortset fra sikkerhedsoplysnin- alvorens het apparaat in gebruik te nemen. Voor meer infor- matie over de bediening van het apparaat raadpleegt u de gerne henvises til den engelske tekst. anderstalige handleidingen.
  • Seite 29 Läs igenom säkerhetsföreskrifterna innan enheten tas i Ole hyvä ja tutustu seuraaviin ohjeisiin varmistaaksesi tuot- bruk. Ytterligare information återfinns på övriga språk i teen turvallisen käytön. Tarvitessasi lisätietoja tuotteen käy- manualen. töstä löydät ne muun kielisistä käyttöohjeista. Säkerhetsföreskrifter Turvallisuudesta Enheten uppfyller alla krav enligt EU och har därför försetts Laite vastaa kaikkia vaadittuja EU direktiivejä, joten se on med symbolen varustettu...
  • Seite 30 ® Copyright © by MONACOR INTERNATIONAL GmbH & Co. KG, Bremen, Germany. All rights reserved. A-1046.99.01.01.2010...

Diese Anleitung auch für:

Led-380rgbw

Inhaltsverzeichnis