
Verwandte Anleitungen für Ten-Haaft Oyster V


Inhaltszusammenfassung für Ten-Haaft Oyster V
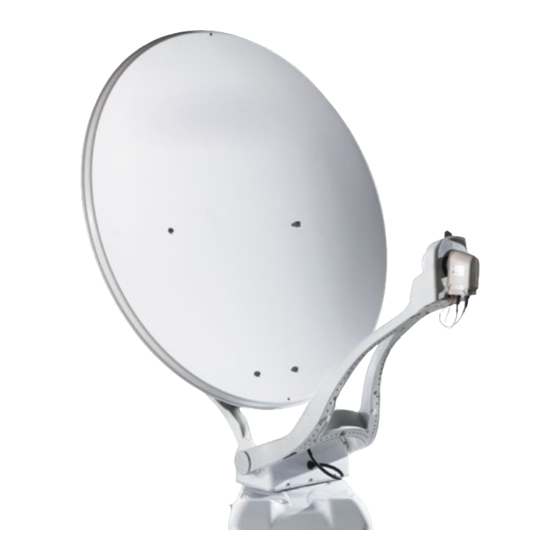
- Seite 1 BEDIENUNGS- UND MONTAGEANLEITUNG OPERATING MANUAL AND INSTALLATION INSTRUCTIONS INSTRUCTIONS D’UTILISATION ET DE MONTAGE www.ten-haaft.com...
-
Seite 2: Inhaltsverzeichnis
INHALTSVERZEICHNIS 1. Allgemeines 1.1 Bestimmungsgemäße Verwendung 1.2 Sicherheitshinweise 1.3 Lieferumfang 2. Montage 2.1 Platzbedarf der Oyster® V 2.2 Spannungsversorgung 2.3 Sicherheitsschaltung 2.4 Spiegelmontage 2.5 Anschlussplan 3. Bedienelemente 3.1 Bedienteil (falls im Lieferumfang enthalten) 3.2 FeatureBox (Vorderseite) 3.3 FeatureBox (Rückseite) 3.4 Warnton FeatureBox 4. -
Seite 3: Allgemeines
1. ALLGEMEINES 1.1 Bestimmungsgemäße Verwendung Die bestimmungsgemäße Verwendung dieses Produktes ist die Festmontage auf Wohnmobilen oder Wohn- anhängern (Caravans) mit einer zulässigen Höchstgeschwindigkeit von nicht mehr als 150 km/h. Das Produkt ist in der Lage, bei geparktem Trägerfahrzeug die eingebaute Antenne selbsttätig auf einen der für Europa üblichen, geostationären, direkt strahlenden Fernsehsatelliten fest auszurichten. -
Seite 4: Sicherheitshinweise
1. ALLGEMEINES 1.2 Sicherheitshinweise Lesen Sie diese Bedienungs- und Montageanleitung aufmerksam durch, bevor Sie mit der Montage und dem Betrieb beginnen. Diese Anleitung beschreibt die Verwendung der automatischen Satellitenanlage. Eine fehlerfreie und betriebssichere Funktion kann nur gewährleistet werden, wenn Sie sowohl für die Montage als auch für den Betrieb diese Anleitung beachten. - Seite 5 1. ALLGEMEINES Bei korrekter Montage fährt die Antenne beim Einschalten der Fahrzeugzündung selbsttätig innerhalb kurzer Zeit in die Ruhelage und arretiert sich dort. Sollte die Anlage auf Grund einer Störung nicht oder nicht vollständig einfahren können, so obliegt es Ihrer Verantwortung als Führer des Kraftfahrzeuges, sich von der ordnungs- gemäßen und vollständigen Ablage der Antenne vor Antritt der Fahrt zu überzeugen bzw.
-
Seite 6: Lieferumfang
1. ALLGEMEINES 1.3 Lieferumfang Bitte prüfen Sie Ihren Lieferumfang auf Vollständigkeit. Im Lieferumfang enthalten: 1. Außeneinheit 2. Spiegel 85 cm 3. Montageplatte (an der Außeneinheit montiert) 4. Kabelsatz zur Außeneinheit (Koaxkabel) 5. FeatureBox 6. Bedienteil (ohne Bedienteil wird die Anlage über angeschlossenen Receiver/TV gesteuert) 7. -
Seite 7: Montage
2. MONTAGE 2.1 Platzbedarf der Oyster® V Fahrtrichtung 850 mm des KFZ Eingefahren Retracted Rétracté Montageplatte Mounting plate Plaque de montage Drehzentrum Ø1930 mm Center of rotation Drehbereich Centre de tournage 370 mm Rotation range Plage de rotation Montageplatte Mounting plate Plaque de montage Aufbauhöhe eingefahren Retracting height... -
Seite 8: Spannungsversorgung
2. MONTAGE 2.2 Spannungsversorgung 1. Sorgen Sie für eine ausreichende Spannungsversorgung des Systems a) Die Anlage benötigt den Anschluss an 12 V / 24 V Bordspannung. b) Zum Anschluss an die Bordspannung darf der Kabelquerschnitt 2,5 mm² nicht unterschreiten. Verwenden Sie ab 6 m Kabellänge einen Querschnitt von mindestens 4,0 mm². -
Seite 9: Sicherheitsschaltung
2. MONTAGE 2.3 Sicherheitsschaltung Um Schäden durch ein versehentliches Fahren mit ausgeklappter Außeneinheit zu verhindern, muss die schwarze Leitung der Spannungsversorgung der FeatureBox mit der „Klemme 15“ verbunden werden (die „Klemme 15“ ist im KFZ eine Leitung, die bei eingeschalteter Zündung Spannung führt und bei ausgeschalteter Zündung keine Spannung führt). -
Seite 10: Anschlussplan
2. MONTAGE 2.5 Anschlussplan Fahrtrichtung... - Seite 11 2. MONTAGE ANSCHLUSSKENNZEICHNUNG AN DER FEATUREBOX Nummer Erklärung Außeneinheit Winkelverschraubung / Dachdurchführung Montageplatte SAT-Zuleitung von Außeneinheit Bedienteil (falls im Lieferumfang enthalten) Sicherungen Schließen Sie hier das mitgelieferte Stromversorgungskabel an. ACHTUNG! Stellen Sie vorher sicher, dass das Stromversorgungskabel am anderen Ende korrekt an das Stromnetz des Fahrzeuges angeschlossen ist, bei Falschpolung kann die FeatureBox zerstört werden! Bordnetzklemme 15: Zündung / ggf.
-
Seite 12: Bedienelemente
Dies erkennen Sie daran, dass keinerlei Text in der Anzeige eingeblendet ist. Ohne ein Bedienteil wird die Anlage vom angeschlossenen Receiver / TV-Gerät gesteuert. Darüber hinaus ist die Bedienung über die kostenlos verfügbare ten Haaft® App über Smartphone / Tablet möglich. -
Seite 13: Featurebox (Vorderseite)
3. BEDIENELEMENTE 3.2 FeatureBox (Vorderseite) Die FeatureBox steuert entweder über ein verkabeltes Bedienteil, über die App oder über den Receiver / TV-Gerät die Funktion der Außeneinheit. Bedientasten 1. Powertaste Hier kann das komplette Antennensystem ein- und ausgeschaltet werden. Wird diese Taste während der Antennenbewegung gedrückt, erfolgt ein sofortiger Stop (Not-Stop). -
Seite 14: Featurebox (Rückseite)
3. BEDIENELEMENTE 3.3 FeatureBox (Rückseite) Anschlüsse 1. Ant Antenne SAT In von der Außeneinheit 2. TV Receiver SAT Out zum Fernsehgerät 3. Mode Drehschalter SAT-Auswahl (Grundstellung 0 = Automatikmodus) 4. USB USB-Schnittstelle (für Updates via USB-Stick) 5. CTRL Anschluss Bedienteil (falls im Lieferumfang enthalten) 6. -
Seite 15: Anhang
Entsorgung kann demgemäß im Rahmen der Altfahrzeug-Verordnung (Europäische Altfahrzeugrichtlinie ELV, 2000/53/EG; für Deutschland: AltfahrzeugV) zusammen mit dem Kraftfahrzeug erfolgen. Das Antennen-System enthält keine der gemäß Richtlinie als umweltschädlich eingestuften Stoffe. Wir wünschen Ihnen viel Freude mit Ihrer SAT-Anlage Ihr ten Haaft Team... -
Seite 16: Konformitätserklärung Ce
4. ANHANG 4.2 Konformitätserklärung CE... -
Seite 17: Typgenehmigung
Oyster V 85 Vision SKEW Oyster V 85 SKEW Premium Oyster V 85 Vision SKEW Oyster V 85 SKEW Premium Oyster V 85 Vision TWIN SKEW Oyster V 85 TWIN SKEW Premium Oyster V 85 Vision TWIN SKEW Oyster V 85 TWIN SKEW Premium... - Seite 18 CONTENTS 1. General information 1.1 Intended use 1.2 Safety precautions 1.3 Scope of supply 2. Installation 2.1 Installation space required for the Oyster® V 2.2 Power supply 2.3 Safety circuit 2.4 Fitting the dish 2.5 Connections 3. Control elements 3.1 Control panel (if included in supply) 3.2 FeatureBox (front face) 3.3 FeatureBox (rear face) 3.4 Warning Tone FeatureBox...
-
Seite 19: General Information
1. GENERAL INFORMATION 1.1 Intended use This product has been designed for permanent installation on mobile homes or camper trailers with a permissible maximum speed of 150 km/h. It is designed to automatically aim a vehicle-mounted antenna at a geostationary television satellite transmit- ting directly to Europe. -
Seite 20: Safety Precautions
1. GENERAL INFORMATION 1.2 Safety precautions Read the operating manual and installation instructions carefully before installing the system. These instructions describe the functions of the automatic satellite system and how to operate it. Correct and safe operation of the system can only be ensured if both the installation instructions and the oper- ating instructions are observed. - Seite 21 1. GENERAL INFORMATION When correctly installed, the antenna automatically returns to its parking position and locks up when the ignition is switched on. If the system cannot fully or completely retract due to a fault, then it is your responsibility as vehicle operator to check and make sure that the antenna is correctly and completely retracted before driving off.
-
Seite 22: Scope Of Supply
1. GENERAL INFORMATION 1.3 Scope of supply Check that you have received all of the following items: 1. Antenna unit 2. 85 cm antenna panel 3. Mounting plate (fitted to external unit) 4. Wiring harness to external unit (coaxial cable) 5. -
Seite 23: Installation
2. INSTALLATION 2.1 Installation space required for the Oyster® V Direction 850 mm of travel Eingefahren Retracted Rétracté Montageplatte Mounting plate Plaque de montage Drehzentrum Ø1930 mm Center of rotation Drehbereich Centre de tournage 370 mm Rotation range Plage de rotation Montageplatte Mounting plate Plaque de montage... -
Seite 24: Power Supply
2. INSTALLATION 2.2 Power supply 1. A sufficient power supply of the system must be ensured: a) The system must be connected to the 12/24-V onboard electric system. b) The minimum cross-section of the wires connecting the satellite system to the power supply is 2.5 mm². For wiring lengths above 6 meters, a cross-section of 4.0 mm²... -
Seite 25: Safety Circuit
2. INSTALLATION 2.3 Safety circuit To prevent damage from driving with the external unit unfolded, the black cable of the FeatureBox' power supply harness must be connected to terminal 15. (A line connected to terminal 15 is live when the ignition is switched on and carries no voltage when the ignition is switched off.) When switching on the ignition, the antenna will retract and not open until the ignition is switched off. -
Seite 26: Connections
2. INSTALLATION 2.5 Connections Direction of travel... - Seite 27 2. INSTALLATION CONNECTIONS AT THE FEATUREBOX Number Explanation Antenna unit Elbow fitting / roof feed-through Mounting plate Satellite harness from exterior unit Control panel (if included in supply) Fuses Connect the power-supply cable provided here. CAUTION! Ensure that the other end of the power-supply cable is correctly connected to the onboard electric system.
-
Seite 28: Control Elements
Check that no text is shown in the display – this is an indication that the system is in rest mode. Without control panel, the system is controlled by the receiver or TV set connected to it. You can also control the system using your mobile device or tablet with the free ten Haaft® app. -
Seite 29: Featurebox (Front Face)
3. CONTROL ELEMENTS 3.2 FeatureBox (front face) The FeatureBox controls either the functions of the external unit via a hard-wired control panel, via the app or via the receiver/TV set. Control buttons 1. Power button This button switches the entire antenna system on and off. If you press this button while the antenna is in motion, it will stop immediately (emergency stop). -
Seite 30: Featurebox (Rear Face)
3. CONTROL ELEMENTS 3.3 FeatureBox (rear face) Inputs/outputs 1. Ant Antenna SAT IN from external unit 2. TV set Receiver SAT OUT to TV set 3. Mode Rotary switch for SAT mode (default setting 0 = automatic mode) 4. USB USB port (for updates via USB stick) 5. -
Seite 31: Appendix
End-of-Life Vehicle Directive ELV, 2000/53/EC. The antenna system does not contain any materials rated as hazardous to the environment according to the directive. We hope your satellite system brings you lots of joyful entertainment hours. Your ten Haaft team... -
Seite 32: Declaration Of Conformity Ce
4. APPENDIX 4.2 Declaration of conformity CE... -
Seite 33: Type Approval
Oyster V 85 Vision SKEW Oyster V 85 SKEW Premium Oyster V 85 Vision SKEW Oyster V 85 SKEW Premium Oyster V 85 Vision TWIN SKEW Oyster V 85 TWIN SKEW Premium Oyster V 85 Vision TWIN SKEW Oyster V 85 TWIN SKEW Premium... - Seite 34 TABLE DES MATIÈRES 1. Généralités 1.1 Utilisation conforme à la destination 1.2 Consignes de sécurité 1.3 Contenu de la fourniture 2. Montage 2.1 Espace nécessaire pour l’Oyster® V 2.2 Alimentation électrique 2.3 Circuit de sécurité 2.4 Assemblage du réflecteur 2.5 Schéma de câblage 3.
-
Seite 35: Généralités
1. GÉNÉRALITÉS 1.1 Utilisation conforme à la destination Ce produit est conçu pour être monté à demeure sur un camping-car ou une caravane dont la vitesse ne doit pas dépasser 150 km/h. Lorsque le véhicule porteur est en stationnement, le produit est capable d’orienter automatiquement l’antenne intégrée vers un des satellites géostationnaires européens de diffusion directe de télévision. -
Seite 36: Consignes De Sécurité
1. GÉNÉRALITÉS 1.2 Consignes de sécurité Lisez attentivement les présentes instructions d’utilisation et de montage avant de commencer le montage et l’utilisation. Les présentes instructions décrivent l’utilisation du système satellite automatique. La fiabilité et les performances du système ne peuvent être garanties que si toutes les instructions de montage et d’utilisation ont été... - Seite 37 1. GÉNÉRALITÉS Lorsque le montage est correct, l’antenne se place automatiquement, en quelques instants, en position de repos à l’établissement du contact et s’y maintient. Si le système ne peut pas se rétracter (ou pas complètement) en raison d’une anomalie, il vous incombe en tant que conducteur du véhicule de veiller à ce qu’elle soit correcte- ment et complètement rangée avant de prendre la route.
-
Seite 38: Contenu De La Fourniture
1. GÉNÉRALITÉS 1.3 Contenu de la fourniture Veuillez vérifier que la fourniture est complète. Contenu de la fourniture : 1. Unité extérieure 2. Antenne parabolique 85 cm 3. Plaque de fixation (montée sur l'unité extérieure) 4. Jeu de câbles pour l’unité extérieure (câble coaxial) 5. -
Seite 39: Montage
2. MONTAGE 2.1 Espace nécessaire pour l’Oyster® V Sens de déplacement 850 mm du véhicule Eingefahren Retracted Rétracté Montageplatte Mounting plate Plaque de montage Drehzentrum Ø1930 mm Center of rotation Drehbereich Centre de tournage 370 mm Rotation range Plage de rotation Montageplatte Mounting plate Plaque de montage... -
Seite 40: Alimentation Électrique
2. MONTAGE 2.2 Alimentation électrique 1. Veillez à ce que l’alimentation électrique du système soit suffisante. a) Le système doit être relié à une tension de bord 12 V / 24 V. b) Pour le raccordement au réseau de bord, la section du câble utilisé ne doit pas être inférieure à 2,5 mm². Si la longueur du câble dépasse 6 m, utilisez une section de 4,0 mm²... -
Seite 41: Circuit De Sécurité
2. MONTAGE 2.3 Circuit de sécurité Pour éviter des dommages dus à l’oubli de replier l’unité extérieure pendant la conduite, reliez le fil noir du câble d’alimentation électrique de la FeatureBox à la borne 15 (la borne 15 d'un véhicule est une ligne qui est sous tension lorsque le contact est établi et hors tension lorsque le contact est coupé). -
Seite 42: Schéma De Câblage
2. MONTAGE 2.5 Schéma de câblage Sens de déplacement... - Seite 43 2. MONTAGE CONNEXIONS SUR LA FEATUREBOX Numéro Explication Unité extérieure Raccordement coudé / traversée de toit Plaque de fixation Ligne d'alimentation SAT de l'unité extérieure Boîtier de commande (si fourni) Fusibles Branchez ici le câble d’alimentation fourni. ATTENTION ! Assurez-vous au préalable que l’autre extrémité du câble d'alimentation est correctement raccordée au réseau de bord du véhicule.
-
Seite 44: Éléments De Commande
C’est le cas lorsqu’aucun texte n'est affiché à l'écran. En l’absence de boîtier de commande, le système se commande au moyen du récepteur / téléviseur connecté. Il peut aussi être commandé au moyen de l’application gratuite ten Haaft® sur smartphone/tablette. -
Seite 45: Featurebox (Face Avant)
3. ELÉMENTS DE COMMANDE 3.2 FeatureBox (face avant) La FeatureBox commande l’unité extérieure au moyen d’un boîtier de commande câblé, de l’application ou du récepteur / téléviseur. Touches de commande 1. Touche Marche/Arrêt Cette touche permet de mettre sous et hors tension le système d'antenne complet. -
Seite 46: Featurebox (Face Arrière)
3. ELÉMENTS DE COMMANDE 3.3 FeatureBox (face arrière) Connexions 1. Ant Entrée de l’antenne satellite depuis l’unité extérieure 2. TV Sortie du récepteur satellite vers le téléviseur 3. Mode Commutateur de sélection de satellite (position de base 0 = mode auto- matique) 4. -
Seite 47: Annexe
Sa mise au rebut peut par conséquent s'effectuer en même temps que le véhicule conformément à la directive européenne 2000/53/CE relative aux véhicules hors d’usage. Le système d'antenne ne contient aucun matériau nocif pour l'environnement aux termes de la directive. Nous vous souhaitons beaucoup de satisfaction avec votre système satellite. L'équipe ten Haaft... -
Seite 48: Déclaration De Conformité Ce
4. ANNEXE 4.2 Déclaration de conformité CE... -
Seite 49: Certification
Oyster V 85 Vision SKEW Oyster V 85 SKEW Premium Oyster V 85 Vision SKEW Oyster V 85 SKEW Premium Oyster V 85 Vision TWIN SKEW Oyster V 85 TWIN SKEW Premium Oyster V 85 Vision TWIN SKEW Oyster V 85 TWIN SKEW Premium... - Seite 50 NOTIZEN / NOTES / NOTES...
- Seite 51 NOTIZEN / NOTES / NOTES...
- Seite 52 FeatureBox! L’autocollant contenant les instructions d’emploi doit être le même que l’autocol- lant sur la boîte de caractéristique ! ten Haaft GmbH Öffnungszeiten Neureutstraße 9 Montag – Freitag 08:00 Uhr – 12:00 Uhr 75210 Keltern und von 12:30 Uhr –...