Clearaudio EMOTION SE Bedienungsanleitung
Second edition
Vorschau ausblenden
Andere Handbücher für EMOTION SE:
- Bedienungsanleitung (36 Seiten) ,
- Bedienungsanleitung (32 Seiten)
Inhaltsverzeichnis
Verfügbare Sprachen
Verfügbare Sprachen
E
m
o
t
i
o
n
E
m
o
t
i
o
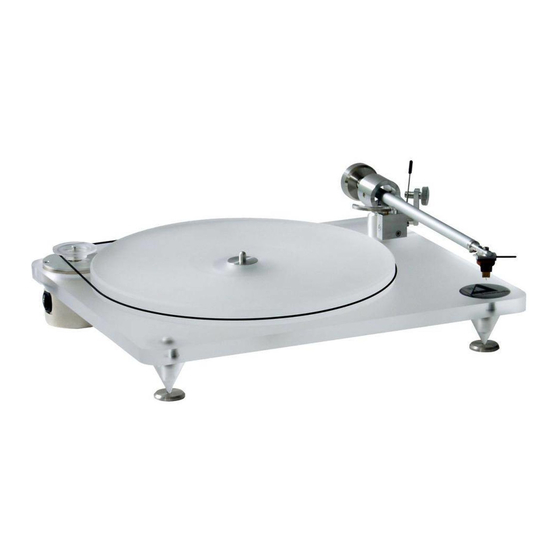
Emotion SE
Hi-Fi Components
Spardorfer Str. 150 D-91054 Erlangen Tel. +49 9131 40300100 FAX +49 9131 40300119
www.clearaudio.de
S
E
n
S
E
S
e
c
S
e
c
clearaudio
www.analogshop.de
o
n
d
E
d
i
t
i
o
n
o
n
d
E
d
i
t
i
o
Made in Germany
®
electronic
info@clearaudio.de
copyright clearaudio 2013
n
User manual
Bedienungsanleitung
GmbH
Version Dezember 2013
Kapitel
Inhaltsverzeichnis

Verwandte Anleitungen für Clearaudio EMOTION SE


Inhaltszusammenfassung für Clearaudio EMOTION SE
- Seite 17 Emotion SE User manual / Bedienungsanleitung Sehr verehrte clearaudio – Kundin, sehr verehrter clearaudio - Kunde, Emotion SE Sie haben sich für ein clearaudio - Laufwerk entschieden, ein hochwertiges Produkt der clearaudio electronic GmbH. Resonanz - reduzierende Formgebung in Verbindung mit einer ausgelagerten Motoreinheit garantieren absolute Laufruhe, originalgetreue Wiedergabe und somit ein echtes Musikerlebnis.
- Seite 18 Emotion SE User manual / Bedienungsanleitung Inhaltsverzeichnis Seite 1. Verpackungsübersicht 2. Lieferumfang 3. Aufbau und Inbetriebnahme 21-28 4. Service 5. Besondere Hinweis 6. Technische Daten Garantie – Informationen Page / Seite 17 Clearaudio electronic GmbH 2013...
-
Seite 19: Verpackungsübersicht
Antriebspulley, Zubehör Sofern Emotion SE im Paket bestellt: clearaudio Satisfy Carbon (dw) Tonarm und/oder Clearaudio Tonabnehmer 2. Etage (Karton mittig): Plattenspielerkörper mit Lagerunterteil 3. Etage (Karton unten): Plattenteller Abb. 1: Verpackungsübersicht Page / Seite 18 Clearaudio electronic GmbH 2013... -
Seite 20: Lieferumfang
Laufwerks. Plattenspielerkörper mit eingesetztem Plattenteller aus GS-Acryl Lagerunterteil, Tonarmaufnahme und höhenverstellbaren Füssen CMB - Lageroberteil Motorantriebseinheit mit Netzzuleitung und Motorbasis Antriebsrad aus Acryl Optional im Paket: Satisfy Carbon Tonarm / direktverkabelt Page / Seite 19 Clearaudio electronic GmbH 2013... - Seite 21 Emotion SE User manual / Bedienungsanleitung Fortsetzung Lieferumfang: 1 paar weiße Handschuhe Erdungskabel für das Emotion SE- Laufwerk clearaudio-Logo, selbstklebend Libelle zum Ausrichten Ihres Laufwerks 11 2 x Antriebsriemen (2 x 292 mm) 3 x Inbusschlüssel Größe 1,5 / 2,5 / 3 13 Feinschraubendreher aus Aluminium Lageröl zur gelegentlichen Schmierung...
-
Seite 22: Aufbau Und Inbetriebnahme
Vermeiden Sie bei diesem Schritt größere, seitliche Kräfte, da die Keramiklagerachse sonst beschädigt werden könnte! Mit sanftem (!) Druck von oben können Sie sicherstellen, dass der Plattenteller auf der gesamten Auflagefläche des Lageroberteiles liegt. Page / Seite 21 Clearaudio electronic GmbH 2013... - Seite 23 Ab Werk werden alle Laufwerksfüsse auf die Position „Null“ voreingestellt. Drehen Sie nun das untere Teil des Fußes im Uhrzeigersinn, um die Höhe zu verstellen (Abb. 5). Drehung im Uhrzeigersinn Abb.5: Höhenverstellung Page / Seite 22 Clearaudio electronic GmbH 2013...
- Seite 24 Satisfy Carbon Nehmen Sie den – Tonarm (Optional im Emotion SE Paket I oder II) und führen Sie zuerst das Signalkabel und anschließend den Fuß des Tonarmes durch die auf dem Chassis vormontierte Tonarmaufnahme. Achten Sie bitte darauf, dass keine Kabel beschädigt oder zu stark abgeknickt werden! Abb.6: Montage des Tonarms...
- Seite 25 Sie einen clearaudio Moving Magnet Tonabnehmer verwenden, können Sie die Auflagekraft auf ca. 20mN (2,0 gr.) einstellen, indem Sie das Gegengewicht des Tonarmes vorsichtig auf den Gewindegängen verdrehen. Optional erhalten Sie im Emotion SE Paket II zur leichteren Einstellung eine clearaudio Kippelwaage. Diese Position der Nadel entspricht einer Auflagekraft von 20 mN (2,0 gr.)
-
Seite 26: Azimuth-Einstellung
Einstellschablone. Stecken Sie diese auf den Dorn des Plattentellers. Drehen Sie anschließend den Plattenteller soweit, dass in etwa die Position wie in nebenstehender Abbildung erreicht wird. Abb.9: Absenken des Tonabnehmers auf der Schablone Page / Seite 25 Clearaudio electronic GmbH 2013... - Seite 27 Fixieren Sie anschließend alle von den Einstellungen betroffenen Schrauben etwas kräftiger. Abb. 11: Korrekte Position des Abtastdiamanten Nach Abschluss der Höheneinstellung können Sie durch festes Anschrauben dieser beiden Justierschrauben den Tonarm endgültig in seiner Position fixieren. Page / Seite 26 Clearaudio electronic GmbH 2013...
-
Seite 28: Antiskating - Einstellung
Einheit in die vorgesehene Aussparung des Laufwerkschassis (von oben betrachtet links) und achten Sie dabei darauf, dass der Schalter des Motors nach außen zeigt. Verbinden Sie das Netzkabel des Motors mit dem Stromnetz. Page / Seite 27 Clearaudio electronic GmbH 2013... - Seite 29 Laufwerk eine längere Zeit nicht in Benutzung ist, schalten Sie das Gerät am Hauptschalter komplett aus. Der Hauptschalter befindet sich am Motorgehäuse (siehe Bild unten). I = AN O = AUS clearaudio wünscht Ihnen viel Vergnügen mit Ihrem neuen Emotion SE - Plattenspieler! Abb. 16: Hauptschalter Page / Seite 28...
-
Seite 30: Service
Beim Verpacken umgekehrt verfahren wie bei Aufbau und Inbetriebnahme (siehe Punkt 3). 5. Besondere Hinweise Um die volle clearaudio-Garantie in Anspruch nehmen zu können, senden Sie uns bitte den entsprechenden Teil der beigelegten Garantiekarte innerhalb von zwei Wochen korrekt ausgefüllt zu, da ansonsten nur die gesetzliche Garantiezeit berücksichtigt werden kann. -
Seite 31: Technische Daten
* nur bei korrekt ausgefüllter und innerhalb von 14 Tagen eingesandter Garantiekarte (siehe Seite 31) Änderungen bleiben vorbehalten. Lieferbar solange Vorrat reicht. Für Druckfehler keine Haftung. Irrtümer vorbehalten. Kopien und Abdrucke – auch nur auszugsweise – bedürfen der schriftlichen Genehmigung durch die clearaudio electronic GmbH. ©clearaudio 2013 Stand: Dezember 2013 Page / Seite 30... -
Seite 32: Warranty Information
RETAIN YOUR PURCHASE RECEIPT Your purchase receipt is your permanent record of a valuable purchase. It should be kept in a safe place to be referred to as necessary for insurance purposes or when corresponding with Clearaudio. IMPORTANT When seeking warranty service, it is the responsibility of the consumer to establish proof and date of purchase. Your purchase receipt or invoice is adequate for such proof.