Seite 1
OWNER MANUAL MANUALE D’USO BEDIENUNGS- ANLEITUNG - ACTIVE TWO-WAY ARRAY SPEAKER WITH INTERNAL DIGITAL MIXER - DIFFUSORE ACUSTICO (“ARRAY”) EVOX JMIX8 AMPLIFICATO A DUE VIE CON MIXER DIGITALE INTEGRATO - AKTIVER ZWEIWEG- SÄULENLAUTSPRECHER MIT INTEGRIERTEM DIGITALMISCHER...
Seite 2
TABLE OF CONTENTS INDICE ENGLISH ITALIANO DEUTSCH...
RCF S.p.A. will not assume any responsibility for the incorrect installation and / or use of this product. WARNING: To prevent the risk of fire or electric shock, never expose this product to rain or WARNING humidity.
Modifications: Any modifications made to this device that are not approved by RCF may void the authority granted to the user by the FCC to operate this equipment.
Seite 5
RCF S.P.A. THANKS YOU FOR PURCHASING THIS PRODUCT, WHICH HAS BEEN MADE TO GUARANTEE RELIABILITY AND HIGH PERFORMANCE. EVOX JMIX8 is a portable active sound system (made of a satellite plus a subwoofer) that combines quality and reliability of RCF transducers with high amplification power.
INSTALLATION Remove the rubber band and take out the satellite Screw the lower part of the satellite speaker stand (the pole) into the subwoofer insert for pole mounting. Screw the telescopic upper part of the satellite speaker stand into its lower part. Loose the stand bolt, adjust the satellite speaker height from the floor and tighten the bolt again, then insert the satellite speaker...
Seite 7
. In this case the male XLR output works as a regular parallel audio output. When the LED is ON, the signal input is coming from EVOX JMIX8 digital mixer. In this case, the male XLR output becomes by default the R output to an addictional EVOX J8.
Seite 8
Before connecting the power cord, check if the A/C Power corresponds to the voltage indicated on the rating plate on the unit. If not, please contact your RCF dealer. Connect the power cord only to a A/C Power socket outlet with a protective earthing connection.
Seite 9
IMPORTANT: befORe TuRNINg The AMPlIfIeR ON lINk The subwOOfeR AMPlIfIeR OuTPuT TO The sATellITe sPeAkeR INPuT As shOwN IN The fIguRe...
Seite 10
AUX OUT; this is a balanced output for the auxiliary send available on each input channel. DISPLAY MENU INFORMATION All the functions available on the EVOX JMIX8 system integrated mixer can be operated from the operating display. The select buttons: INPUT, OUTPUT, HOME, SYSTEM, MFX, FX give access to all the parameter pages on the LCD display.
FRONT PANEL MONO input channels; the MIC/LINE 1 to 4 input channels provide a level knob and an INPUT button. The small yellow point named 0dB indicates the “unity gain” level of the channel. The SIGNAL LED lights up in green when a signal louder than -40dB is applied to the input.
Seite 12
Page EQ EQUALIZATION (EQ): this menu page gives access to EQ parameters; every input channel is provided with a three band EQ: LOW and HIGH bands are +/-12dB shelving EQs with reference frequency at 125Hz and 6.0kHz. The MID BAND EQ provide selectable frequency from 50Hz to 12kHz and +/-12dB gain.
Seite 13
The STEREO box ON/OFF allows to select the chosen system configuration: using the EVOX JMIX8 as a stand alone speaker, the STEREO box has to be set to OFF. Using EVOX 8 JMIX8 + EVOX J8 as a stereo configuration, the STEREO BOX has to be set to ON. In...
Seite 14
EVOX JMIX8 outputs the LEFT channel and the EVOX J8 outputs the RIGHT channel. If the environment or the setup does not permit the correct positioning of EVOX JMIX8 as left channel and EVOX J8 as right channel, it is possible to reverse the stereo image using the box called SWAP LR: SWAP LR OFF: EVOX JMIX8 LEFT –...
Seite 15
When the “LINK OUT” function is selected from the ROUTING menu, the display will show the following message: “AUX CONTROL DISABLED WHEN LINK OUT ACTIVE” AUX GEQ page: this page gives access to the 7 band Graphic EQ available on AUX bus. Select each single band of the EQ using the “PARAMETER SELECT”...
Seite 16
This menu allows to disable the mixer in an EVOX JMIX8 system. Turn the EDIT encoder counterclockwise to change the menu line from MIXER ENABLE to MIXER DISABLE, press the EDIT encoder, a display message will appear: DISABLE MIXER – PRESS ENCODER TO CONFIRM – PRESS ANY KEY TO CANCEL By pressing the EDIT encoder again, the mixer is disabled and the LCD display backlight will switch off in 3 seconds.
Seite 17
LOAD PRESET “XX” – PRESS ENCODER TO CONFIRM - PRESS ANY KEY TO CANCEL Press the EDIT encoder again to load the selected preset, or press any key to cancel the operation. When a preset is loaded, this information will appear in a dedicated area on the LOAD SHOW page.
Seite 18
+48V ON/OFF: enables or disables +48 V phantom power on MIC inputs 1 and 2. BLUETOOTH ON/OFF: enables or disables the Bluetooth connection both for audio streaming and control. STARTUP DEFAULT ON/OFF: if this box is set to OFF when the system is switched on, the mixer keeps its last status when turned off.
Seite 19
AMP page: using the AMP MODEL menu on the bottom of the display, it is possible to select one of the 15 amp simulations by OVERLOUD 1. DARKFACE ‘65 2. JAZZ C 3. ROCK’64 4. ROCK 800 5. ROCK 900 6.
Seite 20
LED will blink as long as a Bluetooth device is associated. When the device is connected, the green LED will be steadily lit. Now it is possible to control the EVOX JMIX8 system via the Android or iOS app. Furthermore, a Bluetooth audio streaming is enabled to stereo channel 7/8 (see section 10 of this chapter) USB.
L’installazione e l’utilizzo errati del prodotto esimono la RCF S.p.A. da ogni responsabilità. ATTENZIONE: per prevenire i rischi di fiamme o scosse elettriche, non esporre mai questo ATTENZIONE prodotto alla pioggia o all’umidità.
Seite 22
8. La RCF S.p.A. raccomanda vivamente che l’installazione di questo prodotto sia eseguita solamente da installatori professionali qualificati (oppure da ditte specializzate) in grado di farla correttamente e certificarla in accordo con le normative vigenti. Tutto il sistema audio dovrà essere in conformità con le norme e le leggi vigenti in materia di impianti elettrici.
Seite 23
RCF S.P.A. VI RINGRAZIA PER L’ACQUISTO DI QUESTO PRODOTTO, REALIZZATO IN MODO DA GARANTIRNE L’AFFIDABILITÀ E PRESTAZIONI ELEVATE. EVOX JMIX8 è un sistema audio attivo e portatile (composto da un diffusore satellite più un subwoofer) che combina la qualità e l’affidabilità dei trasduttori RCF con amplificatori di potenza elevata.
INSTALLAZIONE Rimuovere la cinghia elastica ed estrarre la colonna. Avvitare la parte inferiore dell’asta di supporto nell’inserto presente sul subwoofer. Avvitare la parte superiore telescopica dell’asta di supporto nella sua parte inferiore. Allentare il bullone dell’asta, regolare l’altezza dal pavimento del diffusore “satellite” e serrare di nuovo il bullone, poi posizionare il diffusore “satellite”...
Seite 25
XLR maschio funziona come un normale rilancio. Quando il LED è acceso, il segnale arriva dal mixer della EVOX JMIX8. In questo caso, l’uscita XLR maschio diventa l’uscita destra (R) del mixer, per un eventuale EVOX J8 addizionale.
Seite 26
Prima di collegare il cavo d’alimentazione, assicurarsi che tutte le connessioni siano corrette e che la tensione di rete corrisponda quella di targa dell’apparecchio, in caso contrario rivolgersi ad un rivenditore RCF. Collegare il cavo d’alimentazione solo ad una presa di rete avente la messa a terra.
Seite 27
IMPORTANTe: ’ PRIMA dI AcceNdeRe l AMPlIfIcATORe ’ cOllegARe l uscITA AMPlIfIcATA del ’ subwOOfeR All INgRessO del dIffusORe “ ” ( sATellITe cOMe MOsTRATO NellA fIguRA...
Seite 28
INFORMAZIONI SUL MENU DEL DISPLAY Tutte le funzioni disponibili sul mixer integrato del sistema EVOX JMIX8 possono essere azionate dal display operativo. I pulsanti di selezione: INPUT, OUTPUT, HOME, SYSTEM, MFX, FX danno accesso a tutte le pagine dei parametri sul display LCD.
PANNELLO FRONTALE Canali di ingresso MONO; i canali di ingresso MIC / LINE 1-4 dispongono di una manopola di controllo del livello assoluto e un pulsante INPUT. Il piccolo punto giallo denominato 0dB indica il livello di “guadagno unitario” del canale. Il LED SIGNAL si illumina in verde quando all’ingresso viene applicato un segnale più...
Seite 30
Pagina EQ EQUALIZATION (EQ): questa pagina di menu dà accesso ai parametri EQ; ogni canale di ingresso è dotato di un EQ a tre bande: le bande LOW e HI sono EQ shelving +/- 12dB con frequenza di riferimento a 125Hz e 6.0kHz. MID BAND EQ ha una frequenza selezionabile da 50Hz a 12kHz e guadagno +/- 12dB.
Seite 31
Ingressi STEREO LINE 5/6: collegare a questi jack TS qualsiasi sorgente stereo analogica. Controllare il livello del canale stereo con la manopola dedicata: Il LED SIGNAL si illumina in verde quando all’ingresso viene applicato un segnale più forte di -40dB. Premendo il pulsante INPUT si accede alla visualizzazione dei menu: Pagina LVL LEVELS (LVL): come per i canali MONO, questa pagina di menu dà...
Seite 32
OFF. Utilizzando EVOX JMIX8 + EVOX J8 come configurazione stereo, lo STEREO BOX deve essere impostato su ON. In questo caso, EVOX JMIX8 emette il canale LEFT e EVOX J8 il canale RIGHT. Se l’ambiente o la configurazione del palco non consentono il corretto posizionamento di EVOX JMIX8 come canale sinistro e EVOX J8 come canale destro, è...
Seite 33
MAIN L o R al jack bilanciato AUX OUT, consentendo la creazione di una connessione audio dedicata per una ulteriore EVOX J8. Questa impostazione consente di creare una configurazione stereo EVOX di grandi dimensioni composta da una EVOX JMIX8 e fino a tre EVOX J8. (Vedere pagina 42: CONFIGURAZIONE EVOX JMIX8).
Seite 34
Premendo nuovamente il tasto HOME si accede alla pagina “I / 0” MIXER ENABLE/ DISABLE. Questo menu consente di disabilitare il mixer in un sistema EVOX JMIX8. Ruotare in senso antiorario l’encoder EDIT per modificare la funzione nel menu da MIXER ENABLE a MIXER DISABLE, premere l’encoder EDIT, apparirà...
Seite 35
Per caricare un preset ruotare l’encoder EDIT in senso orario, selezionare il preset scelto e confermare la selezione premendo l’encoder EDIT. Apparirà un messaggio: LOAD PRESET “XX” – PRESS ENCODER TO CONFIRM - PRESS ANY KEY TO CANCEL Premere nuovamente l’encoder EDIT per caricare il preset selezionato o premere un tasto qualsiasi per annullare l’operazione.
Seite 36
+48V ON/OFF: abilita o disabilita l’alimentazione phantom +48V sugli ingressi MIC1 e 2. BLUETOOTH ON / OFF: attiva o disattiva la connessione Bluetooth sia per lo streaming audio che per il controllo via APP RCF EVOX. STARTUP DEFAULT ON/OFF: se questa casella è impostata su OFF quando il sistema viene acceso, il mixer mantiene lo stato presente quando spento.
Seite 37
Premendo nuovamente il pulsante MFX si accede alla pagina AMP: Pagina AMP: utilizzando il menu AMP MODEL nella parte inferiore del display, è possibile selezionare una delle 15 emulazioni di amplificatore per chitarra o basso di OVERLOUD™: 1. DARKFACE ‘65 2.
Seite 38
Il LED verde lampeggia fino a quando non viene associato un dispositivo Bluetooth. Quando il dispositivo è collegato, il LED verde sarà acceso stabilmente. Ora è possibile controllare il sistema EVOX JMIX8 tramite l’app Android o iOS RCF EVOX. Inoltre, lo streaming audio Bluetooth è abilitato sul canale stereo 7/8 (vedere la sezione 10 di questo capitolo) USB.
Die Bedienungsanleitung ist ein Bestandteil dieses Produktes. Bei einem Eigentümerwechsel ist sie dem neuen Besitzer als Anleitung für die sachgemäße Installation und Verwendung sowie als Nachschlagwerk für Sicherheitsvorkehrungen zu übergeben. RCF S.p.A. übernimmt keine Haftung im Falle einer unsachgemäßen Installation und/ oder Benutzung dieses Produkts. ACHTUNG ACHTUNG: Um der Gefahr von Feuer oder Stromschlag vorzubeugen, halten Sie das Gerät...
Der Betrieb dieses Geräts in einem Wohngebiet kann zu schädlichen Störungen führen; in diesem Fall ist der Benutzer verpflichtet, die Störungen auf eigene Kosten zu beheben. Modifikationen: Jegliche Änderungen an diesem Gerät, die nicht ausdrücklich von RCF zugelassen sind, können die dem Benutzer von der FCC erteilte Berechtigung zum Betrieb...
Seite 41
12”-Basslautsprecher im Bassreflexgehäuse. INTERNER 8-KANAL-DIGITALMISCHER Mit dem EVOX J8 hat RCF das System um einen Digitalmischer mit 8 Eingängen erweitert. Mit der Rechenleistung des innovativen integrierten Z.CORE-DSPs steht Ihnen die volle Bandbreite an Mischpultfunktionen und hochwertige Instrumenten-Effekte und Verstärker- Simulationen zur Verfügung.
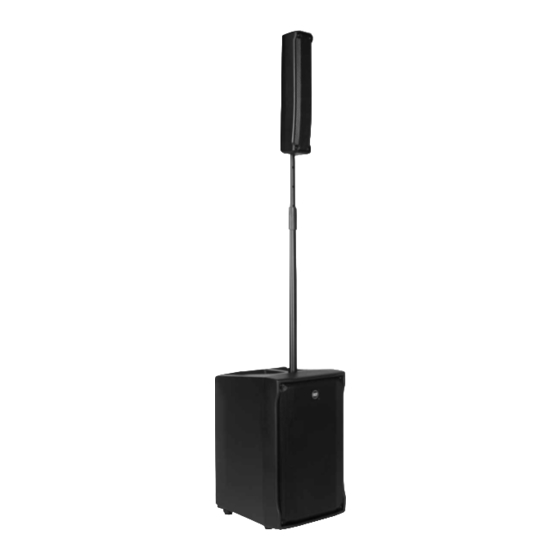
Seite 42
INSTALLATION Entfernen Sie das Gummiband und ziehen Sie den Satelliten heraus. Schrauben Sie den unteren Teil des Satelliten- Lautsprecherstativs (die Distanzstange) in das Gewinde oben am Subwoofer. Schrauben Sie den oberen teleskopischen Teil des Satelliten-Lautsprecherstativs in das untere Teil. Lösen Sie die Stativschraube, stellen Sie die Höhe des Satellitenlautsprechers vom Boden aus ein und ziehen Sie die Schraube wieder fest.
Seite 43
SUBWOOFER-RÜCKSEITE UND ANSCHLÜSSE PUSH PUSH Female XLR connector Male XLR connector Symmetrischer Audioeingang (XLR-Buchse) pins Link Output - Stereo-Ausgang (XLR-Stecker)). (+ , gRound audio signaL Dieser Ausgang ist parallel zum Audioeingang geschaltet und dient zum Anschluss (–, audio signaL coLd eines weiteren Lautsprechers (jedoch nur wenn die LED INPUT FROM MIXER nicht leuchtet).
Seite 44
Prüfen Sie vor dem Anschließen des Netzkabels, ob die Netzspannung mit der auf dem Typenschild des Gerätes angegebenen Spannung übereinstimmt. Wenn nicht, wenden Sie sich bitte an Ihren RCF-Händler. Schließen Sie das Netzkabel nur an eine Steckdose mit Schutzleiteranschluss an.
Seite 45
wIchTIg: BEVOR SIE DEN VERSTÄRKER EINSCHALTEN, VERBINDEN SIE WIE IN DER ABBILDUNG DARGESTELLT DEN SUBWOOFER-VERSTÄRKERAUSGANG MIT DEM SATELLITEN- LAUTSPRECHEREINGANG.
AUX OUT. Dies ist ein symmetrischer Ausgang für den auf jedem Eingangskanal verfügbaren zusätzlichen Signal-Ausspielweg. DISPLAY-MENÜ Alle Funktionen des im EVOX JMIX8-Systems integrierten Mischers können Sie über das Display bedienen. Mit den INPUT, OUTPUT, HOME, SYSTEM, MFX und FX Auswahltasten haben Sie Zugriff auf alle Parameterseiten des LCD-Displays.
Seite 47
BEDIENFELD VORNE MONO-Eingangskanäle. Die Eingangskanäle MIC/LINE 1 bis 4 verfügen über einen Pegelregler und eine INPUT-Taste. Der kleine gelbe Punkt mit der Bezeichnung 0 dB zeigt den Pegel des Kanals mit Verstärkungsfaktor eins an. Die SIGNAL-LED leuchtet grün, wenn ein Signal von mehr als -40 dB am Eingang anliegt. Die rote LED zwischen den Kanälen 1 und 2 zeigt an, dass die +48V Phantomspeisung auf diesen Kanälen aktiviert ist (siehe Abschnitt 16).
Seite 48
EQ-Seite EQUALIZATION (EQ): In dieser Menüseite greifen Sie auf die EQ-Parameter zu. Jeder Eingangskanal ist mit einem Drei-Band-EQ ausgestattet. Die LOW- und HIGH-Bänder sind als +/-12dB-Shelving-EQs (Kuhschwanzfilter) ausgelegt mit Referenzfrequenzen von 125 Hz und 6.0 kHz. Der MID BAND EQ bietet wählbare Frequenzen von 50 Hz bis 12 kHz und +/-12dB Verstärkung.
Seite 49
STEREO LINE Eingangskanal 5/6: Schließen Sie eine beliebige analoge Stereo-Signal- Quelle an diese TS-Buchsen an. Die SIGNAL-LED leuchtet grün, wenn ein Signal mit mehr als -40 dB am Eingang anliegt. Drücken Sie die INPUT-Taste, um in die Display-Menüs zu gelangen: LVL-Seite LEVELS (LVL): Wie bei den MONO-Kanälen bietet diese Menüseite Zugriff auf die FX Send und AUX Send-Signalabgriff-Wege.
Seite 50
STEREO-Schaltfläche auf ON zu stellen. In diesem Fall gibt der EVOX JMIX8 den linken Kanal und der EVOX J8 den rechten Kanal wieder. Falls die Umgebung oder das Setup die normale Positionierung von EVOX JMIX8 als linken Kanal und EVOX J8 als rechten Kanal nicht zulässt, können Sie das Stereobild...
Seite 51
Wählen Sie “LINK OUT” aus dem ROUTING-Dropdown-Menü, um eine Verbindung mit einen weiteren EVOX J8 über die symmetrische AUX OUT-Buchse herzustellen. Mit dieser Einstellung können Sie ein großes EVOX-Setup bestehend aus einem EVOX JMIX8 plus bis zu drei EVOX J8 erstellen. (Siehe Seite 42: EVOX JMIX8 KONFIGURATION).
Seite 52
Drücken). Durch erneutes Drücken des EDIT-Encoders wird der Mischer deaktiviert und die Hintergrundbeleuchtung der LCD-Anzeige schaltet sich in 3 Sekunden aus. Jetzt ist der Mischer deaktiviert und der EVOX JMIX8 kann wie ein herkömmlicher Aktivlautsprecher verwendet werden. Dabei dient der XLR-Anschluss auf der Rückseite des Subwoofers als Mono-Eingang.
Seite 53
LOAD PRESET “XX” – PRESS ENCODER TO CONFIRM - PRESS ANY KEY TO CANCEL (Preset “XX” laden - zur Bestätigung Encoder drücken - zum Abbruch beliebige Taste Drücken). Drücken Sie anschließend den EDIT-Encoder erneut, um das ausgewählte Preset zu laden oder drücken Sie eine beliebige Taste, um den Vorgang abzubrechen. Wenn ein Preset geladen wird, erscheinen diese Informationen in dem dafür vorgesehen Feld auf der LOAD SHOW-Seite.
Seite 54
48V ON/OFF: Aktiviert und deaktiviert die +48 V Phantomspeisung für MIC-Eingänge 1 und 2. BLUETOOTH ON/OFF: Aktiviert und deaktiviert die Bluetooth-Verbindung für Audio- Streaming und Steuerung. STARTUP DEFAULT ON/OFF: Wird diese Schaltfläche beim Einschalten des Systems auf OFF gesetzt, behält der Mischer beim Ausschalten seinen letzten Status. Wenn die Schaltfläche auf ON gesetzt ist, wird der Mischer mit einer Standardkonfiguration eingeschaltet.
Seite 55
AMP-Seite: Über das AMP MODEL-Menü am unteren Rand des Displays können Sie jeweils eine der 15 Verstärker-Simulationen von OVERLOUDTM anwählen: 1. DARKFACE ‘65 2. JAZZ C 3. ROCK’64 4. ROCK 800 5. ROCK 900 6. TOP 30 7. MODERN 8. BASSAMP 9.
Seite 56
Notebook durchgeführt werden soll. Die grüne LED blinkt während dieses Gerät mit einem anderen Bluetooth-Gerät gekoppelt wird. Wenn das Gerät dann angeschlossen ist leuchtet die grüne LED permanent. Nun ist es möglich, das EVOX JMIX8-System über die Android- oder iOS-Applikation zu steuern. Außerdem ist auch Bluetooth-Audio-Streaming auf Stereokanal 7/8 möglich (siehe Abschnitt 10 dieses Kapitels).
Seite 57
EVOX JMIX8 DIMENSIONS 113.9 460.3 [18] [16] [13]...
SYSTEM SPECIFICATIONS EVOX JMIX8 ACOUSTICAL Frequency response 40 Hz - 20.000 Hz Maximum sound pressure level 128 dB Horizontal coverage angle 120° Vertical coverage angle 30° Subwoofer transducer 12”, 2.5” voice coil Satellite transducers 8 x 2”, 1.0” voice coil...
Seite 59
ONBOARD DIGITAL MIXER SPECIFICATIONS Mic Input Phantom Power yes (Ch 1-2) Mono Line Input Stereo Line Input Selectable Hiz Inputs Compressors 4 (Ch 1-4) Aux Output USB Device Internal Fx 1 x Z-CORE DSP FX Hipass Filter All channels from 20Hz to 1kHz Eq for Mono Channels 3 bands (Shelving High and Low, Semi-parametric Mid) Eq for Stereo Channel...