eQ-3 MAX Bedienungsanleitung
Vorschau ausblenden
Andere Handbücher für MAX:
- Bedienungsanleitung (180 Seiten) ,
- Einführung und übersicht (34 Seiten) ,
- Kurzanleitung (2 Seiten)

Verwandte Anleitungen für eQ-3 MAX


Inhaltszusammenfassung für eQ-3 MAX
- Seite 1 Bedienungsanleitung Operating Manual MAX! Wandthermostat + Funk-Wandthermostat (S. 2) MAX! Wireless Wall Thermostat + (p. 32)
-
Seite 2: Inhaltsverzeichnis
7. Datum und Uhrzeit einstellen (dAt) ......8 8. Montage ...............9 9. Montage in bestehende Schalterserien ....11 10. Anlernen ..............12 11. Ablernen von MAX! Komponenten (UnL) ....14 12. Betriebs-Modi ............15 13. Kindersicherung / Bediensperre ( ) .......16 14. Heizungspause einstellen (ON) .......16 15. -
Seite 3: Einleitung Und Bestimmungsgemäßer Einsatz
Software vorgenommen werden. Durch den Einsatz des MAX! Cubes können mehrere MAX! Heizkörperlösungen und MAX! Raumlösungen in einer gemeinsamen Installa- tion miteinander verbunden werden. In der MAX! Hauslö- sung ist es auch möglich, den MAX! Eco Taster als raum- übergreifende Funktion einzusetzen. -
Seite 4: Übersicht
In der Raumlösung können Sie die Konfiguration aller angelernten Geräte in Ihrem Raum komforta- bel über den MAX! Wandthermostat + vornehmen. Bis zu 8 MAX! Heizkörperthermostat + und 8 MAX! Fensterkontakte können über den MAX! Wandthermostat + angelernt und ge- steuert werden. -
Seite 5: Bedienung Und Display
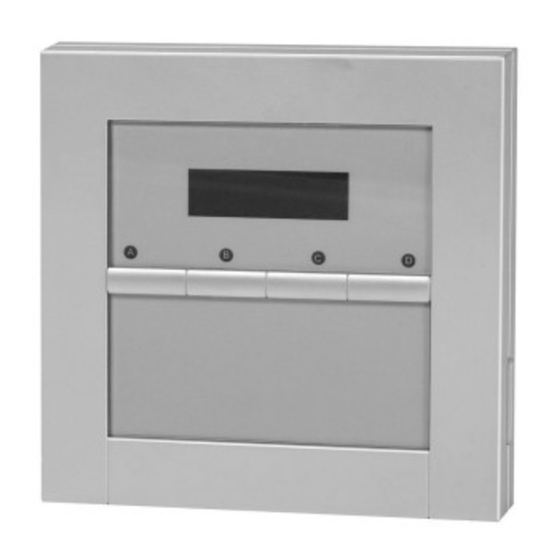
3. Bedienung und Display Automatikbetrieb (Auto), Manueller Betrieb (Manu), Urlaubsfunktion ), Boost-Funktion ( ), Fenster-auf-Symbol ( ), Bedien- BOOST sperre-Symbol ( Wochentag, Batterie-leer-Symbol ( ), Funksynchronität ( ), Kom- fort-/Absenktemperatur ( ), Uhrzeit/Datum Eingestellte Zeiträume im Wochenprogramm Komfort-Taste ( ): zum Wechseln auf die Komforttemperatur Absenk-Taste ( ): zum Wechseln auf die Absenktemperatur Mode-/Menu-Taste: Zum Wechseln des Betriebsmodus und zum Öffnen... -
Seite 6: Sicherheitshinweise
4. Sicherheitshinweise Jeder andere Einsatz als der in dieser Bedienungsan- leitung beschriebene ist nicht bestimmungsgemäß und führt zu Garantie- und Haftungsausschluss. Dies gilt auch für Umbauten und Veränderungen. Die Geräte sind ausschließlich für den privaten Gebrauch gedacht. Das Gerät ist kein Spielzeug, erlauben Sie Kindern nicht damit zu spielen. -
Seite 7: Batterien Einlegen (Wechseln)
Wenn Sie das Gerät zum ersten Mal in Betrieb nehmen, entfernen Sie zunächst die Montageplatte auf der Rück- seite des MAX! Wandthermostat + . • Halten Sie dazu den MAX! Wandthermostat + in einer Hand fest und ziehen Sie die Montageplatte an einer Ecke ab. 2. Montierter Zustand Im montierten Zustand lässt sich der MAX! Wandther-... -
Seite 8: Datum Und Uhrzeit Einstellen (Dat)
• Stellen Sie Jahr, Monat und Tag ein und bestätigen Sie die Eingaben mit der OK-Taste. Jahr: Monat und Tag: • Stellen Sie nun die Uhrzeit ein und bestätigen Sie die Eingaben mit der OK-Taste. Stunden: Minuten: Nach abgeschlossener Zeit- und Datumseingabe wechselt der MAX! Wandthermostat + in den Normalbetrieb. -
Seite 9: Montage
Uhrzeit jederzeit über „dAt“ im Konfigurationsmenü geändert werden. (siehe Kapitel 16). 8. Montage Sie können den MAX! Wandthermostat + entweder im bei- liegenden Rahmen an eine Wand schrauben/kleben oder in eine bestehende Schalterserie integrieren (Näheres zur Kompatibilität finden Sie in Kapitel 9). - Seite 10 • Entfernen Sie die Folie von den Klebestreifen. • Drücken Sie jetzt den zusammengebauten MAX! Wand- thermostat + mit der Rückseite an die gewünschte Posi- tion an die Wand. Schraub-Montage: • Wählen Sie einen geeigneten Montageort aus. Stellen Sie sicher, dass in der Wand keine Leitungen verlaufen.
-
Seite 11: Montage In Bestehende Schalterserien
• Montieren Sie die Montageplatte durch Eindrehen der mitgelieferten Schrauben und Dübel. • Setzen Sie nun den MAX! Wandthermostat + im Rahmen auf die Montageplatte. Achten Sie darauf, dass die Pfeile auf der Rückseite des Wandthermostats nach oben zei- gen und die Klammern der Montageplatte in die Öffnun- gen des Wandthermostats rasten. -
Seite 12: Anlernen
Programmierungen (z.B. Wochenpro- gramme) direkt über die MAX! Software vorge- nommen werden. • Starten Sie die lokale MAX! Software und klicken Sie auf „Neues Gerät“. • Aktivieren Sie den Anlernmodus am MAX! Wandther- mostat + mit einem langen Tastendruck (länger als 3 Se-... - Seite 13 • Gehen Sie in der Software auf „Weiter“, um dem Gerät einen Namen zu geben und es einem Raum zuzuordnen. • Der MAX! Wandthermostat + ist nun im System integ- riert und kann in der Software im jeweiligen Raum kon- figuriert werden.
-
Seite 14: Ablernen Von Max! Komponenten (Unl)
MAX! Wandthermostat + (z.B. Modus, Tem- peratur, Wochenprogramm). Zum Anlernen gehen Sie wie folgt vor: • Versetzen Sie zunächst den Anlernpartner (z.B. den MAX! Heizkörperthermostat + ) gemäß der entsprechenden Be- dienungsanleitung in den Anlernmodus. • Aktivieren Sie den Anlernmodus am MAX! Wandther- mostat + mit einem langen Tastendruck der OK-Taste. -
Seite 15: Betriebs-Modi
• Im Display erscheint ACC (Accept). Bestätigen Sie den Ablern-Vorgang mit der OK-Taste. • Nach der Funktion UnL sind alle Verknüpfungspartner aus dem MAX! Wandthermostat + gelöscht, eine Werksein- stellung ist nicht zwingend notwendig. 12. Betriebs-Modi (Auto / Manu / Urlaubsfunktion / Boost) Sie haben die Möglichkeit, zwischen den Betriebs-Mo-... -
Seite 16: Kindersicherung / Bediensperre ( )
In der MAX! Hauslösung nehmen Sie die Einstel- lungen für den MAX! Wandthermostat + über die MAX! Software vor. In der MAX! Raumlösung können Sie die Funktio- nen über einen kurzen Druck der Mode-Taste wech- seln. Wird der Betriebsmodus oder die Temperatur an ei- nem Gerät im Raum geändert, übernehmen alle an-... -
Seite 17: Frostschutzbetrieb Einstellen (Off)
• Zum Beenden verlassen Sie den manuellen Betrieb (Manu) oder drücken Sie die (+) Taste. 16. Konfigurationsmenü Wenn Sie den MAX! Wandthermostat + in der MAX! Hauslösung nutzen, können Sie die in den folgen- den Kapiteln beschriebenen Funktionen bequem in der MAX! Software in jedem Raum einstellen. -
Seite 18: Wochenprogramm Einstellen (Pro)
dAt: Ändern von Uhrzeit und Datum (Abschnitt 7.) UnL: Ablernen von Funkkomponenten (UnL) (Abschnitt 11.) Pro: Einstellen des Wochenprogramms (Ab - schnitt 16.1) t-d: Anzeige von Uhrzeit und Datum umschalten (Abschnitt 16.2) Komfort- und Absenktemperatur einstellen (Abschnitt 16.4) S-A: Ändern der Displayanzeige von Soll- und Ist- Temperatur (Abschnitt 16.3) bOS: Einstellen der Ventilöffnung und der Dauer der... - Seite 19 • Wiederholen Sie diesen Vorgang, bis für den Zeitraum von 0:00 bis 23:59 Temperaturen hinterlegt sind. Im Auto-Modus kann das eingestellte Wochenprogramm automatisch von angelernten MAX! Heizkörperthermos- taten übernommen und die Temperatur über die (+) - und (-) -Taste bzw. Komfort ( )- und Absenktaste ( ) jederzeit verändert werden.
- Seite 20 Wochenprogramm: Beispiele Mit dem MAX! Wandthermostat + können für jeden Wochen- tag bis zu 6 Heizzeiten (13 Schaltzeitpunkte) mit individu- eller Temperaturvorgabe hinterlegt werden. Werkseitig ist folgendes Wochenprogramm hinterlegt: Montag-Freitag: ab 00:00 bis 06:00 17.0°C ab 06:00 bis 09:00 21.0°C ab 09:00 bis 17:00 17.0°C...
- Seite 21 Soll ein Raum (z.B. Badezimmer) auch zur Mittagszeit beheizt werden, kann eine Programmierung wie folgt aussehen: Montag bis Sonntag: ab 00:00 bis 06:00 15.0°C ab 06:00 bis 09:00 23.0°C ab 09:00 bis 12:00 17.0°C ab 12:00 bis 14:00 19.0°C ab 14:00 bis 18:00 17.0°C ab 18:00 bis 22:00 21.0°C...
-
Seite 22: Anzeige Uhrzeit/Datum Einstellen (T-D)
16.2 Anzeige Uhrzeit/Datum einstellen (t-d) Werkseitig wird im Display die Uhrzeit angezeigt. Über das Menü können Sie statt der Uhrzeit das Datum anzei- gen lassen. • Öffnen Sie durch langen Tastendruck (länger als 3 Sek.) der Mode-Taste das Konfigurationsmenü. • Wählen Sie den Menüpunkt „t-d“ mit den (+) und (-) Tas- ten aus und bestätigen Sie mit der OK-Taste. -
Seite 23: Komfort- Und Absenktemperatur Einstellen
Umschalten zwischen Kom- fort- und Absenktemperatur. Werkseitig liegen diese bei 21.0°C und 17.0°C. Beim Einsatz ohne MAX! Cube passen Sie die Werte über die jeweilige Taste (Komfort- bzw. Absenktemperatur) wie folgt am Gerät an: • Halten Sie die Komfort( )-Taste lange gedrückt, um die Komfort-Temperatur anzupassen bzw. - Seite 24 mit der vorher eingestellten Temperatur. • Die Boost-Funktion lässt sich jederzeit vorzeitig durch nochmaliges Betätigen der OK-Taste deaktivieren. Die verbleibende Funktionsdauer wird im Sekundentakt heruntergezählt (z.B. „300“ bis „000“) und wird im BOOST Display dargestellt. Die Dauer und Ventilöffnung der Boost-Funktion lassen sich individuell anpassen: •...
-
Seite 25: Die Urlaubsfunktion Einstellen ( )
Ist die Dauer der Boost-Funktion (z.B. über den MAX! Cube) so eingestellt, dass die Anzeige im Display eine Anzeige von 999 Sek. überschreitet, wird sie in Minuten dargestellt. 16.6 Die Urlaubsfunktion einstellen ( Die Urlaubsfunktion kann genutzt werden, wenn während eines Urlaubs oder einer Party für einen bestimmten Zeit-... -
Seite 26: Fenster-Auf-Funktion ( , Aer) Einstellen
Während die Entkalkungsfahrt ausgeführt wird, erscheint im Display „CAL“. 16.8 Fenster-auf-Funktion ( , AEr) einstellen Der MAX! Wandthermostat + regelt beim Lüften im Raum die Temperatur automatisch herunter, um Heizkosten zu sparen. Dabei wird im Display des Wandthermostats und aller angelernten Geräte das Fenster-auf-Symbol ( angezeigt. -
Seite 27: Offset-Temperatur Einstellen (Tof)
16.9 Offset-Temperatur einstellen (tOF) Die Temperatur wird am MAX! Wandthermostat + gemes- sen, deshalb kann es woanders im Raum kälter oder wär- mer sein. Um dies anzugleichen, kann ein Temperatur- Offset von ±3.5°C eingestellt werden. Werden z.B. 18°C anstatt eingestellter 20°C gemessen, ist ein Offset von -2.0°C einzustellen. -
Seite 28: Hinweise Zum Funkbetrieb
• Bestätigen Sie die Auswahl mit der OK-Taste. • Es erscheint „ACC“ im Display, bestätigen Sie den Werks- reset mit der OK-Taste. Ist der MAX! Wandthermostat + an einen MAX! Cube angelernt, ist das Konfigurationsmenü am Gerät ge- sperrt. Sie können trotzdem ein Reset wie nachfolgend be- schrieben ausführen:... -
Seite 29: Fehlerbehebung
Hiermit erklärt die eQ-3 Entwicklung GmbH, dass sich dieses Gerät in Übereinstimmung mit den grundlegenden Anforderungen und den anderen relevanten Vorschriften der Richtlinie 1999/5/EG befindet. Die vollständige Konfor- mitätserklärung finden Sie unter www.eQ-3.de. 19. Fehlerbehebung Fehlercode Problem Behebung Batteriesym- Batteriespan-... -
Seite 30: Technische Daten
20. Technische Daten Kurzbezeichnung: BC-TC-C-WM-4 Versorgungsspannung: 2x 1,5 V LR03/Micro/AAA Stromaufnahme: 30 mA max. Batterielebensdauer: 2 Jahre (typ.) Schutzart: IP20 Umgebungstemperatur: 5 bis 55 °C Abmessungen (B x H x T): 86 x 86 x 21,5 mm Gewicht: 79 g (ohne Batterien) - Seite 31 MAX! Hauslösung: • max. 50 Geräte in max. 10 Räumen, • max. 4 MAX! Eco Taster • pro Raum max. 8 MAX! Heizkörperthermostat (+) , 8 MAX! Fensterkontakte und 1 MAX! Wandthermostat + MAX! Raumlösung: • max. 1 MAX! Wandthermostat + •...
- Seite 60 AG Maiburger Straße 29 D-26789 Leer www.eQ-3.de...