ELNA 664 Gebrauchsanleitung
Inhaltsverzeichnis
Inhaltsverzeichnis

Verwandte Anleitungen für ELNA 664


Inhaltszusammenfassung für ELNA 664
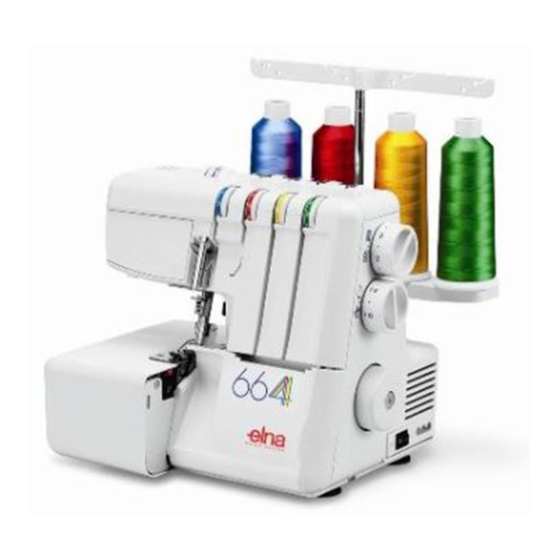
- Seite 1 664 Instruction Manual | Mode d’emploi | Gebrauchsanleitung...
-
Seite 3: Important Safety Instructions
IMPORTANT SAFETY INSTRUCTIONS This appliance is not intended for use by persons (including children) with reduced physical, sensory or mental capabilities, or lack of experience and knowledge, unless they have been given supervision or instruction concerning use of the appliance by a person responsible for their safety. Children should be supervised to ensure that they do not play with this overlock machine. -
Seite 4: Instructions De Sécurité Importantes
INSTRUCTIONS DE SÉCURITÉ IMPORTANTES Cette machine n'est pas censée être utilisée par des personnes (y compris des enfants) ayant des capacités physiques, sensorielles ou mentales réduites ou un manque d'expérience et de connaissances, sauf si elles sont sous surveillance ou ont été instruites sur l'usage de la machine par une personne responsable de leur sécurité. Les enfants devraient être surveillés pour s'assurer qu'ils ne jouent pas avec la machine. -
Seite 5: Wichtige Sicherheitshinweise
WICHTIGE SICHERHEITSHINWEISE Diese Nähmaschine eignet sich nur für den Hausgebrauch. Diese Nähmaschine ist kein Spielzeug. Erlauben Sie Kindern nicht, mit der Maschine zu spielen. Die Maschine darf nicht von Kindern oder geistig behinderten Personen ohne geeignete Aufsicht benutzt werden. Bei der Benutzung eines elektrischen Geräts sind stets grundlegende Sicherheitsvorkehrungen zu treffen, darunter: Lesen Sie vor Inbetriebnahme dieses Geräts alle Anweisungen. -
Seite 6: Besondere Empfehlungen Und Warnhinweise
Do’s and Don’ts 1. Always be aware of the up-and-down movement of the needle and do not turn your attention away from the machine while it is running. 2. When leaving the sewing machine unattended, the main switch of the machine must be switched off or the plug must be removed from the socket-outlet. -
Seite 7: Inhaltsverzeichnis
TABLE OF CONTENTS PREPARATION Names of Parts ..........................8 Standard Accessories ........................10 Connecting the Machine to the Power Supply ..................12 Controlling Sewing Speed......................12 How to Turn the Handwheel ......................14 Opening and Closing the Side Cover ................... 14 Opening and Closing the Looper Cover .................. - Seite 8 TABLE DES MATIÈRES PRÉPARATION Noms des pièces ........................... 9 Accessoires standard ........................11 Raccordement de la machine à la source d’alimentation ..............13 Contrôler la vitesse de couture ....................13 Comment tourner le volant......................15 Ouverture et fermeture du couvercle latéral ................15 Ouverture et fermeture du couvercle du boucleur ...............
- Seite 9 INHALTSVERZEICHNIS VORBEREITUNG Bezeichnungen der Teile ....................... 9 Standardzubehör ......................... 11 Anschließen der Maschine ans Stromnetz ..................13 Reglung der Nähgeschwindigkeit ....................13 Drehen des Handrades ........................ 15 Öffnen und Schließen der Seitenabdeckung ................15 Öffnen und Schließen der Greiferabdeckung ................15 Heben oder Senken des Stoffdrückerfußes.................
-
Seite 10: Preparation Names Of Parts
PREPARATION Names of Parts Left needle thread tension dial Right needle thread tension dial Upper looper thread tension dial Lower looper thread tension dial Side cover Looper cover Handwheel Power switch Machine socket Differential feed dial Stitch length dial Spool stand Spool holder Spool pin Thread guide bar... -
Seite 11: Vorbereitung
PRÉPARATION VORBEREITUNG Noms des pièces Bezeichnungen der Teile Cadran de tension du fil d’aiguille gauche Fadenspannungs-Einstellrad für die linke Nadel Cadran de tension du fil d’aiguille droite Fadenspannungs-Einstellrad für die rechte Nadel Cadran de tension du fil du boucleur supérieur Fadenspannungs-Einstellrad für den oberen Greifer Cadran de tension du fil du boucleur inférieur Fadenspannungs-Einstellrad für den unteren Greifer... -
Seite 12: Standard Accessories
Standard Accessories Screwdriver (Large) Screwdriver (Small) Tweezers Set of needles No.11, No.14 Nets Spool holder caps Lint brush Needle threader Accessory box... -
Seite 13: Accessoires Standard
Accessoires standard Standardzubehör Tournevis (gros) Schraubendreher (Groß) Tournevis (petit) Schraubendreher (klein) Pinces Pinzette Ensemble d'aiguilles n°11, n° 14 Satz mit Nadeln Nr.11, Nr.14 Filets Netze Capuchons de porte-bobine Spulenhalterkappen Brosse anti-charpie Flusenbürste Enfile-aiguille Nadeleinfädler Huile Öl Boîte d’accessoires Zubehörbehälter... -
Seite 14: Connecting The Machine To The Power Supply
Connecting the Machine to the Power Supply Turn off the power switch, and connect the machine plug to the machine socket. Connect the power supply plug to your power supply. Turn on the power switch. Power switch Machine plug Machine socket Power supply plug Power supply Speed controller... -
Seite 15: Anschließen Der Maschine Ans Stromnetz
Anschließen der Maschine ans Stromnetz Raccordement de la machine à la source d’alimentation Schalten Sie den Netzschalter aus und schließen Sie Éteindre l’interrupteur et brancher la prise de la den maschinenseitigen Stecker an die machine à la douille de la machine. Maschinensteckdose an. -
Seite 16: How To Turn The Handwheel
How to Turn the Handwheel Always turn the handwheel toward you (Counterclockwise). Handwheel Opening and Closing the Side Cover To open: Push the side cover to the left. To close: Push the side cover to the right. Side cover Opening and Closing the Looper Cover To open: (A) While pushing with the thumb to the right as far as it will go, pull the looper cover toward you. -
Seite 17: Comment Tourner Le Volant
Comment tourner le volant Drehen des Handrades Toujours tourner le volant vers soi (mouvement anti- Drehen Sie das Handrad stets auf sich zu horaire). (Entgegen dem Uhrzeigersinn). Volant Handrad Ouverture et fermeture du couvercle latéral Öffnen und Schließen der Seitenabdeckung Pour ouvrir : Zum Öffnen: Pousser le couvercle latéral vers la gauche. -
Seite 18: Raising Or Lowering The Presser Foot
Raising or Lowering the Presser Foot By raising or lowering the presser foot lifter, the presser foot goes up or down. * While in operation, keep the presser foot lowered except when threading the machine or test running without threads. Thread tension will be released when the presser foot lifter is raised. -
Seite 19: Soulever Ou Baisser Le Pied Presseur
Heben oder Senken des Nähfußes Soulever ou baisser le pied presseur Wenn Sie den Nähfuß anheben oder En soulevant ou en baissant le releveur de pied senken, bewegt sich der Nähfuß nach oben presseur, le pied presseur monte et descend. oder unten. -
Seite 20: The Position Of Thread Guide Bar
The Position of Thread Guide Bar Pull the thread guide bar up as far as it will go. Turn the thread guide bar so that the thread guides are right above the spool pins. Thread guide bar Thread guide Stoppers Spool pin * Make sure the two stoppers on the thread guide shaft, as shown, are set in at the correct position. -
Seite 21: Position De La Barre Du Guide-Fil
Position des Fadenführerhalters Position de la barre du guide-fil Monter la barre du guide-fil aussi haut que possible. Ziehen Sie den Fadenführerhalter so weit wie Tourner la barre du guide-fil pour que les guide- möglich nach oben heraus. fils se trouvent juste au-dessus des broches à Drehen Sie den Fadenführerhalter so, dass die bobine. -
Seite 22: Changing Needles
Changing Needles Turn off the power switch and unplug the machine. Raise the needle to its highest position. Then loosen the left or right needle clamp screw for the needle you are going to remove. Needle clamp screw on the left Needle clamp screw on the right * Use HA-1SP #14 Needle or #11. -
Seite 23: Auswechseln Der Nadel
Auswechseln der Nadel Changement de l’aiguille Schalten Sie die Maschine am Netzschalter aus und Éteindre l’interrupteur et débrancher la machine. ziehen Sie den Stecker aus der Steckdose. Bringen Sie die Nadel in ihre höchste Stellung. Soulever l’aiguille à sa position la plus haute. Lösen Sie dann die linke oder rechte Nadelklemmschraube für die Nadel, die Sie Desserrer la vis de pince-aiguille gauche ou droite... -
Seite 24: Stitch Definition
Stitch Definition z z z z z Safety 4 Thread An overlock stitch that has 2 needle threads, a lower and upper looper thread is a safety 4 thread. The stitch stretches without breaking. The second needle thread reinforces the durability and strength of the stitch, but the stitch retains its elasticity. -
Seite 25: Définition Du Point
Définition du point Stichprogramme z z z z z z z z z z Safety 4 fils 4 Faden Overlock Un point surjet qui a deux fils d’aiguille, un fil dans le Ist ein Overlock -Stich mit zwei oberen Nadelfäden boucleur inférieur et un fil dans le boucleur und der obere und untere Schlaufengeber sind supérieur est un point de sûreté... - Seite 26 b b b b b 3 Thread The same characteristics as the 3 Thread Wide. This narrower version is suitable for light to medium weight fabrics. Common Uses 1. Construction method for lingerie. 2. Edge finish on single layer of fabric. n n n n n Narrow Hem 3 Three threads form a balanced stitch that is a great...
- Seite 27 b b b b b b b b b b Overlock 3 3 Faden Overlock Die gleichen Merkmale wie bei 3 Fade Ovrelock Les mêmes caractéristiques que pour le point “3 (breit). Diese schmale Variante eignet sich für leichte Fils large” . Cette version plus étroite convient pour les tissus de poids léger moyen.
-
Seite 28: Adjustment Of Stitch Length
Adjustment of Stitch Length To select stitch length, turn the dial. The larger the number, the longer the stitch. The stitch length can be adjusted from 1 to 5 mm. Position “R” is for rolled and narrow hemmings. Stitch length dial Setting mark Adjustment of Differential Feed Ratio The differential feed ratio can be altered by turning... -
Seite 29: Réglage De La Longueur Des Points
Réglage de la longueur des points Einstellung der Stichlänge Pour sélectionner la longueur des points, tourner le ur Wahl der Stichlänge drehen Sie das Einstellrad. cadran. Je größer die Zahl, desto weiter liegen die Stiche Plus le chiffre est élevé, plus la longueur des points auseinander. -
Seite 30: Adjustment Of Needle Plate Setting Knob
Adjustment of Needle Plate Setting Knob (Changing to Standard Serging or Rolled Hemming) The needle plate setting knob is connected with the chaining finger. The chaining finger will slide back and forth when you set the needle plate setting knob at "S" or "R". 1. -
Seite 31: Réglage Du Bouton De La Plaque Aiguille
Réglage du bouton de la plaque aiguille Einstellung des Stichplatten-Einstellknopfs (changement au surfilage standard ou (Wechsel zu Standard-Überwendliungsnähen rouleauté) oder Rollsaumnähen) Le bouton de réglage de la plaque aiguille est Der Stichplatten-Einstellknopf ist mit dem raccordé au doigt de la semelle du pied presseur. Kettelfinger verbunden. -
Seite 32: To Deactivate The Upper Knife
To Deactivate the Upper Knife 1. Turn off the power switch and unplug the machine. 2. Open the looper cover and side cover. 3. Turn the upper knife release knob toward you while pushing it to the right, then guide the hole on the upper knife to the pin to lock the upper knife in the down position. -
Seite 33: Désactiver Le Couteau Supérieur
Désactiver le couteau supérieur Deaktivieren des oberen Messers 1. Éteindre l’interrupteur et débrancher la machine. 1. Schalten Sie den Netzschalter aus und ziehen Sie 2. Ouvrir le couvercle du boucleur et le couvercle den Netzstecker aus der Steckdose. latéral. 2. Öffnen Sie die Greiferabdeckung und die Seitenabdeckung. -
Seite 34: Adjustment Of Cutting Width
Adjustment of Cutting Width When cutting width is too narrow or too wide against seam width, adjust it as follows. Open the side cover and deactivste the upper knife. Turn the cutting width adjusting dial to move the lower knife to the desired position. * The lower knife position can be set at 3–5 mm from the right needle position. -
Seite 35: Réglage De La Largeur De Coupe
Réglage de la largeur de coupe Einstellung der Schnittbreite Lorsque la largeur de coupe est trop étroite ou trop Wenn die Scnittbreite gegenüber der Saumbreite zu large par rapport à la largeur couture, la régler eng oder zu weit ist, können Sie sie folgt einstellen: comme suit: Drehen Sie die Schnittbreite, die Schnittbreiten- Tournez la largeur de découpage ajustant le cadran... -
Seite 36: Threading The Machine
Threading the Machine The illustration shows the machine threaded with four threads. Lower looper thread Upper looper thread Right needle thread Left needle thread Thread guide Thread guide Threading chart The machine is pre-threaded to make threading easier. Tie the end of a new thread to one of the pre-set threads, and pull it to draw the new thread through the machine, following the steps below. -
Seite 37: Enfilage De La Machine
Enfilage de la machine Einfädeln der Maschine Die Abbildung zeigt die Maschine, die mit den vier L’illustration de gauche montre la machine enfilée Gewinden verlegt wird. avec les quatre fils. Unterer Greiferfaden Fil du boucleur inférieur Oberer Greiferfaden Fil du boucleur supérieur Rechter Nadelfaden Fil d’aiguille droite Linker Nadelfaden... - Seite 38 • If one of the threads is broken, follow the re-threading procedure as follows: * Turn off the power switch and unplug the machine. 1. Raise the presser foot and pull the thread chain out to the back of the presser foot, and cut the chain to separate each of the threads.
- Seite 39 • Si l’un des fils est cassé, suivre la procédure de * Wenn einer der Fäden gerissen ist, führen Sie das réenfilage comme suit : Neueinfädelverfahren wie folgt durch: * Schalten Sie den Netzschalter aus und ziehen Sie * Éteindre l’interrupteur et débrancher la machine. den Netzstecker der Maschine heraus.
-
Seite 40: Threading The Lower Looper
Threading the Lower Looper Open the looper cover. Place the spool of thread on the right side spool pin. * The points to thread for lower looper are marked in green. * A convenient threading chart is placed on the machine body inside the looper cover. -
Seite 41: Enfiler Le Boucleur Inférieur
Enfiler le boucleur inférieur Einfädeln des unteren Greifers Ouvrir le couvercle du boucleur. Öffnen Sie die Greiferabdeckung. Placer la bobine de fil sur la broche à bobine droite. Schieben Sie die Spule mit dem Faden auf den Spulendorn auf der rechten Seite. * Les points à... - Seite 42 4. Hook the thread on the corner , and then pass the thread through the looper thread guide. 5. Pass the thread through the thread guide. 6. Pass the thread through the looper thread take-up lever (lower). 7. Pass the thread through the lower looper thread guide (1).
- Seite 43 4. Haken Sie den Faden an der Ecke ein und 4. Accrocher le fil sur le coin , puis faire passer führen Sie den Faden dann durch die le fil dans le guide-fil du boucleur. Greiferfadenführung. 5. Faire passer le fil dans le guide-fil. 5.
- Seite 44 10. Move the lower looper to its rightmost position by turning the handwheel, and draw the thread with a pair of tweezers through the hole on the lower looper 10 cm (4˝) or more. * Make sure the needle threads are not tangled on the lower looper.
- Seite 45 10. Déplacer le boucleur inférieur à sa position 10. Drehen Sie das Handrad, um den unteren Greifer d’extrême droite en tournant le volant et faire auf seine äußerst rechte Position zu verstellen passer le fil à l’aide de pinces dans le trou du und ziehen Sie den Faden mit einer Pinzette boucleur inférieur sur 10 cm (4˝) ou plus.
-
Seite 46: Threading The Upper Looper
Threading the Upper Looper Place a spool of thread on the spool pin second from the right. * The points to thread for upper looper are marked in yellow. * A convenient threading chart is placed on the machine body inside the looper cover. 1. -
Seite 47: Enfiler Le Boucleur Supérieur
Enfiler le boucleur supérieur Einfädeln des oberen Greifers Placer une bobine de fil sur la deuxième broche à Schieben Sie eine Spule auf den zweiten bobine à partir de la droite. Spulendorn vorn rechts. * Die Punkte des Fadens für den oberen Greifer * Les points à... - Seite 48 4. Hook the thread on the corner , and then pass the thread through the looper thread guide. Looper thread guide 5. Pass the thread through the looper thread take-up lever (upper). Looper thread take-up lever (upper) 6. Pass the thread through upper looper thread guide.
- Seite 49 4. Accrocher le fil sur le coin et faire passer le fil 4. Haken Sie den Faden an der Ecke (B) ein und dans le guide-fil du boucleur. führen Sie den Faden dann durch die Greiferfadenführung. Guide-fil du boucleur Greiferfadenführung 5.
-
Seite 50: Threading The Needle On The Right
Threading the Needle on the Right Place the spool of thread on the spool pin second from the left. * The points to thread for needle on the right are marked in red. * A convenient threading chart is placed on the machine body inside the looper cover. -
Seite 51: Enfiler L'aiguille Droite
Enfiler l’aiguille droite Einfädeln der Nadel auf der rechten Seite Placer la bobine de fil sur la deuxième broche à Schieben Sie die Spule mit dem Faden auf den bobine à partir de la gauche. zweiten Spulendorn von links. * Les points à enfiler pour l’aiguille droite sont * Die Punkte des Fadens für die Nadel auf der marqués en rouge. - Seite 52 4. Pass the thread under the thread guides r and t from the right to the left. 5. Slip the thread into the slit y of the take-up lever cover from the bottom. Pull the thread up and hang it up over the third thread guide u.
- Seite 53 4. Passez le fil sous les guide-fil r et t de la droite 4. Führen Sie den Faden unter die Fadenführung r vers la gauche. und t von rechts nach links. 5. Glissez le fil dans la fente y du couvercle du 5.
-
Seite 54: Threading The Needle With The Needle Threader
Threading the Needle with the Needle Threader IMPORTANT: When threading the needle, be sure to: – turn the power switch off. – lower the presser foot. Hold the needle threader with the triangle mark facing up. Insert the thread into the Y-notch of the threader from the right. -
Seite 55: Enfilage De L'aiguille Avec L'enfile-Aiguille
Enfilage de l’Aiguille avec l’Enfile-aiguille Einfädeln mit dem Nadeleinfädler IMPORTANT: WICHTIG: Avant l’untilisation de l’enfile-aiguille, soyez sûr de Achten Sie beim Entfernen und Einsetzen der Nadeln faire: auf Folgendes: – arrêtez l’interrupteur d’alimentation. – Schalten Sie den Netzschalter aus. – abaissez le pied presseur. –... -
Seite 56: Threading The Needle On The Left
Threading the Needle on the Left Place the spool of thread on the left side spool pin. * The points to thread for needle on the left are marked in blue. * A convenient threading chart is placed on the machine body inside the looper cover. -
Seite 57: Enfiler L'aiguille Gauche
Enfiler l’aiguille gauche Einfädeln der Nadel auf der linken Seite Placer la bobine de fil sur la broche à bobine Einfädeln der Nadel auf der linken Seite gauche. Schieben Sie die Garnrolle mit dem Faden auf den zweiten Garnrollenstift von links. * Les points à... - Seite 58 4. Pass the thread under the thread guide r from the right to the left. 5. Slip the thread into the slit t of the take-up lever cover from the bottom. Pull the thread up and hang it up over the third thread guide y.
- Seite 59 4. Passez le fil sous le guide-fil r de la droite 4. Führen Sie den Faden unter die Fadenführung r vers la gauche. von rechts nach links. 5. Glissez le fil dans la fente t de le couvercle du 5. Führen Sie den Faden durch den Schlitz t von levier tendeur du fond.
-
Seite 60: Test Stitching Starting Sewing
TEST STITCHING Starting Sewing Insert the fabric under the toe of the foot (It is not necessary to raise the foot.) Turn the handwheel gently toward you a couple of turns and check the thread chain. Then start sewing slowly. The fabric will automatically be fed. Guide the fabric in the desired direction. -
Seite 61: Points D'essai Commencer À Coudre
POINTS D’ESSAI PROBENÄHEN Beginn des Nähvorgangs Commencer à coudre Schieben Sie den Stoff unter die Vorderseite des Fußes. Insérer le tissu sous l’orteil du pied. (Il n’est pas (Es ist nicht erforderlich, den Fuß anzuheben.) nécessaire de soulever le pied). Tourner le volant délicatement vers soi sur environ Drehen Sie das Handrad vorsichtig einige Umdrehungen deux tours et vérifier la chaîne de fils. -
Seite 62: Securing Ends
Securing Ends To avoid unravelling, it is necessary to leave a thread chain about 5 cm (2˝) long at the beginning and at the end of a seam. To secure the beginning and end of a seam, choose one of the following methods. -
Seite 63: Retenir Les Extrémités
Retenir les extrémités Sichern der Fadenenden Damit sich die Naht nicht wieder aufribbelt ist es Pour éviter l’effilochage, il est nécessaire de laisser erforderlich, am Anfang und am Ende der Naht eine une chaîne de fils d’environ 5 cm (2˝) de long au Fadenkette von etwa 5 cm (2”) Länge zu belassen. -
Seite 64: Thread Tension (4 Threads)
Thread Tension (4 threads) Balanced tension The illustration at left shows sewing results with balanced tension settings. However, adjusting the thread tension may be required depending upon the type of fabric and thread being used. Wrong side of fabric Right side of fabric Right needle thread Left needle thread Upper looper thread... -
Seite 65: Tension Des Fils (4 Fils)
Fadenspannung (4 Fäden) Tension des fils (4 fils) Ausgeglichene Spannung Tension équilibrée Die Abbildung links zeigt die Ergebnisse mit der L’illustration de gauche montre les résultats de richtig eingestellten Fadenspannung. In Abhängigkeit couture avec les réglages de tension équilibrée. von der Art des verwendeten Gewebes und Fadens Toutefois, le réglage de la tension du fil peut être kann es jedoch erforderlich sein, die Fadenspannung requis selon le type de tissu et de fil utilisés. - Seite 66 Looper thread tension is out of balance (1) The illustration shows sewing results when the lower looper thread tension is too tight and/or upper looper thread tension is too loose. Remedy: Loosen lower looper thread tension and/or tighten upper looper thread tension. Wrong side of fabric Right side of fabric Right needle thread...
- Seite 67 Tension du fil de boucleur non équilibrée (1) Spannung des Greiferfadens ist nicht ausgeglichen (1) L’illustration montre les résultats de couture lorsque la tension du fil du boucleur inférieur est trop serrée Die Abbildung zeigt Nähergebnisse, wenn die et/ou la tension du fil du boucleur supérieur est trop Spannung des unteren Greiferfadens zu straff und/ lâche.
-
Seite 68: 3-Thread Serging
3-Thread Serging Using the needle on the right only (for narrow hem 3) When you use the right needle, the standard sewing width is 3.5 mm. The illustration on the left shows you how to thread the needle. Note: Tighten the needle clamp screw on the side that is not being used to prevent losing the screw. -
Seite 69: Surjet À 3 Fils
3 Faden-Überwendlingsnähen Surjet à 3 fils Verwendung nur der rechten Nadel Emploi de l’aiguille droite seulement (für 3 Faden Schmalsaum) (pour ourlet étroit 3) Wenn Sie die rechte Nadel verwenden, ist die Lorsque l’aiguille droite est utilisée, la largeur de Standard-Nähbreite 3,5 mm. -
Seite 70: Thread Tension (3 Threads)
Thread Tension (3 threads) Balanced tension The illustration at left shows sewing results with balanced tension settings. However, adjusting the thread tension may be required depending on the type of fabric and thread being used. Wrong side of fabric Right side of fabric Right or left needle thread Upper looper thread Lower looper thread... -
Seite 71: Tension Des Fils (3 Fils)
adenspannung (3 Fäden) Tension des fils (3 fils) Ausgeglichene Spannung Tension équilibrée Die Abbildung links zeigt die Ergebnisse mit der richtig eingestellten Fadenspannung. In Abhängigkeit L’illustration à gauche montre les résultats de cou- von der Art des verwendeten Gewebes und Fadens ture avec les réglages de tension appropriés. -
Seite 72: Thread Tension For Rolled Hemming
Thread Tension for Rolled Hemming Balanced tension The illustration at left shows sewing results with balanced tension settings. Adjusting the thread tension may be required depending on the type of fabric and thread being used. Wrong side of fabric Right side of fabric Right needle thread Upper looper thread Lower looper thread... -
Seite 73: Tension Du Fil Pour Rouleauté
Fadenspannung für Rollsäumen Tension du fil pour rouleauté Tension équilibrée Ausgeglichene Spannung L’illustration de gauche montre les résultats de Die Abbildung links zeigt die Ergebnisse mit couture avec les bons réglages de tension. der richtig eingestellten Fadenspannung. Le réglage de la tension du fil peut être requise In Abhängigkeit von der Art des verwendeten selon le type de tissu et de fil utilisé. - Seite 74 Rolled hemming Pull the end of thread chain to the back lightly in the beginning and end of sewing. Fabric Thread chain For narrow hemming Balanced tension The illustration at left shows sewing results with balanced tension settings. Wrong side of fabric Right side of fabric Right needle thread Upper looper thread...
- Seite 75 Rouleauté Rollsäumen Tirer légèrement l’extrémité de la chaîne de fils vers Am Anfang und Ende der Naht ziehen sie die l’arrière au début et à la fin de la couture. Fadenkette leicht nach hinten. Tissu Gewebe Chaîne de fils Fadenkette Pour ourlet étroit Für schmales Säumen Tension équilibrée...
-
Seite 76: Care Of Your Machine
CARE OF YOUR MACHINE CAUTION: Turn the power switch off and unplug the machine before cleaning or maintenance. Replacing the Upper Knife NOTE: The upper knife is sold separately. To remove: 1. Turn off the power switch and unplug the machine. 2. -
Seite 77: Pflege Ihrer Maschine
PFLEGE IHRER MASCHINE ENTRETIEN DE LA MACHINE VORSICHT: ATTENTION: Schalten Sie die Maschine am Netzschalter aus und Mettez l’interrupteur d’alimentation sur la position ziehen Sie den Stecker ab, bevor Sie die Maschine arrêt et débranchez la machine avant de procéder reinigen oder Wartung tun. -
Seite 78: Replacing The Light Bulb
Replacing the Light Bulb 1. Turn off the power switch and unplug the machine. 2. Remove the face plate setscrews, and remove the face plate. Face plate Setscrews To remove: Push and twist to the left. To attach: Push and twist to the right. Reattach the face plate, and tighten the face plate setscrews. -
Seite 79: Remplacement De L'ampoule
Remplacement de l’ampoule Auswechseln der Glühbirne 1. Schalten Sie den Netzschalter aus und ziehen Sie 1. Éteindre l’interrupteur et débrancher la machine. den Netzstecker aus der Steckdose. 2. Enlevez les vis de réglage de la plaque frontale 2. Entfernen Sie die Befestigungsschrauben der et retirer la plaque frontale. -
Seite 80: Oiling The Machine
Oiling the Machine Apply a few drops of fine quality sewing machine oil to the parts indicated with arrows. It is recommended to apply oil once a week in normal use, once in ten hours in continuous use. * Open the side cover and apply oil. * Open the looper cover and apply oil. -
Seite 81: Ölen Der Maschine
Ölen der Maschine Huilage de la machine Appliquer quelques gouttes d’huile de machine à Versehen Sie die mit Pfeilen gekennzeichneten Teile coudre de bonne qualité aux pièces indiquées par mit einigen Tropfen qualitativ hochwertigen des flèches. Nähmaschinenöls. Il est recommandé d’appliquer de l’huile une fois par Bei normalem Gebrauch der Maschine empfehlen semaine dans des conditions d’usage normal, une wir, diese einmal wöchentlich zu ölen, und wenn sie... -
Seite 82: Troubleshooting
Troubleshooting Reference Condition Cause See page 74. The fabric is not 1. The feed dog is packed with lint. Lower the presser foot. being fed 2. The presser foot has been raised. smoothly. See page 20. The needle 1. The needle is incorrectly inserted. Replace the needle. -
Seite 83: Recherche Des Pannes
Recherche des pannes Condition Cause Référence Le tissu n’avance pas 1. La griffe d’entraînement est remplie de charpie. Voir la page 75. 2. Le pied presseur est soulevé. Baissez le pied presseur. régulièrement. L’aiguille casse. 1. L’aiguille est mal insérée. Voir la page 21. - Seite 84 Fehlersuche Fehler Bezug Ursache Das Gewebe wird Siehe Seite 75. 1. Der Stoffschieber ist mit Flusen gefüllt. nicht gleichmäßig Stoffdrückerfuß absenken. 2. Der Stoffdrückerfuß ist angehoben. zugeführt. Die Nadel bricht. Siehe Seite 21. 1. Die Nadel ist falsch eingesetzt. Ersetzen Sie die Nadel. 2.