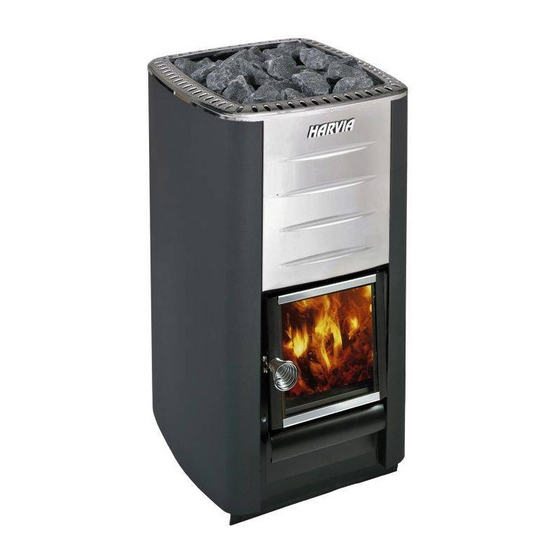
Harvia M1 Gebrauchsanleitung
Holzbeheize saunaofen
Vorschau ausblenden
Andere Handbücher für M1:
- Anleitung für montage und gebrauch (68 Seiten) ,
- Anleitung (17 Seiten) ,
- Bedienungsanleitung (19 Seiten)

Verwandte Anleitungen für Harvia M1


Inhaltszusammenfassung für Harvia M1
- Seite 1 HARVIA M1, M3, 20 Pro, 20 ES Pro/S, 20 Boiler, 26 Pro, 36, 50 Instructions for Installation and Use of Woodburning Stove Anleitung für Montage und Gebrauch des holzbeheizten Saunaofens 20 Pro 20 ES Pro/S 20 Boiler 26 Pro 11042011...
-
Seite 2: Inhaltsverzeichnis
4.1.3. Schutzabdeckungen ........12 4.1.3. Protective Covers ........12 4.1.4. Harvia-Schutzmantel und Schutzplatte ..12 4.1.4. Harvia Protective Sheath and Bedding ... 12 4.2. Montage des Ofens ..........13 4.2. Installing the Stove ..........13 4.2.1. Verstellbare Füße des Ofens ......13 4.2.1. -
Seite 3: General
1. GENERAL 1. ALLGEMEINES 1.1. Technical Data 1.1. Technische Daten 20 Pro 20 ES Pro 20 Boiler 26 Pro WKM11 WK200 WK200ES WK200B WK260 WK360 WK500 20 ES Pro S WKM3 WK200ESST Rated output �kW� �kW� Nennleistung �kW� Sauna room volume �m³� 4,5–13 8–20 8–20... -
Seite 4: Stove Parts
Rear connection opening Hintere Anschlussöffnung Soot opening Rußöffnung Stove door Ofentür Ash box Aschekasten ZKIP-140 ZKIP-170 (M1/M3) ZTS-36 WX048 ZKIP-10 ZKIP-720 Figure 1. Stove parts Abbildung 1. Ofenteile 2. INSTRUCTIONS FOR USE 2. BEDIENUNGSANLEITUNG Read the instructions carefully before using Lesen Sie die Anweisungen vor der Inbetrieb- the stove. -
Seite 5: Preparing The Stove For Use
2.2. Preparing the Stove for Use 2.2. Vorbereiten des Ofens zur Benutzung Perform the first heating outdoors or in a well- Führen Sie das erste Heizen draußen oder in einem ventilated room. The stove body has been painted gut belüfteten Raum durch. Der Ofenkorpus hat eine with protective paint, which will vaporise during Schutzschicht, die bei der erstmaligen Erhitzung the first heating. -
Seite 6: Heating The Stove
Place the larger stones at the bottom and the Legen Sie die größeren Steine nach unten und • • smaller ones on the top. die kleineren nach oben. Make sure that air circulates between the Zwischen den Steinen muss Luft zirkulieren •... -
Seite 7: Sauna Water
fire chamber when the ember is dying down. schlossen werden, um das Feuer klein zu halten Use firewood with a diameter of 12–15 cm. und den Holzverbrauch zu verringern. It takes only a couple of pieces of wood to Legen Sie gegebenenfalls Brennholz in die maintain the bathing temperature. -
Seite 8: Troubleshooting
2.8. Troubleshooting 2.8. Störungen There is no draught in the flue. Smoke comes into Im Rauchfang findet kein Luftzug statt. Es tritt the sauna. Rauch in die Sauna. There are leaks in the flue connection. Seal the Es gibt undichte Stellen im Anschluss des Rauch- •... -
Seite 9: Sauna Room
3. SAUNA ROOM 3. SAUNAKABINE 3.1. Effects that Heating the Stove has on 3.1. Aufheizen der Saunakabine the Sauna Room Helle Böden werden durch Asche, Steinpartikel und Light-coloured floor materials will become dirty from aus dem Ofen fallende Metallsplitter verunreinigt. the ash, particles of stone and metal flakes that fall Verwenden Sie Bodenabdeckungen aus dunklen Ma- from the stove. -
Seite 10: Instructions For Installation
400 mm. Die Platte sollte sich auf einer Unter- surface to keep the floor material dry. You lage leicht über der Bodenoberfläche befinden, can also use the Harvia protective sheath and um Bodenmaterial trocken zu halten. Sie kön- bedding � 4.1.4.�. -
Seite 11: Safety Distances
4.1.2. Safety Distances 4.1.2. Sicherheitsabstände See figure 6. Siehe Abbildung 6. Ceiling. The minimum safety distance between Dach. Der Mindest-Sicherheitsabstand zwi- the stove and the ceiling is 1200 mm. schen Ofen und Dach beträgt 1200 mm. Masonry walls. Leave 50 mm between the Gemauerte Wände. -
Seite 12: Protective Covers
Platte bieten eine einfache Lösung zum Schutz inflammable materials from the heat of the stove. brennbarer Materialien vor der Hitze des Ofen. �Nur �For models M1, M3, 20 Pro, 20 ES Pro/S and 26 M1, M3, 20 Pro, 20 ES Pro/S, 26 Pro.� Pro only.�... -
Seite 13: Installing The Stove
Attach the flue connection pipe �in the über die hintere Anschlussöffnung (Abbildung 9) package� to the rear connection opening so Biegen Sie den Deckel nach unten �nur M1/ �nur M1/ that the side with a depression faces upwards. M3�. Bringen Sie das Abzugsanschlussrohr �im . - Seite 14 �45° oder 90°� benötigt � 4.4.�. Open the cover hatch of the rear connection Öffnen Sie den Deckel der hinteren Anschlus- opening �M1/M3 only�. Move the blocking plug söffnung �nur M1/M3�. Versetzen Sie den from the upper connection opening on the rear Stopfen von der oberen Anschlussöffnung auf...
-
Seite 15: Connecting The Stove To A Harvia Steel Chimney
M1/M3 M1/M3 Figure 11. Connecting the stove to a Harvia steel chi�ney �all di�ensions in �illi�eters� �all di�ensions in �illi�eters� Abbildung 11. Anschluss des Ofens an einen Harvia-Edelstahlschornstein �alle Ab�essungen in Milli�etern� 4.3. Changing the Opening Direction of the 4.3. -
Seite 16: Accessories
4.4. Accessories 4.4. Zubehör �For models M1, M3, 20 Pro, 20 ES Pro/S, 20 Boiler, �Nur M1, M3, 20 Pro, 20 ES Pro/S, 20 Boiler, 26 M1, M3, 20 Pro, 20 ES Pro/S, 20 Boiler, 26 26 Pro and 36 only.�...