Herunterladen Inhalt Inhalt Diese Seite drucken

Werbung

Verfügbare Sprachen

Verfügbare Sprachen

ASPIRATEUR À MAIN SAS 7.4 LI B1
ASPIRATEUR À MAIN
Mode d'emploi
HANDHELD VACUUM CLEANER
Operating instructions
IAN 278383
HANDSTAUBSAUGER
Bedienungsanleitung

Werbung

Inhaltsverzeichnis
loading

Inhaltszusammenfassung für Silvercrest IAN 278383

  • Seite 1 ASPIRATEUR À MAIN SAS 7.4 LI B1 ASPIRATEUR À MAIN HANDSTAUBSAUGER Mode d’emploi Bedienungsanleitung HANDHELD VACUUM CLEANER Operating instructions IAN 278383...
  • Seite 2 Avant de lire le mode d‘emploi, ouvrez la page contenant les illustrations et familiarisez-vous ensuite avec toutes les fonctions de l‘appareil. Klappen Sie vor dem Lesen die Seite mit den Abbildungen aus und machen Sie sich anschließend mit allen Funktionen des Gerätes vertraut. Before reading, unfold the page containing the illustrations and familiarise yourself with all functions of the device.
  • Seite 4: Inhaltsverzeichnis

    Table des matières Introduction ........... 2 Utilisation conforme à...
  • Seite 5: Introduction

    Introduction Toutes nos félicitations pour l'achat de votre nouvel appareil. Vous venez ainsi d'opter pour un produit de grande qualité. Le mode d'emploi fait partie intégrante de ce produit. Il contient des remarques importantes concernant la sécurité, l'usage et la mise au rebut. Avant d'utiliser le produit, veuillez vous familiariser avec toutes les consignes d'utilisation et de sécurité.
  • Seite 6: Description De L'appareil

    Description de l'appareil 1 Embout pour aspiration de liquides 2 Suceur étroit 3 Support mural 4 Bloc d'alimentation 5 Fiche creuse 6 Interrupteur Marche/Arrêt 7 Voyant de contrôle de charge (rouge/vert) 8 Touche de déverrouillage 9 Sac à poussière 0 Filtre à poussière q Bac à...
  • Seite 7: Consignes De Sécurité Importantes

    Consignes de sécurité importantes DANGER - RISQUE DE CHOC ÉLECTRIQUE ! Ne pas charger ou utiliser cet appareil à l'extérieur. ► Ne jamais utiliser l'aspirateur à main avec le cordon, la fi che ► ou le boîtier endommagé. Faîtes immédiatement remplacer une fi che secteur ou un ►...
  • Seite 8 AVERTISSEMENT ! RISQUE DE BLESSURES ! L'appareil n'est pas adapté aux substances infl ammables et ► explosives ou aux liquides chimiques et agressifs. Entreposez toujours l'appareil dans des locaux fermés. Pour ► éviter les accidents, conservez l'appareil dans un endroit sec après utilisation.
  • Seite 9: Avant La Première Mise En Service

    ATTENTION ! DÉGÂTS MATÉRIELS ! Faire attention à ne pas poser l'aspirateur à main près de ► chauff ages, fours ou d'autres appareils ou surfaces brûlants. Veiller à ce que les fentes d'aération soient toujours déga- ► gées. Lorsque la circulation de l'air est gênée, l'appareil risque de surchauff...
  • Seite 10: Montage Du Support Mural

    2) Les batteries atteignent leur pleine capacité après une durée de charge de 24 heures. Nous vous recommandons de procéder comme suit pour l'entretien des batteries : Une fois les batteries chargées, débrancher le bloc d'alimentation 4 de la prise de courant. Lorsque la puissance d'aspiration de l'aspirateur à...
  • Seite 11: Recharger

    Recharger REMARQUE ► Avant de commencer le processus de charge, vérifi er que l'interrupteur Marche/Arrêt 6 a été poussé vers l'arrière (position «0»). Insérez l'aspirateur à main par le haut dans le support mural 3, afi n que ■ la fi che creuse 5 glisse dans la douille sur l'aspirateur à main. Le voyant de contrôle de charge 7 clignote en rouge et le processus de charge commence.
  • Seite 12: Nettoyage

    1) Descendez l'aspirateur à main du support mural 3 ou, si vous n'utilisez pas le support mural 3, retirer la fi che creuse 5 de la douille. 2) Si vous le souhaitez, insérez le suceur approprié sur l'ouverture d'aspiration : –...
  • Seite 13: Élimination

    7) Remettre le bac à déchets q sur le bloc moteur : – Pousser la saillie en plastique (contre la face inférieure de l'aspirateur à main) dans l'évidement ménagé contre le bac à déchets q. – Appuyer sur la touche de déverrouillage 8 et pousser simultanément le bac à...
  • Seite 14: Garantie De Kompernass Handels Gmbh

    Garantie de Kompernass Handels GmbH Chère cliente, cher client, Cet appareil est garanti 3 ans à partir de la date d’achat. Si ce produit venait à présenter des vices, vous disposez de droits légaux face au vendeur de ce produit. Vos droits légaux ne sont pas restreints par notre garantie présentée ci-dessous.
  • Seite 15 Article L211-16 du Code de la consommation Lorsque l‘acheteur demande au vendeur, pendant le cours de la garantie com- merciale qui lui a été consentie lors de l‘acquisition ou de la réparation d‘un bien meuble, une remise en état couverte par la garantie, toute période d‘immobilisation d‘au moins sept jours vient s‘ajouter à...
  • Seite 16: Article 1641 Du Code Civil

    Article 1641 du Code civil Le vendeur est tenu de la garantie à raison des défauts cachés de la chose vendue qui la rendent impropre à l‘usage auquel on la destine, ou qui diminuent tellement cet usage que l‘acheteur ne l‘aurait pas acquise, ou n‘en aurait donné...
  • Seite 17: Service Après-Vente

    Tel.: 0800 919270 E-Mail: kompernass@lidl.fr Service Belgique Tel.: 070 270 171 (0,15 EUR/Min.) E-Mail: kompernass@lidl.be IAN 278383 Importateur Veuillez tenir compte du fait que l’adresse suivante n’est pas une adresse de service après-vente. Veuillez d’abord contacter le service mentionné. KOMPERNASS HANDELS GMBH...
  • Seite 18 Inhaltsverzeichnis Einleitung ........... . 16 Bestimmungsgemäßer Gebrauch .
  • Seite 19: Einleitung

    Einleitung Herzlichen Glückwunsch zum Kauf Ihres neuen Gerätes. Sie haben sich damit für ein hochwertiges Produkt entschieden. Die Bedienungsan- leitung ist Bestandteil dieses Produkts. Sie enthält wichtige Hinweise für Sicherheit, Gebrauch und Entsorgung. Machen Sie sich vor der Benutzung des Produkts mit allen Bedien- und Sicherheitshinweisen vertraut.
  • Seite 20: Gerätebeschreibung

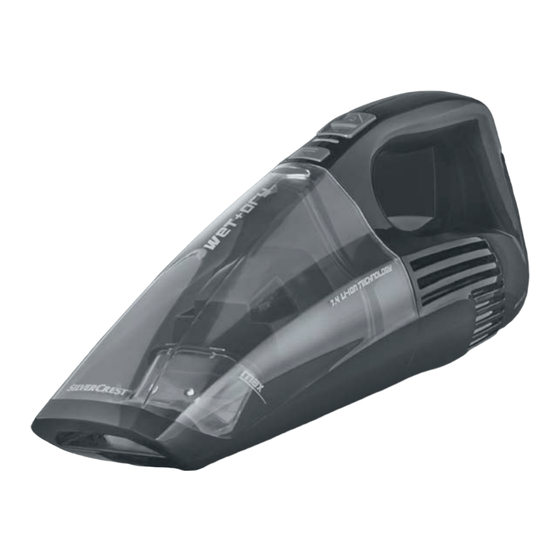
    Gerätebeschreibung 1 Nasssaugdüse 2 Fugendüse 3 Wandhalter 4 Netzteil 5 Hohlstecker 6 Ein-/Ausschalter 7 Ladekontrollleuchte (rot/grün) 8 Entriegelungstaste 9 Staubfi lter-Beutel 0 Staubfi lter q Schmutzbehälter HINWEIS ► Das Gerät wird mit nicht geladenen Akkus geliefert. Vor dem ersten Ge- brauch des Gerätes sind die Akkus zunächst für 24 Stunden zu laden.
  • Seite 21: Wichtige Sicherheitshinweise

    Wichtige Sicherheitshinweise GEFAHR - ELEKTRISCHER SCHLAG! Laden bzw. verwenden Sie dieses Gerät nicht im Freien. ► Den Handstaubsauger niemals gebrauchen, wenn Kabel, ► Stecker oder Gehäuse beschädigt sind. Lassen Sie beschädigte Netzstecker oder Netzkabel sofort ► von autorisiertem Fachpersonal austauschen, um Gefährdun- gen zu vermeiden.
  • Seite 22 WARNUNG! VERLETZUNGSGEFAHR! Das Gerät ist nicht für entfl ammbare und explosive Stoff e ► oder chemische und aggressive Flüssigkeiten geeignet. Lagern Sie das Gerät immer in geschlossenen Räumen. Um ► Unfälle zu verhindern, bewahren Sie das Gerät nach Gebrauch an einem trockenen Ort auf. Unter extremen Bedingungen können Leckagen an den Akku- ►...
  • Seite 23: Vor Der Ersten Inbetriebnahme

    ACHTUNG! SACHSCHADEN! Achten Sie immer darauf, dass die Lüftungsschlitze frei sind. ► Ein blockierter Luftkreislauf kann zur Überhitzung und Be- schädigung des Gerätes führen. Dieses Produkt enthält wiederaufl adbare Akkus. Werfen ► Sie die Akkus nicht ins Feuer und setzen Sie sie nicht hohen Temperaturen aus.
  • Seite 24: Montage Des Wandhalters

    2) Die Akkus erreichen ihre volle Kapazität nach einer Aufl adezeit von 24 Stun- den. Zur Pfl ege der Akkus empfehlen wir folgendes: Ziehen Sie, nachdem die Akkus geladen sind, das Netzteil 4 aus der Netzsteckdose. Verbinden Sie das Netzteil 4 erst wieder mit der Netzsteckdose, wenn die Saugleistung des Handstaubsaugers spürbar schwächer wird.
  • Seite 25: Aufl Aden

    Aufl aden HINWEIS Vergewissern Sie sich, dass der Ein-/Ausschalter 6 nach hinten geschoben ► ist (Position „0”), bevor Sie mit dem Laden beginnen. Setzen Sie den Handstaubsauger von oben in den Wandhalter 3, so dass ■ der Hohlstecker 5 in die Buchse am Handstaubsauger rutscht. Die Ladekont- rollleuchte 7 blinkt rot auf und der Ladevorgang beginnt.
  • Seite 26: Reinigen

    1) Nehmen Sie den Handstaubsauger von dem Wandhalter 3 herunter, oder, wenn Sie den Wandhalter 3 nicht benutzen, ziehen Sie den Hohlstecker 5 aus der Buchse. 2) Setzen Sie, wenn gewünscht, die passende Düse in die Saugöff nung: – die Fugendüse 2, um enge, schwer zu erreichende Stellen zu reinigen. –...
  • Seite 27: Entsorgen

    7) Setzen Sie den Schmutzbehälter q wieder auf den Motorblock: – Schieben Sie die Plastik-Nase an der Unterseite des Handstaubsaugers in die Aussparung am Schmutzbehälter q. – Drücken Sie die Entriegelungstaste 8 und schieben Sie gleichzeitig den Schmutzbehälter q auf den Motorblock. –...
  • Seite 28: Garantie Der Kompernaß Handels Gmbh

    Garantie der Kompernaß Handels GmbH Sehr geehrte Kundin, sehr geehrter Kunde, Sie erhalten auf dieses Gerät 3 Jahre Garantie ab Kaufdatum. Im Falle von Mängeln dieses Produkts stehen Ihnen gegen den Verkäufer des Produkts gesetzliche Rechte zu. Diese gesetzlichen Rechte werden durch unsere im Folgenden dargestellte Garantie nicht eingeschränkt.
  • Seite 29: Abwicklung Im Garantiefall

    Tel.: 0820 201 222 (0,15 EUR/Min.) E-Mail: kompernass@lidl.at Service Schweiz Tel.: 0842 665566 (0,08 CHF/Min., Mobilfunk max. 0,40 CHF/Min.) E-Mail: kompernass@lidl.ch IAN 278383 Importeur Bitte beachten Sie, dass die folgende Anschrift keine Serviceanschrift ist. Kontaktieren Sie zunächst die benannte Servicestelle. KOMPERNASS HANDELS GMBH...
  • Seite 30 Contents Introduction ..........28 Intended use .
  • Seite 31: Introduction

    Introduction Congratulations on the purchase of your new appliance. You have selected a high-quality product. The operating instructions are part of this product. They contain important information on safety, usage and disposal. Before using the product, familiarise yourself with all operating and safety instructions. Use the product only as described and for the specifi...
  • Seite 32: Description Of The Appliance

    Description of the appliance 1 Wet suction nozzle 2 Crevice nozzle 3 Wall bracket 4 Mains adapter 5 Barrel plug 6 On/off switch 7 Charge indicator lamp (red/green) 8 Release button 9 Dust fi lter bag 0 Dust fi lter q Dirt container NOTE ►...
  • Seite 33: Important Safety Instructions

    Important safety instructions DANGER – ELECTRIC SHOCK! Do not charge or use the appliance outdoors. ► Never use the handheld vacuum cleaner if the cable, plug ► or casing are damaged. To avoid risks, arrange to have damaged power cables ►...
  • Seite 34 WARNING! RISK OF INJURY! This appliance is not suitable for use with infl ammable and ► explosive substances or chemical and aggressive liquids. Always store the appliance indoors. To prevent accidents, ► keep the appliance in a dry location when not in use. Under extreme conditions, leaks in the battery cells may ►...
  • Seite 35: Prior To Fi Rst Use

    CAUTION! PROPERTY DAMAGE! Always be sure to keep the handheld vacuum cleaner away ► from heating elements, ovens or other heated appliances and surfaces. Make sure that the ventilation slits are never obstructed. ► A blocked ventilation circuit can result in overheating and damage to the appliance.
  • Seite 36: Installation Of The Wall Bracket

    2) The batteries reach their full capacity after a charging time of 24 hours. For care of the batteries, we recommend the following: Once the batteries have been charged, disconnect the mains adapter 4 from the mains socket. Do not reconnect the mains adapter 4 with the mains socket until the handheld vacuum cleaner's suction power has noticeably decreased.
  • Seite 37: Charging

    Charging NOTE Check to ensure that the on/off switch 6 has been pushed back (to the ► position "0") before starting the charging process. Place the handheld vacuum cleaner from above into the wall bracket 3 so ■ that the barrel plug 5 slips into the socket on the handheld vacuum cleaner. The charge indicator lamp 7 lights up red and the charging process begins.
  • Seite 38: Cleaning

    1) Remove the handheld vacuum cleaner from the wall bracket 3 or, if you are not using the wall bracket 3 remove the barrel plug 5 from the socket. 2) If required, place the appropriate nozzle in the suction opening: –...
  • Seite 39: Disposal

    7) Replace the dirt container q on the motor unit again: – Push the plastic tab on the underside of the handheld vacuum cleaner into the recess on the dirt container q. – Press the release button 8 and push the dirt container q onto the motor unit at the same time.
  • Seite 40: Kompernass Handels Gmbh Warranty

    Kompernass Handels GmbH warranty Dear Customer, This appliance has a 3-year warranty valid from the date of purchase. If this product has any faults, you, the buyer, have certain statutory rights. Your statutory rights are not restricted in any way by the warranty described below. Warranty conditions The validity period of the warranty starts from the date of purchase.
  • Seite 41: Warranty Claim Procedure

    Service Service Great Britain Tel.: 0871 5000 720 (£ 0.10/Min.) E-Mail: kompernass@lidl.co.uk IAN 278383 Importer Please note that the following address is not the service address. Please use the service address provided in the operating instructions. KOMPERNASS HANDELS GMBH...
  • Seite 42 KOMPERNASS HANDELS GMBH BURGSTRASSE 21 44867 BOCHUM DEUTSCHLAND / GERMANY www.kompernass.com Version des informations · Stand der Informationen Last Information Update: 07 / 2016 · Ident.-No.: SAS7.4LIB1-072016-1 IAN 278383...

Diese Anleitung auch für:

Sas 7.4 li b1

Inhaltsverzeichnis