Konig + Neurath INSIDE.25 Montageanleitung

Verwandte Anleitungen für Konig + Neurath INSIDE.25


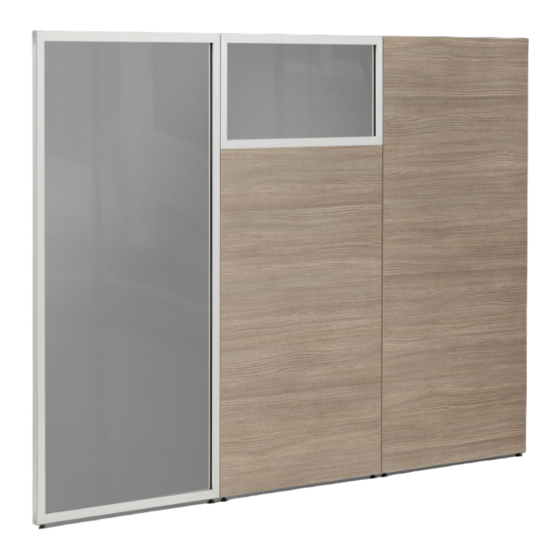
Inhaltszusammenfassung für Konig + Neurath INSIDE.25
- Seite 1 INSIDE.25 Raumgliederungs-System Room partitioning system Montageanleitung Assembly Instructions Freiräume für Leistung.
-
Seite 3: Inhaltsverzeichnis
Inhalt Vorwort Lineare Verbindung zweier Stellwände Eckverbindung L-Konfiguration 90° Eckverbindung T-Konfiguration 90° Eckverbindung X-Konfiguration 90° Eckverbindung Y-Konfiguration 120° Eckverbindung mit Höhenunterschied Montage Fußausleger Montage Fußteller Montage Monitorarm Montage Anbauelemente Tischpaneel an Stellwand montieren Sicherheitshinweise, Belastbarkeit Pflege– und Reinigungshinweise GB Contents Introduction Linear connection between two screens Corner connection L-configuration 90°... -
Seite 5: Vorwort
Vorwort Sehr geehrte Kundin, sehr geehrter Kunde! Sie haben sich für ein Markenprodukt aus dem Hause König + Neurath ent- schieden. Damit dieses Möbel zu Ihrer Zufriedenheit funktioniert, lesen Sie bitte diese Anweisungen vor Inbetriebnahme aufmerksam durch und beach- ten Sie die hier gegebenen Sicherheitshinweise. -
Seite 6: Lineare Verbindung Zweier Stellwände
Montageanleitung Raumgliederungs-System INSIDE.25 Diese Montageanleitung enthält alle nötigen Informationen zur Montage und Umbauvorgängen für das Raumgliederungs-System „INSIDE.25“. Die einzelnen Schritte sind, soweit erforderlich, nummeriert und die unter- schiedlichen Schlüsselgrößen angegeben. 1. Lineare Verbindung zweier Stellwände (a) Obere und untere Abdeck- kappe entfernen. -
Seite 7: Eckverbindung L-Konfiguration 90
2. Eckverbindung L-Konfiguration 90° (a) Jeweils obere und untere Abdeckkappe entfernen. (b) Stellwände unten auf vor- montierte Linearverbinder des Eckpfostens setzen. (c) Abdeckung des Eckpfos- tens abnehmen. Obere Linear- verbinder in Nute des Eck- pfostens und Aussparungen der Stellwände setzen und verschrauben (SW 3). -
Seite 8: Eckverbindung T-Konfiguration
3. Eckverbindung T-Konfiguration 90° (a) Jeweils obere und untere Abdeckkappe entfernen. (b) Stellwände unten auf vor- montierte Linearverbinder des Eckpfostens setzen. (c) Abdeckung des Eckpfos- tens abnehmen. Obere Linear- verbinder in Nute des Eck- pfostens und Aussparungen der Stellwände setzen und verschrauben (SW 3). -
Seite 9: Eckverbindung X-Konfiguration
4. Eckverbindung X-Konfiguration 90° (a) Jeweils obere und untere Abdeckkappe entfernen. (b) Stellwände unten auf vor- montierte Linearverbinder des Eckpfostens setzen. (c) Abdeckung des Eckpfos- tens abnehmen. Obere Linear- verbinder in Nute des Eckpfos- tens und Aussparungen der Stellwände setzen und ver- schrauben (SW 3). -
Seite 10: Eckverbindung Y-Konfiguration 120
5. Eckverbindung Y-Konfiguration 120° (a) Jeweils obere und untere Abdeckkappe entfernen. (b) Stellwände unten auf vor- montierte Linearverbinder des Eckpfostens setzen. (c) Abdeckung des Eckpfos- tens abnehmen. Obere Linear- verbinder in Nute des Eckpfos- tens und Aussparungen der Stellwände setzen und ver- schrauben (SW 3). -
Seite 11: Eckverbindung Mit Höhenunterschied
6. Eckverbindung mit Höhenunterschied (a) Abdeckung des Eckpfos- tens entfernen. Linearverbinder demontieren, danach Nutenstein lösen (SW 2,5). (b) Nutenstein nach unten schieben und an vorgesehener Ankörnung im Eckpfosten fest schrauben. (c) Niedrige Stellwand auf unteren Linearverbinder des Eckpfostens setzen, wie unter Bild 2 - 5 beschrieben. -
Seite 12: Montage Fußausleger
7. Montage Fußausleger (a) Stellfuß heraus drehen. (b) Fußausleger mit Senk- schraube von unten an Stell- wand montieren (SW 4). (c) Höhenjustierung und Ver- spannung an Stellwand durch Münzschlitz möglich. Fußausleger einseitig... -
Seite 13: Montage Fußteller
8. Montage Fußteller (a) Stellfuß heraus drehen. (b) Fußteller mit Senk- schraube von unten an Stell- wand montieren (SW 4). (c) Zur waagerechten Ausrich- tung können beigefügte Unter- legscheiben verwendet werden. Achtung: Fußteller kommen nur bei Ele- menten bis 3 OH oder in Ver- bindung mit L-, T-, X- oder Y- Konfigurationen zum Einsatz! Die Verwendung von Anbauele-... -
Seite 14: Montage Anbauelemente
10. Montage Anbauele- mente (a) Aufsatz-Anbauelemente, wie z.B. Ordnerablage (dar- gestellt), Buchablage oder Regalboden werden von oben auf die Stellwand gesteckt. Mindestabstand bis Aussen- kante Stellwand = 100 mm. (b) Anbauelemente für die Organisationsschiene, wie z.B. Ordnerablage (dargestellt), Hängemappenhalter oder Zettelbox werden in diese ein- gehängt. -
Seite 15: Tischpaneel An Stellwand Montieren
11. Tischpaneel an Stell- wand montieren Obere und untere Abdeck- kappe an der Anbauseite des Tischpaneels entfernen (ohne Abb.). (a) Unteren Nutenstein inklu- sive Linearverbinder im Eck- pfosten lösen, nach oben Ansicht von unten schieben, positionieren und fest schrauben (SW 2,5). (b) Aussparung des Tischpa- neels auf den Linearverbinder setzen. -
Seite 16: Belastbarkeit Der Aufgesetzten Anbauelemente
Sicherheitshinweise max.1600 Der maximale Abstand zwischen zwei Fußaus- legern muss 1600 mm Stellwand mit Regalboden Bei L– und T-Konfigurationen betragen! immer mit zwei Fußauslegern. kann auf Fußausleger ver- Bei Varianten : zichtet werden, wenn der - akustik gegenüberliegende Stellwand- - akustik pinnfähig schenkel min.1600 mm breit ist. -
Seite 17: Pflege- Und Reinigungshinweise
Pflege– und Reinigungshinweise Kunststoffbeschichtete Oberflächen : Oberfläche mit einem Staubtuch reinigen. Bei Verschmutzungen warmes Wasser verwenden und / oder einen milden Kunststoffreiniger, danach trocken wischen. Achtung : Keine scheuernden Reinigungsmittel verwenden! Diese können zu bleibenden, optischen Schäden führen. Acrylglas-Elemente: Bitte bei Acrylglasoberflächen einen Acrylglasreiniger verwenden. Handelsübliche Glasreiniger können Schäden an der Oberfläche verursachen! (Reiniger darf keinen Spiritus enthalten) - Seite 32 Deutschland König + Neurath AG Büromöbelsysteme Industriestraße 1-3 61184 Karben Tel.: 06039 483-0 Fax: 06039 482-214 e-mail: info@koenig-neurath.de www.koenig-neurath.de Great Britain K+N International (Office Systems) Ltd 52 Britton Street London EC1M 5UQ Tel.: 020 74909340 Fax: 020 74909349 e-mail: sales@kn-international.co.uk www.kn-international.co.uk Schweiz König + Neurath AG...