
Verwandte Anleitungen für Classic Cantabile DP 210


Inhaltszusammenfassung für Classic Cantabile DP 210
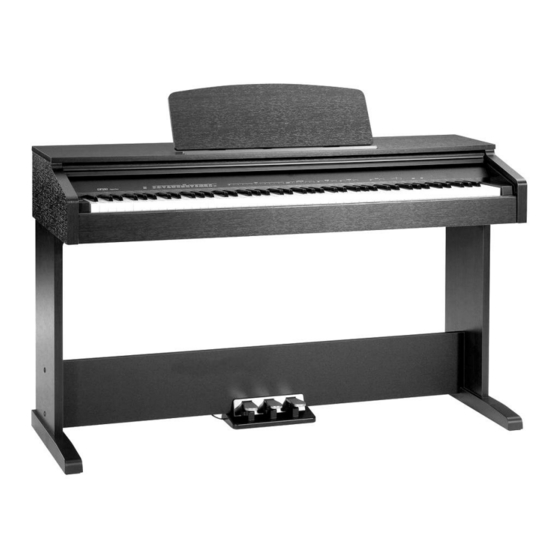
- Seite 1 Classic Cantabile Digitalpiano DP 210 MIDI Bedienungsanleitung / User manual ArtNr 00039141/00039142/00039143 Version 05/2015...
-
Seite 3: Einleitung
Thank you for your purchase of the Classic Cantabile DP 210 digital piano. We hope that you will enjoy the use of the Classic Cantabile DP 210 digital piano. Please read through this manual carefully before beginning to use, so that you will be able to take full advantage of the Classic Cantabile DP 210 digital piano features and enjoy trouble-free operation for years to come. -
Seite 4: Inhaltsverzeichnis
Inhaltsverzeichnis Seite 1. Einführung ........................................3 2. Symbol-Erklärung ......................................3 3. Bestimmungsgemäße Verwendung ................................3 4. Lieferumfang ........................................4 5. Sicherheitshinweise ......................................5 a) Allgemein ........................................5 b) Netzteil ........................................5 c) Betrieb ........................................5 6. Zusammenbau ........................................7 a) Seitenteile, Querstrebe und Fußpedal zusammensetzen .........................7 b) Oberteil montieren ....................................8 c) Fußpedal am Oberteil anschließen, Gerät aufstellen ........................9 7. -
Seite 5: Einführung
1. Einführung Sehr geehrte Kundin, sehr geehrter Kunde, wir bedanken uns für den Kauf dieses Produkts. Dieses Produkt entspricht den gesetzlichen, nationalen und europäischen Anforderungen. Um diesen Zustand zu erhalten und einen gefahrlosen Betrieb sicherzustellen, müssen Sie als Anwender diese Bedienungsanlei tung beachten! Diese Bedienungsanleitung gehört zu diesem Produkt. -
Seite 6: Lieferumfang
4. Lieferumfang • Digital-Piano (1) • Querstrebe (2) • Fußpedale (3) • Linkes Seitenteil (4) • Rechtes Seitenteil (5) • 4x Griffschraube (6) • 4x lange Schrauben (7) • 4x Kunststoffkappe (8) • Verbindungskabel (9) • 4x Gewindestopfen (10) • Netzteil • Netzkabel • Bedienungsanleitung... -
Seite 7: Sicherheitshinweise
5. Sicherheitshinweise Bei Schäden, die durch Nichtbeachten dieser Bedienungsanleitung verursacht werden, erlischt die Gewährleistung/ Garantie. Für Folgeschäden übernehmen wir keine Haftung! Bei Sach- oder Personenschäden, die durch unsachgemäße Handhabung oder Nichtbeachten der Sicherheitshinwei- se verursacht werden, übernehmen wir keine Haftung. In solchen Fällen erlischt die Gewährleistung/Garantie! Sehr geehrte Kundin, sehr geehrter Kunde, die folgenden Sicherheits- und Gefahrenhinweise dienen nicht nur zum Schutz Ihrer Gesundheit, sondern auch zum Schutz des Geräts. - Seite 8 • Vermeiden Sie folgende widrige Umgebungsbedingungen am Aufstellungsort oder beim Transport: - Nässe oder zu hohe Luftfeuchtigkeit - Kälte oder Hitze, direkte Sonneneinstrahlung - Staub oder brennbare Gase, Dämpfe oder Lösungsmittel - starke Vibrationen, Stöße, Schläge - starke Magnetfelder, wie in der Nähe von Maschinen oder Lautsprechern • Verwenden Sie das Produkt niemals gleich dann, wenn es von einem kalten in einen warmen Raum gebracht wird. Das dabei entstehende Kondenswasser kann unter Umständen das Produkt zerstören.
-
Seite 9: Zusammenbau
6. Zusammenbau Aufgrund der großen und schweren Einzelteile ist die Hilfe einer zweiten Person sehr empfehlenswert! Durch das Umfal- len der schweren Teile besteht nicht nur Verletzungsgefahr, sondern auch die Gefahr der Beschädigung des Produkts. a) Seitenteile, Querstrebe und Fußpedal zusammensetzen • Stecken Sie zuerst die 4 Gewindestopfen (A) in die Löcher der Querstrebe. -
Seite 10: Oberteil Montieren
b) Oberteil montieren Setzen Sie das Oberteil auf die beiden Seitenteile auf. Mit den vier Griffschrauben kann das Oberteil fixiert werden (C). -
Seite 11: Fußpedal Am Oberteil Anschließen, Gerät Aufstellen
c) Fußpedal am Oberteil anschließen, Gerät aufstellen Verbinden Sie den Stecker des Fußpedals mit der entsprechenden Buchse am Oberteil, siehe Pfeil im Bild oben. Achten Sie dabei auf die richtige Anordnung des Steckers in der Buchse, wenden Sie keine Gewalt an! Stellen Sie das Digital-Piano anschließend an der gewünschten Stelle auf. -
Seite 12: Bedienelemente
7. Bedienelemente Ein-/Ausschalter Haupt-Lautstärkeregler Taste „FUNCTION“ mit Kontroll-LED Demo-Funktion für Instrumente starten/anhalten Tastenbereich „VOICE“ zur Auswahl eines Instruments Tastenbereich „TEMPO“ zur Einstellung der Geschwindigkeit Fußpedal für „Sustain“-Effekt Fußpedal für „Sostenuto“-Effekt Fußpedal für „Soft“-Effekt 10 Tastenbereich „METRONOME“ 11 Tastenbereich „REVERB“ 12 Tastenbereich „CHORUS“ 13 Tastenbereich „TOUCH“... -
Seite 13: Anschluss Und Inbetriebnahme
8. Anschluss und Inbetriebnahme a) Aufstellung Stellen Sie das Digital-Piano auf eine ausreichend große, ebene, stabile Fläche. Schützen Sie wertvolle Böden mit einer geeigneten Unterlage vor Kratzspuren und Druckstellen. b) Netzteil anschließen • Drehen Sie den Lautstärkeregler „VOLUME“ ganz nach links gegen den Uhrzeigersinn. • Verbinden Sie den Niedervolt-Rundstecker des mitgelieferten Netzteils mit der entsprechenden Buchse des Digital-Pianos. • Verbinden Sie das Netzteil über das Netzkabel mit einer ordnungsgemäße Netzsteckdose. c) Anschluss eines externen Verstärkers An der Klinkenbuchse „AUX OUT“ steht das Audiosignal (Line-Pegel) z.B. für den Anschluss an einen externen Verstärker zur Verfügung. -
Seite 14: Anschluss An Einen Computer
e) Anschluss an einen Computer Anstelle herkömmlicher MIDI-Ports bietet das Digital-Piano einen modernen USB-Port an, um es an einem Computer anzuschlie- ßen. Gehen Sie wie folgt vor: • Schalten Sie das Digital-Piano aus. • Starten Sie anschließend Ihren Computer und warten Sie, bis das Betriebssystem vollständig gestartet ist. • Verbinden Sie die USB-Buchse (42) des Digital-Pianos über ein geeignetes USB-Kabel (nicht im Lieferumfang) mit einem freien USB-Port Ihres Computers. • Schalten Sie das Digital-Piano ein. • Windows erkennt ggf. neue Hardware. Die benötigten Treiber sind Bestandteil des Betriebssystems (mindestens Windows XP oder höher erforderlich). -
Seite 15: Bedienung
9. Bedienung a) Ein-/Ausschalten • Schieben Sie die Abdeckung der Klaviatur vollständig nach innen, so dass die Piano-Tasten sichtbar sind. • Drehen Sie den Lautstärkeregler „VOLUME“ ganz nach links gegen den Uhrzeigersinn. • Schalten Sie das Digital-Piano über den Ein-/Ausschalter ein (Taste kurz drücken). • Wenn Sie das Digital-Piano nicht mehr benötigen, schalten Sie es aus. Das Digital-Piano schaltet sich nach 30 Minuten selbst aus, wenn es nicht benutzt wird, um Strom zu sparen. Soll sich das Digital-Piano nicht automatisch abschal- ten, so können Sie die Stromsparfunktion vorüberge- hend deaktivieren. -
Seite 16: Auswählen Eines Instruments
d) Auswählen eines Instruments Das Digital-Piano verfügt über insgesamt 26 verschiedene Instru- mente. Diese können über die Piano-Tasten im Bereich „VOICE“ ausgewählt werden. Jede Piano-Taste ist mit zwei Instrumenten belegt (siehe Be- schriftung der oberen und unteren Zeile). Gehen Sie zur Auswahl eines Instruments wie folgt vor: • Halten Sie die Taste „FUNCTION“ gedrückt und betätigen Sie anschließend kurz eine Piano-Taste im Bereich „VOICE“, so ist eines der Instrumente ausgewählt. -
Seite 17: Demo-Modus Für Aktuell Eingestelltes Instrument Aktivieren
g) Demo-Modus für aktuell eingestelltes Instrument aktivieren Das Digital-Piano verfügt für jedes der 26 Instrumente einen speziellen Demo-Modus. Gehen Sie wie folgt vor: • Wählen Sie zunächst ein Instrument aus, siehe Kapitel 9. d). • Halten Sie die Taste „FUNCTION“ gedrückt und betätigen Sie kurz die mit „VOICE DEMO“ gekennzeichnete Piano-Taste. Lassen Sie dann die Taste „FUNCTION“ wieder los. Der Abspielvorgang beginnt. Während dem Abspielvorgang blinkt die LED oberhalb der Taste „FUNCTION“. -
Seite 18: Chorus-Effekt
j) Chorus-Effekt Beim Chorus-Effekt wird der jeweiligen Klangfarbe mehr Tiefe verliehen. Der Chorus-Effekt lässt sich in mehreren Stufen einstellen. Gehen Sie wie folgt vor: • Halten Sie die Taste „FUNCTION“ gedrückt und betätigen Sie anschließend kurz eine Piano- Taste im Bereich „CHORUS“, so können Sie den gewünschten Effekt auswählen. „OFF“ = Effekt ausschalten „1“... -
Seite 19: M) Metronom
m) Metronom Bei eingeschaltetem Metronom wird ein Metronom-Geräusch wiedergegeben. Der Takt des Metronoms und die Geschwindigkeit ist einstellbar. Gehen Sie wie folgt vor: • Halten Sie die Taste „FUNCTION“ gedrückt und betätigen Sie anschließend kurz eine Piano-Taste im Bereich „METRONOME“. „ON/OFF“ = Metronom ein- oder ausschalten „2“..„6“ = Taktart auswählen • Stellen Sie die Geschwindigkeit des Metronoms ein, indem Sie die Piano-Tasten „0“ bis „9“ im Bereich „TEMPO“ drücken (Taste „FUNCTION“ muss dabei gedrückt bleiben). -
Seite 20: Wartung Und Reinigung
10. Wartung und Reinigung Das Produkt ist für Sie wartungsfrei. Eine Wartung oder Reparatur darf nur durch einen Fachmann durchgeführt werden. Bevor Sie das Produkt reinigen, schalten Sie es aus und trennen Sie das Digital-Piano von der Spannungs-/Stromversorgung (Netzstecker aus der Netzsteckdose ziehen). Zur Reinigung genügt ein trockenes, weiches, sauberes Tuch. Verwenden Sie keine aggressiven Reinigungsmittel, dies kann zu Verfärbungen führen. -
Seite 21: Anhang A: Instrumente
13. Anhang A: Instrumente Bezeichnung Beschriftung auf dem Digital-Piano Grand Piano Piano Grand Piano 2 Piano 2 Ele.Piano EPiano Ele.Piano 2 EPiano 2 Harpsichord Harpsic Clavichord Clavi Music Box MBox Vibraphone Vibraph Marimba Marimba Drawbar Organ DrawOr Percussive Organ PercOr Church Oragn ChurOr Church Oragn 2... - Seite 22 Table of Contents Page 1. Introduction ........................................21 2. Explanation of Symbols ....................................21 3. Intended Use .........................................21 4. Scope of Delivery ......................................22 5. Safety Information ......................................23 a) General Information ....................................23 b) Mains adapter ......................................23 c) Operation .........................................23 6. Assembly ........................................25 a) Assembly of Side Parts, Transverse Strut and Pedal ........................25 b) Installing the Upper Part ..................................26 c) Connecting the Pedal to the Top, Setting up Device ........................27 7.
-
Seite 23: Introduction
1. Introduction Dear Customer, thank you for purchasing this product. This product complies with the statutory national and European requirements. To maintain this status and to ensure safe operation, you as the user must observe these operating instructions! These operating instructions are part of this product. They contain important notes on commissioning and handling. Also consider this if you pass on the product to any third party. -
Seite 24: Scope Of Delivery
4. Scope of Delivery • Digital piano (1) • Transverse strut (2) • Pedals (3) • Left side unit (4) • Right side unit (5) • 4x grip screw (6) • 4x long screws (7) • 4x plastic cap (8) • Connection cable (9) • 4x threaded plug (10) • Mains adapter • Mains cable • Operating instructions... -
Seite 25: Safety Information
5. Safety Information The guarantee/warranty will expire if damage is incurred resulting from non-compliance with these operating instruc- tions. We do not assume any liability for consequential damage! Nor do we assume any liability for damage to property or personal injury caused by improper use or failure to observe the safety information. - Seite 26 • The following unfavourable conditions are to be avoided at the place of installation and during transport: - dampness or high humidity - Cold or heat, direct solar radiation - dust or flammable gases, fumes or solvents - strong vibration, impact or blows, - strong magnetic fields such as those near machines or speakers • Never use the product immediately after it was taken from a cold into a warm environment. The condensation genera- ted may destroy the product. For the mains adapter/mains cable there is danger to life from electric shock! Let the product reach room temperature before connecting and using it. This may take several hours.
-
Seite 27: Assembly
6. Assembly Due to the large and heavy components, help from a second person is highly recommended! Falling over of the heavy parts not only poses a danger of injury but also danger of damage to the product. a) Assembly of Side Parts, Transverse Strut and Pedal • First plug the 4 threaded plugs (A) into the holes of the transverse strut. Observe that the threaded hole is horizontally aligned with the threaded plug. • Now install the left and right side parts to the transverse strut as illustrated; observe proper placement of the left and right side parts. -
Seite 28: B) Installing The Upper Part
b) Installing the Upper Part Put the upper part onto the two side parts. Fasten the upper part with the four grip screws (C). -
Seite 29: C) Connecting The Pedal To The Top, Setting Up Device
c) Connecting the Pedal to the Top, Setting up Device Connect the plug of the pedal to the corresponding socket at the top part; see arrow in the figure above. Observe proper alignment of the plug with the socket; do not apply any force! Then put the digital piano up in the desired location. Select a sufficiently large, level, stable surface. Protect expensive floors from impressions and scratches with suitable pads. -
Seite 30: Control Elements
7. Control Elements On/off switch Main volume controller 3 Button „FUNCTION“ with indicator LED Start/stop instrument demo function Key area „VOICE“ to select an instrument Key area „TEMPO“ to set the speed Pedal for „Sustain“ effect Pedal for „Sostenuto“ effect Pedal for „Soft“ effect 10 Key area „METRONOME“... -
Seite 31: Connection And Start-Up
8. Connection and Start-Up a) Setup Set the digital piano up on a sufficiently large, level, stable surface. Protect expensive floors from impressions and scratches with suitable pads. b) Connecting Mains Adapter • Turn the volume controller „VOLUME“ all the way to the left counter-clockwise. • Connect the low-voltage round plug of the enclosed mains adapter to the corresponding socket of the digital piano. • Connect the mains adapter to a proper mains socket via the mains cable. c) Connection of an External Amplifier The audio signal (line level) is available at the jack plug socket „AUX OUT“, e.g. for connection to an external amplifier. Proceed as follows for connection: • Reduce the volume at the digital piano, turn the volume controller „VOLUME“ all the way to the left counter-clockwise. Switch off the digital piano. -
Seite 32: E) Pc Connection
e) PC Connection Instead of conventional MIDI ports, the digital piano has a modern USB port to connect it to a computer. Proceed as follows: • Switch off the digital piano. • Then switch on your computer and wait until the operating system has started up completely. • Connect the USB socket (42) of the digital piano to a free USB port of your computer via a suitable USB cable (not enclosed). • Switch on the digital piano. • Windows may recognise new hardware. The drivers needed are part of the operating system (at least Windows XP or newer required). Follow the Windows instructions for installation. There is no software included with the digital piano. However, you may use any programme that supports external digital pianos/music keyboards via USB. -
Seite 33: Operation
9. Operation a) Switching On/Off • Push the cover on the keyboard all the way in to expose the piano keys. • Turn the volume controller „VOLUME“ all the way to the left counter-clockwise. • Switch on the digital piano via the on/off switch (briefly push the key). • When you no longer need the digital piano, switch if off. The digital piano switches off on its own after 30 minu- tes if not used to save power. If the digital piano does not switch off automatically, the power saving function can be deactivated temporarily. -
Seite 34: Selecting An Instrument
d) Selecting an Instrument The digital piano has a total of 26 different instruments. They can be selected via the piano keys in the area „VOICE“. Each piano key has two instruments (see label of the upper and lower line). Proceed as follows to select an instrument: • Keep the key „FUNCTION“ pushed and then briefly push a pia- no key in the „VOICE“ area to select one of the instruments. • Release the key „FUNCTION“ again. -
Seite 35: G) Activating Demo Mode For Currently Set Instrument
g) Activating Demo Mode for Currently Set Instrument The digital piano has a special demo mode for each of the 26 instruments. Proceed as follows: • First select an instrument; see chapter 9. d). • Keep the key „FUNCTION“ pushed and briefly push the piano key marked „VOICE DEMO“. Then release the key „FUNCTION“ again. Playback starts. During playback, the LED above the key „FUNCTION“ will flash. During playback, the keyboard of the digital piano has no function. • If required, set the volume as described in chapter 8. b). -
Seite 36: Chorus Effect
j) Chorus Effect The chorus effect gives the respective sound more depth. The chorus effect can be set in several levels. Proceed as follows: • Keep the key „FUNCTION“ pushed and then briefly push a piano key in the „CHORUS“ area to select the desired effect. „OFF“ = effect off „1“= light chorus „2“= medium chorus „3“= low chorus „4“ = hiss effect • Release the key „FUNCTION“ again. k) Equalizer Effect The equalizer effect changes the sound field of the instruments. -
Seite 37: M) Metronome
m) Metronome With the metronome switched on, a metronome sound is made. The time of the metronome and the speed can be set. Proceed as follows: • Keep the key „FUNCTION“ pushed and then briefly push a piano key in the „METRONO- ME“ area. „ON/OFF“ = switching metronome on or off „2“..„6“ = selecting time type • Set the metronome speed by pushing the piano keys „0“ to „9“ in the „TEMPO“ area (the key „FUNCTION“ must stay pushed). Always enter the times per minute with three digits. Example: For 85 times per minute push the keys „0“, „8“ and „5“ in TEMPO quick succession. -
Seite 38: Maintenance And Cleaning
10. Maintenance and Cleaning The product is maintenance-free for you. Servicing or repair must only be carried out by a specialist. Before cleaning the product, switch it off and disconnect the digital piano from the voltage/current supply (pull the mains plug from the socket). A dry, soft and clean cloth is sufficient for cleaning. Never use any aggressive cleaning agents. They may cause discolouration. Do not push the surface too much when cleaning to avoid scratches. Dust can be removed easily with a clean long-haired brush and a vacuum cleaner. 11. -
Seite 39: Appendix A: Instruments
13. Appendix A: Instruments Designation Label on the digital piano Grand Piano Piano Grand Piano 2 Piano 2 Ele.Piano EPiano Ele.Piano 2 EPiano 2 Harpsichord Harpsic Clavichord Clavi Music Box MBox Vibraphone Vibraph Marimba Marimba Drawbar Organ DrawOr Percussive Organ PercOr Church Oragn ChurOr Church Oragn 2 ChurOr 2 Reed Organ...