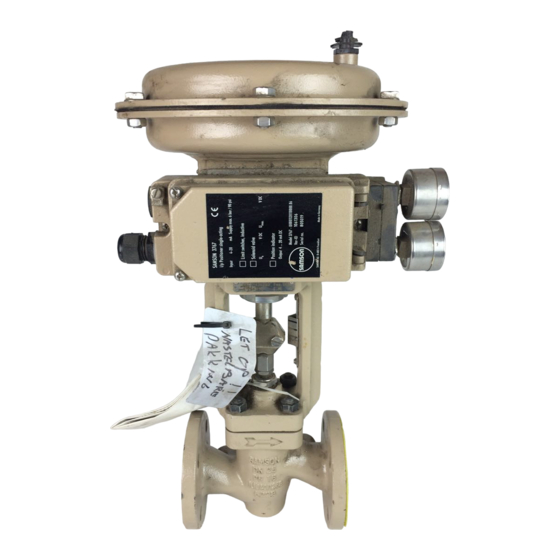
Samson 3730-4 Kurzanleitung
Vorschau ausblenden
Andere Handbücher für 3730-4:
- Schnellstartanleitung ,
- Bedienungsanleitung (200 Seiten) ,
- Kurzanleitung (2 Seiten)
Kurzanleitung Typ 3730-4/-5
Die vorliegende Kurzanleitung ersetzt nicht die dem Gerät bei-
liegende Einbau- und Bedienungsanleitung.
Die in der Einbau- und Bedienungsanleitung enthaltenen Si-
cherheits- und Warnhinweise sind unbedingt zu beachten.
1. Montage
Direktanbau an SAMSON-Antrieb Typ 3277
Hub mm
Antrieb cm
7,5
120
15
240/350
15/30
700
Hinweis: Hebel M mit Abtaststift auf Stiftposition 35 mm für 15 mm Hub
ist serienmäßig montiert!
4
Zur Montage des Stellungsreglers den Hebel anheben, da-
mit der Abtaststift auf dem Mitnehmer der Antriebsstange
zum Liegen kommt.
NAMUR-Anbau:
4
Maximalen Hubbereich des Stellventiles (Stellung Zu bis zum
gegenüberliegenden Anschlag) durch volles Be- und Entlüf-
ten ermitteln.
4
Den zum max. Hubbereich passenden Hebel sowie die
nächstgrößere Stiftposition auswählen und auf der Welle
des Stellungsreglers verschrauben.
4
Hebelauswahl/Stiftabstand: siehe Tabelle auf Deckelschild
4
Den NAMUR-Winkel so am Ventiljoch festschrauben, dass er
bei ca. 50 % Hubstellung mittig zum Schlitz der Mitnehmer-
platte steht.
4
Stellungsregler am NAMUR-Winkel befestigen, der Ab-
taststift muss dabei im Schlitz der Mitnehmerplatte liegen.
Auf freie Hebelbeweglichkeit achten.
Anbau an Schwenkantriebe:
4
Hebel M
Stiftposition 90°
4
Ventil in Schließstellung bringen, Öffnungsrichtung bestimmen.
4
Mitnehmer auf die geschlitzte Antriebswelle aufstecken und
zusammen mit Kupplungsrad verschrauben. Untere und
obere Befestigungswinkel am Antrieb montieren.
4
Den Stellungsregler so auf die Winkel aufsetzen und fest-
schrauben, dass der Hebel mit seinem Abtaststift unter Be-
rücksichtigung der Öffnungsrichtung in den Schlitz des
Kupplungsrades eingreift.
Es muss in jedem Fall gewährleistet sein, dass innerhalb des
Arbeitsbereiches die mittlere Hebelstellung durchlaufen wird
(mittlere Hebelstellung = Hebel steht parallel zur Längsseite
des Stellungsreglergehäuses).
4
Pneumatische Anschlüsse:
Anschlussverschraubungen nur in den jeweils montierten
Verbindungsblock, die Anschlussplatte bzw. den Manome-
terblock aus dem Zubehör einschrauben.
2. Inbetriebnahme
4
Pneumatische Hilfsenergie (1,4 bis 6 bar) aufschalten.
4
Elektrische Führungsgröße gemäß IEC 61158-2 einspeisen.
Sicherheitsstellung eingeben:
Schiebeschalter gemäß der Sicherheitsstellung des Stellventiles
auf AIR TO OPEN (Stelldruck öffnet) oder
AIR TO CLOSE (Stelldruck schließt) setzen.
Volumendrossel Q der Antriebsgröße anpassen:
Drossel nur bei Antrieben < 240 cm
MIN SIDE
bei seitlichem Anschluss oder
MIN BACK
bei rückseitigem Anschluss stellen.
Achtung! Nach jeder Veränderung der Drosselstellung ist eine
Neuinitialisierung notwendig.
2
Stiftposition
25
35
50
2
auf
Quick guide Type 3730-4/-5
This Quick Guide does not substitute the Mounting and Oper-
ating Instructions delivered with the positioner.
The warnings and safety instructions in the Mounting and Op-
erating Instructions must be followed.
1. Mounting
Direct attachment to SAMSON Type 3277 Actuator
Travel mm
Hebel
M
7.5
M
15
M
15/30
Note: Standard delivery includes lever M ready assembled with the follower
pin on 35 mm pin position for 15 mm travel!
4
To mount the positioner, lift the lever so that the follower pin
rests on the follower clamp of the actuator stem.
NAMUR attachment:
4
Determine the maximum travel range of the control valve
(closed position to as far it will go in the other direction) by
applying the max. supply air to the actuator and then ven-
ting the actuator completely.
4
Select the lever to match the maximum travel range as well
the next largest pin position and screw onto the shaft of the
positioner.
4
Lever option/pin distance: see table on cover plate.
4
Screw the NAMUR bracket onto the valve yoke so that it is
aligned centrally to the slot of the follower plate when the
travel position is at approx. 50 %.
4
Secure the positioner to the NAMUR bracket, making sure
that the follower pin is in the slot of the follower plate.
Make sure the lever can still move.
Attachment to rotary actuators:
4
Lever M
4
Put the valve into the closed position, determine the opening
direction.
4
Place the follower plate on the slotted actuator shaft and
fasten it to the coupling wheel. Attach the upper and lower
brackets to the actuator.
4
Place the positioner on the brackets and screw tight, making
sure that the lever with its follower pin engages the slot of
the coupling wheel, while taking into account the opening
direction.
It is important to make sure that the lever's mid position corre-
sponds to the mid travel of the valve (lever's mid position =
lever is parallel to the long side of the positioner housing).
4
Pneumatic connections:
Screw the threaded connections only into the attached mount-
ing block, connecting plate or pressure gauge block from the
accessories.
2. Start-up
4
Connect pneumatic supply air (1.4 to 6 bar).
4
Apply electrical reference variable according to
IEC 61158-2.
Set the fail-safe position:
Set the slider switch to match fail-safe position of the valve:
AIR TO OPEN (signal pressure opens the valve) or
AIR TO CLOSE (signal pressure closes the valve).
Adapt the volume restriction Q to the actuator size:
Only set the restriction for actuators < 240 cm
MIN SIDE
MIN BACK
Caution! After each change of the restriction position, a new
initialization is necessary.
2
Actuator cm
Pin position
120
25
240/350
35
700
50
Pin position 90°
for connection at the side or
for connection at the back.
Lever
M
M
M
2
to

Verwandte Anleitungen für Samson 3730-4


Inhaltszusammenfassung für Samson 3730-4
- Seite 1 The warnings and safety instructions in the Mounting and Op- cherheits- und Warnhinweise sind unbedingt zu beachten. erating Instructions must be followed. 1. Mounting 1. Montage Direct attachment to SAMSON Type 3277 Actuator Direktanbau an SAMSON-Antrieb Typ 3277 Travel mm Actuator cm Pin position...
- Seite 2 Handsymbol For detailed information on mounting and operation, refer to: Einzelheiten sind den Einbau- und Bedienungsanleitungen zu entnehmen: EB 8384-4 EN for Type 3730-4 Typ 3730-4 siehe EB 8384-4 EB 8384-5 EN for Type 3730-5...