Grasslin Talento 891 Bedienungsanleitung
Kapitel
Inhaltsverzeichnis

Verwandte Anleitungen für Grasslin Talento 891


Inhaltszusammenfassung für Grasslin Talento 891
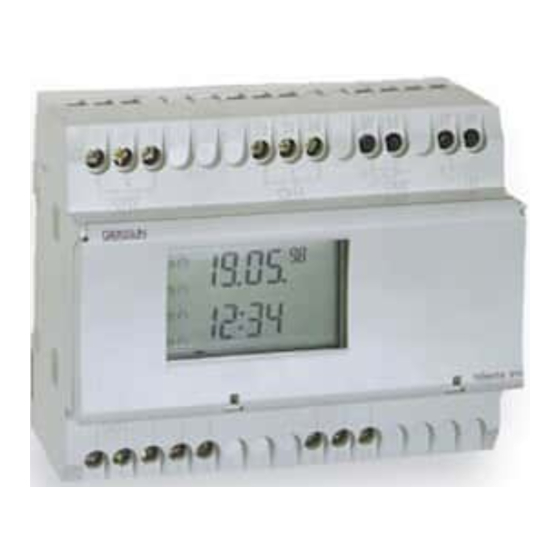
- Seite 1 Bedienungsanleitung Operating Instructions Mode d’emploi Instruzioni d’uso Instrucciones de empleo Instruções de funcionamento Gebruiksaanwijzing Návod k obsulze Instrukcja obslugi...
-
Seite 3: Inhaltsverzeichnis
Inhaltsangabe Inhalt Seite Hinweise zur Sicherheit Montage, Inbetriebnahme, Anschluß Bedienelemente Anzeige Allgemeines Werkseitige Einstellung Einstellungen ändern Betriebsart wählen 7.2.1 AU = automatische Umstellung 7.2.2 cHA = wochentagsbezogene Umstellung 7.2.3 no = keine Umstellung Schaltbefehle Datum Einzeldatum ohne/mit Jahr Datumsbereich ohne/mit Jahr Priorität Impuls-Schaltbefehle Zyklus-Schaltbefehle... -
Seite 4: Hinweise Zur Sicherheit
Hinweise zur Sicherheit Die Installation muß von einer Fachkraft oder unter deren Leitung und Aufsicht durchgeführt und geprüft werden. Für die Montage: • geeignet für den Einsatz bei Umgebungsbedingungen mit üblicher Verunreinigung • für Wandaufbau das entsprechende Zubehör von Grässlin verwenden. -
Seite 5: Montage, Inbetriebnahme, Anschluß
Montage, Inbetriebnahme, Anschluß Montage Schaltuhr montieren • auf DIN-Schiene • Option Wandaufbau Aufbauset für 6 TE Art.-Nr. 03.59.0046.2 Inbetriebnahme Die Uhrzeit und das Datum wurden im Werk eingestellt. Die Schaltuhr ist im Stromspar-Modus, nur der Doppelpunkt blinkt. Drücken Sie eine beliebige Taste: •... -
Seite 6: Bedienelemente
Bedienelemente Handschalter Minuten/Sekunden wählen für Zyklus-/Impulsfunktion Minuten einstellen Stunden Jahr einstellen Kalendermonat einstellen Kalendertag bis, für Datumsbereich Sommer-/Winterzeit-Umstellung Reset Impuls wählen Zyklus wählen akutelles Datum, Uhrzeit einstellen Programmeingabe beginnen IR Senden/Empfangen Priorität Wochentage wählen Löschen 1 = Montag 2 = Dienstag 3 = …... -
Seite 7: Anzeige
Anzeige Tag (US Monat) Monat (US Tag) Impuls (Minuten) Impuls (Sekunden) Zyklus (Minuten) Zyklus (Sekunden) Kanal 1 Jahreszahl Dauerbetrieb Blocknummer Handbetrieb Priorität Automatikbetrieb Schaltzustand Sommer-/ Winterzeit- Kanal 2 Umstellung Kanal 3 Automatikbetrieb Kanal 4 DCF 77 Funkempfang Impuls 1234567 = Wochentag Stunde Zyklus Jahreszahl... -
Seite 8: Allgemeines
Allgemeines Blocknummern Beim Programmieren werden automatisch Programmblöcke vergeben. Es gibt Programmblöcke von 00 ..99 (Notizblockprinzip). Alle Schaltbefehle ohne Datumszuweisung erhalten immer die Blocknummer 00. (Der Blocknummer 00 ist immer Priorität 0 zugeordnet – sie kann nicht verändert werden). Alle Schaltbefehle mit Datumszuweisung erhalten die Block- nummern von 01 .. - Seite 9 Allgemeines Back Up Programm gesichert mit Taste Prog und 1 (Tagestaste) Das Schaltprogramm im Vordergrund aktuelles Programm bleibt erhalten und kann beliebig verändert werden. Bei Bedarf rufen Sie das ursprüngliche Schaltprogramm wieder auf mit der Funktion Restore. Restore Programm gesichert mit Taste Prog und 7 (Tagestaste) Das Schaltprogramm im Vordergrund aktuelles Programm...
-
Seite 10: Programmieren Am Schreibtisch
Allgemeines Programmieren am Schreibtisch Das Bedienteil können Sie herausnehmen. Das Programmieren erledigen Sie dann bequem am Schreibtisch. Programmieren mit dem talento taxxi (Handprogrammiergerät) Die komfortabelste Übertragung der Schaltprogramme bietet das talento taxxi. 6.5.1 Von Schaltuhr zu Schaltuhr (von Bedienteil zu Bedienteil –... -
Seite 11: Sie Erstellen Ihre Schaltprogramme Mit Der Software
Allgemeines 6.5.2 Sie erstellen Ihre Schaltprogramme mit der Software talento dialog auf einem PC. Diese werden dann über die PC-Schnittstelle ins taxxi übertragen. Mit dem taxxi werden jetzt die Schaltprogramme über die Infrarot Schnittstelle in die jeweilige Schaltuhr (Bedienteil) übertragen, siehe Handtuch talento dialog. talento taxxi Hinweis: Software und Zubehör sind gesondert zu bestellen: •... -
Seite 12: Fehlermeldungen
Allgemeines Service 6.6.1 Fehlermeldungen Die Schaltuhr meldet Fehlfunktionen: • Er 04 – bei fehlerhaftem Zugriff auf das EEProm Im Einzelfall kann diese Fehlermeldung erscheinen. Drücken Sie eine beliebige Taste, die Schaltuhr arbeitet ganz normal weiter. Sollte diese Fehlermeldung öfters auftreten, empfehlen wir die Schaltuhr auszutauschen. -
Seite 13: Werkseitige Einstellung
Werkseitige Einstellung Die Vorgaben entsprechen der mitteleuropäischen Zeit (MEZ). Die Schaltuhr bietet 3 Betriebsarten. Das Datum und die Uhrzeit sowie Betriebsart AU sind eingestellt. Betriebsarten: • AU Automatische Umstellung der Sommerzeit-Regelung, siehe Kapitel 7.2.1 Die Umstellung erfolgt an den vom Gesetzgeber vorbestimmten Daten. - Seite 14 Werkseitige Einstellung Datumsanzeige drehen (Schreibweise in den USA/GB) -Taste 1x drücken Doppelpunkt blinkt nicht! 2-Taste (Wochentag) 1x drücken (Monat, Tag) -Taste 1x drücken, Eingabe ist beendet. Anpassen an MEZ Empfängt die Schaltuhr das Zeitsignal DCF 77, kann es – je nach Standort –...
-
Seite 15: Einstellungen Ändern
7.1. Einstellungen ändern Hinweis: Bei allen Einstellungen/Änderungen, die Sie vornehmen, ist der Aussteig bzw. Abschluss mit der -Taste jederzeit möglich. Datum und Uhrzeit -Taste 1x drücken Doppelpunkt blinkt nicht! Datum einstellen, ändern: mit Day-Taste Kalendertag mit Month-Taste Kalendermonat mit Year-Taste Kalenderjahr Uhrzeit einstellen, ändern: mit h-Taste Stunden mit m-Taste Minuten... -
Seite 16: Betriebsart Wählen
7.2 Betriebsart wählen 7.2.1 AU = Automatische Umstellung 7.2.2 cHA = Wochentagsbezogene Umst. 7.2.3 no = keine Umstellung 7.2.1 AU = automatische Umstellung Diese Daten können Sie an dieser Stellen nur lesen. Daten ändern siehe Kapitel 7.1 -Taste 1x drücken Doppelpunkt blinkt nicht! + 1h-Taste 1x drücken Beginn der Sommerzeit,... -
Seite 17: Cha = Wochentagsbezogene Umstellung
7.2 Betriebsart wählen 7.2.2 cHA = Wochentagsbezogene Umstellung -Taste 1x drücken Doppelpunkt blinkt nicht! + 1h-Taste 1 bzw. 2x drücken, bis cHA erscheint Individuellen Sommerzeit-Beginn einstellen: mit Day-Taste Kalendertag mit Month-Taste Kalendermonat -Taste 1x drücken, blinkt Individuelles Sommerzeit-Ende einstellen: mit Day-Taste Kalendertag mit Month-Taste Kalendermonat -Taste 1x drücken, Eingabe ist beendet. -
Seite 18: No = Keine Umstellung
7.2.3 no = keine Umstellung der Sommerzeit -Taste 1x drücken Doppelpunkt blinkt nicht! + 1h-Taste so oft drücken, bis no erscheint Die Schaltuhr arbeitet mit Kalender, jedoch ohne automatische Umstellung. Die manuelle Umstellung kann immer aktiviert werden, mit Taste + 1h. -Taste 1x drücken, Eingabe ist beendet. -
Seite 19: Schaltbefehle
Schaltbefehle Die Eingabe der Schaltbefehle gilt für alle Arten der Zuordnung: • Schaltbefehle ohne Datumszuweisung, immer in Block 00, immer mit Priorität 0 (Standardschaltbefehle) • Schaltbefehle mit Einzeldatum, siehe Kapitel 9.1 • Schaltbefehle mit Datumsbereich, siehe Kapitel 9.2 • Impuls – Schaltbefehle, siehe Kapitel 11 •... - Seite 20 Wochentage einstellen: 1 2 3 4 5 6 7 (Montag … Sonntag) Schaltzustand einstellen: 1/0 -Taste für jeden Kanal separat wählen = EIN; = AUS Prog.-Taste 1x kurz drücken, der Schaltbefehl ist gespeichert. Ein freier Speicherplatz ist angezeigt – für weitere Eingaben. oder -Taste 1x drücken, Eingabe ist beendet.
-
Seite 21: Datum
Datum eingeben • Schaltbefehlen, denen ein Datum zugwiesen wird, werden in Blöcken geordnet, gleichzeitig wird die Priorität 2 zugewiesen, Priorität ändern – siehe Kapitel 10 • Das Zuordnen der Blocknummer erfolgt automatisch (01 bis 99) (Schaltbefehle ohne Datumszuweisung immer in Block 00, immer mit Priorität 0) siehe Kapitel 10 •... -
Seite 22: Einzeldatum Ohne/Mit Jahr
9.1 Einzeldatum ohne/mit Jahr Day, Month oder Year -Taste 1 x drücken Es wird immer das aktuelle Datum, eine neue Blocknummer und die Priorität 2 angeboten. Gewünschtes Datum eingeben: (ohne oder mit Jahr) mit Day-Taste Kalendertag mit Month-Taste Kalendermonat mit Year-Taste Kalenderjahr Priorität ändern, siehe Kapitel 10 Prog.-Taste nur kurz drücken, Diese Eingabe ist gespeichert! - Seite 23 9.2 Datumsbereiche ohne/mit Jahr Day, Month oder Year -Taste 1 x drücken Es wird immer das aktuelle Datum, eine neue Blocknummer und die Priorität 1 angeboten. Gewünschtes Anfangsdatum eingeben: (ohne oder mit Jahr) mit Day-Taste Kalendertag mit Month-Taste Kalendermonat mit Year-Taste Kalenderjahr Priorität ändern, siehe Kapitel 10 -Taste 1x drücken, blinkt!
- Seite 24 Ein freier Speicherplatz ist angezeigt – für weitere Eingaben. Haben Sie für diesen Block alle Datumseingaben gemacht ? Wenn ja, geben Sie jetzt die zugehörigen Schaltbefehle ein, siehe Kapitel 8 oder -Taste 1 x drücken, Eingabe ist beendet. Das Display zeigt das Datum und die Uhrzeit.
-
Seite 25: Priorität
10. Priorität Schaltbefehle mit einer Datumszuweisung können mit unterschiedlichen Prioritäten belegt werden. (Blocknummer 00 und Priorität 0 ist festgelegt für Schaltbefehle ohne Datumszuweisung) Wird beim Programmieren mit einem Datum begonnen, wird immer eine neue Blocknummer und die Priorität 2 angeboten = Vorgabe für ein Einzeldatum. -
Seite 26: Impuls-Schaltbefehle
11. Impuls-Schaltbefehle Wird ein Verbraucher mit hoher Schalthäufigkeit – im Sekundenbereich – EIN- und AUS-geschaltet, muß sichergestellt sein, dass Rückwirkungen auf die Qualität von Beleuchtungseinrichtungen (Flicker) und Störungen im Rundfunk- und Fernsehempfang vermieden werden. Sie bestimmen die Zeiten für Impuls-Schaltbefehle, Symbol Impulszeiten sind: 01...99 Sekunden oder 01...99 Minuten. - Seite 27 Vorwahl für Sekunden oder Minuten - Taste - Taste schrittweise drücken Impulszeit einstellen, von 01 ... 99 Hinweis: Wird die Taste länger gedrückt, erfolgt das Einstellen in Schritten von 05 Prog.-Taste 1x nur kurz drücken, der Schaltbefehl ist gespeichert. Ein freier Speicherplatz ist angezeigt –...
-
Seite 28: Zyklus-Schaltbefehle
12. Zyklus-Schaltbefehle Wird ein Verbraucher mit hoher Schalthäufigkei – im Sekundenbereich – EIN- und AUS-geschaltet, muss sichergestelt sein, dass Rückwirkungen auf die Qualität von Beleuchtungseinrichtungen (Flicker) und Störungen im Rundfunk- und Fernsehempfang vermieden werden. Sie bestimmen die Zeiten für zyklische Schaltbefehle Symbole: = Zyklus-Dauer (2...99 Sek. - Seite 29 12. Zyklus-Schaltbefehle Startzeit Endzeit EIN-Schaltdauer 10 Minuten Pause Pause Zyklus-Dauer Zyklus-Dauer 60 Min. 60 Min. Freien Speicherplatz wählen: Prog.-Taste 1 x drücken – –.– – – – – – Eingabe nach Bedarf: – Schaltbefehl, Wochentag(e), Schaltzustand, siehe Kapitel 8 – Einzeldatum ohne/mit Jahr, siehe Kapitel 9.1 –...
- Seite 30 Zykluszeit einstellen, von 01 ... 99 -Taste schrittweise drücken Hinweis: Wird die Taste länger gedrückt, erfolgt das Einstellen in Schritten von 05 EIN - Schaltdauer einstellen, von 01 ... 99 Diese kann nie grösser sein, als die zuvor eingestellte Zykluszeit! -Taste schrittweise drücken Prog.-Taste 1x nur kurz drücken, der Schaltbefehl ist gespeichert.
-
Seite 31: Lesen - Ändern - Löschen - Reset
13. Lesen – Ändern – Löschen – Reset • Sie lesen die Anzahl der freien Speicherplätze/Blocknummern • Sie lesen die Progamminhalte schrittweise • Sie änden, überschreiben die Progamminhalte • Sie löschen die Progamminhalte 13.1 Lesen Freien Speicherplatz wählen: Prog.-Taste 1x drücken –... - Seite 32 Inhalt von Block 01 bis 99 lesen: Prog.-Taste ca.1 Sekunde – 1x drücken, Sie sind in Block 01. Die Inhalte dieses Blockes lesen: Prog.-Taste nur kurz – schrittweise – drücken, die Inhalte werden nach- einander angezeigt. Ist ein Datumsbereich angezeigt, erscheint im Display „date “.
-
Seite 33: Löschen - Einzelne Schaltbefehle
13. Lesen – Ändern – Löschen – Reset 13.2 Ändern Jeder Programminhalt kann individuell verändert/überschrieben werden. Mit Prog-Taste (lesen) rufen Sie den Inhalt auf, den Sie ändern/über- schreiben wollen. Das ändern erfolgt in der gleicher Weise wie die Eingabe neuer Daten (siehe jeweiliges Kapitel). -
Seite 34: Löschen - Alle Schaltbefehle
13.4 Löschen – alle Schaltbefehle Prog.-Taste 2x drücken, die Anzahl der freien Blocknummern sowie die Anzahl der freien Speicherpätze sind angezeigt. Clear-Taste 1x drücken Im Display erscheint zusätzlich c l und blinkt. Clear-Taste 1x drücken. Alle Inhalte werden gelöscht! Das Display zeigt die Block- nummer 0, sowie die Anzahl der max. -
Seite 35: Handschalter
14. Handschalter Sie verändern – manuell – den momentanen Schaltzustand. Das individuell eingestellte Schaltprogramm bleibt jedoch erhalten. 1 für Kanal 1 2 für Kanal 2 3 für Kanal 3 4 für Kanal 4 = Automatik = Handbetrieb FIX = Dauerbetrieb = AUS = EIN FIX = Dauer EIN... -
Seite 36: Technische Daten
16. Technische Daten 1, 2, 3 bzw. 4 Kanal Jahresuhr Maße (H x B x T) mm 45 x 108 x 60 Verteilerausschnitt mm 45 x 108 Gewicht g (ca.) Anschluß siehe Geräteaufdruck Leistungsaufnahme siehe Geräteaufdruck Schaltleistung – ohmsche Last (VDE, IEC) 16 A/250 V AC –...