Inhaltsverzeichnis
Werbung
Verfügbare Sprachen
Verfügbare Sprachen
Benutzerhandbuch
ONLINE XANTO S-Serie (ab 2012)
Deutschland
ONLINE USV-Systeme AG
Dreimühlenstraße 4
D-80469 München
Phone +49 (89) 2423990-10
Fax
+49 (89) 2423990-20
www.online-usv.de
XS700-XS3000_manual_ger_eng_it_V1.1.0.doc
Modelle 700 – 3000
Version: 1.1.0
Deutsch:
Seite
English:
Page
Italia:
Pagina 149 - 222
Italien
ONLINE UPS-Systems S.r.l.
Via Edison 12
I-20852 Villasanta (MB)
Phone +39 (039) 2051444
Fax
+39 (039) 2051435
www.online-ups.it
1 / 222
1 -
74
75 - 148
Schweiz
ONLINE USV-Systeme AG
Eigenheimstraße 11
CH-8304 Wallisellen (Zürich)
Phone
Fax
www.online-usv.ch
...........................................................
+41 (44) 9452829
+41 (44) 9453288
R. Kistler
Werbung
Kapitel
Inhaltsverzeichnis
Fehlerbehebung

Verwandte Anleitungen für Online USV XANTO S 700


Inhaltszusammenfassung für Online USV XANTO S 700
-
Seite 1: Benutzerhandbuch
Seite English: Page 75 - 148 Italia: Pagina 149 - 222 Deutschland Italien Schweiz ONLINE USV-Systeme AG ONLINE UPS-Systems S.r.l. ONLINE USV-Systeme AG Dreimühlenstraße 4 Via Edison 12 Eigenheimstraße 11 D-80469 München I-20852 Villasanta (MB) CH-8304 Wallisellen (Zürich) Phone +49 (89) 2423990-10... - Seite 2 2 / 222 XS700-XS3000_manual_ger_eng_it_V1.1.0.doc R. Kistler ............
-
Seite 3: Inhaltsverzeichnis
Inhalt Benutzerhandbuch ................1 Einleitung ..................6 Sicherheitswarnungen ..............8 Montage ..................10 Überprüfung der Lieferung ..........10 Auspacken der USV-Anlage ..........10 Überprüfung des Zubehörs ..........11 Installation des Tower-Modells .......... 11 3.4.1 Mechanischer Aufbau ............11 3.4.2 Elektrische Installation ............12 Installation des Rack-Modells ........... - Seite 4 Spezialfunktionen ..............38 Frequenzumrichterbetrieb ..........38 Kommunikation ................. 39 Kommunikationsoptionen ..........39 6.1.1 RS-232- und USB-Kommunikationsschnittstelle ....40 6.1.2 Slot für Schnittstellenkarten ..........41 6.1.3 Notaus-Funktion (REPO) ..........42 6.1.4 Programmierbare Ausgangskontakte ....... 44 6.1.5 Programmierbare Signaleingänge ........45 DataWatch Software ............46 Wartung ..................
- Seite 5 Abbildung 18: Entfernen der Frontblende vom Batteriepaket .... 55 Abbildung 19: Typische Installation meherer Batteriepakete ..... 57 Abbildung 20: XANTO S 700 .............. 70 Abbildung 21: XANTO S 1000 und 1500 ..........70 Abbildung 22: XANTO S 2000 ............70 Abbildung 23: XANTO S 3000 ............
-
Seite 6: Einleitung
E I N L E I T U N G 1. Einleitung Die ONLINE USV-Systeme AG (ONLINE) gehört zu den führenden Herstellern von unterbrechungsfreien Stromversorgungen (USV). Seit 1988 beschäftigt sich das deutsche Unternehmen mit Entwick- lung, Fertigung, Vertrieb und Support von USV-Systemen. Nach ver- kauften Stückzahlen sind die Produkte der ONLINE die deutsche... -
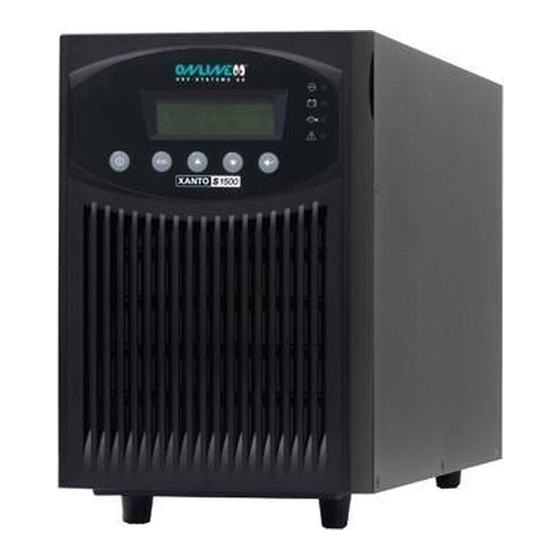
Seite 7: Abbildung 1: Xanto S Tower Und Das Optionale Batteriepaket
Wirkungsgrad von bis zu 94% dank Hocheffizienzbetrieb Rack-Modelle in Platz sparender 2U Größe, die in jedes 48cm (19“) Standardrack passen RS-232- und USB-Schnittstelle, Relais Ausgangskontakte Slot für optionale SNMP-Adapter, AS400- oder Relais-Karte Notaus-Funktion (Remote Emergency Power-Off) .......... -
Seite 8: Sicherheitswarnungen
S I C H E R H E I T S W A R N U N G E N 2. Sicherheitswarnungen Dieses Handbuch enthält wichtige Anweisungen, die Sie während der Installation und Wartung der USV-Anlage und der Batterien be- folgen müssen. - Seite 9 ACHTUNG Batterien können das Risiko eines elektrischen Schlags ber- gen oder durch hohen Kurzschlussstrom in Brand geraten. Bitte treffen Sie die erforderlichen Vorsichtsmaßnahmen. Die Wartung muss von qualifiziertem Personal durchgeführt wer- den, das im Umgang mit Batterien geübt ist und über gute Kenntnisse der erforderlichen Vorsichtsmaßnahmen verfügt (siehe Wartung).
-
Seite 10: Montage
M O N T A G E 3. Montage 3.1 Überprüfung der Lieferung Bewahren Sie die Transportkartons und das Verpackungsmaterial für die Spedition oder die Verkaufsstelle auf. Falls Anlagenteile wäh- rend des Transports beschädigt wurden, reichen Sie innerhalb von 24 Stunden eine Transportschaden-Reklamation bei Ihrem Lieferan- ten ein. -
Seite 11: Überprüfung Des Zubehörs
M O N T A G E 3.3 Überprüfung des Zubehörs Der Lieferumfang ist folgender Tabelle zu entnehmen: Beschreibung 19"-Montagewinkel (links und rechts) RS-232 Schnittstellen- kabel 10A Kaltgeräteverlänge- rung 16A Netzanschlusskabel Batteriekabel Software DataWatch Bedienungsanleitung Tabelle 1: Lieferumfang 3.4 Installation des Tower-Modells 3.4.1 Mechanischer Aufbau Die USV-Anlage / das Batteriepaket wird vollständig zusammenge- baut und anschlussfertig geliefert. -
Seite 12: Elektrische Installation
M O N T A G E 1. Stellen Sie die USV-Anlage auf eine ebene, stabile Oberfläche an ihren endgültigen Platz. 2. Wenn Sie zusätzliche Batteriepakete installieren, stellen Sie diese neben die USV-Anlage an ihre endgültigen Plätze. 3. Fahren Sie mit dem folgenden Abschnitt Elektrische Installati- on fort. - Seite 13 M O N T A G E Anschließen der Batteriepakete 1. Entfernen Sie die Kabelklemme an der Rückseite der USV- Anlage, die den Batterieanschluss abdeckt. Bewahren Sie Klemme und Schrauben auf (siehe Abbildung 3). 2. Installation eines einzelnen Batteriepaketes: Entfernen Sie die Kabelklemme, die den rechten (bei Modellen mit 1000 –...
-
Seite 14: Installation Des Rack-Modells
M O N T A G E Abbildung 3: Anschließen der Batteriepakete 3.5 Installation des Rack-Modells 3.5.1 Mechanischer Einbau Die USV-Anlage / das Batteriepaket wird vollständig zusammenge- baut und anschlussfertig geliefert. Für das Rack-Modell werden optionale Gleitschienen (Art.-Nr. Rack- Kit) angeboten. Die Gleitschienen sind passend für 48 cm (19 Zoll) Racks mit einer Bautiefe von 61 bis 76 cm (24 bis 30 Zoll). -
Seite 15: Abbildung 4: Befestigen Der Gehäusefront
M O N T A G E 2. Stellen Sie die USV-Anlage auf eine ebene, stabile Oberflä- che. Die Vorderseite des Gehäuses ist zu Ihnen gerichtet. 3. Richten Sie die Montagewinkel (L = Links und R = Rechts) mit den Schraubenbohrungen auf jeder Seite der USV-Anlage aus und befestigen Sie diese mit den beigefügten M4 x 8 Flach- kopfschrauben. -
Seite 16: Elektrische Installation
M O N T A G E 3.5.2 Elektrische Installation Installation der USV-Anlage HINWEIS Nehmen Sie keine unbefugten Veränderungen an der USV- Anlage vor, da sonst die Anlage beschädigt werden kann und der Garantieanspruch verloren geht Verbinden Sie das Anschlusskabel der USV-Anlage nicht mit dem Versorgungsnetz, bevor die Installation vollständig ab- geschlossen ist 1. -
Seite 17: Abbildung 5: Entfernen Der Frontblende Von Der Usv-Anlage
M O N T A G E HINWEIS Ein Flachbandkabel verbindet das LCD Anzeige- und Bedi- enfeld mit der USV. Ziehen Sie nicht an dem Kabel und tren- nen Sie die Verbindung nicht. Abbildung 5: Entfernen der Frontblende von der USV-Anlage 2. -
Seite 18: Abbildung 7: Entfernen Der Frontblende Vom Batteriepaket
M O N T A G E Abbildung 7: Entfernen der Frontblende vom Batteriepaket 4. Entfernen Sie bei dem unteren (oder einzigen) Batteriepaket den Kabelauswurf nur an der Oberseite der Frontblende. In Abbildung 7 wird die Lage des oberen Kabelauswurfs darge- stellt. -
Seite 19: Abbildung 8: Typische Installation Meherer Batteriepakete
M O N T A G E Modelle mit 2000 – 3000VA: Verbinden Sie rot mit rot, schwarz mit schwarz und grün mit grün. Drücken Sie die bei- den Teile kräftig zusammen, um eine gute Verbindung herzu- stellen. Alle Modelle: Um ein zweites Batteriepaket anzuschließen, lösen Sie die Steckverbindung am ersten Batteriepaket. -
Seite 20: Inbetriebnahme
M O N T A G E 3.6 Inbetriebnahme HINWEIS Vergewissern Sie sich, dass die Gesamtnennleistung aller angeschlossenen Geräte die Kapazität der USV-Anlage nicht überschreitet. 1. Im Falle der Installation optionaler Batteriepakete stellen Sie sicher, dass diese richtig an die USV-Anlage angeschlossen sind (siehe Anschließen der Batteriepakete/Tower- bzw. - Seite 21 8. Drücken Sie die Taste bis das Display den Startbetrieb anzeigt. Die USV-Anlage sollte sich im Modus „Normalbetrieb“ befin- den. 9. Falls zusätzliche Batteriepakete installiert sind, muss die An- zahl der installierten Batteriepakete in der USV-Anlage einge- stellt werden (siehe Betrieb – Konfigurieren der USV-Anlage für Batteriepakete).
-
Seite 22: Betrieb
B E T R I E B 4. Betrieb Dieser Abschnitt enthält Informationen über die Verwendung der XANTO S 700 - 3000VA, wie Nutzung des Bedienfeldes an der Vor- derseite, Betriebsarten, Starten und Abschalten der USV-Anlage, Wechseln zwischen verschiedenen Betriebsarten, Abrufen des Er-... -
Seite 23: Ändern Der Sprache
B E T R I E B 4.1.1 Ändern der Sprache Drücken Sie die Taste auf der linken Seite und halten Sie diese etwa drei Sekunden lang gedrückt, um das Sprachmenü auszuwäh- len. Dieser Vorgang kann von jedem Menü ausgeführt werden. 4.1.2 Anzeigefunktionen Standardmäßig oder nach 15-minütiger Inaktivität zeigt das LCD den Startbildschirm an. -
Seite 24: Anwenderprogrammierung
B E T R I E B Hauptmenu Untermenü Anzeigeinformation der Menüfunktion Identifikation USV-Anlagen-Typ / Teilenummer / Serien- nummer / Firmware „Anwender- Einstellungen Zu Einzelheiten siehe Tabelle 4. programmierung“ „Service- Dieses Menü ist nur für den Kundendienst und programmierung“ durch ein Kennwort geschützt. Tabelle 3: Hauptmenü... - Seite 25 B E T R I E B „Aktiviert“, „Deaktiviert“ „Deaktiviert“ Frequenzumrichter Im Modus „Aktiviert“ funktioniert die USV- Anlage als Frequenzumrichter. Der Bypassbe- trieb und alle Bypass-bezogenen Warnmel- dungen werden deaktiviert. Empfehlung: nicht ändern. Überlast Alarm 10%, 20%, 30%, ... 100% 100% Level Diese Werte betreffen nur die Warnmelde-...
- Seite 26 B E T R I E B „Deaktiviert“, 50W, 100W, ... 1000W „Deaktiviert“ Energiespar- betrieb Der Ausgang der USV-Anlage wird ausge- schaltet, wenn die USV-Anlage im Batteriebe- trieb läuft und die Ausgangsleistung unter dem gewählten Schwellenwert liegt. Empfehlung: nicht ändern. „Keine Verzögerung“, 1s, 2s, ...
- Seite 27 B E T R I E B Anzahl der 0, 1, 2 ... 10 Batterie Strings Siehe Konfigurieren der Batterieeinstellungen Empfehlung: an Erfordernisse anpassen. „IBM-Zyklen“, „Konstant“ „IBM-Zyklen“ Batterie Ladebetrieb Empfehlung: nicht ändern. „Aktiviert“, „Deaktiviert“ „Aktiviert“ Temperaturkom- pensiertes Laden Im Modus „Deaktiviert“ werden die Stan- dardspannungen des Aufladegerätes für 25°C vorausgesetzt.
-
Seite 28: Betriebsarten
B E T R I E B 4.2 Betriebsarten Der Status der USV-Anlage wird auf dem Bedienfeld an der Vorder- seite angezeigt. 4.2.1 Normalbetrieb Im Normalbetrieb leuchtet die Anzeige ständig und die USV- Anlage wird vom Versorgungsnetz gespeist. Die USV-Anlage über- wacht die Batterien und lädt diese je nach Bedarf auf. -
Seite 29: Bypassbetrieb
B E T R I E B HINWEIS Je nach Last an der USV-Anlage und der Anzahl der ange- schlossenen Batteriepakete kann die Warnmeldung „Batte- riestand niedrig” bereits angezeigt werden, bevor die Batte- rien einen Ladestand von 25% erreicht haben (siehe „Tabelle Überbrückungszeit“... -
Seite 30: Standbybetrieb
B E T R I E B 4.2.4 Standbybetrieb Wenn die USV-Anlage ausgeschaltet ist, der Stecker aber in der Steckdose bleibt, läuft die USV-Anlage noch immer im Standby- Betrieb. Die Anzeige ist ausgeschaltet, was darauf hinweist, dass für die angeschlossene Last kein Strom verfügbar ist. Die Batterie wird bei Bedarf geladen, und der Kommunikationsslot wird mit Strom versorgt. -
Seite 31: Starten Der Usv-Anlage Im Batteriebetrieb
B E T R I E B 5. Überprüfen Sie das Display auf aktive Warnmeldungen oder Hinweise. Beheben Sie etwaige aktive Warnmeldungen, bevor Sie fortfahren (siehe Fehlerbehebung). Falls die Anzeige aufleuchtet, fahren Sie erst fort, nachdem Sie alle Warnmeldungen behoben haben. Prüfen Sie den Sta- tus der USV-Anlage anhand der Anzeigen und achten Sie auf etwaige aktive Warnmeldungen. -
Seite 32: Abschalten Der Usv-Anlage
B E T R I E B Prüfen Sie den Status der USV-Anlage anhand der Anzeigen im Display und achten Sie auf etwaige aktive Warnmeldungen. Beheben Sie die Warnmeldungen und starten Sie das Gerät neu, falls nötig. 3. Drücken Sie die Taste, bis der Startbildschirm angezeigt wird. -
Seite 33: Einstellen Der Energiestrategie
B E T R I E B 4.5 Einstellen der Energiestrategie In der Einstellung „Hocheffizienz“ läuft die USV-Anlage normaler- weise im Bypassbetrieb, wechselt bei Ausfall des Netzes in weniger als 10ms zum Inverter und wechselt 1 Minute nach Rückkehr des Netzstroms wieder in den Bypassbetrieb. -
Seite 34: Konfigurieren Von Lastsegmenten
B E T R I E B Qualifiziere Bypass. Standardmäßig wird ein Wechsel in den By- passbetrieb nur dann zugelassen, wenn sich der Bypass innerhalb der folgenden Spezifikationen befindet: Die Bypass-Spannung liegt zwischen dem eingestellten „Unte- ren Schwellenwert für Bypass-Spannung“ und dem „Oberen Schwellenwert für Bypass-Spannung“... - Seite 35 B E T R I E B Jede USV-Anlage verfügt über zwei konfigurierbare Lastsegmente: Lastsegment 1: Die oberen oder linken Steckdosen Lastsegment 2: Die unteren oder rechten Steckdosen (siehe „Rückseiten der USV-Anlagen“ unter Technische Daten). So steuern Sie die Lastsegmente über das Display: 1.
-
Seite 36: Konfigurieren Der Batterieeinstellungen
B E T R I E B 4.8 Konfigurieren der Batterieeinstellungen 4.8.1 Konfigurieren der USV-Anlage für Batteriepakete Konfigurieren Sie die USV-Anlage für die richtige Anzahl Batteriepa- kete, um eine maximale Batterielaufzeit zu gewährleisten: 1. Drücken Sie eine beliebige Taste am Front-Display, um die Menüoptionen zu aktivieren, und wählen Sie „EINSTEL- „ANWENDER-PROGRAMMIERUNG“... -
Seite 37: Ausführen Der Automatischen Batterietests
4.8.2 Ausführen der automatischen Batterietests Automatische Batterietests werden alle 30 Tage durchgeführt, sofern diese Option aktiviert wurde. Während des Batterietests wechselt die USV-Anlage in den Batteriebetrieb und entlädt die Batterien 25 Se- kunden lang an der vorhandenen Last. HINWEIS Der Hinweis „USV im Batteriebetrieb“ und der Warnhinweis „Batteriestand niedrig“... -
Seite 38: Spezialfunktionen
S P E Z I A L F U N K T I O N E N 5. Spezialfunktionen 5.1 Frequenzumrichterbetrieb HINWEIS Im Frequenzumrichterbetrieb steht keine Bypass Funktion zur Verfügung und alle Bypass-bezogenen Warnmeldungen werden deaktiviert. Im Frequenzumrichterbetrieb arbeitet die USV-Anlage immer mit ei- ner fest definierten Ausgangsfrequenz (50Hz oder 60Hz), egal wel- che Eingangsfrequenz (40Hz bis 70Hz) anliegt. -
Seite 39: Kommunikation
K O M M U N I K A T I O N 6. Kommunikation Abbildung 10: Kommunikationsoptionen (Modell XANTO S 3000R 6.1 Kommunikationsoptionen Die XANTO S hat serielle - (RS-232) und eine USB – Kommunikati- onsschnittstelle sowie einen Slot für optionale Schnittstellenkarten. HINWEIS ... -
Seite 40: Rs-232- Und Usb-Kommunikationsschnittstelle
K O M M U N I K A T I O N 6.1.1 RS-232- und USB-Kommunikationsschnittstelle Um die Kommunikation zwischen der USV-Anlage und einem Com- puter herzustellen, schließen Sie den Computer mithilfe eines geeig- neten Datenkabels (RS-232 - Kabel im Lieferumfang) an eine der Kommunikationsschnittstellen der USV-Anlage an. -
Seite 41: Slot Für Schnittstellenkarten
K O M M U N I K A T I O N Siehe Programmierbare Ausgangskontakte. Siehe Programmierbare Signaleingänge. Signal muss mindestens 5 Sekunden anliegen. Wenn der ausgewählte Zustand aktiv ist, wechseln die Ausgabe- signale auf Pin 1 und 8 von „Low” (positive Spannung) zu „High” (negative Spannung). -
Seite 42: Notaus-Funktion (Repo)
K O M M U N I K A T I O N 6.1.3 Notaus-Funktion (REPO) Die Notaus-Funktion (REPO = Remote Emergency Power-Off) dient zum Herunterfahren der USV-Anlage und zum sofortigen Abschalten der angeschlossenen Verbraucher aus der Ferne. Hierzu muss der REPO-Stecker (Rückseite USV-Anlage) entfernt und ein externer Notaus-Schalter angeschlossen werden. -
Seite 43: Abbildung 12: Notaus-Anschluss
K O M M U N I K A T I O N Zur Lage des REPO-Steckers siehe Abbildung 10. Abbildung 12 zeigt eine Skizze der REPO-Anschlüsse. Abbildung 12: Notaus-Anschluss Sie können die REPO-Polarität einstellen. Siehe die Einstellung „Po- larität des REPO Eingangs“ unter Anwenderprogrammierung. HINWEIS Je nach Benutzerkonfiguration müssen die Kontakte geöffnet (Empfehlung) oder geschlossen werden, um den Betrieb der... -
Seite 44: Programmierbare Ausgangskontakte
K O M M U N I K A T I O N 6.1.4 Programmierbare Ausgangskontakte Die USV-Anlage hat drei programmierbare Ausgangskontakte: Einen Relais-Ausgangskontakt. Wählen Sie „EINSTELLUNGEN“, „ANWENDER- PROGRAMMIERUNG“, RELAIS EINSTELLUNGEN und an- schließend „STANDARD“ aus. Zwei potentialfreie Ausgänge (Optokoppler, max. 5mA) an der RS-232-Kommunikationsschnittstelle (Pin 1 und 8). -
Seite 45: Programmierbare Signaleingänge
K O M M U N I K A T I O N 6.1.5 Programmierbare Signaleingänge Die USV-Anlage hat zwei programmierbare Signaleingänge: Einen Signaleingang an der RS-232- Kommunikationsschnittstelle (Pin 3). Wählen Sie „EINSTELLUNGEN“, „ANWENDER- PROGRAMMIERUNG“, „SIGNAL EINGÄNGE“ und anschlie- ßend „RS232-3“... -
Seite 46: Datawatch Software
K O M M U N I K A T I O N 6.2 DataWatch Software Zum serienmäßigen Lieferumfang der XANTO S-Serie gehört Data- Watch, die umfassende Softwarelösung zum Shutdown und Ma- nagement des PC- oder Serversystems, sowie zum Monitoring der XANTO S und des Stromversorgungsnetzes. -
Seite 47: Wartung
W A R T U N G 7. Wartung 7.1 Pflege und Wartung von USV-Anlagen / Batterien Für eine lange Lebensdauer der Anlage sollte der Bereich um die USV-Anlage sauber und staubfrei sein. Falls es in der Umgebung der Anlage sehr staubig ist, reinigen Sie die Außenflächen der Anla- ge mit einem Staubsauger. -
Seite 48: Zeitpunkt Für Das Austauschen Der Batterien
W A R T U N G 7.3 Zeitpunkt für das Austauschen der Batterien Wenn die Anzeige aufleuchtet, das Alarmsignal zu hören ist und der Warnhinweis „Batteriewartung erforderlich“ aufleuchtet, müssen die Batterien ausgetauscht werden. Wenden Sie sich an Ihren Händ- ler oder ONLINE, um neue Batterien zu bestellen. -
Seite 49: Austausch Der Internen Batterien Des Tower-Modells
W A R T U N G ACHTUNG Batterien müssen sachgemäß entsorgt werden. Richten Sie sich bei der Entsorgung nach den örtlich geltenden gesetzli- chen Bestimmungen Batterien dürfen nicht verbrannt werden. Es besteht Explosi- onsgefahr Sehen Sie vom Öffnen oder Herumhantieren mit den Batte- rien ab. -
Seite 50: Abbildung 14: Entfernen Der Frontblende Von Der Usv-Anlage
W A R T U N G Abbildung 14: Entfernen der Frontblende von der USV-Anlage 2. Drehen Sie die beiden Schrauben, mit denen die Steckver- bindung befestigt ist, heraus und legen Sie diese zur Seite. Trennen Sie die interne Batterie-Steckverbindung (siehe Abbildung 15). - Seite 51 W A R T U N G 4. Ziehen Sie den Batterieeinschub vorsichtig am Griff heraus und schieben Sie die Batterien auf eine ebene, stabile Unter- lage. Stützen Sie die Batterien mit beiden Händen ab. HINWEIS Überprüfen Sie, ob die Ersatzbatterien dieselben Spezifikati- onen aufweisen wie die Altbatterien.
-
Seite 52: Austausch Des Batteriepaketes Des Tower-Modells
W A R T U N G 7.4.2 Austausch des Batteriepaketes des Tower-Modells HINWEIS Das Batteriepaket hat keine Hot-Swap-Batterien. Bitte tau- schen Sie das gesamte Batteriepaket. Wenn Sie die Einzel- Batterien tauchen wollen, kontaktieren Sie bitte Ihren Fach- händler. ACHTUNG Das Batteriepaket hat ein hohes Gewicht. -
Seite 53: Austausch Der Internen Batterien Des Rack-Modells
W A R T U N G 7.4.3 Austausch der internen Batterien des Rack-Modells ACHTUNG Die internen Batterien der USV-Anlage haben ein hohes Gewicht. Beim Umgang mit den schweren Batterien ist Vor- sicht geboten. Die internen Batterien befinden sich hinter der Frontblende der USV- Anlage. -
Seite 54: Abbildung 17: Austauschen Der Internen Batterien Der Usv-Anlage
W A R T U N G ....Abbildung 17: Austauschen der internen Batterien der USV-Anlage 4. Lösen Sie die Schrauben an der Batterieabdeckung. Fassen Sie die Batterieabdeckung an einer Kante an und ziehen Sie diese vorsichtig nach vorne. Nehmen Sie die Batterieabde- ckung und legen Sie diese zur Seite. -
Seite 55: Austausch Des Batteriepaketes Vom Rack-Modell
W A R T U N G 9. Drücken Sie die Steckverbindungen der internen Batterie wie- der zusammen. Verbinden Sie rot mit rot und schwarz mit schwarz. Drücken Sie die beiden Teile kräftig zusammen, um eine gute Verbindung sicherzustellen. 10. Nur bei Gerätetypen bis zu 1500 VA: Falls das Kabel für ein zusätzliches Batteriepaket nicht angeschlossen ist, befestigen Sie das Kabel wieder an der entsprechenden Halterung auf der Batterieabdeckung (siehe Abbildung 17). - Seite 56 W A R T U N G 2. Ziehen Sie das Kabel des Batteriepaketes von der USV- Anlage ab. Falls weitere Batteriepakete installiert sind, ziehen Sie jeweils das Kabel von dem Batterieanschluss an jedem Batteriepaket ab. 3. Tauschen Sie die Batteriepakete aus. Für eine sachgemäße Entsorgung lesen Sie den Abschnitt Entsorgen der Altbatterien oder der USV-Anlage.
-
Seite 57: Testen Der Neuen Batterien
W A R T U N G Abbildung 19: Typische Installation meherer Batteriepakete 6. Einsetzen der Frontblende des Batteriepaketes. Hierzu stellen Sie sicher, dass die Kabel des Batteriepaketes durch die Ka- belauswürfe geführt sind. Schieben Sie anschließend die Blende nach rechts, bis sie in die Halterung an der linken Sei- te des Gehäuses einrastet. -
Seite 58: Entsorgen Der Altbatterien Oder Der Usv-Anlage
W A R T U N G 7.6 Entsorgen der Altbatterien oder der USV-Anlage Erkundigen Sie sich vor Ort bei einer Recycling-Stelle oder einer Sondermüllanlage, wie die Altbatterie oder die USV-Anlage ord- nungsgemäß entsorgt werden kann. Altbatterien können auch kos- tenlos bei ONLINE entsorgt werden. -
Seite 59: Fehlerbehebung
F E H L E R B E H E B U N G 8. Fehlerbehebung Die XANTO S ist für den selbständigen Betrieb ausgelegt und meldet etwaige auftretende Probleme beim Betrieb automatisch. Normaler- weise bedeuten die auf dem Bedienfeld angezeigten Warnmeldun- gen nicht, dass die Ausgangsspannung betroffen ist. -
Seite 60: Ereignisprotokoll Auf Den Verlauf Von Statusereignissen Überprüfen
F E H L E R B E H E B U N G Ereignisprotokoll auf den Verlauf von Statusereignissen überprüfen: 1. Drücken Sie eine beliebige Taste, um die Menüoptionen zu aktivieren. Taste, bis „EREIGNISAUFZEICHNUNG“ 2. Drücken Sie die angezeigt wird. 3. - Seite 61 F E H L E R B E H E B U N G Alarmsignal Mögliche Ursache Maßnahme oder Status Die USV-Anlage erkennt die Überprüfen Sie, ob alle Batterien Batterien inneren Batterien nicht. ordnungsgemäß angeschlossen getrennt sind. LED An Wenden Sie sich an den Support. akustisches Sig- nal jede s Energiebedarf...
- Seite 62 F E H L E R B E H E B U N G Alarmsignal Mögliche Ursache Maßnahme oder Status Die USV-Anlage Die Batterien müssen aufge- Schließen Sie die USV-Anlage 48 stellt nicht die laden oder getauscht wer- Stunden lang an den Netzstrom an, erwartete Zeit für den.
-
Seite 63: Stummschalten Des Warnsignals
8.2 Stummschalten des Warnsignals Drücken Sie eine beliebige Taste, um das Warnsignal stumm zu schalten. Prüfen Sie den Status, der die Warnmeldung ausgelöst hat, und führen Sie geeignete Maßnahmen durch, um diesen Zu- stand zu beheben. Wenn sich der Status der Warnmeldung ändert, wird das akustische Signal wieder ausgegeben. -
Seite 64: Technische Daten
T E C H N I S C H E D A T E N 9. Technische Daten 9.1 Spezifikationen der USV-Anlagen 9.1.1 Liste der Gerätetypen USV-Anlage Artikel-Nr. Leistung Batteriepaket Artikel-Nr. 700 VA XANTO S 700 XST700 630 W 1000 VA Batteriepaket XANTO S 1000 XST1000 XST1000BP 900 W XANTO S 1000... -
Seite 65: Gewichte Und Abmessungen (Netto)
T E C H N I S C H E D A T E N 9.1.2 Gewichte und Abmessungen (netto) Abmessungen (H x B x T) Gewicht Tower Modell XANTO S 700 251 x 160 x 370 mm 12 kg XANTO S 1000 251 x 160 x 400 mm... -
Seite 66: Elektrische Ein- Und Ausgänge
Tabelle 14: Eingangsleistung Modell Eingang Wählbare Spannungsbereich Spannung / Ausgangs- bei 100% Last Strom spannungen XANTO S 700 230V / 200V, 208V, 160 - 276VAC XANTO S 700R 3,0A 220V, 230V, 240V XANTO S 1000 230V / 200V, 208V, 160 - 276VAC... - Seite 67 T E C H N I S C H E D A T E N Alle Modelle Normalbetrieb Batteriebetrieb Spannungsregler ±2% Nenn-Ausgangsspannung ±3% Wirkungsgrad >95% (Hocheffizienzbetrieb), >79,5% (700VA), >88% >82% (1000 - 1500VA), >84% (2000 - 3000VA) Frequenzregler Synchronisation mit Netz ±3Hz ±0,1Hz der automatisch der Nennfrequenz des Netzes gewählten Nennfrequenz...
-
Seite 68: Batterie
T E C H N I S C H E D A T E N 9.1.4 Batterie Interne Batterie Batteriepaket (BP) Tower Modell XANTO S 700 24V (2 x 12V / 7Ah) XANTO S 1000 36V (3 x 12V / 7Ah) 36V (6 x 12V / 7Ah) -
Seite 69: Kommunikationsoptionen
T E C H N I S C H E D A T E N 9.1.6 Kommunikationsoptionen Slot für optionale 1x Slot für Schnittstellenkarten Schnittstellen Optionale Schnittstellenkarten: SNMP-Adapter Basic (Artikel-Nr. DW7SNMP30) SNMP-Adapter Professional (Artikel-Nr. DW5SNMP30) Relais-Einschubkarte (Artikel-Nr. PHXNOV-I) AS400-Interface (Artikel-Nr. PHXAS400I) Kommunikations- RS-232 (DB-9) schnittstellen... -
Seite 70: Rückansichten Der Usv-Anlagen
9.2 Rückansichten der USV-Anlagen HINWEIS Die Anschlüsse für Lastsegment 1 sind schattiert dargestellt. Beschreibung der Kommunikationsfunktionen siehe Abbildung 10 Abbildung 20: XANTO S 700 Abbildung 21: XANTO S 1000 und 1500 Abbildung 22: XANTO S 2000 Abbildung 23: XANTO S 3000 70 / 222 XS700-XS3000_manual_ger_eng_it_V1.1.0.doc... -
Seite 71: Abbildung 24: Xanto S 700R, 1000R Und 1500R
T E C H N I S C H E D A T E N Abbildung 24: XANTO S 700R, 1000R und 1500R Abbildung 25: XANTO S 2000R Abbildung 26: XANTO S 3000R 71 / 222 XS700-XS3000_manual_ger_eng_it_V1.1.0.doc R. Kistler ............ -
Seite 72: Ce Bestätigung
T E C H N I S C H E D A T E N 9.3 CE Bestätigung 72 / 222 XS700-XS3000_manual_ger_eng_it_V1.1.0.doc R. Kistler ............ -
Seite 73: Garantie
10. Garantie Die ONLINE USV-Systeme AG (ONLINE) gewährleistet, dass dieses Produkt für die Dauer von zwei Jahren ab Kaufdatum frei von Mate- rial- und Fertigungsfehlern ist. Die Verpflichtung von ONLINE gemäß dieser Garantie ist auf die Reparatur oder den Ersatz (Entscheidung trifft ONLINE) jeglicher defekter Produkte begrenzt. - Seite 74 74 / 222 XS700-XS3000_manual_ger_eng_it_V1.1.0.doc R. Kistler ............
-
Seite 75: User Manual
Seite English: Page 75 - 148 Italia: Pagina 149 - 222 Germany Italy Switzerland ONLINE USV-Systeme AG ONLINE UPS-Systems S.r.l. ONLINE USV-Systeme AG Dreimühlenstraße 4 Via Edison 12 Eigenheimstraße 11 D-80469 Munich I-20852 Villasanta (MB) CH-8304 Wallisellen (Zürich) Phone +49 (89) 2423990-10... - Seite 76 76 / 222 XS700-XS3000_manual_ger_eng_it_V1.1.0.doc R. Kistler ............
- Seite 77 Contents User Manual ..................75 Introduction ................80 Safety warnings ................ 82 Installation ................84 Inspecting the shipment ............ 84 Unpacking the UPS system ..........84 Checking the accessories ..........85 Installing the tower model ..........85 3.4.1 Mechanical installation ............85 3.4.2 Electrical installation ............
- Seite 78 Special functions ..............112 Converter mode............... 112 Communication............... 113 Communication options ........... 113 6.1.1 RS-232 and USB communication interfaces ....114 6.1.2 Slot for interface cards ............ 115 6.1.3 Emergency-off function (REPO) ........116 6.1.4 Programmable output contacts ........118 6.1.5 Programmable signal inputs ..........
- Seite 79 Figure 18: Removing the front cover of the battery module ..... 129 Figure 19: Typical installation of multiple battery modules ....131 Figure 20: XANTO S 700 ..............144 Figure 21: XANTO S 1000 and 1500 ..........144 Figure 22: XANTO S 2000 ..............144 Figure 23: XANTO S 3000 ..............
-
Seite 80: Introduction
I N T R O D U C T I O N 1. Introduction ONLINE USV-Systeme AG (ONLINE) is one of the leading manufac- turers of Uninterruptible Power Supplies (UPS). Since 1988, the German company has specialised in the development, manufacture and sales &... -
Seite 81: Figure 1: Xanto S Tower And The Optional Battery Module
I N T R O D U C T I O N Rack models in space-saving 2U size, which fits in every 48 cm (19") standard rack RS-232 and USB interfaces, relay output contactors Slot for optional SNMP adapter, AS400 card or relay card ... -
Seite 82: Safety Warnings
S A F E T Y W A R N I N G S 2. Safety warnings This handbook contains important instructions that you must comply with during the installation and maintenance of the UPS system and the batteries. Please read these instructions completely before you begin working with the device. - Seite 83 S A F E T Y W A R N I N G S CAUTION Batteries can pose an electric shock risk or catch fire due to high short-circuit currents. Please take the necessary measures. The maintenance must be performed by qualified personnel who have been trained in the handling of batteries and who have sound knowledge about the required safety measures (see Maintenance).
-
Seite 84: Installation
I N S T A L L A T I O N 3. Installation 3.1 Inspecting the shipment Keep the shipping cartons and the packaging material for the ship- ping company or the sales agency. If parts of the system were dam- aged during transport, please submit a transport damage claim to your supplier within 24 hours. -
Seite 85: Checking The Accessories
I N S T A L L A T I O N 3.3 Checking the accessories Refer to the following table for the scope of supply: Description 19" Mounting bracket (left and right) RS-232 interface cable 10A low-heat devices power cord extension 16A power cable Battery cable DataWatch software... -
Seite 86: Electrical Installation
I N S T A L L A T I O N 1. Place the UPS system on a level, stable surface in its final position. 2. If you are installing additional battery modules, position these next to the UPS system at its final position. 3. - Seite 87 I N S T A L L A T I O N Connecting the battery modules 1. Remove the cable clamp on the rear side of the UPS system which covers the battery connection. Keep the clamp and screws (see Figure 3). 2.
-
Seite 88: Installing The Rack Model
I N S T A L L A T I O N Figure 3: Connecting the battery modules 3.5 Installing the rack model 3.5.1 Mechanical installation The UPS system/the battery module is delivered completely assem- bled and ready-to-connect. Optional slide rails (article number: Rack-Kit) are available for the rack model. -
Seite 89: Figure 4: Attaching The Front Of The Housing
I N S T A L L A T I O N 1. Installation of the rack kit (see separate installation instructions). 2. Place the UPS system on a level, stable surface. The front side of the housing is facing you. 3. -
Seite 90: Electrical Installation
I N S T A L L A T I O N 3.5.2 Electrical installation Installing the UPS system NOTE Do not perform any unauthorised modifications to the UPS system as doing otherwise will damage the system and void the warranty ... -
Seite 91: Figure 5: Removing The Front Cover From The Ups System
I N S T A L L A T I O N Figure 5: Removing the front cover from the UPS system 2. Remove the cable ejection on the lower side of the front cover of the UPS system (see Figure 6). NOTE Proceed carefully so that you do not damage the LCD dis- play and control panel and the connected ribbon cable. -
Seite 92: Figure 7: Removing The Front Cover From The Battery Module
I N S T A L L A T I O N Figure 7: Removing the front cover from the battery module 4. For the lower (or only) battery module, remove the cable ejec- tion on the upper side of the front cover only. The position of the upper cable ejection is shown in Figure 7. -
Seite 93: Figure 8: Typical Installation Of Multiple Battery Modules
I N S T A L L A T I O N Models with 2000 – 3000VA: Connect red with red, black with black and green with green. Press both parts together firmly to create a good connection. All models: To connect a second battery module, release the plug connection on the first battery module. -
Seite 94: Commissioning
I N S T A L L A T I O N 3.6 Commissioning NOTE Make sure that the total nominal power of all connected devices does not exceed the capacity of the UPS system. 1. If optional battery modules are being installed, ensure that these are connected to the UPS system (see Connecting the battery modules/tower or rack model). - Seite 95 I N S T A L L A T I O N 8. Press the button on till the display shows the power on mode. The UPS system should be in the "Normal mode". 9. If additional battery modules are installed, the number of in- stalled battery modules must be set in the UPS system (see Operation –...
-
Seite 96: Operation
O P E R A T I O N 4. Operation This section contains information about the use of the XANTO S 700 - 3000VA, such as the use of the control panel on the front side, operating modes, starting and shutting down the UPS system, switching between different operating modes, calling up the event log, setting the power strategy and configuring the bypass settings, load segments, battery settings and communication. -
Seite 97: Changing The Language
O P E R A T I O N 4.1.1 Changing the language Press the button on the left side and hold this pressed for approximately 3 seconds in order to select the language menu. This procedure can be executed from every menu. 4.1.2 Display functions By default or after 15 min. -
Seite 98: User Settings
O P E R A T I O N Main menu Submenu Display information of the menu function Identification UPS system type / Part number / Serial number / Firmware Settings "User Settings" Please see Table 4 for details. "Service Settings" This menu is for customer service only and protected by a password. - Seite 99 O P E R A T I O N Frequency "Enabled", "Disabled" "Disabled" Converter In the "Enabled" mode, the UPS system func- tions as converter. The bypass mode and all bypass-related warning messages disabled. Recommendation: Do not change. Overload Alarm 10%, 20%, 30%, ...
- Seite 100 O P E R A T I O N Energy Saving "Disabled", 50W, 100W, ... 1000W "Disabled" Mode The output of the UPS system is shutdown if the UPS system is running in battery mode and the output power lies below the selected threshold value.
- Seite 101 O P E R A T I O N Number of Battery 0, 1, 2 ... 10 Strings See Configuring the battery settings Recommendation: Adapt to requirements. Battery Charge "IBM cycles", "Constant" "IBM cycles" Mode Recommendation: Do not change. Temperature "Enabled", "Disabled"...
-
Seite 102: Operating Modes
O P E R A T I O N 4.2 Operating modes The status of the UPS system is displayed on the control panel on the front side. 4.2.1 Normal mode In normal mode, the display lights up continuously and the UPS system is supplied by the mains power supply. -
Seite 103: Bypass Mode
O P E R A T I O N NOTE Depending on the load at the UPS system and the number of connected battery modules, the "Battery Low" warning mes- sage may already be displayed before the batteries have reached a charge state of 25% (see "Bridging time table" un- der Technical Data). -
Seite 104: Standby Mode
O P E R A T I O N 4.2.4 Standby mode If the UPS system is shut down, however, the plug remains in the outlet, the UPS system will continue to run in standby mode. The display is switched off, which indicates that no current is available for the connected load. -
Seite 105: Starting The Ups System In Battery Mode
O P E R A T I O N 5. Check the display for active warning messages or information. Rectify any active warning messages before you proceed (see Troubleshooting). If the display lights up, only proceed after all warning mes- sages have been rectified. -
Seite 106: Shutting Down The Ups System
O P E R A T I O N 4.3.3 Shutting down the UPS system 1. Press the button on the UPS system for three seconds. The UPS system begins to output an audio signal and shows the " UPS off pending... " status. The UPS system then switches to standby mode and the display switches off. -
Seite 107: Setting The Power Strategy
O P E R A T I O N 4.5 Setting the power strategy In the "High efficiency" setting, the UPS system normally works in bypass mode. It will switch to the inverter in less than 10 ms if the mains power fails and will switch back to bypass mode 1 minute after the mains power has returned. -
Seite 108: Configuring Load Segments
O P E R A T I O N Qualify Bypass. By default, a switching to bypass mode is only then permitted if the bypass is within the following specifications: The bypass voltage lies between the set "Lower bypass volt- age threshold value"... - Seite 109 O P E R A T I O N Each UPS system has two configurable load segments: Load segment 1: The upper or left power outlet Load segment 2: The lower or right power outlet (see "Rear sides of the UPS systems" under Technical Data). To control the load segments via the display: 1.
-
Seite 110: Configuring The Battery Settings
O P E R A T I O N 4.8 Configuring the battery settings 4.8.1 Configuring the UPS system for battery modules Configure the UPS system for the correct number of external battery modules to ensure a maximum battery runtime: 1. -
Seite 111: Performing The Automatic Battery Tests
O P E R A T I O N 4.8.2 Performing the automatic battery tests Automatic battery tests are performed every 30 days, provided this option was activated. During the battery test, the UPS system switches to battery mode and discharges the batteries for 25 seconds with the available load. -
Seite 112: Special Functions
S P E C I A L F U N C T I O N S 5. Special functions 5.1 Converter mode NOTE In converter mode, no bypass function is available and all bypass-related warning messages are disabled. In converter mode, the UPS system always works with a specifically defined output frequency (50 Hz or 60 Hz) regardless of which input frequency (40 Hz to 70 Hz) is present. -
Seite 113: Communication
C O M M U N I C A T I O N 6. Communication Figure 10: Communication options (Model XANTO S 3000R 6.1 Communication options The XANTO S features a serial (RS-232) and a USB communica- tions port as well as a slot for optional interface cards. NOTE ... -
Seite 114: Rs-232 And Usb Communication Interfaces
C O M M U N I C A T I O N 6.1.1 RS-232 and USB communication interfaces To facilitate communication between the UPS system and a computer, connect the computer using a suitable data cable (RS-232 cable, included in the scope of supply) to one of the communication ports of the UPS system. -
Seite 115: Slot For Interface Cards
C O M M U N I C A T I O N See “Programmable output contacts”. See “Programmable signal inputs”. Signal must at least 5 seconds. If the selected state is enabled, the output signals on connection pin 1 and 8 switch from "Low" (positive voltage" to "High" (negative voltage). -
Seite 116: Emergency-Off Function (Repo)
C O M M U N I C A T I O N 6.1.3 Emergency-off function (REPO) The emergency-off function (REPO = Remote Emergency Power- Off) serves to shut down the UPS system and to immediately switch off the connected consumers remotely. The REPO connector (rear side of the UPS system) must be removed and an external emergency-off switch must be connected for this. -
Seite 117: Figure 12: Emergency-Off Connection
C O M M U N I C A T I O N For the position of the REPO connector, see Figure 10. Figure 12 shows a drawing of the REPO connectors. Figure 12: Emergency-off connection You can set the REPO polarity. See the " REPO Input Polarity " setting under User Settings. -
Seite 118: Programmable Output Contacts
C O M M U N I C A T I O N 6.1.4 Programmable output contacts The UPS system has three programmable output contacts: One relay output. Select „SETTINGS“, „USER SETTINGS“, “RELAY CONFIGURATION“ and then „STANDARD“. Two potential free outputs (optocoupler, max. 5mA) in the RS-232 communication interface (Pin 1 and 8). -
Seite 119: Programmable Signal Inputs
C O M M U N I C A T I O N 6.1.5 Programmable signal inputs The UPS system has two programmable signal inputs: One signal input in the RS-232 communication interface (Pin 3). Select „SETTINGS“, „USER SETTINGS“, „SIGNAL INPUTS“ and then „RS232-3“. -
Seite 120: Datawatch Software
C O M M U N I C A T I O N 6.2 DataWatch software The XANTO S series includes DataWatch, the comprehensive soft- ware solution for the shutdown and management of the PC or server system, as well as monitoring the XANTO S and the mains power supply. -
Seite 121: Maintenance
M A I N T E N A N C E 7. Maintenance 7.1 Care and maintenance of UPS systems/batteries To ensure a long service life of the system, the area around the UPS system should be kept clean and free of dust. If the area around the system is very dusty, cleaning the outer surfaces of the system using a vacuum cleaner. -
Seite 122: When To Replace Batteries
M A I N T E N A N C E 7.3 When to replace batteries If the display lights up, the alarm signal sounds and the "Battery maintenance necessary" message lights up, the batteries must be replaced. Please contact your dealer or ONLINE to order new batteries. -
Seite 123: Replacing The Internal Batteries Of The Tower Model
M A I N T E N A N C E CAUTION Batteries must be disposed of properly. Comply with the local regulations for the proper disposal of batteries Batteries may not be incinerated. There is a risk of explosion ... -
Seite 124: Figure 14: Removing The Front Cover From The Ups System
M A I N T E N A N C E Figure 14: Removing the front cover from the UPS system 2. Unscrew the two screws that secure the plug connection in place these to the side. Disconnect the internal battery plug connection (see Figure 15). - Seite 125 M A I N T E N A N C E 4. Carefully pull out the battery module insert by the grip and slide the batteries onto a level, stable support. Support the batteries with both hands. NOTE Check whether the replacement batteries have the same specifications as the old batteries.
-
Seite 126: Replacing The Battery Module Of The Tower Model
M A I N T E N A N C E 7.4.2 Replacing the battery module of the tower model NOTE The battery module does not have any hot-swap batteries. Please replace the entire battery module. Please contact your dealer if you want to replace the individual batteries. CAUTION The battery module is very heavy. -
Seite 127: Replacing The Internal Batteries Of The Rack Model
M A I N T E N A N C E 7.4.3 Replacing the internal batteries of the rack model CAUTION The internal batteries of the UPS system are heavy. Use caution when handling the heavy batteries. The internal batteries are located behind the front cover of the UPS system. -
Seite 128: Figure 17: Replacing The Internal Batteries Of The Ups System
M A I N T E N A N C E ....Figure 17: Replacing the internal batteries of the UPS system 4. Unscrew the screws to the battery cover. Grab the battery cover at a corner and pull it carefully forwards. Take the bat- tery cover and place it to the side. -
Seite 129: Replacing The Battery Module Of The Rack Model
M A I N T E N A N C E 9. Press the plug connections of the internal battery together again. Connect red with red and black with black. Press both parts together firmly to ensure a good connection. 10. - Seite 130 M A I N T E N A N C E 2. Pull off the cable of the battery module from the UPS system. If additional battery modules are installed, pull off the cables from the battery connection on every battery module. 3.
-
Seite 131: Testing The New Batteries
M A I N T E N A N C E Figure 19: Typical installation of multiple battery modules 6. Inserting the front cover of the battery module. To insert the cover again, make sure that the cables of the battery module are guided through the cable ejections. -
Seite 132: Disposing Of Old Batteries Or The Ups System
M A I N T E N A N C E 7.6 Disposing of old batteries or the UPS system Contact the recycling centre onsite or a special waste facility for in- formation on disposing of the old batteries or UPS system properly. You can also dispose of old batteries at ONLINE at no cost. -
Seite 133: Troubleshooting
T R O U B L E S H O O T I N G 8. Troubleshooting The XANTO S is designed for automatic operation and reports any occurring problems during operation automatically. Normally, the warning messages shown on the control panel do not mean that the output voltage is affected. - Seite 134 T R O U B L E S H O O T I N G Check the event log for the sequence of status events: 1. Press any button to activate the menu options. 2. Press the button until "EVENT LOG" is displayed. 3.
- Seite 135 T R O U B L E S H O O T I N G Alarm signal or Possible causes Measure status The UPS system does not Check whether all batteries are Batteries detect the inner batteries. properly connected. disconnected Please contact support.
- Seite 136 T R O U B L E S H O O T I N G Alarm signal or Possible causes Measure status The UPS system batteries must Connect the UPS system to the does not make charged or replaced. mains power for 48 hours to charge the expected up the batteries.
-
Seite 137: Muting The Warning Signal
T R O U B L E S H O O T I N G 8.2 Muting the warning signal Press any button to mute the warning signal. Check the status which triggered the warning message and perform the suitable measures to rectify this state. -
Seite 138: Technical Data
9.1 UPS systems specifications 9.1.1 List of the device types UPS system Article Power Battery module Article number number 700 VA XANTO S 700 XST700 630 W 1000 VA Battery module XANTO S 1000 XST1000 XST1000BP 900 W XANTO S 1000... -
Seite 139: Dimensions And Weights (Net)
T E C H N I C A L D A T A 9.1.2 Dimensions and weights (net) Dimensions (H x W x D) Weight Tower model XANTO S 700 251 x 160 x 370 mm 12 kg XANTO S 1000 251 x 160 x 400 mm... -
Seite 140: Electrical Inputs And Outputs
Table 14: Input power Model Line input Selectable output Voltage range at Voltage/ voltages 100% load current XANTO S 700 230 V / 200V, 208V, 160 - 276VAC XANTO S 700R 3.0A 220V, 230V, 240V XANTO S 1000 230 V /... - Seite 141 T E C H N I C A L D A T A All models Normal mode Battery mode Voltage regulator ±2% Nominal output voltage ±3% Efficiency >95% (HE mode), >88% >79.5% (700VA), >82% (1000 - 1500VA), >84% (2000 - 3000VA) Frequency regula- Synchronisation with mains ±0.1Hz of the automatically...
-
Seite 142: Battery
T E C H N I C A L D A T A 9.1.4 Battery Internal battery Battery module (BP) Tower model XANTO S 700 24V (2 x 12V / 7Ah) XANTO S 1000 36V (3 x 12V / 7Ah) 36V (6 x 12V / 7Ah) -
Seite 143: Communication Options
T E C H N I C A L D A T A 9.1.6 Communication options Slot for optional 1x slot for interface cards interfaces Optional interface cards: SNMP adapter basic (article number: DW7SNMP30) SNMP adapter professional (article number: DW5SNMP30) Relay module (article number: PHXNOV-I) AS400 interface (article number: PHXAS400I) Communication... -
Seite 144: Back Views Of The Ups Systems
NOTE The connections for Load segment 1 are shown shaded. Description of the communication functions, see Figure 10 Figure 20: XANTO S 700 Figure 21: XANTO S 1000 and 1500 Figure 22: XANTO S 2000 Figure 23: XANTO S 3000 144 / 222 XS700-XS3000_manual_ger_eng_it_V1.1.0.doc... -
Seite 145: Figure 24: Xanto S 700R, 1000R And 1500R
T E C H N I C A L D A T A Figure 24: XANTO S 700R, 1000R and 1500R Figure 25: XANTO S 2000R Figure 26: XANTO S 3000R 145 / 222 XS700-XS3000_manual_ger_eng_it_V1.1.0.doc R. Kistler ............ -
Seite 146: Ce Conformity
T E C H N I C A L D A T A 9.3 CE conformity 146 / 222 XS700-XS3000_manual_ger_eng_it_V1.1.0.doc R. Kistler ............ -
Seite 147: Warranty
W A R R A N T Y 10. Warranty ONLINE USV-Systeme AG (ONLINE) hereby warrants this product to be free from defects in material and workmanship for a period of two years from the date of purchase. The obligation of ONLINE under this warranty is limited to the replacement or repair of any product which proves upon our examination to be defective. - Seite 148 148 / 222 XS700-XS3000_manual_ger_eng_it_V1.1.0.doc R. Kistler ............
-
Seite 149: Manuale Dell'utente
Seite English: Page 75 - 148 Italia: Pagina 149 - 222 Germania Italia Svizzera ONLINE USV-Systeme AG ONLINE UPS-Systems S.r.l. ONLINE USV-Systeme AG Dreimühlenstraße 4 Via Edison 12 Eigenheimstraße 11 D-80469 München I-20852 Villasanta (MB) CH-8304 Wallisellen (Zürich) Phone +49 (89) 2423990-10... - Seite 150 150 / 222 XS700-XS3000_manual_ger_eng_it_V1.1.0.doc R. Kistler ............
- Seite 151 Indice Manuale dell'utente ................ 149 Introduzione ................154 Avvertenze di sicurezza ............156 Montaggio ................158 Controllo della fornitura ........... 158 Disimballaggio dell’UPS ..........158 Controllo degli accessori ..........159 Installazione del modello Tower ........160 3.4.1 Struttura meccanica ............160 3.4.2 Installazione elettrica ............
- Seite 152 Modalità Converter (convertitore di frequenza) ....186 Comunicazione ............... 187 Opzioni di comunicazione ..........187 6.1.1 Interfaccia di comunicazione RS-232 e USB ....188 6.1.2 Slot per schede d'interfaccia ........... 189 6.1.3 Funzione di arresto d'emergenza remoto (REPO) ..190 6.1.4 Segnalazioni (Contatti) di uscita programmabili ....
- Seite 153 Figura 18: Rimozione del pannello frontale dal pacco batterie ..203 Figura 19: Installazione tipica di più pacchi batterie ......205 Figura 20: XANTO S 700 ..............218 Figura 21: XANTO S 1000 e 1500 ............ 218 Figura 22: XANTO S 2000 ..............218 Figura 23: XANTO S 3000 ..............
-
Seite 154: Introduzione
I N T R O D U Z I O N E 1. Introduzione ONLINE USV-Systeme AG (ONLINE) è un'azienda tedesca leader nel settore dei gruppi di continuità (UPS), attiva dal 1988 nello sviluppo, produzione, commercializzazione e assistenza di sistemi UPS. L'azien- da è... - Seite 155 I N T R O D U Z I O N E Slot per adattatore SNMP, scheda AS400 o scheda relè opzionali Funzione di arresto d'emergenza remoto (Remote Emergency Power-Off) ..........Figura 1: XANTO S Tower e pacco batterie opzionale Figura 2: XANTO S Rack e pacco batterie opzionale 155 / 222 XS700-XS3000_manual_ger_eng_it_V1.1.0.doc...
-
Seite 156: Avvertenze Di Sicurezza
A V V E R T E N Z E D I S I C U R E Z Z A 2. Avvertenze di sicurezza Il presente manuale contiene istruzioni importanti da osservare durante l'installazione e la manutenzione dell’UPS e delle batterie. Prima di lavorare con l'apparecchio, leggere attentamente tutte le istruzioni del presente manuale. - Seite 157 A V V E R T E N Z E D I S I C U R E Z Z A ATTENZIONE Le batterie possono celare il rischio di una scossa elettrica o incendiarsi a causa di un'elevata corrente di cortocircuito. Adottare le misure di precauzione necessarie.
-
Seite 158: Montaggio
M O N T A G G I O 3. Montaggio 3.1 Controllo della fornitura Il cliente è tenuto al momento della consegna a premettere alla firma sul documento di consegna del trasportatore la dicitura “RITIRATO CON RISERVA DI VERIFICA”. In caso contrario, le compagnie assi- curative non accettano il rimborso della merce e di conseguenza ONLINE non potrà... -
Seite 159: Controllo Degli Accessori
M O N T A G G I O Per il disimballaggio della scatola e degli accessori: 1. Aprire il cartone esterno e prelevare gli accessori imballati con il sistema UPS. 2. Prelevare il sistema UPS dal cartone esterno sollevandolo con cautela. -
Seite 160: Installazione Del Modello Tower
M O N T A G G I O 3.4 Installazione del modello Tower 3.4.1 Struttura meccanica Il sistema UPS / il pacco batterie viene consegnato completamente assemblato e pronto per il collegamento. ATTENZIONE La scatola dell’UPS ha un peso elevato (vedi Dati tecnici). Per l'estrazione dal cartone sono necessarie almeno due persone. - Seite 161 M O N T A G G I O Collegamento dei pacchi batterie 1. Rimuovere il morsetto del cavo che copre l'attacco della batte- ria sul lato posteriore dell’UPS. Conservare il morsetto e le viti (vedi Figura 3). 2. Installazione di un singolo pacco batterie: rimuovere il morsetto del cavo che copre l'attacco destro (nei modelli da 1.000 –...
-
Seite 162: Installazione Del Modello In Armadio Rack
M O N T A G G I O Figura 3: Collegamento dei pacchi batterie 3.5 Installazione del modello in armadio rack 3.5.1 Montaggio meccanico Il sistema UPS / il pacco batterie viene consegnato completamente assemblato e pronto per il collegamento. Per il montaggio in un armadio rack sono disponibili delle guide di montaggio opzionali (cod. - Seite 163 M O N T A G G I O 1. Montaggio del kit rack (vedi istruzioni di montaggio separate). 2. Posizionare il sistema UPS su una superficie piana e stabile. Il lato anteriore del cabinet dell’UPS deve essere rivolto verso l'utente.
-
Seite 164: Installazione Elettrica
M O N T A G G I O 3.5.2 Installazione elettrica Installazione dell’UPS AVVERTENZA Non apportare modifiche non autorizzate al sistema UPS, poiché queste potrebbero causare danni all'impianto e invali- darne la garanzia Non collegare il cavo di allacciamento dell’UPS alla rete di alimentazione prima di aver completato l'installazione 1. - Seite 165 M O N T A G G I O Figura 5: Rimozione del pannello frontale dal sistema UPS 2. Rimuovere l'uscita cavi sul lato inferiore del pannello frontale dell’UPS (vedi Figura 6). AVVERTENZA Procedere con cautela per non danneggiare il campo di visualizzazione e comando LCD e il cavo piatto collegato.
- Seite 166 M O N T A G G I O Figura 7: Rimozione del pannello frontale dal pacco batterie 4. Nel pacco batterie inferiore (o nell'unico pacco batterie) rimuo- vere l'uscita cavi solo sul lato superiore del pannello frontale. Nella Figura 7 è rappresentata la posizione dell'uscita cavi superiore.
-
Seite 167: Messa In Funzione
M O N T A G G I O Modelli da 2.000 – 3.000 VA: collegare il rosso con il rosso, il nero con il nero e il verde con il verde. Spingere a fondo con energia entrambe le parti per garantire un buon collegamento. Tutti i modelli: per collegare un secondo pacco batterie, allentare il collegamento a innesto sul primo pacco batterie. - Seite 168 M O N T A G G I O 1. In caso di installazione di pacchi batterie opzionali, accertarsi che questi siano collegati correttamente al sistema UPS (vedi Collegamento dei pacchi batterie/modello Tower o in armadio rack). 2. Collegare gli apparecchi da proteggere al sistema UPS senza attivarli.
- Seite 169 M O N T A G G I O 8. Premere il tasto finché sul display viene visualizzata la modalità di avvio (Power-on mode). Il sistema UPS deve trovarsi in modalità “Normal Mode”. 9. Se sono installati pacchi batterie supplementari, nel sistema UPS deve essere impostato il numero dei pacchi batterie in- stallati (vedi Funzionamento –...
-
Seite 170: Funzionamento
4. Funzionamento Nel presente paragrafo sono contenute informazioni sull'utilizzo del sistema XANTO S 700 - 3000VA, come l'uso del quadro di comando sul lato anteriore, informazioni sui modi di funzionamento, modalità di avvio e spegnimento dell’UPS, commutazione tra le diverse moda- lità... -
Seite 171: Modifica Della Lingua
F U N Z I O N A M E N T O 4.1.1 Modifica della lingua Per selezionare il menu della lingua premere il tasto sul lato si- nistro e tenerlo premuto per circa tre secondi. Questa procedura può essere eseguita all'interno di ogni menu. -
Seite 172: Programmazione Utente
F U N Z I O N A M E N T O Menu Sottomenu Informazione della funzione del menu principale Identification UPS Type (modello) / UPS P/N (part Number) / UPS Serial Number (S/N -matricola) / Firmware Settings "User Settings" Per maggiori dettagli, vedi Tabella 4. - Seite 173 F U N Z I O N A M E N T O Frequency "Enabled", "Disabled" "Disabled" Converter In modalità "Enabled" l’UPS funziona come un convertitore di frequenza. La modalità Bypass e tutti i messaggi di avvertimento riferiti al by- pass vengono disattivati.
- Seite 174 F U N Z I O N A M E N T O Energy Saving "Disabled", 50W, 100W, ... 1000W "Disabled" Mode L'uscita dell’UPS viene disattivata nel caso questo funzioni a batteria, quando la potenza in uscita è inferiore al valore di soglia selezio- nato.
- Seite 175 F U N Z I O N A M E N T O Synchronization "Sync disabled", ± 3,0Hz Window ± 0,5Hz, ± 1,0Hz, ± 2,0Hz, ± 3,0Hz] Vedi Configurazione delle impostazioni di bypass Raccomandazione: non modificare. Unsynchronized "Enabled", "Disabled" "Disabled" Transfers Vedi Configurazione delle impostazioni di bypass...
-
Seite 176: Modalità D'esercizio
F U N Z I O N A M E N T O 4.2 Modalità d'esercizio Lo stato dell’UPS viene visualizzato sul quadro di comando sul lato anteriore. 4.2.1 Funzionamento normale In modalità di funzionamento normale l'indicatore è costantemente acceso e l’UPS viene alimentato dalla rete di alimentazione. L’UPS mo- nitora le batterie e le ricarica se necessario. -
Seite 177: Modalità Bypass
F U N Z I O N A M E N T O AVVERTENZA A seconda del carico sull’UPS e del numero dei pacchi batterie collegati, il messaggio di avvertimento "Battery Low" può già essere visualizzato prima che le batterie abbiano raggiunto un livello di carica del 25% (vedi "Tabella Tempo di continuità"... -
Seite 178: Modalità Standby
F U N Z I O N A M E N T O 4.2.4 Modalità Standby Se l’UPS è disattivato ma la spina resta inserita nella presa, l’UPS continua a funzionare sempre in modalità Standby. L'indicazione è disattivata, indicando che per il carico collegato non è disponibile al- cuna corrente. -
Seite 179: Avvio Dell'ups In Modalità A Batteria
F U N Z I O N A M E N T O 5. Controllare l'eventuale presenza di messaggi di avvertimento attivi o avvertenze sul display. Prima di proseguire, eliminare eventuali messaggi di avvertimento attivi (vedi Eliminazione dei guasti). Se l'indicazione si accende, proseguire solo una volta eliminati tutti i messaggi di avvertimento. -
Seite 180: Spegnimento Dell'ups
F U N Z I O N A M E N T O 2. Controllare l'eventuale presenza di messaggi di avvertimento attivi o di avvertenze sull'assenza di corrente elettrica sul di- splay dell’UPS. Prima di proseguire, eliminare eventuali mes- saggi di avvertimento attivi (vedi Eliminazione dei guasti). In questo caso, l'avvertenza "... -
Seite 181: Impostazione Della Strategia Energetica
F U N Z I O N A M E N T O 4.5 Impostazione della strategia energetica Nell'impostazione "High efficiency" l’UPS funziona normalmente in modalità Bypass, ma in caso di caduta di rete commuta in meno di sulla modalità batteria minuto dopo... - Seite 182 F U N Z I O N A M E N T O Politica di bypass (Qualify Bypass). In genere, la commutazione sulla modalità Bypass viene consentita solo quando il bypass è con- forme alle seguenti specifiche: La tensione di bypass è compresa tra il "valore soglia inferiore per la tensione di bypass"...
-
Seite 183: Configurazione Dei Segmenti Di Carico
F U N Z I O N A M E N T O 4.7 Configurazione dei segmenti di carico I segmenti di carico sono gruppi di prese di uscita dell’UPS, che pos- sono essere comandati dal software DataWatch o dal pannello di controllo e che consentono uno spegnimento e un avvio fisico del ca- rico. -
Seite 184: Configurazione Delle Impostazioni Delle Batterie
F U N Z I O N A M E N T O 4.8 Configurazione delle impostazioni delle batterie 4.8.1 Configurazione dell’UPS per pacchi batterie Configurare l’UPS per il numero corretto di pacchi batterie, al fine di garantire la massima autonomia: 1. -
Seite 185: Esecuzione Dei Test Automatici Delle Batterie
F U N Z I O N A M E N T O 4.8.2 Esecuzione dei test automatici delle batterie Se è stata attivata questa opzione, i test automatici delle batterie vengono eseguiti ogni 30 giorni. Durante il test delle batterie l’UPS commuta sul funzionamento a batteria e scarica le batterie sul carico per 25 secondi. -
Seite 186: Funzioni Speciali
F U N Z I O N I S P E C I A L I 5. Funzioni speciali 5.1 Modalità Converter (convertitore di frequenza) AVVERTENZA In modalità Converter non è disponibile alcuna funzione di bypass e tutti i messaggi di avvertimento riferiti al bypass vengono disattivati. -
Seite 187: Comunicazione
C O M U N I C A Z I O N E 6. Comunicazione Figura 10: Opzioni di comunicazione (modello XANTO S 3000R 6.1 Opzioni di comunicazione XANTO S dispone di un'interfaccia di comunicazione seriale (RS-232) e di un'interfaccia USB, così come di uno slot per schede d'interfaccia opzionali. -
Seite 188: Interfaccia Di Comunicazione Rs-232 E Usb
C O M U N I C A Z I O N E 6.1.1 Interfaccia di comunicazione RS-232 e USB Per ripristinare la comunicazione tra l’UPS e un computer, collegare computer delle interfacce comunicazione UPS mediante un cavo dati idoneo (cavo RS-232 fornito in dotazio- ne). -
Seite 189: Slot Per Schede D'interfaccia
C O M U N I C A Z I O N E vede Segnalazioni (Contatti) di uscita programmabili Configurabile. vede Segnalazioni (Contatti) di ingresso programmabili. Se lo stato selezionato è attivo, (esempio: “funzionamento a batte- ria”) i segnali di uscita commutano sul pin 1 e 8 da "Low" (tensione positiva) a "High"... -
Seite 190: Funzione Di Arresto D'emergenza Remoto (Repo)
C O M U N I C A Z I O N E 6.1.3 Funzione di arresto d'emergenza remoto (REPO) La funzione di arresto d'emergenza remoto (REPO = Remote Emer- gency Power-Off) serve per lo spegnimento dell’UPS e per la disatti- vazione immediata a distanza delle utenze collegate. - Seite 191 C O M U N I C A Z I O N E Per la posizione del connettore REPO vedi Figura 10. La Figura 12 mostra uno schizzo dei collegamenti REPO. Figura 12: Porta per l'arresto d'emergenza È possibile impostare la polarità REPO. Vedi l'impostazione " REPO Input Polarity "...
-
Seite 192: Segnalazioni (Contatti) Di Uscita Programmabili
C O M U N I C A Z I O N E 6.1.4 Segnalazioni (Contatti) di uscita programmabili L’UPS contiene tre contatti di uscita programmabili: Un contatto di uscita a relè. Selezionare "SETTINGS", "USER SETTINGS", “RELAY CONFIGURATION“ quindi "STANDARD". ... -
Seite 193: Segnalazioni (Contatti) Di Ingresso Programmabili
C O M U N I C A Z I O N E 6.1.5 Segnalazioni (Contatti) di ingresso programmabili L'UPS contiene due contatti d’ingressi programmabili: Un segnale d’ingresso RS-232 interfaccia di comunicazione (pin tre). Selezionare "SETTINGS", "USER SETTINGS", “SIGNAL INPUTS“... -
Seite 194: Software Datawatch
C O M U N I C A Z I O N E 6.2 Software DataWatch In dotazione con ogni sistema della Serie XANTO S viene fornito il software DataWatch, la soluzione completa per lo spegnimento e la gestione del PC o server, come anche per il monitoraggio del grup- po XANTO S e della rete. -
Seite 195: Manutenzione
M A N U T E N Z I O N E 7. Manutenzione 7.1 Cura e manutenzione dell’ UPS e delle batterie Per una lunga durata del sistema è necessario che l'area circostante l’UPS sia pulita e priva di polvere. Se l'area in cui si trova il sistema è molto polverosa, pulire le superfici esterne del sistema con un aspi- rapolvere. -
Seite 196: Quando Sostituire Le Batterie
M A N U T E N Z I O N E 7.3 Quando sostituire le batterie Se si accende la spia , suona il segnale di allarme e si attiva la segnalazione attiva “Battery Maintenance necessary” (Manutenzione batterie richiesta), è necessario sostituire le batterie. Per ordinare batterie nuove rivolgersi al proprio rivenditore o alla ONLINE. -
Seite 197: Sostituzione Delle Batterie Interne Del Modello Tower
M A N U T E N Z I O N E ATTENZIONE Le batterie devono essere smaltite in modo conforme alle disposizioni. Per lo smaltimento osservare le norme di legge locali in vigore Le batterie non devono essere bruciate. In tal caso sussiste il pericolo di esplosione ... - Seite 198 M A N U T E N Z I O N E Figura 14: Rimozione del pannello frontale dall’UPS 2. Svitare entrambe le viti con le quali è fissato il collegamento a innesto e metterle da parte. Separare il collegamento a innesto della batteria interna (vedi Figura 15).
- Seite 199 M A N U T E N Z I O N E 4. Estrarre con cautela l'inserto batterie afferrandolo dall'impu- gnatura e spingere le batterie su una base d'appoggio piana e stabile. Sostenere le batterie con entrambe le mani. AVVERTENZA Verificare che le batterie sostitutive abbiano le stesse speci- fiche delle batterie vecchie.
-
Seite 200: Sostituzione Del Pacco Batterie Del Modello Tower
M A N U T E N Z I O N E 7.4.2 Sostituzione del pacco batterie del modello Tower AVVERTENZA Quando necessario, sostituire l'intero pacco batterie. Se si desidera sostituire le singole batterie, contattare il proprio ri- venditore specializzato. ATTENZIONE Il pacco batterie ha un peso elevato. -
Seite 201: Sostituzione Delle Batterie Interne Dell'ups In Formato Rack
M A N U T E N Z I O N E 7.4.3 Sostituzione delle batterie interne dell’UPS in formato rack ATTENZIONE Le batterie interne dell’UPS hanno un peso elevato. Durante la manipolazione delle batterie pesanti prestare la massima cautela. Le batterie interne si trovano dietro il pannello frontale dell’UPS. - Seite 202 M A N U T E N Z I O N E ....Figura 17: Sostituzione delle batterie interne dell’UPS 4. Allentare le viti sulla copertura delle batterie. Afferrare la copertura delle batterie da un bordo e tirarla con cautela in avanti.
-
Seite 203: Sostituzione Del Pacco Batterie Dell'ups In Formato Rack
M A N U T E N Z I O N E 9. Premere l'uno contro l'altro i collegamenti a innesto della bat- teria interna. Collegare il rosso con il rosso e il nero con il nero. Stringere assieme con energia entrambe le parti per garantire un buon collegamento. - Seite 204 M A N U T E N Z I O N E 2. Staccare il cavo del pacco batterie dall’UPS. Se vi sono altri pacchi, staccare il cavo dall'attacco batteria su ogni pacco. 3. Sostituire i pacchi batterie. Per uno smaltimento corretto leggere il paragrafo Smaltimento delle batterie vecchie o dell’UPS.
-
Seite 205: Test Delle Batterie Nuove
M A N U T E N Z I O N E Figura 19: Installazione tipica di più pacchi batterie 6. Montare il pannello frontale del pacco batterie. A tale scopo assicurarsi che i cavi del pacco batterie passino attraverso le uscite cavi. -
Seite 206: Smaltimento Delle Batterie Vecchie O Dell'ups
M A N U T E N Z I O N E 7.6 Smaltimento delle batterie vecchie o dell’UPS Informarsi presso il centro di riciclaggio o l'impianto di smaltimento dei rifiuti speciali presente nella propria zona per lo smaltimento corretto delle batterie vecchie o dell’UPS. -
Seite 207: Eliminazione Dei Guasti
E L I M I N A Z I O N E D E I G U A S T I 8. Eliminazione dei guasti La serie XANTO S è predisposta per il funzionamento autonomo e segnala automaticamente eventuali problemi durante il funzionamen- to. - Seite 208 E L I M I N A Z I O N E D E I G U A S T I Controllare il log eventi per l'andamento degli eventi di stato: 1. Premere un tasto qualsiasi per attivare le opzioni del menu. 2.
- Seite 209 E L I M I N A Z I O N E D E I G U A S T I Segnale di Possibile causa Misura allarme o stato L’UPS non riconosce le Controllare che tutte le batterie sia- Batterie staccate batterie interne.
- Seite 210 E L I M I N A Z I O N E D E I G U A S T I Segnale di Possibile causa Misura allarme o stato L’UPS non mette Collegare l’UPS alla corrente di rete Le batterie devono essere a disposizione il caricate o sostituite.
-
Seite 211: Silenziamento Del Segnale Di Avvertimento
E L I M I N A Z I O N E D E I G U A S T I 8.2 Silenziamento del segnale di avvertimento Premere un tasto qualsiasi per silenziare il segnale di avvertimento. Controllare lo stato che ha fatto scattare il messaggio di avvertimento e adottare misure adeguate per eliminare questo stato. -
Seite 212: Dati Tecnici
9.1 Specifiche dei sistemi UPS 9.1.1 Elenco dei modelli Modello UPS Cod. Potenza Pacco batterie Cod. articolo articolo 700 VA XANTO S 700 XST700 630 W 1.000 VA Pacco batterie XANTO S 1000 XST1000 XST1000BP 900 W XANTO S 1000 1.500 VA... -
Seite 213: Pesi E Dimensioni (Netti)
D A T I T E C N I C I 9.1.2 Pesi e dimensioni (netti) Dimensioni (A x L x P) Peso Modello Tower XANTO S 700 251 x 160 x 370 mm 12 kg XANTO S 1000 251 x 160 x 400 mm... -
Seite 214: Ingressi E Uscite Elettrici
Modello Ingresso Tensioni di uscita Intervallo di ten- Tensione / selezionabili sione con carico Corrente 100% XANTO S 700 230V / 200V, 208V, 160 - 276VAC XANTO S 700R 3,0 A 220V, 230V, 240V XANTO S 1000 230V / 200V, 208V,... - Seite 215 D A T I T E C N I C I Tutti i modelli Funzionamento normale Funzionamento a batteria Regolatore ±2% Tensione d'uscita nominale di tensione ±3% Rendimento >95% (ECO mode), >88% >79,5% (700VA), >82% (1000 - 1500VA), >84% (2000 - 3000VA) Regolatore Sincronizzazione con rete ±0,1Hz della frequenza no-...
-
Seite 216: Batteria
D A T I T E C N I C I 9.1.4 Batteria Batteria interna Pacco batterie (BP) Modello XANTO S 700 24V (2 x 12V / 7Ah) Tower XANTO S 1000 36V (3 x 12V / 7Ah) 36V (6 x 12V / 7Ah) -
Seite 217: Opzioni Di Comunicazione
D A T I T E C N I C I 9.1.6 Opzioni di comunicazione Slot per interfacce 1x slot per schede d'interfaccia opzionali Schede d'interfaccia opzionali: SNMP-Adapter Basic (cod. articolo DW7SNMP30) SNMP-Adapter Professional (cod. articolo DW5SNMP30) Scheda relè inseribile (cod. articolo PHXNOV-I) AS400-Interface (cod. -
Seite 218: Viste Posteriori Dei Sistemi Ups
I collegamenti per il segmento di carico 1 sono rappresentati ombreggiati. Descrizione delle funzioni di comunicazione, vedi Figura 10 Figura 20: XANTO S 700 Figura 21: XANTO S 1000 e 1500 Figura 22: XANTO S 2000 Figura 23: XANTO S 3000 218 / 222 XS700-XS3000_manual_ger_eng_it_V1.1.0.doc... - Seite 219 D A T I T E C N I C I Figura 24: XANTO S 700R, 1000R e 1500R Figura 25: XANTO S 2000R Figura 26: XANTO S 3000R 219 / 222 XS700-XS3000_manual_ger_eng_it_V1.1.0.doc R. Kistler ............
-
Seite 220: Dichiarazione Ce
D A T I T E C N I C I 9.3 Dichiarazione CE 220 / 222 XS700-XS3000_manual_ger_eng_it_V1.1.0.doc R. Kistler ............ -
Seite 221: Garanzia
Tutti i contenuti sono protetti dal diritto d'autore. Copyright © 2012 di ONLINE USV-Systeme AG. Tutti i diritti riservati. È vietata la riprodu- zione, integrale o parziale, senza autorizzazione. 221 / 222 XS700-XS3000_manual_ger_eng_it_V1.1.0.doc... - Seite 222 222 / 222 XS700-XS3000_manual_ger_eng_it_V1.1.0.doc R. Kistler ............