Herunterladen Diese Seite drucken
krick Borkum Anleitung
Vorschau ausblenden Andere Handbücher für Borkum:

Werbung

Verfügbare Sprachen

Verfügbare Sprachen

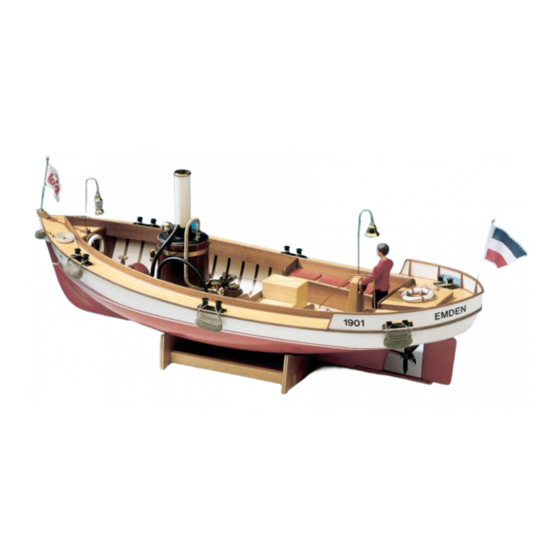
Um die Jahrhundertwende wurden zur Versorgung der
vor der Küste liegenden Inseln seegehende Boote ge-
baut, die die Inselbewohner mit dem Festland verbanden.
Teilweise waren sie auch mit einer Dampfmaschine als
Antrieb versehen.
Unser Modell soll Ihnen eine Vorstellung eines solchen
Versorgers geben.
Um Ihnen den Bau des Modells zu erleichtern, sind alle
Holzteile in der modernen Lasertechnik fertig ausge-
schnitten.
Der Bau der Borkum ist nicht schwierig. Lassen Sie sich
Zeit und verwenden Sie Sorgfalt beim Zusammenbau. Mit
dem extra erhältlichen Ausstattungssatz können Sie Ihr
Modellschiff noch ausschmücken.
Zusatzbedarf:
Inselversorger "Borkum"
Maßstab 1 : 12
Bestell-Nr. 20291
Seite 1
Sie benötigen zum Bau des Modells einigen Zubehör, der
nicht im Baukasten enthalten ist:
Ca. 2 m Gesamtlänge Leistenstücke 5 x 5 mm
1 Tube Silikon farblos Bestell-Nr. 80486
2 Servoverlängerungskabel Ihrer Fernsteuerung
1 Antennensteckerpaar
200 g Porenfüller oder Schleifgrund
Seiden- oder Mattlack farblos
Lackfarbe rot (Seidenmatt)
Lackfarbe weinrot (Seidenmatt)
1 Ausstattungssatz für Borkum, Best.-Nr. 20293
2 Packungen Ballast-Eisenschrot, Best.-Nr. 60112
© Krick Modelltechnik Knittlingen Juli 2015

Werbung

loading

Inhaltszusammenfassung für krick Borkum

  • Seite 1 Holzteile in der modernen Lasertechnik fertig ausge- 200 g Porenfüller oder Schleifgrund schnitten. Seiden- oder Mattlack farblos Der Bau der Borkum ist nicht schwierig. Lassen Sie sich Lackfarbe rot (Seidenmatt) Zeit und verwenden Sie Sorgfalt beim Zusammenbau. Mit Lackfarbe weinrot (Seidenmatt) dem extra erhältlichen Ausstattungssatz können Sie Ihr...
  • Seite 2 30 eingeklebt und das Ganze mit dem Heckspant 29 ver- Zuerst ein wichtiger Hinweis: leimt. Prüfen Sie vorher nach, ob Ihr Servo in den Aus- Wir empfehlen für den Antrieb der Borkum unsere schnitt passt. Dampfmaschine Puffin II Deluxe, Bestell-Nr. 210092.
  • Seite 3 Deck, und sichern Sie sie gegen Durchrutschen mit lehne 92 leimen und das Ganze am Schanzkleid 72 an- einem Knoten auf der Oberseite des Decks. Unter dem kleben. Sitzbankseitenteil 93, Sitzbankfuß 94 und Stützen 95 anleimen. Seite 3 © Krick Modelltechnik Knittlingen Juli 2015...
  • Seite 4 Bohren Sie an der angegebenen Stelle ein Loch mit 1.5 mm Ø, schlagen Sie den Haltestift 166 von Ihr Inselversorger "BORKUM" kann nun fertig lackiert unten in die Kistenwand, feilen Sie den Kopf ab, stellen werden. Um Beschädigungen des ABS Rumpfes durch Sie die Kiste an ihren Platz und drücken Sie den Stift et-...
  • Seite 5 75438 Knittlingen Telefon: (07043) 93510 Fax: (07043) 9351-19 Vergessen Sie nicht: Best.-Nr. 20293: Ausstattungssatz Borkum. Alle Teile, die Ihr Modell erst richtig echt machen. Best.-Nr. 60102: Eisenschrott als Ballast (2 Stück erforderlich) Seite 5 © Krick Modelltechnik Knittlingen Juli 2015...
  • Seite 6 MS-Mutter M4 Schiffsschraube MS-Fertigteil Stellring MS-Fertigteil Ø 4,2 mm Manschette Silikonschlauch Zylinderschraube Stahl M 3 x 14 mm Oberdeck (Plicht) Sperrholz 3 mm Lukenrahmen Linde 1,5 x 5 x 210 mm gesamt Seite 6 © Krick Modelltechnik Knittlingen Juli 2015...
  • Seite 7 122-123 Podest für Flaggenmastsockel Edelholz 5 x 12 x 30 mm Podest für Lampensockel Edelholz 5 x 12 x 12 mm 125-126 Halter für Rettungsring Tanganjika-Sperrholz 3 mm 127-128 Flaggenmastsockel MS-Fertigteil Lampenmastsockel MS-Fertigteil Glockenmastsockel MS-Fertigteil Seite 7 © Krick Modelltechnik Knittlingen Juli 2015...
  • Seite 8 MS 2 mm 174-175 Schraube Inbus-Gewindestift M 3 x 3 mm Inbusschlüssel Fertigteil Ballast Eisenschrot 1,8 kg Transportkiste Seitenteil Sperrholz 3 mm Transportkiste Rückteil Sperrholz 3 mm Transportkiste Oberteil Sperrholz 3 mm Seite 8 © Krick Modelltechnik Knittlingen Juli 2015...
  • Seite 9 Seite 9 © Krick Modelltechnik Knittlingen Juli 2015...
  • Seite 10 Seite 10 © Krick Modelltechnik Knittlingen Juli 2015...
  • Seite 11 Seite 11 © Krick Modelltechnik Knittlingen Juli 2015...
  • Seite 12 Seite 12 © Krick Modelltechnik Knittlingen Juli 2015...
  • Seite 13 Seite 13 © Krick Modelltechnik Knittlingen Juli 2015...
  • Seite 14 Modellbau vom Besten   krick Borkum • Island Supporter 20291  Klaus Krick Modelltechnik Borkum Building Instructions At the turn of the century boats had been built for supplying the near islands at the coast. Many of them  had a steam engine for a fast and powerful run. You have acquired a model kit which in its conception is clearly different from others. The wooden  parts are all cut by modern laser technique. The visible parts are all made of African hard wood, which  makes this model very attractive. The construction of the Borkum is not very difficult. All you need is a bit of constructor skill, combined  with accuracy and patience. Completed with the extra available fitting set you will have a very nice  model. Before beginning with the construction, transfer the numbers of all construction parts to the precut parts.  Do not yet remove the parts. You will find the corresponding numbers in the reduced figures in the  assembly instructions. Please use a lead pencil and mark the numbers only lightly so that you can erase  them later. For removing the parts we recommend to use a very thin fretsaw blade (00). We urgently  ask you to follow our recommendations concerning the glue. Experience has shown that following these recommendations will ensure success.
  • Seite 15: Technical Data

    Borkum • Island Supporter 20291 For the construction of the Borkum we recommend:   Strip parts 5 x 5 mm x approx. 2m total   Silicon sealant, clear Wood sealer   2 servo extension leads of your RC   1 fitting set Borkum, art. No. 20293   2 packages ballast, art. No. 60112   Krick extra fest, art. No 80480, a P.V.A. glue of good quality.   You can use Ponal, Uhu coli or something similar instead.   Krick ruck zuck, art. No. 80491 or similar cyano acrylit glue   Krick ABS glue, art. No. 80478, developed especially for the connection    of wood and ABS or UHU plus acrylit, art. No. 48315 a two component glue.   UHU plus endfest 300, art. No. 45640, for the ballast. If there is no special glue indicated in the instructions, you have free choice. Generally you should lightly sand carefully all wooden parts after gluing and varnishing them three  times with wood sealer. Sand after each coating in order to smooth the prominent wood fibers. The final  varnishing with mat or silkmat lacquer is only applicated at the very end, when the model is finished. For the construction please follow the numbers of the construction Plan. Technical data:   Scale:    1:12   ...
  • Seite 16 Borkum • Island Supporter 20291 6.  Use the same way for combining strip 27 and support 28 with frame 29. Before you glue servo  support 31 between back frame bearings 30 please check whether your servo fits the hole. When  this is ready glue, front and back frame to the deck. Now plank both frames with strips no. 32 and  33. Begin from the middle of each frame to the left and right end. Glue parts 34 as head ledge on  the deck. 7.  Now you need a bit time for the next steps. You will now fit the deck into the hull. It is necessary to  adapt the frames to the form of the hull. Press the deck into the edge. If everything fits perfect, first  glue only the deck to the hull giving ABS glue into the edge of the hull and laying the deck inside.  With adhesive tape, press the deck into the hull as shown on Fig. 7. Be sure that the deck lies deep  enough in the edge. At this moment, there must not be any strain, because the frames could shift to  the middle and shorten the place for the floors. During the drying time lay the hull with the deck side  down on the table that outcoming glue does not disturb the ship‘s side. When the glue is dry, fix the  frames with superglue to the hull. 8.  Sand rubbing strake 35 at the outside before you glue it and give it three coats of sealer. Then glue  it. The strip has to stay 0,5 to 0,8 mm over the deck. 9.  As shown on the plan the deck planking 36 and 37 must be glued on the deck. The planking strips  37 have to be ironed flat with a flat iron as shown on Fig. 9 after they were soaked in hot water.  Plank from the middle to the outside. Sand the complete planking carefully after the glue is dry. The  plan shows how to glue strip 39 to frame 38 under the marked line. Then plank the frame above the  strip with strips 40 10. Glue strips 41 on frame 38 as shown on Fig. 10. Then glue strips 42. Now glue the complete frame  into the hull. Fit engine base plate 43 into the hull but do not glue. Sand the edges oblique as shown  in Fig. 17 with part 65.    Without fig.   Glue the hatchway surrounding 52 from below on the engine base plate 43 and fit in the hatch. The  engine base plate 43 has to be planked with strips 54 and sanded properly. Give the plate two or  three coats of wood sealer, sand and glue in hull with „ruck-zuck“ or a similar cyano acrylit glue.   Building Instructions for Borkum Steamboat - Page 4 of 14 14. Push prop shaft tube 58 through the hole in the hull and complete it with shaft 59, shaft nut 60, pro-...
  • Seite 17 Borkum • Island Supporter 20291 16. Now produce the hatchway surrounding with parts 79 and 80. Keep them removable with some  strips of paper. After the glue is dry glue hatch 81 on the surrounding. Plank the hatch 81 with  strips 82 and the surrounding 79/80 with strips 83. Strips 84 must be painted totally before they  are cut. Mark the position of the false frames 84 in the hull and glue them with small drops of super- glue. The blind strip 85 covers the edge of the upper deck 65/69 at frame 38 and should be 1 mm  higher then the deck planking as stop face for the seat side parts 86 and 93. It must be glued with  superglue. Now fit seat side part 86 on frame 38 and bulwark 72. Sand seat side Part 86 and  glue in.   Glue seat bottom part 87 with supports 88, put them into the holes in the deck and glue them to  side part 86 and upper deck 65. Sand seat 89 and side part 90 and glue them. Glue strip 91 as  shown with no. 100 in Fig. 17 behind the back of the seat 92 and fix all at bulwark 72. Then glue  seat side part 93, bottom part 94 and supports 95. 17. Place seat receiver and battery under the starboard and glue the switch plate 96 at a good place.  The starboard seat must not be glued, only glue fastener 98. Drill through bottom part 94 and faste- ner 98 a hole of 1,5 mm for screw 99. Strip 100 must be glued to the bulwark that seat 97 can be  opened. Sand off the 1 mm rest of strip 85. Round the cushions 102 to 107 and paint them. They  will be glued after the last painting of the boat.   Building Instructions for Borkum Steamboat - Page 5 of 14 18. Build up the pedestal with surroundings 108 and 109 and floor 110 and plank it with strips 111  and 112. Produce the rudder stand 113 as shown in the plan, drill the hole for screw 116 of rud- der 115 and glue it to the pedestal. Then glue the complete pedestal to the deck with strips 117.  The rudder with spacing Sleeve will be mounted after the last painting of the boat.   Glue the stair out of stair side 118 and steps 119, but glue them after the final painting of the boat.  Glue stair base 121 and step 120 as shown in the plan. Sand and drill (4 mm) pedestal 122 to  124 as shown in the plan and glue it. Sand also holders 125 and 126 for the lifebelts and glue  them at the correct place. For the mast bases 129 to 131 drill a 4 mm hole at the correct place,  also 2 mm holes for mounting eyes 132.    You can now finish painting your Borkum. To avoid damage at the hull use some adhesive tape  under the deck and under the rail. Seal the engine base plate to the hull with clear silicone sealant.  After painting glue bases 129 to 131 and eye 132.  ...
  • Seite 18 Borkum • Island Supporter 20291 20.   Produce the transport box for covering the servo with parts 178 - 180 and plank it with strips  165. Don‘t glue the box to the deck so that you can reach your servo. Drill at the correct place a  hole of 1,5 mm, hammer in nail 166 into the wall, grind away the nail‘s head, place the box to the  deck that the nail makes a small mark into the deck. Drill a 1,5 mm hole into the mark.    Fix the waterslide nameplates to the front and the deck of the boat as shown on the plan. Connect  the servos with clevis 168/169, pushrods 170/171, set collars 172/173 and screw 174/175.   Building Instructions for Borkum Steamboat - Page 6 of 14   Shorten the antenna of your receiver of the length of the wire in the boat (500 mm). Solder a coup- ling to the cable and connect it with the antenna. Before trimming your boat you have to place all  fittings at the correct place. All parts that are put in later will change the trim. Before you fill in the ballast please pay attention to the following points.   1.   P ut in steam engine with full boiler.   2. Put in full gas tank.   3. Put in steam condenser.   4. Set in the complete RC (receiver, servos, batteries and switch)   5. Pull the servo cables tight and fix them carefully with tape.   7. To avoid a damage of the deck cover it with a broad tape.   8. Set the boat into the water.   9. Mix the ballast with UHU plus endfest 300 that all balls are moistened a bit.   10. Now fill in the ballast with a spoon. ...
  • Seite 19 Borkum • Island Supporter 20291 Parts List: No. Description Qty. Material Location 1-2  boats rack  ......2  plywood 7 mm  ...
  • Seite 20 Borkum • Island Supporter 20291 No. Description Qty. Material Location 71   hatch surrounding  ......4   mahagoni 0,5 x 5 x 190 total 72-74 bulwark  ....... 4   tanganjika plywood 3 mm  ...
  • Seite 21 Borkum • Island Supporter 20291 No. Description Qty. Material Location 141+142 flagg   ......2   prefabricated  ...
  • Seite 22 Borkum • Island Supporter 20291...
  • Seite 23 Borkum • Island Supporter 20291  Klaus Krick Modelltechnik • Postfach 11  3 8 • D-75  4 34 Knittlingen  Telefon 0 70 43 / 9 35 10 •  Telefax 0 70 43 / 3 18 38 • www.krick-modell.de ...
  • Seite 24 Borkum • Island Supporter 20291...
  • Seite 25 Borkum • Island Supporter 20291  Klaus Krick Modelltechnik • Postfach 11  3 8 • D-75  4 34 Knittlingen  Telefon 0 70 43 / 9 35 10 •  Telefax 0 70 43 / 3 18 38 • www.krick-modell.de ...
  • Seite 26 Borkum • Island Supporter 20291...
  • Seite 27 - Island Supporter    - La restauration insulaire  FR • Historisch• Historic• Historique• Die Borkum ist ein typischer offener Inselversorger der Nordsee um die Jahrhundertwende. Dieses Mo- dell eignet sich besonders, um seinen eigenen Ideen für Zusatzausstattung, Ladung usw. so richtig freien  Lauf zu lassen. Aufgrund der offenen Bauweise eigent sich die Borkum hervorragend für den Einbau von  Dampfmaschinen.   The Borkum is a typical open island provider of the North Sea around the turn of the century. This mo- del is suited especially to let so really free run to your own ideas for additional equipment, load etc. On  account of the open coverage type is suited the Borkum very well for the installation of vapour machi- nes.   Borkum est un soutien de famille d‘île ouvert typique de la mer du Nord au tournant de siècle. Ce  modèle convient particulièrement, autour de ses propres idées pour l‘équipement supplémentaire laisser  le cours si correctement libre à la charge etc. En raison de la méthode de construction ouverte convient  Borkum à la perfection pour l‘installation des machines de vapeur.    Modellbau vom Besten krick  Klaus Krick Modelltechnik  Inhaber Matthias Krick  Postfach 11  3 8 · D-75  4 34 Knittlingen  Industriestr. 1· D-75  4 38 Knittlingen  Telefon 0 70 43 / 9 35 10  Telefax 0 70 43 / 3 18 38  www.krick-modell.de   Klaus Krick Modelltechnik • Postfach 11  3 8 • D-75  4 34 Knittlingen  Telefon 0 70 43 / 9 35 10 •  Telefax 0 70 43 / 3 18 38 • www.krick-modell.de ...