Jaga FREEDOM MICRO Montagehinweise
FREEDOM CLIMA
Montagehandleiding / Instructions de montage / Montagehinweis / Mounting instructions
Lees deze handleiding aandachtig voor een correcte installatie van het product.
Lire attentivement la totalité de la notice avant l' installation.
Bevor Sie mit der Montage beginnen, lesen Sie daher dieses Handbuch sorgfältig durch.
Please read this manual carefully before installing.
Als het toestel gebruikt wordt voor koelen moeten de hy-
draulische leidingen geïsoleerd worden.
Si l'appareil est utilisé pour refroidir, les tuyaux doivent être isolés.
Wenn das Gerät zur Kühlung verwendet werden, sollten die Rohre
isoliert werden.
If the unit is used for cooling, the pipes must be insulated.

Verwandte Anleitungen für Jaga FREEDOM MICRO


Inhaltszusammenfassung für Jaga FREEDOM MICRO
- Seite 1 FREEDOM CLIMA Montagehandleiding / Instructions de montage / Montagehinweis / Mounting instructions Als het toestel gebruikt wordt voor koelen moeten de hy- draulische leidingen geïsoleerd worden. Si l'appareil est utilisé pour refroidir, les tuyaux doivent être isolés. Wenn das Gerät zur Kühlung verwendet werden, sollten die Rohre isoliert werden.
- Seite 2 Freedom Clima Onderdelen / Parts / Teile / Parts Rooster uit aluminium Grille réalisées en aluminium Rost aus Aluminium Grill from aluminum RVS Flexibels 15 cm 1/2” (roestvrij staal) Flexibles 15 cm 1/2” (acier inoxydable) Flexible 15 cm 1/2” (Edelstahl) SSSFlexibles 15 cm 1/2”...
- Seite 3 Freedom Clima Afmetingen / Dimensions / Abmessungen / Dimensions Type L (cm) H (cm) B (cm) 73.3 19.7 5 cm 109.2 19.7 19.7 180.9 19.7 Installatie / Installation • Voorzie genoeg ruimte voor gordijnen! Positioneer de hydraulische, elektrische leidingen en condensafvoerbuis met behulp Espace sufficant prévu pour les rideaux! van de montagemal.
- Seite 4 Freedom Clima Installatie / Installation • Plaats vulbeton. • Remplir lieu béton. Het type vloer - vol of hol bepaalt welk soort • Platz Beton zu füllen. plug en schroef gebruikt dient te worden. • Place concrete fill. Le type de étage, solide ou cavité, d'etermine le type de vis ou le module d'extention qui est utilisé.
- Seite 5 Freedom Clima Installatie / Installation...
- Seite 6 Freedom Clima Onderhoud / Entretien / Wartung / Maintenance Filter reinigen Reinigen van de systeembehuizing - een vervuilde filter hindert de luchtstroom naar de ventilator. Rei- Nettoyage du système de logement nig op regelmatige interval naargelang het gebruik en functie van Reinigung des Gehäuses System de ruimte Cleaning of the housing system...
- Seite 8 Das Urheberrecht dieser Gebrauchsanweisung be- sitzt die Firma Jaga n.v. Gelieve deze instructies te volgen en te bewaren! S’il vous plaît garder cette instruction! Bitte bewahren Sie diese Anleitung! Please follow and keep these instructions! 27200.24600001-maart 10, 2014 3:48 PM - Jaga N.V.
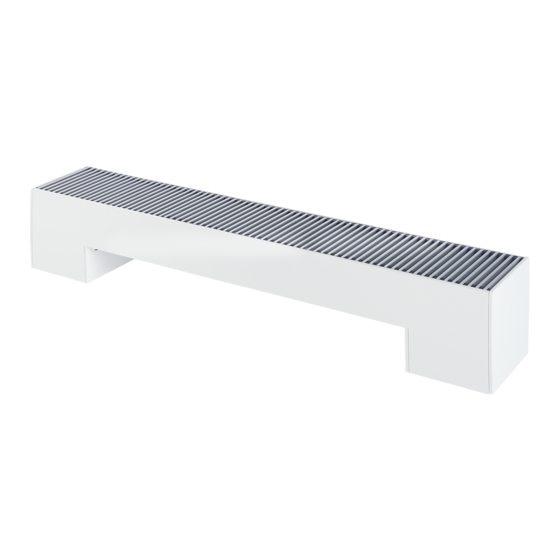
- Seite 9 FREEDOM MICRO Montagehandleiding / Instructions de montage / Montagehinweis / Mounting instructions Enkel voor verwarming. Voor koelen, neem contact op met JAGA. Uniquement pour le chauffage. refroidissement, s'il vous plaît contactez- Jaga. Nur für Heizung. für kühlung, kontaktieren sie bitte JAGA.
- Seite 10 Freedom Micro Onderdelen / Parts / Teile / Parts RVS rooster Grille en acier inoxydable Rost aus Edelstahl Stainless steel grill RVS Flexibels 15 cm 1/2” (roestvrij staal) Flexibles 15 cm 1/2” (acier inoxydable) Flexible 15 cm 1/2” (Edelstahl) SSSFlexibles 15 cm 1/2” (stainless steel)
- Seite 11 Freedom Micro Afmetingen / Dimensions / Abmessungen / Dimensions Type L (cm) B (cm) H (cm) 61,7 96,7 131,7 5 cm 166,7 201,7 Installatie / Installation Voorzie genoeg ruimte • Positioneer de hydraulische, elektrische leidingen en condensafvoerbuis met voor gordijnen! behulp van de montagemal.
- Seite 12 Freedom Micro Installatie / Installation • Werk de vloer af. • Finition le sol • Beenden Sie den Boden. • Finish the floor. Het type vloer - vol of hol bepaalt welk soort plug en schroef gebruikt dient te worden.
- Seite 13 Freedom Micro Installatie / Installation...
- Seite 14 Freedom Micro Onderhoud / Entretien / Wartung / Maintenance Filter reinigen Reinigen van de systeembehuizing - een vervuilde filter hindert de luchtstroom naar de ventilator. Rei- Nettoyage du système de logement nig op regelmatige interval naargelang het gebruik en functie van Reinigung des Gehäuses System...
- Seite 15 Freedom Micro Onderhoud / Entretien / Wartung / Maintenance OPGEPAST: Draag zorg voor de elektrische bekabeling, ontkoppel de elektrische bedrading niet. ATTENTION: Prenez soin des câbles électriques, ne pas débrancher les fils électriques. ACHTUNG: Achten Sie auf die Stromleitung, die elektrische Verdraht- ung nicht trennen.
- Seite 16 Das Urheberrecht dieser Gebrauchsanweisung be- sitzt die Firma Jaga n.v. Gelieve deze instructies te volgen en te bewaren! S’il vous plaît garder cette instruction! Bitte bewahren Sie diese Anleitung! Please follow and keep these instructions! 27200.24600001-maart 24, 2014 1:47 PM - Jaga N.V.
- Seite 17 • 1 JDPC.001 per unit, otherwise the warranty is no longer valid. Installation / user guide Briza JDPC.BRC4 / JDPC.BRC6 Jaga Dynamic Product Controller with control panel Briza JDPC.BRC3 Jaga Dynamic Product Controller Read this manual carefully before installation and follow the instructions.
- Seite 18 Index JDPC Jaga Dynamic Product Controller Page Setup and operation JDPC.BRC3 Connecting Control Panel mounting Setup and operation JDPC.BRC4 Connecting User manual control panel heating Setup and operation JDPC.BRC6 Connecting User manual control panel heating and cooling Adjusting Fan speed Table 1 Table 2: adjusting min.
- Seite 19 BRIZA JDPC.001 Dynamic Product Controller, mounting control panel Control panel mounting Clean the surface on which the panel is mounted. a. plug in the control panel b. remove the protective film from the tape c. attach the control panel using the tape BRIZA JDPC.BRC3 Dynamic Product Controller, heating cooling.
-
Seite 20: Setup And Operation
BRIZA JDPC.BRC4 Dynamic Product Controller with control panel, heating. With room-temperature sensor and water-temperature sensor Put the controller in the desired mode with the control panel Basic settings JDPC.001: MODE C Press button until the desi- red mode is reached MODE Configuration code: see the product label on the device (±... - Seite 21 BRIZA JDPC.BRC6 Dynamic Product Controller with control panel, heating cooling With room-temperature sensor and water-temperature sensor Put the controller in the desired mode with the control panel Basic settings JDPC.001: MODE C 3” Mode MODE / BOOST COMFORT / 2 BOOST / 3 Press button until the �...
- Seite 22 BRIZA JDPC.001 Dynamic Product Controller: Table 1 Adjusting Fan speed SPEED %: only for Mode 1-2-7-C > (MIN) blue LED blinks fast red LED blinks fast (MAX) Adjusting the Fan speed: MODE • short press “-” or “+” to adjust the speed of the motor(s). •...
-
Seite 23: Setting The Water Temperature
BRIZA JDPC.001 Dynamic Product Controller: Table 2 / Table 3 Setting the water temperature Setting the minimum water temperature heating (default => 32 ° C) Setting temperature ° C MODE 24°C 26°C 28°C 30°C 32°C 34°C 36°C 38°C - 2°C + 2°C Press and hold the (+) button until the red LED... - Seite 24 • equipment that is built in, in a way that it cannot be reached normally. If you have any questions or complaints, please contact your supplier or installer. The copyright of these instructions is the property of the company Jaga Inc. 27200.24100011 - October 5, 2015 3:14 PM - Jaga N.V.