Seite 1
User instructions Gebrauchsanweisung Instrukcja obsługi 
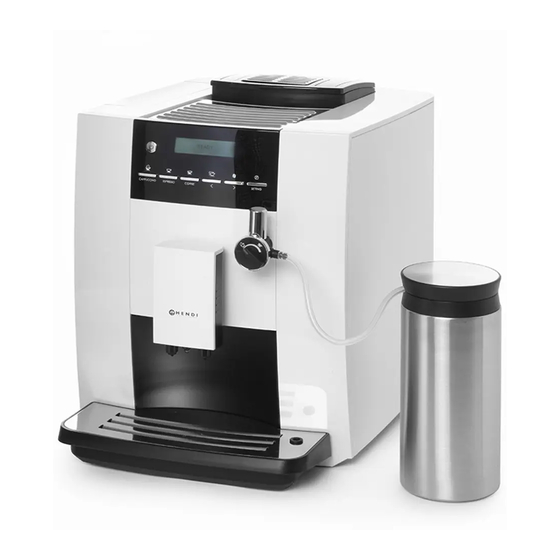
FULLY AUTOMATIC COMPACT COFFEE MACHINE KITCHEN LINE 208861 You should read these user instructions carefully before using the appliance Bevor Sie das Gerät in Betrieb nehmen, sollten Sie diese Gebrauchsanweisung aufmerksam lesen Przed uruchomieniem urządzenia należy koniecznie...
Seite 2
INSTRUCTIONS OF COFFEE MACHINE PARTS 1 Bean container cover 8 Grinding wheel 2 Water tank lid 9 Bean container 3 Water tank 10 Milk frother 4 Coffee grounds container 11 Milk and cream spout 5 Drip tray 12 Coffee spout 6 Drip tray grid 13 Power cord 7 Powder container cover...
Seite 3
COFFEE MACHINE OPERATION INTERFACE INSTRUCTIONS 1 Power switch 5 Screen 2 Cappuccino button 6 Double cup 3 Espresso button 7 Coffee strength button 4 Coffee button 8 Setting...
1. SAFETY INSTRUCTIONS Please see specification label on the bottom of coffee machine or specification parameters indicated in instruction manual (P23). PRECAUTIONS • Unplug from outlet when stop using and before cleaning. • Please do not contact with heat parts of coffee machine Allow to cool before disassembling and cleaning the to avoid scalding.
Seite 5
WARNINGS Never disassemble and repair the machine without authorization. If there is any errors, please sent it to authorized service center for repairing. PROHIBITIONS Except cleaning and daily maintenance for coffee machine, • Never use non-family usage detergent to wipe the if it failures, please send it to authorized after-sale service machine, otherwise it may cause corrosion of coffee center for repairing, or contact with customer service for...
2. PROPER OPERATION To guarantee the coffee taste, make sure that temperature this manual, so that you can know the coffee machine suf- of the water filled into the water tank is at 25 °C or so. ficiently. Coffee machine can only be used for preparing coffee and hot water.
CATALOGUE 1. Safety Instructions..................4 2. Proper usage ..................... 6 3. Instructions for use..................6 Coffee machine model ................6 Symbol description ..................6 4. Instructions for first time use ..............8 Power connection..................8 Fill water tank .................... 8 Fill beans....................
4. INSTRUCTIONS FOR FIRST-TIME USE This chapter will help you to know the basic operations and settings for your first time use. POWER CONNECTION • Place the coffee machine on a stable workbench that is not close to water. • Keep the coffee machine far away from high temperature heat source. •...
POWER ON • As the machine has been tested at factory, there may be a little coffee powder left over. We promise the machine is brand new. • The coffee machine will start self-testing and cleaning at the first-time use, this helps the coffee machine to achieve the best working condition, and this process cannot be skiped.
5. MAKING BEVERAGES This chapter instructs you making various kinds of coffee, hot water, hot milk and milk foam by this coffee machine. Please read the following instructions carefully to help you make high-quality beverages. The temperature of the hot water is high, please do not touch it to avoid being scalded.
Seite 11
MAKING COFFEE: Before making Coffee, please rotate the button to the direction of milk cream silk printing. When the screen shows “READY”, press coffee button READY for coffee function. The grinder will begin to grind. At this time, you can STRENGTH COFFEE adjust the amount of coffee beans by pressing the left and...
SINGLE TIME SETTING OF COFFEE PARAMETERS 5 items as bellow can be set at single time. • Set the amount of coffee beans when the screen shows “READY” • Set the amout of coffee beans during grinding process • Set the the volume of coffee when making coffee •...
When the screen shows ”READY”, press setting READY button to enter into setting. Press left and right button to choose the fuction CLEAN you need. When the screen shows “USE POWDER”, press USE POWDER setting button to enter into coffee powder making coffee fuction.
6. PROGRAM SETTING • This chapter will give instructions on program setting. • Ensure the coffee machine shows “READY”, press the setting button, than SETTING press left and right button to select “MENU”, than you can set the menu. MAINTENANCE SETTING •...
AUTOMATIC SWITCH-OFF • After entering the program setting, choose • The machine’s default switch off time is 2 hours, which means the machine will automatically “AUTO-OFF”, press left and right button to adjust switch off after power on 2 hour. auto off time, then press the setting button, setting •...
7. CLEANING AND MAINTENANCE • This chapter will instruct you how to clean and maintain the coffee machine. • Paying attention to daily maintenance of coffee machine, not only ensure the taste of each cup of coffee, but also extend the life of the coffee machine. RINSING THE COFFEE MACHINE •...
Screen shows “PRESS SETTING” to start. PRESS SETTING The brew unit is cleaning. CLEANING Open the coffee powder container lid and add the ADD TABLET PRESS SETTING cleaning tablet, close the coffee powder container lid and press the cleaning button to clean the brew unit. Brew unit is cleaning.
Seite 18
Press left and right button to choose “DESCALE”. DESCALE Press setting button to confirm. DESCALE CONFIRM It will take around 30 minutes. Press setting to start 30 MINS descaling. PRESS SETTING Take a bag of decalcifier and sufficiently dissolves it SOLVENT IN TANK in clean water then lead this mixed liquid to the water PRESS SETTING...
RINSE MILK UNIT • After a long time use, residual materials may be left in the milk unit and need to be cleaned. When the screen shows “READY”, press setting READY button to enter into setting. Select “MENU” by pressing the left and right MENU button, then press the button to enter it.
Please remove coffee grounds of the drip tray and INSTALL TRAY coffee grounds container. Reinstall the water drip tray to the machine, it returns READY to “READY” status. If the drip tray is full, the machine will automati- EMPTY TRAY cally prompt "EMPTY TRAY".
8. DISPLAY INFORMATION • This chapter will instruct you the information shows on the screen and the solutions. Causes Solutions If the water drip tray is full, any function of Take the drip tray out, empty the EMPTY TRAY making beverage will be out of service. waste water in the drip tray and reinstall it to the machine.
9. FAILURES HANDLING • This chapter will instruct you some errors that may encounter and the solutions. • If there are some failures cannot be resolved by the following methods, please contact with the customer sevice center. Problem Cause Solutions The coffee cup was not pre-heated.
10. TRANSPORT AND RECYCLE TRANSPORT • Please save the packaging of the coffee machine for future transportation. • Make sure to empty water inside the machine before transportation, otherwise, it will damage the machine. • After emptying the waterway, please wipe the machine both inside and outside to dry.
1. SICHERHEITSHINWEISE Technische Daten finden Sie auf dem Etikett am Boden des Gerätes oder in dieser Bedienungsanleitung (S. 45). SICHERHEITSVORKEHRUNGEN • Keine heißen Maschinenteile berühren, um Verbren- • Das Gerät aus der Steckdose ziehen, wenn es gereinigt nungen zu verhindern. oder nicht benutzt wird.
Seite 27
WARNUNG Zerlegung und Reparatur der Maschine sollte nur von berechtigten Personen durchgeführt werden. Sollten Fehler auftauchen, sollte das Gerät ins Reparaturzentrum eingesendet werden. VERBOTE Der Bediener führt nur die Reinigung und tägliche Pflege Gerätes benutzen, da es zur Korrosion des Gerätes und des Gerätes durch.
2. BEDIENEN Damit Kaffee gut schmeckt, sollte die Temperatur des falschen Gebrauch entstanden sind, wird keine Haftung Wassers, das in den Wassertank gefüllt wird, circa 25 °C übernommen. Lesen Sie bitte alle Kapitel dieser Bedie- betragen. nungsanleitung, um das Gerät verwenden zu können. Die Kaffeemaschine kann nur zur Getränke- und Heißwas- serzubereitung benutzt werden.
4. HINWEISE FÜR INBETRIEBNAHME In diesem Kapitel werden die Grundschritte und -einstel- lungen bei der ersten Inbetriebnahme beschrieben. STROMANSCHLUSS • Das Gerät auf einer stabilen Fläche weitab vom Wasser aufbewahren. • Das Gerät weitab von Wärmequellen aufbewahren. • Für die Maschine geeignete Stromversorgung verwenden. •...
EINSCHALTEN • Da das Gerät in der Fabrik getestet wurde, kann etwas Kaffeepulver drin geblie- ben sein. Wir garantieren, dass das Gerät fabrikneu ist. • Bei dem ersten Gebrauch wird das Gerät einen Selbsttest und Reinigung durchführen. Dieser Prozess kann nicht übergangen werden, da das Gerät dadurch einen optimalen Arbeitszustand erreicht.
5. GETRÄNKEZUBEREITUNG In diesem Kapitel wird die Zubereitung der verschiedenen Kaffees, warmen Milch, des Heißwassers und des Schaums beschrieben. Lesen Sie die folgen- den Hinweise, um hochqualitative Getränke zuzubereiten. Da die Temperatur des Heißwassers hoch ist, achten Sie auf die Verbrennungs- gefahr.
Seite 33
KAFFEE ZUBEREITEN: Bevor Sie einen Kaffee zubereiten, drehen Sie den Knopf auf Milchschaum. Wenn auf dem Display ”Ready” erscheint, drücken Sie READY die "COFFEE"-Taste. Die Mühle wird in Betrieb gesetzt. Jetzt können Sie STRENGTH COFFEE die Menge der Kaffeebohnen einstellen, indem Sie die linke und rechte Taste drücken.
EINMALIGE EINSTELLUNG DER KAFFEEPARAMETER: 5 Parameter können jedes Mal eingestellt werden. • Wenn auf dem Display “READY” erscheint, können Sie die Kaffeebohnenmenge einstellen • Die Kaffeebohnenmenge können Sie auch während des Mahlens einstellen • Die Kaffeemenge kann während der Kaffeezubereitung eingestellt werden •...
Wenn auf dem Display ”READY” erscheint, drücken READY Sie die "SETTING"-Taste, um Einstellungen zu öffnen. Drücken Sie die linke und rechte Taste, um die CLEAN gewünschte Funktion zu wählen. Wenn auf dem Display ”USE POWDER” erscheint, drücken Sie die "SETTING"-Taste, um die Zubere- USE POWDER itung zu starten.
6. PROGRAMMEINSTELLUNG • In diesem Kapitel werden die Hinweise zur Programmeinstellung beschrieben. • Auf dem Display sollte “READY” erscheinen. Drücken Sie die "SETTING"- Taste. Dann drücken Sie die linke und rechte Taste, um “MENU” zu wählen SETTING und zum Menü zu gehen. PFLEGEEINSTELLUNG •...
AUTOMATISCHE ABSCHALTUNG • Gehen Sie zu Programmeinstellungen, wählen • Die automatische Ausschaltzeit ist auf 2 Stunden eingestellt. Nach 2 Stunden schaltet das Gerät Sie “AUTO-OFF” und drücken Sie die linke und automatisch ab. rechte Taste, um die gewünschte Ausschaltzeit • Der Einstellbereich beträgt von 5 Minuten bis zu einzustellen.
7. REINIGUNG UND PFLEGE • In diesem Kapitel wird die Reinigung und Pflege des Gerätes beschrieben. • Die tägliche Pflege wird die Lebensdauer des Gerätes verlängern und einen guten Kaffeegeschmack gewährleisten. KAFFEEMASCHINE SPÜLEN • In diesem Kapitel wird die Reinigung und Pflege des Gerätes beschrieben. •...
Auf dem Display erscheint “PRESS SETTING”. Drücken PRESS SETTING Sie die "SETTING"-Taste, um den Reinigungsprozess zu starten. Die Reinigung der Brüheinheit wird durchgeführt. CLEANING ADD TABLET Den Pulverbehälterdeckel öffnen, die Reinigungstab- PRESS SETTING lette hineinwerfen, den Deckel zumachen und die "SETTING"-Taste drücken, um den Reinigungspro- zess zu starten.
Seite 40
Drücken Sie die linke und rechte Taste, DESCALE um “DESCALE” zu wählen. Um Ihre Wahl zu bestätigen, drücken Sie DESCALE die "SETTING"-Taste. CONFIRM Der Prozess dauert ungefähr 30 Minuten. Drücken 30 MINS PRESS SETTING Sie die "SETTING"-Taste, um den Entkalkung- sprozess zu starten.
MILCHEINHEIT SPÜLEN • Nach dem langen Benutzen kann es erforderlich sein, die Restmilch aus der Milcheinheit zu beseitigen. Wenn auf dem Display “READY” erscheint, drü- READY cken Sie die "SETTING"-Taste, um zur Einstel- lung zu gehen. MENU Um “MENU” zu wählen, drücken Sie die linke und rechte Taste.
Den Kaffeesatz aus der Tropfschale und dem INSTALL TRAY Satzbehälter beseitigen. Die Tropfschale wieder einsetzen. Auf dem Display READY erscheint wieder “READY”. Wenn die Tropfschale voll ist, erscheint auf dem EMPTY TRAY Display "EMPTY TRAY". Die Tropfschale entnehmen und das Wasser wegschütten. Die Tropfschale in die Maschine einsetzen, READY Das Gerät ist wieder im Bereitschaftsstatus.
DISPLAYMELDUNGEN • In diesem Kapitel wird die Vorgehensweise bei Displaymeldungen beschrieben. Grund Lösung Wenn die Tropfschale voll ist, ist Die Tropfschale entnehmen, leeren EMPTY TRAY die Getränkezubereitung nicht möglich. und wieder ins Gerät einsetzen. Wenn der Satzbehälter voll ist, ist Satzbehälter entnehmen, leeren EMPTY GROUNDS die Getränkezubereitung nicht möglich.
FEHLER BEHEBEN • In diesem Kapitel wird die Vorgehensweise bei Fehlermeldungen beschrie- ben. • Konnten Sie einen Fehler auf die beschriebene Weise nicht beheben, setzen Sie sich mit dem Kundendienst in Kontakt. Problem Grund Lösung Die Kaffeetasse wurde nicht vorgeheizt. Spülen Sie die Tasse mit warmem Wasser, bevor Sie einen Kaffee zubereiten.
10. TRANSPORT UND RECYCLING TRANSPORT • Die Verpackung für den zukünftigen Transport des Gerätes behalten. • Das Wasser aus dem Gerät vor dem Transportieren beseitigen, da es die Maschine beschädigen kann. • Nach dem Beseitigen des Wassers sollte die Maschine innen und außen getrocknet werden.
Seite 46
PRZEDSTAWIENIE CZĘŚCI EKSPRESU 1 Pokrywa pojemnika na kawę ziarnistą 7 Pokrętło regulacji mielenia 2 Pokrywa zbiornika wody 8 Pojemnik na kawę ziarnistą 3 Zbiornik wody 9 Spieniacz mleka 4 Pojemnik na fusy Tacka ociekowa 10 Wylewka gorącego mleka i gorącego 5 Kratka tacki ociekowej spienionego mleka Wylewka kawy 6 Pokrywa pojemnika na kawę...
Seite 47
OPIS INTERFEJSU EKSPRESU DO KAWY 1 Włącznik 5 Wyświetlacz 2 Przycisk cappuccino 6 Podwójna filiżanka 3 Przycisk espresso 7 Przycisk mocy kawy 4 Przycisk czarnej kawy (duża kawa) 8 Ustawienia...
1. INSTRUKCJE BEZPIECZEŃSTWA Należy zapoznać się z informacjami podanymi na tabliczce znamionowej znajdującej się pod spodem urządzenia albo danymi technicznymi z instrukcji (str. 66). ŚRODKI OSTROŻNOŚCI • Unikać kontaktu z gorącymi elementami ekspresu z uwagi • Odłączyć kabel od gniazdka po zakończeniu eksploatacji na ryzyko wystąpienia poparzeń.
OSTRZEŻENIA Nigdy nie rozkładać ani nie naprawiać urządzenia bez upoważnienia. W przypadku wystąpienia błędu odesłać urządzenie do autoryzowanego centrum serwisowego w celu naprawy. CZYNNOŚCI ZABRONIONE Z wyjątkiem czyszczenia i codziennej konserwacji ekspresu, • Nigdy nie używać przemysłowych środków czyszczą- w razie wystąpienia awarii należy odesłać urządzenie do ser- cych, ponieważ...
2. POPRAWNA OBSŁUGA Dobry smak kawy gwarantuje temperatura wody w zbior- powiedzialności za konsekwencje nieprawidłowej obsługi. niku na poziomie ok. 25°C. Należy uważnie przeczytać niniejszą instrukcję, aby do- Ekspres przeznaczony jest wyłącznie do parzenia kawy kładnie poznać urządzenie. i przygotowania gorącej wody. Nie używać urządzenia niezgodnie z przeznaczeniem.
Seite 51
SPIS TREŚCI 1. Instrukcje bezpieczeństwa................. 48 2. Poprawna obsługa ..................50 3. Instrukcje eksploatacji ................50 Model ekspresu..................50 Opis symboli....................50 4. Instrukcje dotyczące eksploatacji po raz pierwszy........52 Podłączenie do zasilania................52 Napełnianie zbiornika wody............... 52 Wsypywanie kawy ziarnistej............... 52 Pokrętło regulacji grubości mielenia ............
4. INSTRUKCJE DOTYCZĄCE EKSPLOATACJI PO RAZ PIERWSZY Ten rozdział zawiera informacje dotyczące podstawowych czynności i ustawień przy pierwszym uruchomieniu. PODŁĄCZENIE DO ZASILANIA • Umieścić ekspres na stabilnym blacie z dala od wody. • Ekspres należy ustawić daleko od źródła wysokiej temperatury. •...
WŁĄCZANIE • Urządzenie zostało poddane testom w zakładzie, dlatego mogą znajdować się w nim resztki kawy. Zapewniamy, że urządzenie jest nowe. • Przy pierwszym uruchomieniu ekspresu do kawy włączy się system autodiag- nostyki i czyszczenia, co pozwala na osiągnięcie najlepszego stanu urządze- nia.
5. PRZYGOTOWYWANIE NAPOJÓW Ten rozdział zawiera instrukcje przygotowywania różnych rodzajów kawy, gorącej wody, podgrzanego i spienionego mleka. Pomogą one w przygotowaniu wysokiej jakości napojów. Woda jest gorąca, zachować ostrożność, aby uniknąć oparzenia. Przed przygotowaniem kawy należy sprawdzić, czy na wyświetlaczu pojawił się komunikat „READY (Gotowy)”.
PRZYGOTOWANIE CAPPUCCINO W celu przygotowanie cappuccino przekręcić pokrętło w lewo na funkcję spieniania mleka. Gdy wyświetlony zostanie komunikat READY (Gotowy) READY nacisnąć przycisk CAPPUCCINO. COFFEE Młynek rozpocznie mielenie kawy. W tym momencie można STRENGTH dostosować moc kawy naciskając przyciski lewo/prawo. Domyślna ilość...
PRZYGOTOWANIE KAWY LATTE W celu przygotowanie kawy latte przekręcić pokrętło w lewo na funkcję spieniania mleka Gdy wyświetlony zostanie komunikat READY (Gotowy) nacis- READY COFFEE nąć przycisk SETTING aby otworzyć menu SETTING Naciskaj prawy przycisk do momentu, aż na wyświetlaczu LATTE pojawi się...
KONFIGURACJA JEDNORAZOWYCH PARAMETRÓW KAWY Za jednym razem można wprowadzić 5 parametrów • Ustawienie mocy kawy (ilości mielonych ziaren) po wyświetleniu komunikatu „READY” • Ustawienie ilości kawy do zmielenia • Ustawienie pojemności kawy • Ustawienie czasu spieniania podczas przygotowywania cappuccino • Ustawienie wielkości i mocy podczas przygotowywania espresso •...
Gdy wyświetlony zostanie komunikat READY (Go- READY towy)”, nacisnąć przycisk ustawień „SETTING” przez SETTING około 5 sekund, aby przejść do menu ustawień. Nacisnąć przyciski lewo i prawo, aby wybrać żą- CLEAN daną funkcję. Gdy na wyświetlaczu pojawi się komunikat „USE USE POWDER POWDER (Użyć...
6. KONFIGURACJA USTAWIEŃ • Ten rozdział zawiera instrukcje dotyczące konfiguracji ustawień. • Sprawdzić, czy wyświetlany jest komunikat „READY”, nacisnąć przycisk SETTING ustawień „SETTING” przez około 5 sekund następnie za pomocą przyci- sków lewo/prawo wybrać „MENU” i odpowiednie ustawienia. KONFIGURACJA CZYNNOŚCI KONSERWACYJNYCH •...
AUTOMATYCZNE WYŁĄCZANIE • Po przejściu do ustawień wybrać opcję „AUTO- • Domyślnie ustawiono automatyczne wyłączenie po 2 godzinach, co oznacza, że urządzenie wyłączy OFF (Auto wył.)”, naciskać przyciski lewo/prawo, się automatycznie po 2 godzinach bezczynności. aby ustawić czas, następnie zatwierdzić przy- •...
7. CZYSZCZENIE I KONSERWACJA • Ten rozdział zawiera instrukcje mycia i konserwacji ekspresu. • Aby zapewnić doskonały smak każdej filiżanki kawy i wydłużyć okres eksploa- SETTING tacji urządzenia, należy regularnie wykonywać czynności konserwacyjne. PŁUKANIE EKSPRESU • Ten rozdział zawiera instrukcje mycia i konserwacji ekspresu. •...
Przed czyszczeniem zaparzacza należy umyć tackę EMPTY TRAY ociekową. Zużyta woda będzie ściekać do tacki. Zainstalować tackę ociekową. INSTALL TRAY Po zainstalowaniu tacki ociekowej zostanie wyświetlony PRESS SETTING komunikat „PRESS SETTING (Naciśnij przycisk ustawień)”. Czyszczenie zaparzacza w toku. CLEANING Otworzyć pokrywę pojemnika na kawę mieloną i wrzu- ADD TABLET cić...
Seite 63
Naciskając przyciski lewo/prawo wybrać opcję „DE- DESCALE SCALE (Odkamienianie)”. Aby zatwierdzić, nacisnąć przycisk ustawień. DESCALE CONFIRM Proces odkamieniania zajmie ok. 30 minut. Nacisnąć 30 MINS przycisk ustawień, aby rozpocząć. PRESS SETTING Przygotowanie do odkamieniania i mycia. Przede EMPTY TRAY wszystkim, należy opróżnić tackę ociekową, ponieważ ściekać...
PŁUKANIE SPIENIACZA DO MLEKA • Po długim okresie eksploatacji może dojść do osadzenia się resztek mleka w automacie, należy go wtedy wyczyścić. Gdy wyświetlony zostanie komunikat „READY”, na- READY cisnąć przycisk ustawień „SETTING” przez około 5 s, aby wejść do menu ustawień. Wybrać...
Usunąć fusy z tacki i pojemnika na fusy. INSTALL TRAY Zamocować tackę w urządzeniu, które powróci do READY stanu gotowości („READY”). Jeśli tacka ociekowa jest pełna, urządzenie au- EMPTY TRAY tomatycznie wyświetli komunikat „EMPTY TRAY (Opróżnić tackę)”. Wyjąć tackę i wylać z niej wodę. Zamocować...
8. WYŚWIETLANE INFORMACJE • Ten rozdział zawiera informacje o wyświetlanych komunikatach o błędach i ich rozwiązywaniu. Przyczyny Rozwiązania Jeśli tacka ociekowa jest pełna, Wyjąć tackę ociekową, wylać EMPTY TRAY funkcja przygotowywania napojów z niej wodę i założyć z powrotem. będzie niedostępna. Jeśli pojemnik na fusy jest pełen, Wyjąć...
9. POSTĘPOWANIE W PRZYPADKU AWARII • Ten rozdział zawiera informacje o ewentualnych błędach i ich rozwiąza- niach. • Jeśli niektórych błędów nie można usunąć za pomocą podanych tutaj rozwiązań, należy skontaktować się z centrum serwisowym. Problem Przyczyna Rozwiązania Filiżanka nie została podgrzana. Przed przygotowaniem kawy przepłukać...
10. TRANSPORT I RECYKLING TRANSPORT • Należy zachować opakowanie ekspresu na wypadek transportu w przyszłości. • Przed transportem opróżnić zbiornik wody w urządzeniu, ponieważ dojdzie do uszkodzenia ekspresu. • Po opróżnieniu przewodów wody wytrzeć urządzenie od wewnątrz i na zewnątrz. •...